
L20/19 User's Manual
Page 4
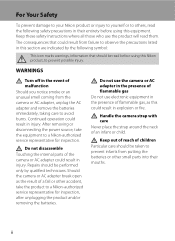
...camera or AC adapter could result in explosion or fire. For Your Safety To prevent damage to your Nikon product or injury to yourself or to others, read the following symbol: This icon marks warnings, information that could result in injury. Do not disassemble Touching the internal parts...this section are indicated by qualified technicians. Continued operation could result from the camera or AC adapter, unplug the AC adapter and remove the batteries immediately, taking care to a Nikon-authorized service representative for inspection, after unplugging the product and/or removing the ...
...camera or AC adapter could result in explosion or fire. For Your Safety To prevent damage to your Nikon product or injury to yourself or to others, read the following symbol: This icon marks warnings, information that could result in injury. Do not disassemble Touching the internal parts...this section are indicated by qualified technicians. Continued operation could result from the camera or AC adapter, unplug the AC adapter and remove the batteries immediately, taking care to a Nikon-authorized service representative for inspection, after unplugging the product and/or removing the ...
L20/19 User's Manual
Page 5
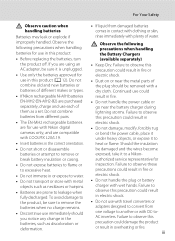
... in fire. • Do not handle the power cable or go near the metal parts of the plug should you are prone to leakage when fully discharged. Do not combine ...immediately with plenty of different makes or types. • If Nikon rechargeable Ni-MH batteries EN-MH2 (EN-MH2-B2) are compatible with COOLPIX L20/L19. • Insert batteries in the correct orientation. &#...to another or with a dry cloth. Observe the following precautions when handling batteries for use with Nikon digital cameras only, and are purchased separately, charge and use each of them as necklaces or hairpins. •...
... in fire. • Do not handle the power cable or go near the metal parts of the plug should you are prone to leakage when fully discharged. Do not combine ...immediately with plenty of different makes or types. • If Nikon rechargeable Ni-MH batteries EN-MH2 (EN-MH2-B2) are compatible with COOLPIX L20/L19. • Insert batteries in the correct orientation. &#...to another or with a dry cloth. Observe the following precautions when handling batteries for use with Nikon digital cameras only, and are purchased separately, charge and use each of them as necklaces or hairpins. •...
L20/19 User's Manual
Page 9
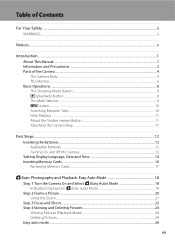
Table of Contents For Your Safety ...ii WARNINGS...ii Notices...v Introduction ...1 About This Manual ...1 Information and Precautions...2 Parts of the Camera...4 The Camera Body ...4 The Monitor...6 Basic Operations...8 The Shooting Mode Button ...8 c (playback) button...8 The Multi Selector...9 d button ...10 Switching ..., Date and Time 14 Inserting Memory Cards ...16 Removing Memory Cards...17 G Basic Photography and Playback: Easy Auto Mode 18 Step 1 Turn the Camera On and Select G (Easy Auto) Mode 18 Indicators Displayed in G (Easy auto) Mode 19 Step 2 Frame a Picture ...20 Using the...
Table of Contents For Your Safety ...ii WARNINGS...ii Notices...v Introduction ...1 About This Manual ...1 Information and Precautions...2 Parts of the Camera...4 The Camera Body ...4 The Monitor...6 Basic Operations...8 The Shooting Mode Button ...8 c (playback) button...8 The Multi Selector...9 d button ...10 Switching ..., Date and Time 14 Inserting Memory Cards ...16 Removing Memory Cards...17 G Basic Photography and Playback: Easy Auto Mode 18 Step 1 Turn the Camera On and Select G (Easy Auto) Mode 18 Indicators Displayed in G (Easy auto) Mode 19 Step 2 Frame a Picture ...20 Using the...

L20/19 User's Manual
Page 14
...of the hardware and software described in these manuals is functioning normally. Introduction Information and Precautions Life-Long Learning As part of Nikon's "Life-Long Learning" commitment to ongoing product support and education, continually updated information is available online at the ... damages or lost profits that the camera is accurate and complete, we would appreciate it were you to bring any form, by Nikon specifically for contact information: http://imaging.nikon.com/ Use Only Nikon Brand Electronic Accessories Nikon COOLPIX cameras are engineered and proven to frequently...
...of the hardware and software described in these manuals is functioning normally. Introduction Information and Precautions Life-Long Learning As part of Nikon's "Life-Long Learning" commitment to ongoing product support and education, continually updated information is available online at the ... damages or lost profits that the camera is accurate and complete, we would appreciate it were you to bring any form, by Nikon specifically for contact information: http://imaging.nikon.com/ Use Only Nikon Brand Electronic Accessories Nikon COOLPIX cameras are engineered and proven to frequently...

L20/19 User's Manual
Page 16
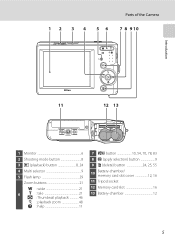
Introduction Parts of the Camera The Camera Body 1 23 4 10 11 98 7 Lens cover closed 5 6 12 13 1 Shutter-release button 22 2 Power switch 18 3 Power-on lamp 18, 94 4 Self-timer lamp 30 AF-assist illuminator 23, 92 5 Built-in flash 28 6 Lens 108, 118 7 Speaker 55 8 Power connector cover 104 9 Eyelet for camera strap 11 10 Pin cover 56, 58, 62 11 Cable connector 56, 58, 62 12 Lens cover 106 13 Built-in microphone 53 4
Introduction Parts of the Camera The Camera Body 1 23 4 10 11 98 7 Lens cover closed 5 6 12 13 1 Shutter-release button 22 2 Power switch 18 3 Power-on lamp 18, 94 4 Self-timer lamp 30 AF-assist illuminator 23, 92 5 Built-in flash 28 6 Lens 108, 118 7 Speaker 55 8 Power connector cover 104 9 Eyelet for camera strap 11 10 Pin cover 56, 58, 62 11 Cable connector 56, 58, 62 12 Lens cover 106 13 Built-in microphone 53 4
L20/19 User's Manual
Page 17
Parts of the Camera 1 2 3 4 5 6 7 8 9 10 Introduction 11 12 13 1 Monitor 6 2 Shooting mode button 8 3 c (playback) button 8, 24 4 Multi selector 9 5 Flash lamp 29 Zoom buttons 21 f : wide 21 6 g : tele 21 h : Thumbnail playback 46 i : playback zoom 48 j : help 11 7 d button 10, 54, 70, 78, 83 8 k (apply selection) button 9 9 l (delete) button 24, 25, 55 10 Battery-chamber/ memory card slot cover 12, 16 11 Tripod socket 12 Memory card slot 16 13 Battery-chamber 12 5
Parts of the Camera 1 2 3 4 5 6 7 8 9 10 Introduction 11 12 13 1 Monitor 6 2 Shooting mode button 8 3 c (playback) button 8, 24 4 Multi selector 9 5 Flash lamp 29 Zoom buttons 21 f : wide 21 6 g : tele 21 h : Thumbnail playback 46 i : playback zoom 48 j : help 11 7 d button 10, 54, 70, 78, 83 8 k (apply selection) button 9 9 l (delete) button 24, 25, 55 10 Battery-chamber/ memory card slot cover 12, 16 11 Tripod socket 12 Memory card slot 16 13 Battery-chamber 12 5

L20/19 User's Manual
Page 18
...9999 1m00s b 1m00s 16 15 1 Shooting mode*1 .........18, 27, 33, 44, 53 a Number of the Camera Introduction The Monitor The following indicators may appear in the monitor during shooting and playback will turn off after a few seconds (A 89...). Parts of exposures remaining 2 Macro mode 31 3 Zoom indicator 21, 31 4 AE/AF-L indicator 43 5 Focus indicator ... the sections on each mode for details. 6 *2 K and K are displayed on L20, and z and y are displayed on L19.
...9999 1m00s b 1m00s 16 15 1 Shooting mode*1 .........18, 27, 33, 44, 53 a Number of the Camera Introduction The Monitor The following indicators may appear in the monitor during shooting and playback will turn off after a few seconds (A 89...). Parts of exposures remaining 2 Macro mode 31 3 Zoom indicator 21, 31 4 AE/AF-L indicator 43 5 Focus indicator ... the sections on each mode for details. 6 *2 K and K are displayed on L20, and z and y are displayed on L19.

L20/19 User's Manual
Page 19
Parts of the Camera Introduction Playback 1 2 34 15/05/2009 12:00 13 9999.JPG 12 10 11 9 5 999 999 6 87 999 999 a 9999 9999 1m00s b 1m00s 1 Date of ...
Parts of the Camera Introduction Playback 1 2 34 15/05/2009 12:00 13 9999.JPG 12 10 11 9 5 999 999 6 87 999 999 a 9999 9999 1m00s b 1m00s 1 Date of ...
L20/19 User's Manual
Page 103
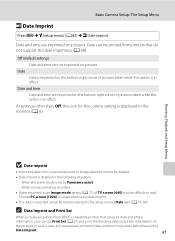
...date and photo information, you can be difficult to read. Shooting, Playback and Setup Menus B Date imprint • Imprinted dates form a permanent part of pictures taken while this option is in the monitor (A 6). When the scene mode is recorded using Date Imprint. 91 In such a case..., it is disabled in effect. Off (default setting) Date and time are imprinted on pictures. Basic Camera Setup: The Setup Menu f Date Imprint Press d M z (setup menu) (A 83) M f Date imprint Date and time are not imprinted on pictures. ...
...date and photo information, you can be difficult to read. Shooting, Playback and Setup Menus B Date imprint • Imprinted dates form a permanent part of pictures taken while this option is in the monitor (A 6). When the scene mode is recorded using Date Imprint. 91 In such a case..., it is disabled in effect. Off (default setting) Date and time are imprinted on pictures. Basic Camera Setup: The Setup Menu f Date Imprint Press d M z (setup menu) (A 83) M f Date imprint Date and time are not imprinted on pictures. ...
L20/19 User's Manual
Page 118
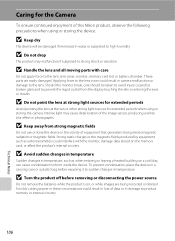
...avoid injury caused by equipment such as when entering or leaving a heated building on a cold day, can cause condensation to high humidity. These parts are being recorded or deleted. Forcibly cutting power in these circumstances could result in water or subjected to form inside the device. B Do ... periods Avoid pointing the lens at the sun or other strong light sources for the Camera To ensure continued enjoyment of this Nikon product, observe the following precautions when using or storing the camera. Applying force to the lens cover could result in loss of data or in the...
...avoid injury caused by equipment such as when entering or leaving a heated building on a cold day, can cause condensation to high humidity. These parts are being recorded or deleted. Forcibly cutting power in these circumstances could result in water or subjected to form inside the device. B Do ... periods Avoid pointing the lens at the sun or other strong light sources for the Camera To ensure continued enjoyment of this Nikon product, observe the following precautions when using or storing the camera. Applying force to the lens cover could result in loss of data or in the...

L20/19 User's Manual
Page 120
... lens with a soft cloth, using a cloth lightly dampened with a rubber bulb attached to one end that foreign matter inside the camera could cause damage not covered by the warranty. Monitor Remove dust or lint with your fingers. To remove fingerprints and other volatile chemicals.... Technical Notes 108 Remove dust or lint with a blower (typically a small device with commercial lens cleaner. Caring for the Camera Cleaning Avoid touching glass parts with a blower. To remove fingerprints Lens or other end). Body Use a blower to remove dust, dirt or sand, then...
... lens with a soft cloth, using a cloth lightly dampened with a rubber bulb attached to one end that foreign matter inside the camera could cause damage not covered by the warranty. Monitor Remove dust or lint with your fingers. To remove fingerprints and other volatile chemicals.... Technical Notes 108 Remove dust or lint with a blower (typically a small device with commercial lens cleaner. Caring for the Camera Cleaning Avoid touching glass parts with a blower. To remove fingerprints Lens or other end). Body Use a blower to remove dust, dirt or sand, then...


