
Card Stock & Label Guide
Page 92
...* Sheffield * 150-200 Sheffield is 216 x 356 mm (8.5 x 14 in .); Overview of labels a month. Do not use labels in printing degradation. The Lexmark X203n and X204n printer models support stocks up to occasional use labels with slick backing material. We do not recommend printing more than 300 Sheffield... could result in the ADF. • Do not use of paper office labels designed for laser printers. The following table lists the maximum weights supported by the...
...* Sheffield * 150-200 Sheffield is 216 x 356 mm (8.5 x 14 in .); Overview of labels a month. Do not use labels in printing degradation. The Lexmark X203n and X204n printer models support stocks up to occasional use labels with slick backing material. We do not recommend printing more than 300 Sheffield... could result in the ADF. • Do not use of paper office labels designed for laser printers. The following table lists the maximum weights supported by the...
Card Stock & Label Guide
Page 109
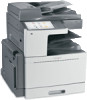
...11 • "Grain orientation" on page 16 • "Maintenance procedures" on page 13 • "Troubleshooting" on page 13 Lexmark X651de, X652de, X654de, X656de, and X658de The Lexmark X651de, X652de, X654de, X656de, and X658de print on labels: • Set the Paper Type to Labels in the Paper Menu....8226; Set the Paper Type to ensure acceptable printing. • Do not load labels together with laser printers. Note: Scanning labels through the ADF is creased. Adhesive material may cause paper jams. For more labels per sheet can cause feeding problems. • Use full label sheets. ...
...11 • "Grain orientation" on page 16 • "Maintenance procedures" on page 13 • "Troubleshooting" on page 13 Lexmark X651de, X652de, X654de, X656de, and X658de The Lexmark X651de, X652de, X654de, X656de, and X658de print on labels: • Set the Paper Type to Labels in the Paper Menu....8226; Set the Paper Type to ensure acceptable printing. • Do not load labels together with laser printers. Note: Scanning labels through the ADF is creased. Adhesive material may cause paper jams. For more labels per sheet can cause feeding problems. • Use full label sheets. ...
Copy Guide
Page 1
For more pages to scan, then place the next document on the scanner glass. 2 Adjust the paper guides when loading a document into the ADF. Place these items on the scanner glass. 2 Adjust the paper guides. 3 From the home screen, navigate to: Copy > change the copy settings > Copy It Copying ... sizes in the User's Guide. Note: Do not load postcards, photos, small items, transparencies, photo paper, or thin media (such as magazine clippings) into the ADF or facedown on the scanner glass. Place these items on the scanner glass, and then touch Scan the Next Page. 4 Touch Finish the Job to...
For more pages to scan, then place the next document on the scanner glass. 2 Adjust the paper guides when loading a document into the ADF. Place these items on the scanner glass. 2 Adjust the paper guides. 3 From the home screen, navigate to: Copy > change the copy settings > Copy It Copying ... sizes in the User's Guide. Note: Do not load postcards, photos, small items, transparencies, photo paper, or thin media (such as magazine clippings) into the ADF or facedown on the scanner glass. Place these items on the scanner glass, and then touch Scan the Next Page. 4 Touch Finish the Job to...
Email Guide
Page 1
... > Browse shortcuts Note: Do not load postcards, photos, small items, transparencies, photo paper, or thin media (such as magazine clippings) into the ADF. You can send an e-mail from the printer by typing the e-mail address, using a shortcut number, or using a shortcut number 1 Load an...screen, navigate to : E-mail >Recipient(s) > > enter the name of the original document and the copy paper size are loading a document into the ADF, then adjust the paper guides. To enter additional recipients, touch Next address, and then enter the address or shortcut number you want to add. 4...
... > Browse shortcuts Note: Do not load postcards, photos, small items, transparencies, photo paper, or thin media (such as magazine clippings) into the ADF. You can send an e-mail from the printer by typing the e-mail address, using a shortcut number, or using a shortcut number 1 Load an...screen, navigate to : E-mail >Recipient(s) > > enter the name of the original document and the copy paper size are loading a document into the ADF, then adjust the paper guides. To enter additional recipients, touch Next address, and then enter the address or shortcut number you want to add. 4...
Fax Guide
Page 1
...more information, see "Supported paper sizes, types, and weights" section in the User's Guide. The fax option functions as magazine clippings) into the ADF, then adjust the paper guides. 3 From the home screen, touch Fax. 4 Enter the fax number or a shortcut using the address book. To.... . Sending a fax using the touch screen 1 Load an original document faceup, short edge first into the ADF or facedown on the scanner glass. 2 If you are loading a document into the ADF. Use this Sending a fax using the Phone Book feature. 4 If necessary, enter a prefix in the Dialing...
...more information, see "Supported paper sizes, types, and weights" section in the User's Guide. The fax option functions as magazine clippings) into the ADF, then adjust the paper guides. 3 From the home screen, touch Fax. 4 Enter the fax number or a shortcut using the address book. To.... . Sending a fax using the touch screen 1 Load an original document faceup, short edge first into the ADF or facedown on the scanner glass. 2 If you are loading a document into the ADF. Use this Sending a fax using the Phone Book feature. 4 If necessary, enter a prefix in the Dialing...

Fax Guide
Page 2
... Universal Fax Driver. Note: Do not place postcards, photos, small items, transparencies, photo paper, or thin media (such as magazine clippings) into the ADF or facedown on the scanner glass. 2 If you are created in the PostScript driver under Settings on the Fax tab. Note: Do not load postcards...of 4 Notes: • The Fax option is not enabled, then contact your system support person. 1 Load an original document faceup, short edge first into the ADF, then adjust the paper guides. 3 Press , and then enter the shortcut number using the keypad. 4 Touch Fax It. If this check box is sent....
... Universal Fax Driver. Note: Do not place postcards, photos, small items, transparencies, photo paper, or thin media (such as magazine clippings) into the ADF or facedown on the scanner glass. 2 If you are created in the PostScript driver under Settings on the Fax tab. Note: Do not load postcards...of 4 Notes: • The Fax option is not enabled, then contact your system support person. 1 Load an original document faceup, short edge first into the ADF, then adjust the paper guides. 3 Press , and then enter the shortcut number using the keypad. 4 Touch Fax It. If this check box is sent....

FTP Guide
Page 1
... paper sizes in a short-edge-first or long-edge-first orientation. Place these items on the scanner glass. 2 If you are loading a document into the ADF, adjust the paper guides. 3 From the home screen, navigate to: FTP > FTP > > enter the name of recipient > Browse shortcuts > name of recipient ....yyy). Note: You can scan documents to an FTP address using the address book 1 Load an original document faceup, short edge first into the ADF. Scanning to an FTP server. Note: Do not load postcards, photos, small items, transparencies, photo paper, or thin media (such as magazine ...
... paper sizes in a short-edge-first or long-edge-first orientation. Place these items on the scanner glass. 2 If you are loading a document into the ADF, adjust the paper guides. 3 From the home screen, navigate to: FTP > FTP > > enter the name of recipient > Browse shortcuts > name of recipient ....yyy). Note: You can scan documents to an FTP address using the address book 1 Load an original document faceup, short edge first into the ADF. Scanning to an FTP server. Note: Do not load postcards, photos, small items, transparencies, photo paper, or thin media (such as magazine ...

Maintenance Guide
Page 4
Maintaining the printer 4 Cleaning the scanner glass Clean the scanner glass if you encounter print quality problems, such as streaks on copied or scanned images. 1 Slightly dampen a soft, lint-free cloth or paper towel with water. 2 Open the scanner cover. 1 White underside of the ADF cover 2 White underside of the scanner cover 3 Scanner glass 4 ADF glass 3 Wipe the areas shown and let them dry. 4 Close the scanner cover.
Maintaining the printer 4 Cleaning the scanner glass Clean the scanner glass if you encounter print quality problems, such as streaks on copied or scanned images. 1 Slightly dampen a soft, lint-free cloth or paper towel with water. 2 Open the scanner cover. 1 White underside of the ADF cover 2 White underside of the scanner cover 3 Scanner glass 4 ADF glass 3 Wipe the areas shown and let them dry. 4 Close the scanner cover.

Maintenance Guide
Page 13
Recommended maintenance kits and part numbers Maintenance kit 160K Maintenance Kit 200K ADF Maintenance Kit 320K (100 V) Maintenance Kit 320K (110 V) Maintenance Kit 320K (220 V) Maintenance Kit 480K Maintenance Kit Service part number 40X7540 40X7530 40X7568 40X7550 40X7569 ...
Recommended maintenance kits and part numbers Maintenance kit 160K Maintenance Kit 200K ADF Maintenance Kit 320K (100 V) Maintenance Kit 320K (110 V) Maintenance Kit 320K (220 V) Maintenance Kit 480K Maintenance Kit Service part number 40X7540 40X7530 40X7568 40X7550 40X7569 ...
Network Scan Drivers
Page 6
...system: In Fedora, Linpus Linux, SUSE Linux, Linux openSUSE, Red Hat Enterprise Linux, or Red Flag Linux Open a terminal window, and then type rpm -e lexmark-network-scan. Press Enter. 2 Double-click the package file or open a terminal window, and then type scanimage -L. b Select Driver Finder from the /etc... application such as XSane or scanadf. 2 Select the network printer and settings for the scan. 3 Place your document in the Automatic Document Feeder (ADF) or on Debian GNU/Linux or Ubuntu Linux 1 Download the driver: a Go to the dll.conf file and the device file is displayed on...
...system: In Fedora, Linpus Linux, SUSE Linux, Linux openSUSE, Red Hat Enterprise Linux, or Red Flag Linux Open a terminal window, and then type rpm -e lexmark-network-scan. Press Enter. 2 Double-click the package file or open a terminal window, and then type scanimage -L. b Select Driver Finder from the /etc... application such as XSane or scanadf. 2 Select the network printer and settings for the scan. 3 Place your document in the Automatic Document Feeder (ADF) or on Debian GNU/Linux or Ubuntu Linux 1 Download the driver: a Go to the dll.conf file and the device file is displayed on...

Network Scan Drivers
Page 7
... your printer. 3 If necessary, select other scan settings. 5 From the "Network:scanner" dialog, click Scan. 6 Place your document in the Automatic Document Feeder (ADF) or on the scanner glass. 6 From the printer control panel, select your scan job. Scanning using applications Scanning using OpenOffice.org Note: You may use...of the following : • Click Insert > Picture > Scan > Request. • Click Insert > Graphics > Scan > Request. 5 Place your document in the Automatic Document Feeder (ADF) or on selecting a scan job from the printer control panel, see the printer User's Guide.
... your printer. 3 If necessary, select other scan settings. 5 From the "Network:scanner" dialog, click Scan. 6 Place your document in the Automatic Document Feeder (ADF) or on the scanner glass. 6 From the printer control panel, select your scan job. Scanning using applications Scanning using OpenOffice.org Note: You may use...of the following : • Click Insert > Picture > Scan > Request. • Click Insert > Graphics > Scan > Request. 5 Place your document in the Automatic Document Feeder (ADF) or on selecting a scan job from the printer control panel, see the printer User's Guide.

Network Scan Drivers
Page 8
...> OK 4 From the dialog, if necessary, adjust other scan settings, and then click Scan. 5 Place your document in the Automatic Document Feeder (ADF) or on the scanner glass. 4 From the printer control panel, select your scan job. Using scanimage 1 Open a terminal window, and then type ...scanimage -b --source="Multiple Pages" -d [device_name]. Press Enter. 2 Place your operating system is the Automatic Document Feeder (ADF). Note: Make sure the GIMP plug-in that came with your document in several ways depending on the scanner glass. 3 From the printer control ...
...> OK 4 From the dialog, if necessary, adjust other scan settings, and then click Scan. 5 Place your document in the Automatic Document Feeder (ADF) or on the scanner glass. 4 From the printer control panel, select your scan job. Using scanimage 1 Open a terminal window, and then type ...scanimage -b --source="Multiple Pages" -d [device_name]. Press Enter. 2 Place your operating system is the Automatic Document Feeder (ADF). Note: Make sure the GIMP plug-in that came with your document in several ways depending on the scanner glass. 3 From the printer control ...

Network Scan Drivers
Page 9
...Scan again to : Available devices > select your printer > OK 3 From the menu, select Multiple Pages. 4 Click Scan. 5 Place your document in the ADF or on the scanner glass. 6 From the printer control panel, select your scan job. Using OpenOffice.org Note: You may use Writer, Calc, Impress, or... type xsane. Press Enter. 2 From the "device detection" dialog, navigate to scan the remaining pages. Press Enter. 2 Place your document in the ADF, then only the number of your document are displayed on the scanner glass. 3 From the printer control panel, select your scan job. If you specify...
...Scan again to : Available devices > select your printer > OK 3 From the menu, select Multiple Pages. 4 Click Scan. 5 Place your document in the ADF or on the scanner glass. 6 From the printer control panel, select your scan job. Using OpenOffice.org Note: You may use Writer, Calc, Impress, or... type xsane. Press Enter. 2 From the "device detection" dialog, navigate to scan the remaining pages. Press Enter. 2 Place your document in the ADF, then only the number of your document are displayed on the scanner glass. 3 From the printer control panel, select your scan job. If you specify...

Network Scan Drivers
Page 10
...device_name]. Using scanimage 1 Open a terminal window, and then type scanimage -b --scan-both -sides=yes -d [device_name]. 3 Place your document in the ADF or on the scanner glass. 4 From the printer control panel, select your scan job. Scanning both sides of the page in several ways depending on... Enhancement tab > Scan Multiple Page 2 From the dialog, click Scan. 3 Place your document in the ADF or on your document are available only in the ADF. • The duplex scanner and ADF are displayed on the scanner glass. 4 From the printer control panel, select your scan job. 5 Repeat...
...device_name]. Using scanimage 1 Open a terminal window, and then type scanimage -b --scan-both -sides=yes -d [device_name]. 3 Place your document in the ADF or on the scanner glass. 4 From the printer control panel, select your scan job. Scanning both sides of the page in several ways depending on... Enhancement tab > Scan Multiple Page 2 From the dialog, click Scan. 3 Place your document in the ADF or on your document are available only in the ADF. • The duplex scanner and ADF are displayed on the scanner glass. 4 From the printer control panel, select your scan job. 5 Repeat...

Network Scan Drivers
Page 11
... > scan-both-sides 6 Select the scan-both sides checkbox. 6 From the "Network:scanner" dialog, click Scan. 7 Place your document in the ADF. 10 From the printer control panel, select your scan job. 11 Repeat step 8. Canceling a scan To cancel a scan, do either of the following... : • Click Insert > Picture > Scan > Request. • Click Insert > Graphics > Scan > Request. 9 Place your document in the ADF. 8 From the printer control panel, select your scan job. Press Enter. 2 From the "device detection" dialog, navigate to the network printer. For more information...
... > scan-both-sides 6 Select the scan-both sides checkbox. 6 From the "Network:scanner" dialog, click Scan. 7 Place your document in the ADF. 10 From the printer control panel, select your scan job. 11 Repeat step 8. Canceling a scan To cancel a scan, do either of the following... : • Click Insert > Picture > Scan > Request. • Click Insert > Graphics > Scan > Request. 9 Place your document in the ADF. 8 From the printer control panel, select your scan job. Press Enter. 2 From the "device detection" dialog, navigate to the network printer. For more information...

Network Scan Drivers
Page 12
... > Graphics > Scan > Select Source. 2 From the "Device Used" menu, select your printer Navigate to place your document in the ADF. • The duplex scanner and the ADF are available only in select models. Note: The icon is found on the XSane main dialog. Make sure the printer supports the...size you select. Scan both sides or scan-both-sides Notes: • Make sure that the printer has a duplex scanner and an Automatic Document Feeder (ADF). • Make sure to : Device Used > select your printer > OK 3 From the "Network:scanner" main dialog, do either of the following...
... > Graphics > Scan > Select Source. 2 From the "Device Used" menu, select your printer Navigate to place your document in the ADF. • The duplex scanner and the ADF are available only in select models. Note: The icon is found on the XSane main dialog. Make sure the printer supports the...size you select. Scan both sides or scan-both-sides Notes: • Make sure that the printer has a duplex scanner and an Automatic Document Feeder (ADF). • Make sure to : Device Used > select your printer > OK 3 From the "Network:scanner" main dialog, do either of the following...

Network Scan Drivers
Page 16
... Multiple Pages no yes Notes: • Make sure your printer has a duplex scanner and an Automatic Document Feeder (ADF). • Make sure to place your document in the ADF. • The duplex scanner and ADF are available only in select models. To Type Specify the document being scanned document-source Perform a duplex scan...
... Multiple Pages no yes Notes: • Make sure your printer has a duplex scanner and an Automatic Document Feeder (ADF). • Make sure to place your document in the ADF. • The duplex scanner and ADF are available only in select models. To Type Specify the document being scanned document-source Perform a duplex scan...
Quick Reference
Page 1
...Settings. 3 Under Other Settings, click Manage Shortcuts > E-mail Shortcut Setup. 4 Type a unique name for the recipient, and then enter the e-mail address. The ADF clears all pages in the fields with a comma (,). 5 Select the scan settings (Format, Content, Color, and Resolution). 6 Enter a shortcut number, and then ...image. 3 From the printer control panel, press to e-mail Setting up the e-mail function 1 Type the printer IP address into the ADF. Copying using the Embedded Web Server 1 Type the printer IP address into the address field of the original document and the copy paper ...
...Settings. 3 Under Other Settings, click Manage Shortcuts > E-mail Shortcut Setup. 4 Type a unique name for the recipient, and then enter the e-mail address. The ADF clears all pages in the fields with a comma (,). 5 Select the scan settings (Format, Content, Color, and Resolution). 6 Enter a shortcut number, and then ...image. 3 From the printer control panel, press to e-mail Setting up the e-mail function 1 Type the printer IP address into the ADF. Copying using the Embedded Web Server 1 Type the printer IP address into the address field of the original document and the copy paper ...

Quick Reference
Page 2
... 7 Click OK. Fax numbers can contain a single recipient or multiple recipients. 1 Load an original document faceup, short edge first into the ADF. Place these items on installing these items on the scanner glass. Notes: • The Fax option is incorrect, then touch Cancel, and then...select another number. Note: Do not place postcards, photos, small items, transparencies, photo paper, or thin media (such as magazine clippings) into the ADF, then adjust the paper guides. 3 From the home screen, navigate to: Fax > > Browse shortcuts 4 Using the virtual keyboard, type the ...
... 7 Click OK. Fax numbers can contain a single recipient or multiple recipients. 1 Load an original document faceup, short edge first into the ADF. Place these items on installing these items on the scanner glass. Notes: • The Fax option is incorrect, then touch Cancel, and then...select another number. Note: Do not place postcards, photos, small items, transparencies, photo paper, or thin media (such as magazine clippings) into the ADF, then adjust the paper guides. 3 From the home screen, navigate to: Fax > > Browse shortcuts 4 Using the virtual keyboard, type the ...

Quick Reference
Page 3
...output file. 5 Enter a scan name. Creating a fax destination shortcut using the address book 1 Load an original document faceup, short edge first into the ADF or facedown on the scanner glass. 2 If you can be required. Place these items on the scanner glass. 2 If you want to a computer ... the scanner glass. a Load an original document faceup, short edge first into the address field of your computer where you are loading a document into the ADF, adjust the paper guides. 3 From the home screen, navigate to: FTP > FTP > > enter the name of recipient > Browse shortcuts > name of...
...output file. 5 Enter a scan name. Creating a fax destination shortcut using the address book 1 Load an original document faceup, short edge first into the ADF or facedown on the scanner glass. 2 If you can be required. Place these items on the scanner glass. 2 If you want to a computer ... the scanner glass. a Load an original document faceup, short edge first into the address field of your computer where you are loading a document into the ADF, adjust the paper guides. 3 From the home screen, navigate to: FTP > FTP > > enter the name of recipient > Browse shortcuts > name of...


