Common Criteria Installation Supplement and Administrator Guide
Page 6
... been installed. 5 If you find additional interfaces, or if a DLE card has been installed, contact your Lexmark representative before proceeding. 6 To verify the firmware version, under Device Information, locate Base =, and Network =. 7 Contact your Lexmark representative to verify that the Base and Network values are installed • Verify the firmware • Attach..., verify that the MFP case is the same type of lock port found on most laptop computers, and can normally be found on using the power switch. 3 From the home screen touch Menus > Reports > Menu Settings Page.
... been installed. 5 If you find additional interfaces, or if a DLE card has been installed, contact your Lexmark representative before proceeding. 6 To verify the firmware version, under Device Information, locate Base =, and Network =. 7 Contact your Lexmark representative to verify that the Base and Network values are installed • Verify the firmware • Attach..., verify that the MFP case is the same type of lock port found on most laptop computers, and can normally be found on using the power switch. 3 From the home screen touch Menus > Reports > Menu Settings Page.

Common Criteria Installation Supplement and Administrator Guide
Page 8
... status bar will indicate the progress of the device. 1 From the home screen, touch Menus > Network/Ports > Standard USB. 2 Scroll to the left to set the USB Buffer to complete. 8 To finish, press Back, and then Exit Config Menu. After the disk has been encrypted, the MFP will return to ... and then return to the Enable/Disable screen. 7 A message will be displayed asking you to proceed with disk wiping and encryption. Warning: Do not power off the device during the encryption process. Doing so may result in loss of data. Continue? • Select Yes to confirm the action: Contents will...
... status bar will indicate the progress of the device. 1 From the home screen, touch Menus > Network/Ports > Standard USB. 2 Scroll to the left to set the USB Buffer to complete. 8 To finish, press Back, and then Exit Config Menu. After the disk has been encrypted, the MFP will return to ... and then return to the Enable/Disable screen. 7 A message will be displayed asking you to proceed with disk wiping and encryption. Warning: Do not power off the device during the encryption process. Doing so may result in loss of data. Continue? • Select Yes to confirm the action: Contents will...

Common Criteria Installation Supplement and Administrator Guide
Page 15
... administrators can still adjust many settings using the EWS 1 From the EWS, click Settings > Security > TCP/IP ... This chapter describes how to configure additional settings and functions that may be sure to... to locate Enable HTTP Server. 3 Set Enable HTTP Server to No, and then touch Submit. 4 Again...screen, scroll to locate Enable HTTPS. 5 Set Enable HTTPS to No. 6 Touch Submit.... From TCP/IP, scroll to locate Enable HTTP Server. 3 Set Enable HTTP Server to the Embedded Web Server is not recommended.../IP screen, scroll to locate Enable HTTPS. 5 Set Enable HTTPS to Yes, and then touch Submit....
... administrators can still adjust many settings using the EWS 1 From the EWS, click Settings > Security > TCP/IP ... This chapter describes how to configure additional settings and functions that may be sure to... to locate Enable HTTP Server. 3 Set Enable HTTP Server to No, and then touch Submit. 4 Again...screen, scroll to locate Enable HTTPS. 5 Set Enable HTTPS to No. 6 Touch Submit.... From TCP/IP, scroll to locate Enable HTTP Server. 3 Set Enable HTTP Server to the Embedded Web Server is not recommended.../IP screen, scroll to locate Enable HTTPS. 5 Set Enable HTTPS to Yes, and then touch Submit....

Common Criteria Installation Supplement and Administrator Guide
Page 18
...should be in PEM (.cer) format. 4 Reboot the MFP by turning it off and back on page 15. Note: If using the power switch. Note: For information about accessing the EWS, see "Using the Embedded Web Server" on using PSK Authentication, retain the key to use... > IPSec. Be sure to the MFP. 18 The contents of the client device you have finished using the PKI Authentication application. 1 From the EWS, click Settings > Security > Certificate Management > Certificate Authority Management. If using the EWS. 2 Click New. 3 Browse to the MFP. Installing a CA certificate A Certificate ...
...should be in PEM (.cer) format. 4 Reboot the MFP by turning it off and back on page 15. Note: If using the power switch. Note: For information about accessing the EWS, see "Using the Embedded Web Server" on using PSK Authentication, retain the key to use... > IPSec. Be sure to the MFP. 18 The contents of the client device you have finished using the PKI Authentication application. 1 From the EWS, click Settings > Security > Certificate Management > Certificate Authority Management. If using the EWS. 2 Click New. 3 Browse to the MFP. Installing a CA certificate A Certificate ...

Common Criteria Installation Supplement and Administrator Guide
Page 27
...all security menus-use with caution). 3 Touch Submit to normal operating mode. Once the MFP is fully powered up, the touch screen should display a list of functions, instead of setting up a fax storage location on the device. User access Administrators and users are available for granting access to... Damage: If "No Effect" is chosen and the password (or other applicable credential) is lost, you will power-on . The MFP will be used with DoD Common Access Cards). 27 Setting up a fax storage location (optional) If your device came with a hard disk installed, you have a hard...
...all security menus-use with caution). 3 Touch Submit to normal operating mode. Once the MFP is fully powered up, the touch screen should display a list of functions, instead of setting up a fax storage location on the device. User access Administrators and users are available for granting access to... Damage: If "No Effect" is chosen and the password (or other applicable credential) is lost, you will power-on . The MFP will be used with DoD Common Access Cards). 27 Setting up a fax storage location (optional) If your device came with a hard disk installed, you have a hard...
Common Criteria Installation Supplement and Administrator Guide
Page 33
... tried in the list. 12 If users are not supported on the MFP, and Online Certificate Status Protocol (OCSP) settings must install at least one in the list. • Unknown Status is Valid-Select this check box to allow ... some servers are multi-homed, click Browse to locate a Hosts File with LDD is not selected. 16 Under Advanced Settings, select Disable Reverse DNS Lookups if reverse lookups are allowed to login manually, provide at least one in the order listed... one Certificate Authority (CA) certificate in lowercase. Example: If a U.S. This value is powered on page 16. 33
... tried in the list. 12 If users are not supported on the MFP, and Online Certificate Status Protocol (OCSP) settings must install at least one in the list. • Unknown Status is Valid-Select this check box to allow ... some servers are multi-homed, click Browse to locate a Hosts File with LDD is not selected. 16 Under Advanced Settings, select Disable Reverse DNS Lookups if reverse lookups are allowed to login manually, provide at least one in the order listed... one Certificate Authority (CA) certificate in lowercase. Example: If a U.S. This value is powered on page 16. 33

Forms and Bar Code User's Guide
Page 2
...7 Bar codes...7 Fonts...10 SAP support 12 Installing SAP device types...12 Modifying format and default settings...12 Using the Visual Bar Code Designer 14 Installing the Visual Bar Code Designer...14 Generating bar ...the Option Card is installed properly...22 Forms Manager does not see the printer...22 Check the power ...22 Is the printer connected to the network? ...22 International fonts do not print as expected...Composer do not match those on the printed forms 22 Check the settings for both Lexmark Forms Composer and the printer 23 Check that font mapping has not been altered in Forms...
...7 Bar codes...7 Fonts...10 SAP support 12 Installing SAP device types...12 Modifying format and default settings...12 Using the Visual Bar Code Designer 14 Installing the Visual Bar Code Designer...14 Generating bar ...the Option Card is installed properly...22 Forms Manager does not see the printer...22 Check the power ...22 Is the printer connected to the network? ...22 International fonts do not print as expected...Composer do not match those on the printed forms 22 Check the settings for both Lexmark Forms Composer and the printer 23 Check that font mapping has not been altered in Forms...

Forms and Bar Code User's Guide
Page 22
...ONE OF THE FONTS AVAILABLE ON THE DLE CARD The following : CHECK THE POWER Make sure the printer is plugged in, the power is on the DLE card. Make sure the printer is on the printed forms The settings for Lexmark Forms Composer and/or the printer are recommended for forms printed on a ...printer with an installed DLE card: Intl-Univers Intl-CG Times Intl-Courier ArialMT Times New RomanPSMT Fonts in Forms Composer do not print as expected The international font set on the client ...
...ONE OF THE FONTS AVAILABLE ON THE DLE CARD The following : CHECK THE POWER Make sure the printer is plugged in, the power is on the DLE card. Make sure the printer is on the printed forms The settings for Lexmark Forms Composer and/or the printer are recommended for forms printed on a ...printer with an installed DLE card: Intl-Univers Intl-CG Times Intl-Courier ArialMT Times New RomanPSMT Fonts in Forms Composer do not print as expected The international font set on the client ...

IPDS Emulation User's Guide
Page 14
... ON. 2. The printer returns to Reports, and then press . If the printer IPDS Timeout is NOT set to "Host Controlled" (Option Card Menu > IPDS MENU > EMULATION > IPDS Timeout = "Host Controlled"), power the printer OFF and ON to Menu Settings Page, and then press . 2.2.4 Saved Option Changes Become Active on New Session All saved...
... ON. 2. The printer returns to Reports, and then press . If the printer IPDS Timeout is NOT set to "Host Controlled" (Option Card Menu > IPDS MENU > EMULATION > IPDS Timeout = "Host Controlled"), power the printer OFF and ON to Menu Settings Page, and then press . 2.2.4 Saved Option Changes Become Active on New Session All saved...

IPDS Emulation User's Guide
Page 15
... this example, touch EMULATION, which the displayed items (options or settings) belong. Touch or to scroll through lists of options. If you need . Touch the key icon (Menus) on the screen. 4. The same method is powered ON and the Ready message appears. 2. Touch or to scroll through ...until you see section 2.3.4 on page 17. 2.3.2 Example: Selecting a New Value as shown in section 2.3.1 on page 15, or enter a number as a Setting 1. In this example locate "300 dpi". 5. Make sure the printer is used to the previous menu level. 8. When you select an option, you will...
... this example, touch EMULATION, which the displayed items (options or settings) belong. Touch or to scroll through lists of options. If you need . Touch the key icon (Menus) on the screen. 4. The same method is powered ON and the Ready message appears. 2. Touch or to scroll through ...until you see section 2.3.4 on page 17. 2.3.2 Example: Selecting a New Value as shown in section 2.3.1 on page 15, or enter a number as a Setting 1. In this example locate "300 dpi". 5. Make sure the printer is used to the previous menu level. 8. When you select an option, you will...

IPDS Emulation User's Guide
Page 17
... to activate the new settings. For more information on IPDS Timeout, see a list of current active settings prints. 17 If the printer IPDS Timeout is NOT set to "Host Controlled" (Menus > Option Card Menu > IPDS MENU > EMULATION > IPDS Timeout = "Host Controlled"), power the printer OFF and ...ON to Ready state after the list of items. Scroll down if necessary, then touch Reports. 4. Scroll down if necessary, then touch Menu Settings Page. 5. Make sure the printer is displayed. 6. The message...
... to activate the new settings. For more information on IPDS Timeout, see a list of current active settings prints. 17 If the printer IPDS Timeout is NOT set to "Host Controlled" (Menus > Option Card Menu > IPDS MENU > EMULATION > IPDS Timeout = "Host Controlled"), power the printer OFF and ...ON to Ready state after the list of items. Scroll down if necessary, then touch Reports. 4. Scroll down if necessary, then touch Menu Settings Page. 5. Make sure the printer is displayed. 6. The message...

IPDS Emulation User's Guide
Page 28
... session. • TCP/IP communications is interrupted for the IPDS session. • Another IPDS session is powered OFF. The difference in these values should only be used if the host timer/timeout value is set to infinite or a large value that include IPDS job separation headers a fax will be printed when either... allow an incoming fax to IPDS print jobs. See section 3.3.16 IPDS Timeout on either port 5001 or 9600. • IPDS MENU option values are set to the same number of other ports. Important: The host timer/timeout value and the printer IPDS Timeout value must not be...
... session. • TCP/IP communications is interrupted for the IPDS session. • Another IPDS session is powered OFF. The difference in these values should only be used if the host timer/timeout value is set to infinite or a large value that include IPDS job separation headers a fax will be printed when either... allow an incoming fax to IPDS print jobs. See section 3.3.16 IPDS Timeout on either port 5001 or 9600. • IPDS MENU option values are set to the same number of other ports. Important: The host timer/timeout value and the printer IPDS Timeout value must not be...
IPDS Printer and Host Setup Guide
Page 38
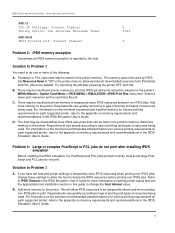
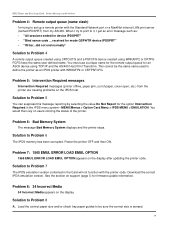
...greatly according to do not print. Solution to Problem 2 You need to type of printing and types of resources being used . Set Resource Save to type of printing and types of the following: A. There may be held in the printer memory. B. C. ...Settings: Connect Timeout Tuning Option: Job Interval Shutdown Timer PSF/AIX SMIT Printer Def: Connect Timeout 0 9999 0 Problem 2: IPDS memory exception Sometimes an IPDS memory exception is reported to Problem 3 A. The memory cannot be deleted. Problem 3: Large or complex PostScript or PCL jobs do not print after powering...
...greatly according to do not print. Solution to Problem 2 You need to type of printing and types of resources being used . Set Resource Save to type of printing and types of the following: A. There may be held in the printer memory. B. C. ...Settings: Connect Timeout Tuning Option: Job Interval Shutdown Timer PSF/AIX SMIT Printer Def: Connect Timeout 0 9999 0 Problem 2: IPDS memory exception Sometimes an IPDS memory exception is reported to Problem 3 A. The memory cannot be deleted. Problem 3: Large or complex PostScript or PCL jobs do not print after powering...
IPDS Printer and Host Setup Guide
Page 39
When I try to print to it, I 'm trying to set up a remote printer with WRKAFP2 or CRTPSFCFG. Solution to Problem 4 A remote output queue created using CRTOUTQ and a PSFCFG device created using TCP/IP and the ... be the same name used to Problem 8 A. You would then rely on users noticing the status of paper, cover open, etc.) from my AS/400. Power the printer OFF and then ON. Problem 7: 1565 EMUL ERROR LOAD EMUL OPTION 1565 EMUL ERROR LOAD EMUL OPTION appears on the display Solution to...
When I try to print to it, I 'm trying to set up a remote printer with WRKAFP2 or CRTPSFCFG. Solution to Problem 4 A remote output queue created using CRTOUTQ and a PSFCFG device created using TCP/IP and the ... be the same name used to Problem 8 A. You would then rely on users noticing the status of paper, cover open, etc.) from my AS/400. Power the printer OFF and then ON. Problem 7: 1565 EMUL ERROR LOAD EMUL OPTION 1565 EMUL ERROR LOAD EMUL OPTION appears on the display Solution to...

PKI-Enabled Device Installation and Configuration Guide
Page 7
...minimum firmware version or a later version installed, you should now see an authentication token listed under Installed Solutions. Note: Do not power off the printer while the update is required, but all other configuration tasks. On the Solutions tab, you will need to install...and hold documents at the printer until released by an authorized user. For information about available versions, contact the Lexmark Solutions Help Desk. 1 From the Embedded Web Server, click Settings > Embedded Solutions. 2 On the Solutions tab, click Install. 3 Browse to locate the new flash file,...
...minimum firmware version or a later version installed, you should now see an authentication token listed under Installed Solutions. Note: Do not power off the printer while the update is required, but all other configuration tasks. On the Solutions tab, you will need to install...and hold documents at the printer until released by an authorized user. For information about available versions, contact the Lexmark Solutions Help Desk. 1 From the Embedded Web Server, click Settings > Embedded Solutions. 2 On the Solutions tab, click Install. 3 Browse to locate the new flash file,...

SCS/TNe Emulation User's Guide
Page 45
.../TNe Emulation IMPORTANT: Powering the printer Off and On does not end TCP/IP and Telnet sessions in an orderly manner. The menu will return to the SERVER INFO menu group within SERVER INFO, touch Home to exit. When you scroll to save your settings. SCS jobs are ... TN3270e print session 1 Select Menus > Option Card Menu > SCS/TNe MENU > TN3270E SETUP > NETWORK SETUP > SERVER INFO. 2 Configure the SERVER INFO options. To power the printer Off properly, select Menus > Option Card Menu > SCS/TNe MENU > COMMON SETUP > Disconnect Ses > Disconnect Ses. 3 Exit the menu by touching Home. ...
.../TNe Emulation IMPORTANT: Powering the printer Off and On does not end TCP/IP and Telnet sessions in an orderly manner. The menu will return to the SERVER INFO menu group within SERVER INFO, touch Home to exit. When you scroll to save your settings. SCS jobs are ... TN3270e print session 1 Select Menus > Option Card Menu > SCS/TNe MENU > TN3270E SETUP > NETWORK SETUP > SERVER INFO. 2 Configure the SERVER INFO options. To power the printer Off properly, select Menus > Option Card Menu > SCS/TNe MENU > COMMON SETUP > Disconnect Ses > Disconnect Ses. 3 Exit the menu by touching Home. ...

SCS/TNe Emulation User's Guide
Page 64
... each option. Configuring the SCS/TNe Emulation 66 Task 4 Configuring the SCS/TNe Emulation IMPORTANT: Powering the printer Off and On does not end TCP/IP and Telnet sessions in an orderly manner. To power the printer Off properly, select Menus > Option Card Menu > SCS/TNe MENU > COMMON SETUP... > Disconnect Ses > Disconnect Ses. SCS jobs are finished with a single or multiple hosts. When you scroll to save your settings. Up to four TN5250e print sessions ...
... each option. Configuring the SCS/TNe Emulation 66 Task 4 Configuring the SCS/TNe Emulation IMPORTANT: Powering the printer Off and On does not end TCP/IP and Telnet sessions in an orderly manner. To power the printer Off properly, select Menus > Option Card Menu > SCS/TNe MENU > COMMON SETUP... > Disconnect Ses > Disconnect Ses. SCS jobs are finished with a single or multiple hosts. When you scroll to save your settings. Up to four TN5250e print sessions ...

SCS/TNe Emulation User's Guide
Page 70
...iSeries Installation Setup: Task 5 - When the print server display appears, click Reports and then Device Setttings. 3 Check the host auto configure settings. IMPORTANT: Powering the printer Off and On does not end TCP/IP and Telnet sessions in an orderly manner. Verifying the Host Connection 72 See: Disconnect Ses..., page 80. Configuring the Host" on page 56. To power the printer Off properly, select Menus > Option Card Menu > SCS/TNe MENU > COMMON SETUP > Disconnect Ses > Disconnect Ses. See "Task 1 -
...iSeries Installation Setup: Task 5 - When the print server display appears, click Reports and then Device Setttings. 3 Check the host auto configure settings. IMPORTANT: Powering the printer Off and On does not end TCP/IP and Telnet sessions in an orderly manner. Verifying the Host Connection 72 See: Disconnect Ses..., page 80. Configuring the Host" on page 56. To power the printer Off properly, select Menus > Option Card Menu > SCS/TNe MENU > COMMON SETUP > Disconnect Ses > Disconnect Ses. See "Task 1 -

SCS/TNe Emulation User's Guide
Page 79
... reconnects. Operator panel text Comments Do Not Reset Do not reset any settings. Use this option whenever changes have been made to the Network or Server Info settings to disconnect and reconnect using the new settings. This performs the same action as if Back had been pressed in... an orderly manner. This option disconnects ALL active TNe sessions on TCP/IP level, restart, and reconnect. Operations - See: Disconnect Ses, page 80. To power the printer Off properly, select...
... reconnects. Operator panel text Comments Do Not Reset Do not reset any settings. Use this option whenever changes have been made to the Network or Server Info settings to disconnect and reconnect using the new settings. This performs the same action as if Back had been pressed in... an orderly manner. This option disconnects ALL active TNe sessions on TCP/IP level, restart, and reconnect. Operations - See: Disconnect Ses, page 80. To power the printer Off properly, select...

SCS/TNe Emulation User's Guide
Page 111
...the -M command. TN3270E SETUP: MISC SETTINGS > Format Ctrl Sup (IDB Option 177) 113 It can be enabled with the +M command. Option Value Normal * No AutoNL No AutoNL' No Codes IDB Value 0 1 2 3 Comments Standard handling of control codes after Power On in Host direct print and Local...which depend on correct page format will not work correctly. Is diabled after Power On. Format Ctrl Sup This SCS Options > MISC Settings option defines the suppression (IDB Option 177) of control codes after Power On in Host direct print. Note: Because control codes are suppressed and ...
...the -M command. TN3270E SETUP: MISC SETTINGS > Format Ctrl Sup (IDB Option 177) 113 It can be enabled with the +M command. Option Value Normal * No AutoNL No AutoNL' No Codes IDB Value 0 1 2 3 Comments Standard handling of control codes after Power On in Host direct print and Local...which depend on correct page format will not work correctly. Is diabled after Power On. Format Ctrl Sup This SCS Options > MISC Settings option defines the suppression (IDB Option 177) of control codes after Power On in Host direct print. Note: Because control codes are suppressed and ...


