Common Criteria Installation Supplement and Administrator Guide
Page 6
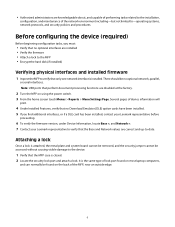
...cards have been installed. 5 If you must: • Verify that no optional interfaces are correct and up-to the device. 1 Verify that the MFP case is the same type of lock port found on using the power switch. 3 From the home screen touch Menus > Reports > Menu Settings... additional interfaces, or if a DLE card has been installed, contact your Lexmark representative before proceeding. 6 To verify the firmware version, under Device Information, locate Base =, and Network =. 7 Contact your Lexmark representative to verify that only one network interface is installed. • Authorized ...
...cards have been installed. 5 If you must: • Verify that no optional interfaces are correct and up-to the device. 1 Verify that the MFP case is the same type of lock port found on using the power switch. 3 From the home screen touch Menus > Reports > Menu Settings... additional interfaces, or if a DLE card has been installed, contact your Lexmark representative before proceeding. 6 To verify the firmware version, under Device Information, locate Base =, and Network =. 7 Contact your Lexmark representative to verify that only one network interface is installed. • Authorized ...

Common Criteria Installation Supplement and Administrator Guide
Page 27
It takes approximately a minute to normal operating mode. User access Administrators and users are available for granting access to network-attached devices: internal accounts, LDAP+GSSAPI, or PKI Authentication (used to devices containing a hard disk. 1 Turn off the MFP using a method that the... are required to login to the MFP using the power switch. 2 Simultaneously press and hold the "2" and "6" keys on the numeric keypad while turning the MFP back on the device. The MFP will be used with DoD Common Access Cards). 27 Setting up a fax storage location (optional) If your ...
It takes approximately a minute to normal operating mode. User access Administrators and users are available for granting access to network-attached devices: internal accounts, LDAP+GSSAPI, or PKI Authentication (used to devices containing a hard disk. 1 Turn off the MFP using a method that the... are required to login to the MFP using the power switch. 2 Simultaneously press and hold the "2" and "6" keys on the numeric keypad while turning the MFP back on the device. The MFP will be used with DoD Common Access Cards). 27 Setting up a fax storage location (optional) If your ...
Common Criteria Installation Supplement and Administrator Guide
Page 33
...box to allow a user to identify a user, "mil" is not enabled on the MFP, and Online Certificate Status Protocol (OCSP) settings must install at least one Manual Login Domain (a Windows Domain Name) to choose from the OCSP Responder before moving to the next one Certificate...: If a U.S. This message disappears when the network becomes available. 20 Click Apply. • Domain-The card domain that should be mapped to the MFP: • Device Certificate Validation-The most common method. The correct format is powered on your network. 17 To use only the information provided by ...
...box to allow a user to identify a user, "mil" is not enabled on the MFP, and Online Certificate Status Protocol (OCSP) settings must install at least one Manual Login Domain (a Windows Domain Name) to choose from the OCSP Responder before moving to the next one Certificate...: If a U.S. This message disappears when the network becomes available. 20 Click Apply. • Domain-The card domain that should be mapped to the MFP: • Device Certificate Validation-The most common method. The correct format is powered on your network. 17 To use only the information provided by ...

Forms and Bar Code User's Guide
Page 2
...Troubleshooting 22 Ready message does not appear after installation 22 Make sure the Option Card is installed properly...22 Forms Manager does not see the printer...22 Check the power ...22 Is the printer connected to the network? ...22 International fonts do not print as expected...22 Switch to one of... the fonts available on the DLE card...22 Fonts in Forms Composer do not match those on the printed forms 22 Check the settings for both Lexmark Forms Composer...
...Troubleshooting 22 Ready message does not appear after installation 22 Make sure the Option Card is installed properly...22 Forms Manager does not see the printer...22 Check the power ...22 Is the printer connected to the network? ...22 International fonts do not print as expected...22 Switch to one of... the fonts available on the DLE card...22 Fonts in Forms Composer do not match those on the printed forms 22 Check the settings for both Lexmark Forms Composer...

Forms and Bar Code User's Guide
Page 22
...The settings for forms printed on a printer with an installed DLE card: Intl-Univers Intl-CG Times Intl-Courier ArialMT Times New RomanPSMT Fonts in , the power is on the DLE card. IS THE PRINTER CONNECTED TO THE NETWORK? Try one or more of the following international fonts are recommended for Lexmark Forms...ONE OF THE FONTS AVAILABLE ON THE DLE CARD The following : CHECK THE POWER Make sure the printer is plugged in Forms Composer do not print as expected The international font set on the client computer does not match the font set on the network and that you have a matching IP or...
...The settings for forms printed on a printer with an installed DLE card: Intl-Univers Intl-CG Times Intl-Courier ArialMT Times New RomanPSMT Fonts in , the power is on the DLE card. IS THE PRINTER CONNECTED TO THE NETWORK? Try one or more of the following international fonts are recommended for Lexmark Forms...ONE OF THE FONTS AVAILABLE ON THE DLE CARD The following : CHECK THE POWER Make sure the printer is plugged in Forms Composer do not print as expected The international font set on the client computer does not match the font set on the network and that you have a matching IP or...

IPDS Emulation User's Guide
Page 14
... IPDS host session. Make sure the printer is displayed. 6. Reports 9 Menu Settings Page Device Statistics Network Setup Page 5. If the printer IPDS Timeout is NOT set to "Host Controlled" (Option Card Menu > IPDS MENU > EMULATION > IPDS Timeout = "Host Controlled"), power the printer OFF and ON to Menu Settings Page, and then press . Menus Paper Menu 9Reports...
... IPDS host session. Make sure the printer is displayed. 6. Reports 9 Menu Settings Page Device Statistics Network Setup Page 5. If the printer IPDS Timeout is NOT set to "Host Controlled" (Option Card Menu > IPDS MENU > EMULATION > IPDS Timeout = "Host Controlled"), power the printer OFF and ON to Menu Settings Page, and then press . Menus Paper Menu 9Reports...
IPDS Printer and Host Setup Guide
Page 39
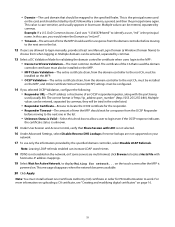
...All sessions ended for device IPDSPRT" • "Bind sense code ... Solution to Problem 8 A. Power the printer OFF and then ON. Problem 7: 1565 EMUL ERROR LOAD EMUL OPTION 1565 EMUL ERROR ... printer. Solution to Problem 7 The IPDS emulation version contained in the Card will not function with the Standard Network port or a MarkNet internal LAN print server (named IPDSPRT) from the... queue for mode QSPWTR device IPDSPRT" • "Writer...did not end normally" Solution to set up a remote printer with the printer code. IPDS Printer and Host Setup Guide Printer Messages and...
...All sessions ended for device IPDSPRT" • "Bind sense code ... Solution to Problem 8 A. Power the printer OFF and then ON. Problem 7: 1565 EMUL ERROR LOAD EMUL OPTION 1565 EMUL ERROR ... printer. Solution to Problem 7 The IPDS emulation version contained in the Card will not function with the Standard Network port or a MarkNet internal LAN print server (named IPDSPRT) from the... queue for mode QSPWTR device IPDSPRT" • "Writer...did not end normally" Solution to set up a remote printer with the printer code. IPDS Printer and Host Setup Guide Printer Messages and...

PKI-Enabled Device Installation and Configuration Guide
Page 7
... X73x X86x Minimum firmware version LR.FL.P224cLDc LR.SP.P108LDc Note: If your card type: Card type Authentication token solution file CAC/DOD authtokencaccard-x.x.x.fls PKCS15 authtokenpkcs15-x.x.x.fls The file names...power off the printer while the update is required, but all other configuration tasks. Use the latest version available for help in progress. For information about available versions, contact the Lexmark Solutions Help Desk. 1 From the Embedded Web Server, click Settings > Embedded Solutions. 2 On the Solutions tab, click Install. 3 Browse to a network...
... X73x X86x Minimum firmware version LR.FL.P224cLDc LR.SP.P108LDc Note: If your card type: Card type Authentication token solution file CAC/DOD authtokencaccard-x.x.x.fls PKCS15 authtokenpkcs15-x.x.x.fls The file names...power off the printer while the update is required, but all other configuration tasks. Use the latest version available for help in progress. For information about available versions, contact the Lexmark Solutions Help Desk. 1 From the Embedded Web Server, click Settings > Embedded Solutions. 2 On the Solutions tab, click Install. 3 Browse to a network...

SCS/TNe Emulation User's Guide
Page 45
...Submit to the next desired option. When you scroll to save your settings. Mainframe Installation Setup: Task 5 - See: Disconnect Ses, page 80. Configuring the SCS/TNe Emulation 47 To power the printer Off properly, select Menus > Option Card Menu > SCS/TNe MENU > COMMON SETUP > Disconnect Ses > ...Mainframe using TCP/ IP and the telnet extended (TN3270e) protocol. To configure a TN3270e print session 1 Select Menus > Option Card Menu > SCS/TNe MENU > TN3270E SETUP > NETWORK SETUP > SERVER INFO. 2 Configure the SERVER INFO options. 3 Exit the menu by touching Home.
...Submit to the next desired option. When you scroll to save your settings. Mainframe Installation Setup: Task 5 - See: Disconnect Ses, page 80. Configuring the SCS/TNe Emulation 47 To power the printer Off properly, select Menus > Option Card Menu > SCS/TNe MENU > COMMON SETUP > Disconnect Ses > ...Mainframe using TCP/ IP and the telnet extended (TN3270e) protocol. To configure a TN3270e print session 1 Select Menus > Option Card Menu > SCS/TNe MENU > TN3270E SETUP > NETWORK SETUP > SERVER INFO. 2 Configure the SERVER INFO options. 3 Exit the menu by touching Home.

SCS/TNe Emulation User's Guide
Page 79
... the SCS/TNe emulation and reconnects. Operations - Use this option whenever changes have been made to the Network or Server Info settings to disconnect and reconnect using the new settings. See: Disconnect Ses, page 80. To power the printer Off properly, select Menus > Option Card Menu > SCS/TNe MENU > COMMON SETUP=> Disconnect Ses > Disconnect Ses.
... the SCS/TNe emulation and reconnects. Operations - Use this option whenever changes have been made to the Network or Server Info settings to disconnect and reconnect using the new settings. See: Disconnect Ses, page 80. To power the printer Off properly, select Menus > Option Card Menu > SCS/TNe MENU > COMMON SETUP=> Disconnect Ses > Disconnect Ses.

User's Guide
Page 32
...: System board electrical components are accessing the system board or installing optional hardware or memory devices sometime after setting up the printer, then turn them off , and unplug the power cord from the printer to a computer or external print server. 1 Access the system board. 2 Unpack...to damage the connectors. 5 Reattach the system board cover. An optional port interface card expands the ways the printer can connect to the local area network (LAN). Note: The cable connectors on the card must fit through the opening in the faceplate. Additional printer setup 32 Notes: ...
...: System board electrical components are accessing the system board or installing optional hardware or memory devices sometime after setting up the printer, then turn them off , and unplug the power cord from the printer to a computer or external print server. 1 Access the system board. 2 Unpack...to damage the connectors. 5 Reattach the system board cover. An optional port interface card expands the ways the printer can connect to the local area network (LAN). Note: The cable connectors on the card must fit through the opening in the faceplate. Additional printer setup 32 Notes: ...

User's Guide
Page 231
... data bits) are deleted. • Delete fonts, macros, and other data stored in flash memory. • Upgrade to a larger capacity flash memory card. 53 Unformatted flash detected Try one or more of the following : • Touch Continue to continue printing. • Turn the printer off and then...printer off and then back on to reset the printer. • Upgrade (flash) the network firmware in flash memory are set correctly on the printer and host computer. • Touch Continue to continue printing. • Turn the printer power off and then back on to reset the printer. 54 Standard...
... data bits) are deleted. • Delete fonts, macros, and other data stored in flash memory. • Upgrade to a larger capacity flash memory card. 53 Unformatted flash detected Try one or more of the following : • Touch Continue to continue printing. • Turn the printer off and then...printer off and then back on to reset the printer. • Upgrade (flash) the network firmware in flash memory are set correctly on the printer and host computer. • Touch Continue to continue printing. • Turn the printer power off and then back on to reset the printer. 54 Standard...

User's Guide
Page 232
...card from the printer system board. 4 Connect the power cord to a properly grounded outlet. 5 Turn the printer power back on the printer system board. The printer discards any data received through the USB port. • Make sure the USB Buffer menu item is not set... through the parallel port. • Make sure the Parallel Buffer menu item is not set to Disabled. 56 Standard USB port disabled Try one or more of the serial port.... the message. Troubleshooting 232 • Upgrade (flash) the network firmware in the printer or print server. 55 Unsupported option in slot is not...
...card from the printer system board. 4 Connect the power cord to a properly grounded outlet. 5 Turn the printer power back on the printer system board. The printer discards any data received through the USB port. • Make sure the USB Buffer menu item is not set... through the parallel port. • Make sure the Parallel Buffer menu item is not set to Disabled. 56 Standard USB port disabled Try one or more of the serial port.... the message. Troubleshooting 232 • Upgrade (flash) the network firmware in the printer or print server. 55 Unsupported option in slot is not...
User's Guide
Page 310
... menu 181 flash memory card installing 31 troubleshooting 275 font sample list printing 82 forwarding faxes 120 FTP address book 123 FTP quality, improving 126 FTP screen advanced options 125 options 124, 125 FTP Settings menu 178 G General Settings menu 156 green settings Power Saver 23 H hard... printer software adding options 41 internal print server installing 32 troubleshooting 275 Internal Solutions Port troubleshooting 275 Internal Solutions Port, network changing port settings 50 IPv6 menu 149 J jams avoiding 235 locating jam areas 236 locations 236 numbers 236 jams, clearing 200-201 ...
... menu 181 flash memory card installing 31 troubleshooting 275 font sample list printing 82 forwarding faxes 120 FTP address book 123 FTP quality, improving 126 FTP screen advanced options 125 options 124, 125 FTP Settings menu 178 G General Settings menu 156 green settings Power Saver 23 H hard... printer software adding options 41 internal print server installing 32 troubleshooting 275 Internal Solutions Port troubleshooting 275 Internal Solutions Port, network changing port settings 50 IPv6 menu 149 J jams avoiding 235 locating jam areas 236 locations 236 numbers 236 jams, clearing 200-201 ...


