User's Guide for Windows
Page 13
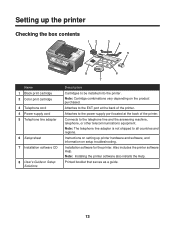
Attaches to the EXT port at the back of the printer. Attaches to be installed into the printer. Note: Cartridge combinations vary depending on setup troubleshooting. Note: The telephone ...on setting up the printer Checking the box contents 12 3 4 5 x Name 1 Black print cartridge 2 Color print cartridge 3 Telephone cord 4 Power supply cord 5 Telephone line adapter 6 Setup sheet 7 Installation software CD 8 User's Guide or Setup Solutions 8 6 7 Description Cartridges to the power supply port located at the back of the printer. Installation software for the printer. Setting up...
Attaches to the EXT port at the back of the printer. Attaches to be installed into the printer. Note: Cartridge combinations vary depending on setup troubleshooting. Note: The telephone ...on setting up the printer Checking the box contents 12 3 4 5 x Name 1 Black print cartridge 2 Color print cartridge 3 Telephone cord 4 Power supply cord 5 Telephone line adapter 6 Setup sheet 7 Installation software CD 8 User's Guide or Setup Solutions 8 6 7 Description Cartridges to the power supply port located at the back of the printer. Installation software for the printer. Setting up...
User's Guide for Windows
Page 102
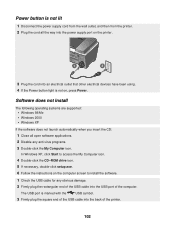
...does not launch automatically when you insert the CD: 1 Close all the way into the power supply port on the printer. 1 2 3 Plug the cord into an electrical outlet that other electrical devices have been using. 4 If the Power button light is marked with the USB symbol. 3 Firmly plug the square end of ...the USB cable into the USB port of the printer. 102 In Windows XP, click Start to ...
...does not launch automatically when you insert the CD: 1 Close all the way into the power supply port on the printer. 1 2 3 Plug the cord into an electrical outlet that other electrical devices have been using. 4 If the Power button light is marked with the USB symbol. 3 Firmly plug the square end of ...the USB cable into the USB port of the printer. 102 In Windows XP, click Start to ...
User's Guide for Windows
Page 104
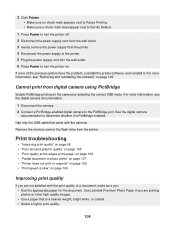
..."Print speed is slow" on the camera by selecting the correct USB mode. Use Lexmark Premium Photo Paper if you : • Use the appropriate paper for the document....1 Disconnect the camera. 2 Connect a PictBridge-enabled digital camera to the PictBridge port. Use only the USB cable that is PictBridge-enabled. See the digital camera documentation...Power to turn the printer off. 2 Disconnect the power supply cord from the wall outlet. 3 Gently remove the power supply from the printer. 4 Reconnect the power supply to the printer. 5 Plug the power supply cord into the wall outlet. 6 Press Power...
..."Print speed is slow" on the camera by selecting the correct USB mode. Use Lexmark Premium Photo Paper if you : • Use the appropriate paper for the document....1 Disconnect the camera. 2 Connect a PictBridge-enabled digital camera to the PictBridge port. Use only the USB cable that is PictBridge-enabled. See the digital camera documentation...Power to turn the printer off. 2 Disconnect the power supply cord from the wall outlet. 3 Gently remove the power supply from the printer. 4 Reconnect the power supply to the printer. 5 Plug the power supply cord into the wall outlet. 6 Press Power...
User's Guide for Windows
Page 121
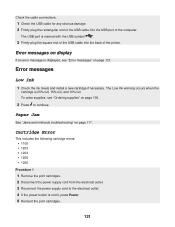
...1105 • 1203 • 1204 • 1205 • 1206 Procedure 1 1 Remove the print cartridges. 2 Disconnect the power supply cord from the electrical outlet. 3 Reconnect the power supply cord to continue. Error messages on display If an error message is marked with the USB symbol . 3 Firmly plug the square end... of the USB cable into the USB port of the printer. To order supplies, see "Error messages" ...
...1105 • 1203 • 1204 • 1205 • 1206 Procedure 1 1 Remove the print cartridges. 2 Disconnect the power supply cord from the electrical outlet. 3 Reconnect the power supply cord to continue. Error messages on display If an error message is marked with the USB symbol . 3 Firmly plug the square end... of the USB cable into the USB port of the printer. To order supplies, see "Error messages" ...


