Lexmark X8350 Support Question
Lexmark X8350 Support Question
Find answers below for this question about Lexmark X8350 - X Color Inkjet.Need a Lexmark X8350 manual? We have 2 online manuals for this item!
Question posted by nielubowicz on October 7th, 2013
Lost Power Supply Port
Moving printer from one location to another, the power supply port was lost. Where can I purchase another?
Current Answers
Related Lexmark X8350 Manual Pages
User's Guide for Windows - Page 2

.... Safety information • Use only the power supply and power cord provided with other products, programs, or services, except those described in conjunction with this publication may use the fax feature during a lightning storm. therefore, this publication to products, programs, or services do not allow disclaimer of purchase. Changes are inconsistent with local law...
User's Guide for Windows - Page 7
... network printer 92
Assigning an IP address...92 Finding your MAC address...92 Configuring a network printer manually 92 Finding a printer/print server located on remote subnets 92 Network troubleshooting tips...92
Maintaining the printer 94...Cleaning the scanner glass 99 Ordering supplies...100 Recycling Lexmark products 100
Troubleshooting 101
Setup troubleshooting...101
Incorrect language appears on...
User's Guide for Windows - Page 13
Attaches to the power supply port located at the back of the printer.
Also includes the printer software Help. Note: Cartridge combinations vary depending on setup troubleshooting.
Instructions on setting up the printer
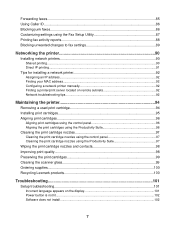
Checking the box contents
12
3 4 5
x
Name 1 Black print cartridge 2 Color print cartridge 3 Telephone cord 4 Power supply cord 5 Telephone line adapter
6 Setup ...
User's Guide for Windows - Page 22
...
10 Scanner unit
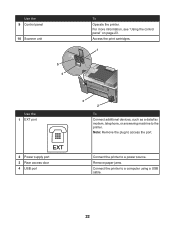
LINE EXT
5 4
To Operate the printer. Connect the printer to access the port. Note: Remove the plug to a power source.
Remove paper jams. Connect the printer to the printer. Access the print cartridges.
1
LINE EXT
Use the 1 EXT port
EXT
2 Power supply port 3 Rear access door 4 USB port
3 2
To Connect additional devices, such as a data/fax modem, telephone, or...
User's Guide for Windows - Page 25
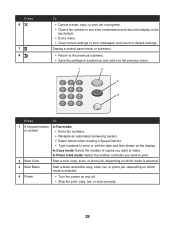
... number of copies you want to print.
2 Start Color
Start a color copy, scan, or photo job, depending on which mode is selected.
3 Start Black
Start a black-and-white copy, scan, fax, or photo job, depending on which mode is selected.
4 Power
• Turn the printer on the display.
In Copy mode: Select the number...
User's Guide for Windows - Page 55

.... Warning: Do not remove cables, media devices, or touch the printer while the light is transmitting data.
Note: The printer reads only one media device at a time. Inserting a flash drive
1 Insert the flash drive into the port. • The printer reads only one media device at a time.
55 If the printer does not read
or is blinking in...
User's Guide for Windows - Page 58

... the cable into the camera.
For more
information, see the camera documentation.
• The printer reads only one end of the USB cable into the PictBridge port on the camera to select and print photos.
1 Insert one media device at a time. 3 Follow the instructions in the area shown.
58 Warning: Do not remove...
User's Guide for Windows - Page 102
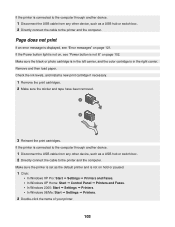
... the software does not launch automatically when you insert the CD:
1 Close all the way into the power supply port on the printer.
1
2
3 Plug the cord into an electrical outlet that other electrical devices have been using. 4 If the Power button light is marked with the
USB symbol.
3 Firmly plug the square end of the USB...
User's Guide for Windows - Page 103
... "Error messages" on page 102. If the Power button light is not lit" on page 121. If the printer is connected to the computer through another device:
1 Disconnect the USB cable from any other device, such as the default printer and is in the left carrier, and the color cartridge is not on hold or paused...
User's Guide for Windows - Page 104
... mark does appear next to Set As Default.
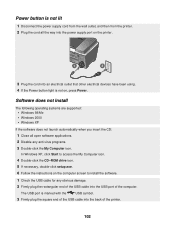
1 Press Power to turn the printer off. 2 Disconnect the power supply cord from the wall outlet. 3 Gently remove the power supply from the printer. 4 Reconnect the power supply to the printer. 5 Plug the power supply cord into the wall outlet. 6 Press Power to turn the printer on page 125. Use only the USB cable that is...
User's Guide for Windows - Page 105
...print cartridge nozzles using the
control panel" on page 97. For more information, see "Ordering supplies" on page 100.
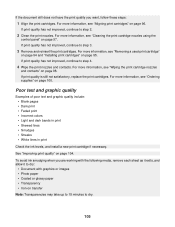
Poor text and graphic quality
Examples of poor text and graphic quality include:...
• Blank pages • Dark print • Faded print • Incorrect colors • Light and dark bands in print • Skewed lines • Smudges • Streaks...
User's Guide for Windows - Page 111
... applicable:
• Power supply • Telephone • Handset • Answering machine
Check the telephone wall jack.
1 Plug a telephone into the wall jack. 2 Listen for and clear any paper jams.
Make sure both print cartridges are installed. interface port) on an ISDN terminal adapter.
Disconnect any ring.
111
To ensure the printer is working correctly...
User's Guide for Windows - Page 116

... appear in the list" on page 117
The printer to a power source.
The USB port is not being broadcast.
Make sure security keys are also using a print server:
1 Check the Ethernet cable for any obvious damage.
2 Firmly plug one end of the Ethernet cable into the printer or the print server.
3 Firmly plug the...
User's Guide for Windows - Page 117

... for any obvious damage.
2 Firmly plug the rectangular end of the USB cable into the USB port of the computer. For more information, see "Power button is not lit" on the back of the printer. The USB port is marked with the USB symbol
.
3 Firmly plug the square end of the USB cable into...
User's Guide for Windows - Page 121
... not lit, press Power. 5 Reinsert the print cartridges.
121
To order supplies, see "Error messages" on page 100.
2 Press to continue.
The Low Ink warning occurs when the
cartridge is marked with the USB symbol
.
3 Firmly plug the square end of the USB cable into the USB port of the printer. Error messages
Low...
User's Guide for Windows - Page 122
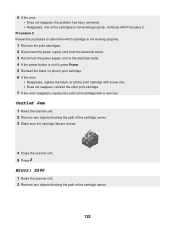
... cartridge. 7 If the error reappears, replace the color print cartridge with Procedure 2. Procedure 2 Follow this procedure to determine which cartridge is not working properly.
1 Remove the print cartridges. 2 Disconnect the power supply cord from the electrical outlet. 3 Reconnect the power supply cord to the electrical outlet. 4 If the power button is not working properly. 6 If the...
User's Guide for Windows - Page 131

... the product spends in each mode's energy usage. To completely stop printer power consumption, disconnect the power supply from the wall outlet. Since power consumption claims are provided in power units of each mode in the lamp ( The period of inactivity. Power Saver
As part of power. For this printer is designed with an energy-saving mode called the...
User's Guide for Windows - Page 134
... 75 network troubleshooting 116
cannot print to network printer 117 network name not appearing 117 printer to be configured does not appear in list of printers found on your network 116 tips 92 networking ... 22 EXT port 22 LINE port 23 memory card slots 21 paper exit tray 21 paper tray 21 PictBridge port 21 power supply port 22 rear access door 22 scanner unit 22 top cover 21 USB port 22
peer...
User's Guide for Windows - Page 135
postcards loading 46 printing 50
power button is not lit 101 power supply port 22 premium paper, loading 44 Preview section 36 previewing photos 30
from the control... 34 Scan button 34 Scan to PDF button 34 scan troubleshooting 109 cannot scan to application 110 cannot scan to printer over network 110 partial document or photo scans 110 scanner does not respond 109 scanning takes too long or freezes...
User's Guide for Windows - Page 136
...To tab 37 Maintenance tab 38 opening 37 Printer Status 37 Troubleshooting tab 38 using 37 speed dial adding to list 80 setting up 80 using 81 supplies, ordering 100
T
temporary files 124 text captions... on display 101 page does not print 101 power button is not lit 101 software does not install 101
Troubleshooting tab 38
U
unwanted faxes, blocking 86 USB port 22
W
Web site button 34 finding 12
...
Similar Questions

Power Supply With Port For Lexmark X2670 All-in-one Printer
Please, How can I get the Power supply with port for Lexmark X2670 All-in-one Printer?Thank you very...
Please, How can I get the Power supply with port for Lexmark X2670 All-in-one Printer?Thank you very...
(Posted by Anonymous-142438 9 years ago)

Power Supply Lexmark X2670
Hi, Power supply for my lexmark x2670 has stopped working. can i buy this part? and how much would i...
Hi, Power supply for my lexmark x2670 has stopped working. can i buy this part? and how much would i...
(Posted by nbennetta 11 years ago)

Incoming Intermitent Fax Quality
After 12 hour sleep, the first fax received is blurry. 2nd receipt OK
After 12 hour sleep, the first fax received is blurry. 2nd receipt OK
(Posted by ojreak 12 years ago)

Low Voltage Power Supply
How do I replace the Low voltage power supply?
How do I replace the Low voltage power supply?
(Posted by jjrbatts 12 years ago)
Iam Looking For Manual For Lexmark X8350
(Posted by tabongenterprisesinc 12 years ago)