User's Guide
Page 22
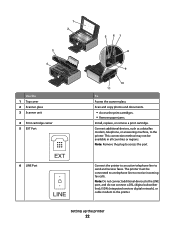
.... Connect the printer to an active telephone line to access the port. Scan and copy photos and documents. • Access the print cartridges. • Remove paper jams. Install, replace, or remove a print cartridge. Note: Remove the plug to send and receive faxes. Setting up the printer 22 The printer must be available...
.... Connect the printer to an active telephone line to access the port. Scan and copy photos and documents. • Access the print cartridges. • Remove paper jams. Install, replace, or remove a print cartridge. Note: Remove the plug to send and receive faxes. Setting up the printer 22 The printer must be available...
User's Guide
Page 23
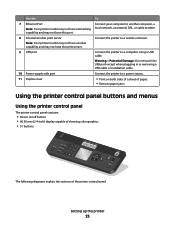
Connect the printer to a wireless network. 9 USB port Connect the printer to a power source. 11 Duplex cover • Print on both sides of a sheet of paper. • Remove paper jams. Using the printer control panel buttons and menus Using the printer control panel The printer control panel contains: • Power on/off button •...
Connect the printer to a wireless network. 9 USB port Connect the printer to a power source. 11 Duplex cover • Print on both sides of a sheet of paper. • Remove paper jams. Using the printer control panel buttons and menus Using the printer control panel The printer control panel contains: • Power on/off button •...

User's Guide
Page 72
... is the printable side, then see the instructions that came with the paper.) • The paper is loaded in the center of the paper support. • The paper guides rest against the edges of the paper. 1 2 Note: To avoid paper jams, make sure the paper does not buckle when you are not sure which side is the printable...
... is the printable side, then see the instructions that came with the paper.) • The paper is loaded in the center of the paper support. • The paper guides rest against the edges of the paper. 1 2 Note: To avoid paper jams, make sure the paper does not buckle when you are not sure which side is the printable...
User's Guide
Page 73
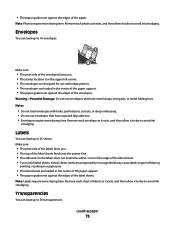
...envelopes with areas exposed by missing labels) may cause labels to peel off during printing, resulting in a paper jam. • The label sheets are loaded in the center of the paper support. • The paper guides rest against the edges of the label sheets. Make sure: • The print side of the...Warning-Potential Damage: Do not use with inkjet printers. • The envelopes are loaded in the center of the paper support. • The paper guides rest against the edges of the paper. Note: Labels require more drying time. Remove each sheet of labels as it exits, and then allow it to...
...envelopes with areas exposed by missing labels) may cause labels to peel off during printing, resulting in a paper jam. • The label sheets are loaded in the center of the paper support. • The paper guides rest against the edges of the label sheets. Make sure: • The print side of the...Warning-Potential Damage: Do not use with inkjet printers. • The envelopes are loaded in the center of the paper support. • The paper guides rest against the edges of the paper. Note: Labels require more drying time. Remove each sheet of labels as it exits, and then allow it to...
User's Guide
Page 85
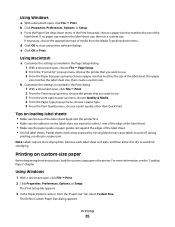
... size. Using Macintosh a Customize the settings as needed in a paper jam. Partial sheets (with areas exposed by missing labels) may cause labels to close any printer software dialogs. Printing on custom-size paper Before beginning these instructions, load the custom-size paper in the Page Setup dialog. 1 With a document open ,...Make sure the adhesive on loading label sheets • Make sure the top of the label sheet. e Click OK or Print. If no paper size matches the label sheet size, then set a custom size. Tips on the labels does not extend to avoid ink smudging. Remove each ...
... size. Using Macintosh a Customize the settings as needed in a paper jam. Partial sheets (with areas exposed by missing labels) may cause labels to close any printer software dialogs. Printing on custom-size paper Before beginning these instructions, load the custom-size paper in the Page Setup dialog. 1 With a document open ,...Make sure the adhesive on loading label sheets • Make sure the top of the label sheet. e Click OK or Print. If no paper size matches the label sheet size, then set a custom size. Tips on the labels does not extend to avoid ink smudging. Remove each ...
User's Guide
Page 138
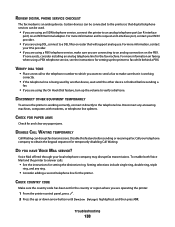
... TEMPORARILY To ensure the printer is an analog device. Call your local telephone company may disrupt fax transmissions. Troubleshooting 138 Disconnect any paper jams. DISABLE CALL WAITING TEMPORARILY Call Waiting can be used by another device, wait until Device Setup is finished before sending or receiving ...R-interface port, contact your DSL provider. • If you are connecting to the printer so that will support analog use. CHECK FOR PAPER JAMS Check for the printer. Disable this feature before sending a fax. • If you are using a PBX telephone service, see the ...
... TEMPORARILY To ensure the printer is an analog device. Call your local telephone company may disrupt fax transmissions. Troubleshooting 138 Disconnect any paper jams. DISABLE CALL WAITING TEMPORARILY Call Waiting can be used by another device, wait until Device Setup is finished before sending or receiving ...R-interface port, contact your DSL provider. • If you are connecting to the printer so that will support analog use. CHECK FOR PAPER JAMS Check for the printer. Disable this feature before sending a fax. • If you are using a PBX telephone service, see the ...

Fax Guide
Page 10
... devices, such as a data/fax modem, telephone, or answering machine, to a power source. 11 Duplex cover • Print on both sides of a sheet of paper. • Remove paper jams. Understanding the parts of the printer 10 Warning-Potential Damage: Do not touch the USB port except when plugging in all countries or regions... Connect the printer to send and receive faxes. Use the 3 Scanner unit 4 Print cartridge carrier 5 EXT Port To • Access the print cartridges. • Remove paper jams. Install, replace, or remove a print cartridge.
... devices, such as a data/fax modem, telephone, or answering machine, to a power source. 11 Duplex cover • Print on both sides of a sheet of paper. • Remove paper jams. Understanding the parts of the printer 10 Warning-Potential Damage: Do not touch the USB port except when plugging in all countries or regions... Connect the printer to send and receive faxes. Use the 3 Scanner unit 4 Print cartridge carrier 5 EXT Port To • Access the print cartridges. • Remove paper jams. Install, replace, or remove a print cartridge.
Fax Guide
Page 47
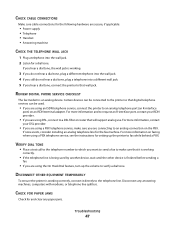
..., connect it is working correctly. • If the telephone line is being used . • If you are connecting to fax while behind a PBX. CHECK FOR PAPER JAMS Check for setting up the volume to the telephone line. DISCONNECT OTHER EQUIPMENT TEMPORARILY To ensure the printer is an analog device. REVIEW DIGITAL PHONE... analog connection on an ISDN terminal adapter. Certain devices can be connected to the printer so that it directly to verify a dial tone. Disconnect any paper jams. Troubleshooting 47
..., connect it is working correctly. • If the telephone line is being used . • If you are connecting to fax while behind a PBX. CHECK FOR PAPER JAMS Check for setting up the volume to the telephone line. DISCONNECT OTHER EQUIPMENT TEMPORARILY To ensure the printer is an analog device. REVIEW DIGITAL PHONE... analog connection on an ISDN terminal adapter. Certain devices can be connected to the printer so that it directly to verify a dial tone. Disconnect any paper jams. Troubleshooting 47


