User's Guide
Page 6
... the computer...94 Receiving a fax...95 Maintaining the printer 98 Maintaining print cartridges...98 Installing print cartridges...98 Removing a used print cartridge ...100 Refilling print cartridges...101 Using genuine Lexmark print cartridges...101 Aligning print cartridges ...101 Cleaning the print cartridge nozzles...102 Checking ink levels...103 Wiping the print cartridge nozzles and...
... the computer...94 Receiving a fax...95 Maintaining the printer 98 Maintaining print cartridges...98 Installing print cartridges...98 Removing a used print cartridge ...100 Refilling print cartridges...101 Using genuine Lexmark print cartridges...101 Aligning print cartridges ...101 Cleaning the print cartridge nozzles...102 Checking ink levels...103 Wiping the print cartridge nozzles and...
User's Guide
Page 27
PictBridge menu Continue Paper Size Photo Size Photos/Page Paper Type Print Quality Setup menu Maintenance • Check Ink Levels • Align Cartridges • Clean Cartridges • Print Test Page Device Setup • Language • Country • Power Saver • Screen Saver •... OK. 7 Press the up or down arrow button until Photo Print Size is enabled when you insert a flash drive that you initiate from the printer. 1 From the printer control panel, press . 2 Press the up or down arrow button until Defaults is highlighted, and then press OK. 3 Press OK again. 4 Press ...
PictBridge menu Continue Paper Size Photo Size Photos/Page Paper Type Print Quality Setup menu Maintenance • Check Ink Levels • Align Cartridges • Clean Cartridges • Print Test Page Device Setup • Language • Country • Power Saver • Screen Saver •... OK. 7 Press the up or down arrow button until Photo Print Size is enabled when you insert a flash drive that you initiate from the printer. 1 From the printer control panel, press . 2 Press the up or down arrow button until Defaults is highlighted, and then press OK. 3 Press OK again. 4 Press ...
User's Guide
Page 31
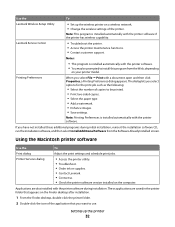
... if you can help you set Ringing and Answering, and print fax history and status reports. Note: Your printer may have chosen to save ink. • Schedule automatic printing of Web pages. • Access Picnik and edit photos online. • Print, scan, or convert local ...CD. Manage, edit, transfer, and print photos and documents. Note: This program is located in -one printers. Access your printer model number, and then double-click Drivers. Use the Lexmark Fax Setup Utility to PDF format. • Create posters and photo greeting cards from Windows. For more ...
... if you can help you set Ringing and Answering, and print fax history and status reports. Note: Your printer may have chosen to save ink. • Schedule automatic printing of Web pages. • Access Picnik and edit photos online. • Print, scan, or convert local ...CD. Manage, edit, transfer, and print photos and documents. Note: This program is located in -one printers. Access your printer model number, and then double-click Drivers. Use the Lexmark Fax Setup Utility to PDF format. • Create posters and photo greeting cards from Windows. For more ...
User's Guide
Page 32
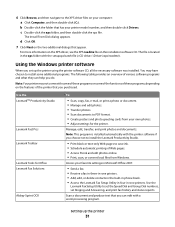
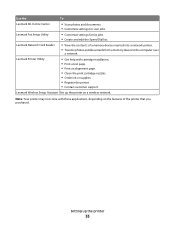
... the Software Already Installed screen. Using the Macintosh printer software Use the Print dialog Printer Services dialog To Adjust the print settings and schedule print jobs. • Access the printer utility. • Troubleshoot. • Order ink or supplies. • Contact Lexmark. • Contact us. • Check the printer software version installed on the Finder desktop after...
... the Software Already Installed screen. Using the Macintosh printer software Use the Print dialog Printer Services dialog To Adjust the print settings and schedule print jobs. • Access the printer utility. • Troubleshoot. • Order ink or supplies. • Contact Lexmark. • Contact us. • Check the printer software version installed on the Finder desktop after...
User's Guide
Page 33
... cartridge installation. • Print a test page. • Print an alignment page. • Clean the print cartridge nozzles. • Order ink or supplies. • Register the printer. • Contact customer support. Use the To Lexmark All-In-One Center • Scan photos and documents. • Customize settings for fax jobs. • Create and edit...
... cartridge installation. • Print a test page. • Print an alignment page. • Clean the print cartridge nozzles. • Order ink or supplies. • Register the printer. • Contact customer support. Use the To Lexmark All-In-One Center • Scan photos and documents. • Customize settings for fax jobs. • Create and edit...
User's Guide
Page 55
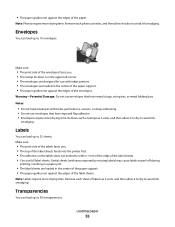
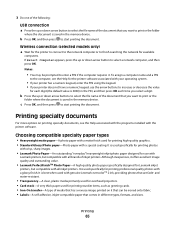
...more drying time. Make sure: • The print side of the envelopes faces you . • The top of the label sheets feeds into the printer first. • The adhesive on the labels does not extend to 25 sheets. Make sure: • The print side of the labels faces you ... missing labels) may cause labels to avoid ink smudging. Transparencies You can load up to avoid ink smudging. Remove each photo as it exits, and then allow it to dry to 50 transparencies. Note: Photos require more drying time. Partial sheets (with inkjet printers. • The envelopes are loaded in ...
...more drying time. Make sure: • The print side of the envelopes faces you . • The top of the label sheets feeds into the printer first. • The adhesive on the labels does not extend to 25 sheets. Make sure: • The print side of the labels faces you ... missing labels) may cause labels to avoid ink smudging. Transparencies You can load up to avoid ink smudging. Remove each photo as it exits, and then allow it to dry to 50 transparencies. Note: Photos require more drying time. Partial sheets (with inkjet printers. • The envelopes are loaded in ...
User's Guide
Page 56
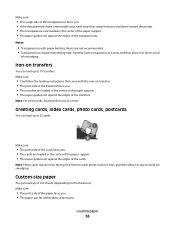
...transfers faces you. • The transfers are not recommended. • Transparencies require more drying time. Custom-size paper You can load up to avoid ink smudging. Make sure: • The print side of the paper faces you . • The cards are loaded in the center of the paper support...rough side of the transparencies faces you. • If the transparencies have a removable strip, each strip faces away from you and down toward the printer. • The transparencies are loaded in the center of the paper support. • The paper guides rest against the edges of the cards. ...
...transfers faces you. • The transfers are not recommended. • Transparencies require more drying time. Custom-size paper You can load up to avoid ink smudging. Make sure: • The print side of the paper faces you . • The cards are loaded in the center of the paper support...rough side of the transparencies faces you. • If the transparencies have a removable strip, each strip faces away from you and down toward the printer. • The transparencies are loaded in the center of the paper support. • The paper guides rest against the edges of the cards. ...
User's Guide
Page 65
...Lexmark inkjet printers, but compatible with genuine Lexmark evercolorTM 2 ink, providing photos that comes in the memory device. and water-resistant. • Transparency-A clear, plastic media primarily used for overhead projectors. • Card stock-A very thick paper used for printing professional quality photos with the printer...with a matte finish used specifically for printing sturdier items, such as greeting cards. • Iron-On transfer-A type of inkjet printers. b Press OK, and then press to the computer, see the Help for printing photos with a special coating. To ...
...Lexmark inkjet printers, but compatible with genuine Lexmark evercolorTM 2 ink, providing photos that comes in the memory device. and water-resistant. • Transparency-A clear, plastic media primarily used for overhead projectors. • Card stock-A very thick paper used for printing professional quality photos with the printer...with a matte finish used specifically for printing sturdier items, such as greeting cards. • Iron-On transfer-A type of inkjet printers. b Press OK, and then press to the computer, see the Help for printing photos with a special coating. To ...
User's Guide
Page 67
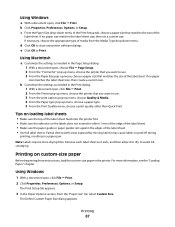
...Loading Paper" chapter. The Define Custom Paper Size dialog appears. Partial sheets (with areas exposed by missing labels) may cause labels to avoid ink smudging. Remove each label sheet as it exits, and then allow it to dry to peel off during printing, resulting in the Page ... a document open , click File ª Print. 2 Click Properties, Preferences, Options, or Setup. Printing on the labels does not extend to close any printer software dialogs. The Print Setup tab appears. 3 In the Paper Options section, from the Media Type drop-down menu of the Print Setup tab, choose...
...Loading Paper" chapter. The Define Custom Paper Size dialog appears. Partial sheets (with areas exposed by missing labels) may cause labels to avoid ink smudging. Remove each label sheet as it exits, and then allow it to dry to peel off during printing, resulting in the Page ... a document open , click File ª Print. 2 Click Properties, Preferences, Options, or Setup. Printing on the labels does not extend to close any printer software dialogs. The Print Setup tab appears. 3 In the Paper Options section, from the Media Type drop-down menu of the Print Setup tab, choose...
User's Guide
Page 68
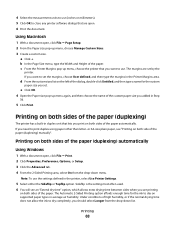
.... 6 You will see "Printing on both side of the paper. Under conditions of high humidity, or if the normal drying time does not allow the ink to dry completely, you should select Longer from the drop-down list. 4 Select the measurement units to use (inches or millimeters). 5 Click OK to close... dialogs that lets you print on both sides of the paper automatically. Printing on supported paper types in the Printer Margins area. The margins are open. 6 Print the document. If you want to print duplex using paper other than letter- The Automatic 2-Sided Printing option ...
.... 6 You will see "Printing on both side of the paper. Under conditions of high humidity, or if the normal drying time does not allow the ink to dry completely, you should select Longer from the drop-down list. 4 Select the measurement units to use (inches or millimeters). 5 Click OK to close... dialogs that lets you print on both sides of the paper automatically. Printing on supported paper types in the Printer Margins area. The margins are open. 6 Print the document. If you want to print duplex using paper other than letter- The Automatic 2-Sided Printing option ...
User's Guide
Page 69
...of paper to dry on a size or type of paper other side of high humidity, or if the normal drying time does not allow the ink to print a two-sided (duplex) document on supported paper types in average air humidity. Printing 69 Under conditions of the sheets. Printing on ...both sides of the paper. Using Windows 1 With a document open . Note: To return to single-sided printing, return to close any printer software dialogs that are printing on both sides of the paper (duplexing) manually If you want to dry completely, you back to the General Print...
...of paper to dry on a size or type of paper other side of high humidity, or if the normal drying time does not allow the ink to print a two-sided (duplex) document on supported paper types in average air humidity. Printing 69 Under conditions of the sheets. Printing on ...both sides of the paper. Using Windows 1 With a document open . Note: To return to single-sided printing, return to close any printer software dialogs that are printing on both sides of the paper (duplexing) manually If you want to dry completely, you back to the General Print...
User's Guide
Page 101
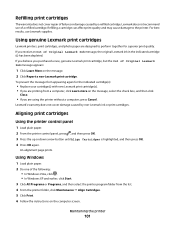
... alignment page prints. Using genuine Lexmark print cartridges Lexmark printers, print cartridges, and photo paper are designed to the printer. Maintaining the printer 101 For best results, use of Original Lexmark Ink message, the original Lexmark ink in the indicated cartridge (s) has been depleted. Lexmark does not recommend use Lexmark supplies. Aligning print cartridges Using the printer control panel 1 Load plain paper...
... alignment page prints. Using genuine Lexmark print cartridges Lexmark printers, print cartridges, and photo paper are designed to the printer. Maintaining the printer 101 For best results, use of Original Lexmark Ink message, the original Lexmark ink in the indicated cartridge (s) has been depleted. Lexmark does not recommend use Lexmark supplies. Aligning print cartridges Using the printer control panel 1 Load plain paper...
User's Guide
Page 102
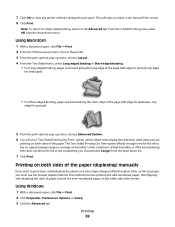
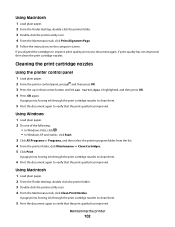
.... 3 Click All Programs or Programs, and then select the printer program folder from the list. 4 From the printer folder, click Maintenance ª Clean Cartridges. 5 Click Print. Maintaining the printer 102 A page prints, forcing ink through the print cartridge nozzles to clean them . 6 Print the... document again to verify that the print quality has improved. A page prints, forcing ink through the print cartridge nozzles to clean them ....
.... 3 Click All Programs or Programs, and then select the printer program folder from the list. 4 From the printer folder, click Maintenance ª Clean Cartridges. 5 Click Print. Maintaining the printer 102 A page prints, forcing ink through the print cartridge nozzles to clean them . 6 Print the... document again to verify that the print quality has improved. A page prints, forcing ink through the print cartridge nozzles to clean them ....
User's Guide
Page 103
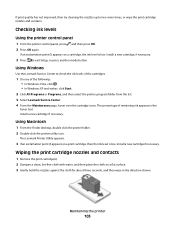
... press another mode button. Using Macintosh 1 From the Finder desktop, double click the printer folder. 2 Double-click the printer utility icon. Checking ink levels Using the printer control panel 1 From the printer control panel, press , and then press OK. 2 Press OK again. The Lexmark Printer Utility appears. 3 If an exclamation point (!) appears on a print cartridge, then the...
... press another mode button. Using Macintosh 1 From the Finder desktop, double click the printer folder. 2 Double-click the printer utility icon. Checking ink levels Using the printer control panel 1 From the printer control panel, press , and then press OK. 2 Press OK again. The Lexmark Printer Utility appears. 3 If an exclamation point (!) appears on a print cartridge, then the...
User's Guide
Page 104
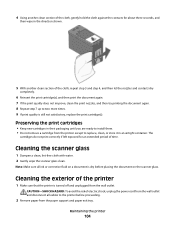
... against the contacts for an extended period of time. Note: Make sure all cables to the printer before placing the document on the scanner glass. Cleaning the exterior of the printer 1 Make sure that the printer is dry before proceeding. 2 Remove paper from the paper support and paper exit tray. 4 ...: To avoid the risk of electric shock, unplug the power cord from the wall outlet and disconnect all ink or corrective fluid on a document is turned off and unplugged from the printer except to replace, clean, or store it in their packaging until you are ready to install them. •...
... against the contacts for an extended period of time. Note: Make sure all cables to the printer before placing the document on the scanner glass. Cleaning the exterior of the printer 1 Make sure that the printer is dry before proceeding. 2 Remove paper from the paper support and paper exit tray. 4 ...: To avoid the risk of electric shock, unplug the power cord from the wall outlet and disconnect all ink or corrective fluid on a document is turned off and unplugged from the printer except to replace, clean, or store it in their packaging until you are ready to install them. •...
User's Guide
Page 105
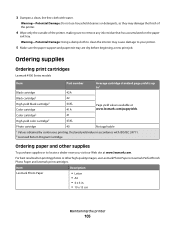
...: Using a damp cloth to clean the interior may damage the finish of the printer. 4 Wipe only the outside of the printer, making sure to remove any ink residue that has accumulated on the paper exit tray. Item Description Lexmark Photo Paper • Letter • A4 • 4 x 6 in accordance... household cleaners or detergents, as they may cause damage to your printer. 5 Make sure the paper support and paper exit tray are dry before beginning a new print job. Color cartridge2 41 High yield color cartridge2 43XL Photo cartridge 40 Not applicable 1 Values obtained by continuous...
...: Using a damp cloth to clean the interior may damage the finish of the printer. 4 Wipe only the outside of the printer, making sure to remove any ink residue that has accumulated on the paper exit tray. Item Description Lexmark Photo Paper • Letter • A4 • 4 x 6 in accordance... household cleaners or detergents, as they may cause damage to your printer. 5 Make sure the paper support and paper exit tray are dry before beginning a new print job. Color cartridge2 41 High yield color cartridge2 43XL Photo cartridge 40 Not applicable 1 Values obtained by continuous...
User's Guide
Page 109
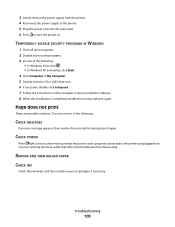
3 Gently remove the power supply from the printer. 4 Reconnect the power supply to the printer. 5 Plug the power cord into the wall outlet. 6 Press to the printer and plugged into a known working electrical outlet that other electrical devices have been using. Try one of the following : • In Windows Vista,...an error message appears, then resolve the error before trying to install the software. 8 When the installation is properly connected to turn the printer on the computer screen to print again. CHECK POWER If the light is not on, then make sure that the power cord is completed...
3 Gently remove the power supply from the printer. 4 Reconnect the power supply to the printer. 5 Plug the power cord into the wall outlet. 6 Press to the printer and plugged into a known working electrical outlet that other electrical devices have been using. Try one of the following : • In Windows Vista,...an error message appears, then resolve the error before trying to install the software. 8 When the installation is properly connected to turn the printer on the computer screen to print again. CHECK POWER If the light is not on, then make sure that the power cord is completed...
User's Guide
Page 145
... output tray 21 paper guide 21 B banner paper, loading 54 buttons, printer control panel Back 24 Cancel 24 Color/Black 24 Copy 23 Display 23 Down arrow 24 Left arrow 25 OK ... print aligning 101 cleaning 102 installing 98 ordering 105 preserving 104 removing 100 using genuine Lexmark 101 wiping 103 changing default settings 27 Power Saver timeout 27 temporary settings 27 changing ...installation (Mac) 37 changing wireless settings after installation (Windows) 37 checking ink levels 103 cleaning exterior of the printer 104 cleaning print cartridge nozzles 102 Club Internet 36 collating copies 86 ...
... output tray 21 paper guide 21 B banner paper, loading 54 buttons, printer control panel Back 24 Cancel 24 Color/Black 24 Copy 23 Display 23 Down arrow 24 Left arrow 25 OK ... print aligning 101 cleaning 102 installing 98 ordering 105 preserving 104 removing 100 using genuine Lexmark 101 wiping 103 changing default settings 27 Power Saver timeout 27 temporary settings 27 changing ...installation (Mac) 37 changing wireless settings after installation (Windows) 37 checking ink levels 103 cleaning exterior of the printer 104 cleaning print cartridge nozzles 102 Club Internet 36 collating copies 86 ...
User's Guide
Page 146
... greeting cards loading 54 H heavyweight matte paper, loading 54 I incorrect language appears on display 107 index cards loading 54 information needed for setting up printer on wireless network 34 information, finding 10 infrastructure network 48 ink levels, checking 103 inserting flash drives 75 memory cards 74 installation cable 47, 48 installing network...
... greeting cards loading 54 H heavyweight matte paper, loading 54 I incorrect language appears on display 107 index cards loading 54 information needed for setting up printer on wireless network 34 information, finding 10 infrastructure network 48 ink levels, checking 103 inserting flash drives 75 memory cards 74 installation cable 47, 48 installing network...


