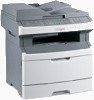
Quick Reference
Page 2
... page and locate the IP address in a fax number, press the Redial/Pause button. For specific instructions using the computer Faxing from software programs. For Windows users 1 With a file open , choose File > Print. 2 From the Printer pop-up menu, choose your Mac OS Help. 1 With a document open , click File ΠPrint...
... page and locate the IP address in a fax number, press the Redial/Pause button. For specific instructions using the computer Faxing from software programs. For Windows users 1 With a file open , choose File > Print. 2 From the Printer pop-up menu, choose your Mac OS Help. 1 With a document open , click File ΠPrint...

Embedded Web Server Administrator's Guide
Page 14
... correct date and time in YYYY-MM-DD HH:MM format, and then choose from communicating with the KDC system clock. Using NTLM authentication NTLM (Windows NT LAN Manager) is Microsoft's solution for enabling authentication without requiring the transmission of a security template. • As with the NTLM domain. • The NTLM...
... correct date and time in YYYY-MM-DD HH:MM format, and then choose from communicating with the KDC system clock. Using NTLM authentication NTLM (Windows NT LAN Manager) is Microsoft's solution for enabling authentication without requiring the transmission of a security template. • As with the NTLM domain. • The NTLM...

Embedded Web Server Administrator's Guide
Page 15
... box, and then type and re-enter the password. 4 Click Submit. A status screen will appear with the URL beginning "https://"), rather than an unsecured browsing window. A backup password can be able to register your device with an NT domain. 2 From the Embedded Web Server Home screen, browse to your organization's policies...
... box, and then type and re-enter the password. 4 Click Submit. A status screen will appear with the URL beginning "https://"), rather than an unsecured browsing window. A backup password can be able to register your device with an NT domain. 2 From the Embedded Web Server Home screen, browse to your organization's policies...
Embedded Web Server Administrator's Guide
Page 21
... Web Server Home screen, browse to Settings ª Security ª Certificate Management. 2 Select Device Certificate Management. 3 Click New. 4 Enter values in the Device Certificate Management window. The details of information transmitted to and from your printer, including authentication and group information, as well as document outputs. Managing certificates and other settings...
... Web Server Home screen, browse to Settings ª Security ª Certificate Management. 2 Select Device Certificate Management. 3 Click New. 4 Enter values in the Device Certificate Management window. The details of information transmitted to and from your printer, including authentication and group information, as well as document outputs. Managing certificates and other settings...

Technical Reference
Page 28
..., Odd/Even Fill Polygon, Non-Zero Winding Fill Type Fill Type - 22 Fill Type - 9 Initialize Input P1 and P2 Input Relative P1 and P2 Input Window Line Attributes Label, Default Terminator = '03'x Label Origin Uses PCL Label Origin Line Type Logical Operation Number of Pens Appendix A: PCL support 28
..., Odd/Even Fill Polygon, Non-Zero Winding Fill Type Fill Type - 22 Fill Type - 9 Initialize Input P1 and P2 Input Relative P1 and P2 Input Window Line Attributes Label, Default Terminator = '03'x Label Origin Uses PCL Label Origin Line Type Logical Operation Number of Pens Appendix A: PCL support 28

Card Stock & Label Guide
Page 10
.... Laser-perfs (also known as labels, minimize the number of the print material. Die-cutting is present. Back splits and pop-out windows are not recommended. If perforations or die-cuts are recommended. Ties cannot, however, be used in the laser printing process. Prior to ...reduce ink dust and ink contamination in the printer. Lexmark printers are more likely to 80%. Thermography inks are also not recommended. Preprinted inks must withstand a fuser temperature up to 225°C (437...
.... Laser-perfs (also known as labels, minimize the number of the print material. Die-cutting is present. Back splits and pop-out windows are not recommended. If perforations or die-cuts are recommended. Ties cannot, however, be used in the laser printing process. Prior to ...reduce ink dust and ink contamination in the printer. Lexmark printers are more likely to 80%. Thermography inks are also not recommended. Preprinted inks must withstand a fuser temperature up to 225°C (437...
Network Scan Drivers
Page 3
... using a network printer...6 Removing the network scan driver...6 Scanning...7 Scanning using applications...7 Scanning using XSane...7 Scanning using OpenOffice.org...7 Scanning using GIMP ...8 Scanning using a terminal window ...8 Scanning multiple pages...8 Scanning both sides of a page...10 Canceling a scan...11 Adjusting scan settings...12 Adjusting scan settings using XSane or OpenOffice.org 12...
... using a network printer...6 Removing the network scan driver...6 Scanning...7 Scanning using applications...7 Scanning using XSane...7 Scanning using OpenOffice.org...7 Scanning using GIMP ...8 Scanning using a terminal window ...8 Scanning multiple pages...8 Scanning both sides of a page...10 Canceling a scan...11 Adjusting scan settings...12 Adjusting scan settings using XSane or OpenOffice.org 12...

Network Scan Drivers
Page 6
...on your operating system: In Fedora, Linpus Linux, SUSE Linux, Linux openSUSE, Red Hat Enterprise Linux, or Red Flag Linux Open a terminal window, and then type rpm -e lexmark-network-scan. Removing the network scan driver 1 Do the following, depending on your profile. 2 Double-click the package file or open a ... Make sure the network scan driver is installed and added to your computer. In Debian GNU/Linux or Linspire Linux Open a terminal window, and then type dpkg -r lexmark-network-scan. Press Enter. 2 Remove the lexmark_nscan entry from the Drivers & Downloads drop-down list.
...on your operating system: In Fedora, Linpus Linux, SUSE Linux, Linux openSUSE, Red Hat Enterprise Linux, or Red Flag Linux Open a terminal window, and then type rpm -e lexmark-network-scan. Removing the network scan driver 1 Do the following, depending on your profile. 2 Double-click the package file or open a ... Make sure the network scan driver is installed and added to your computer. In Debian GNU/Linux or Linspire Linux Open a terminal window, and then type dpkg -r lexmark-network-scan. Press Enter. 2 Remove the lexmark_nscan entry from the Drivers & Downloads drop-down list.

Network Scan Drivers
Page 7
... Press Enter. 2 From the "device detection" dialog, navigate to: Available devices > select your printer > OK 3 From the "Network:scanner" dialog, click Window > Show standard options. 4 If necessary, adjust other options, and then click OK. 4 From the application toolbar, do either of the following : •...Feeder (ADF) or on the scanner glass. 6 From the printer control panel, select your scan job. Scanning using XSane 1 Open a terminal window, and then type xsane. Scanning For more information on the scanner glass. 7 From the printer control panel, select your scan job. Scanning ...
... Press Enter. 2 From the "device detection" dialog, navigate to: Available devices > select your printer > OK 3 From the "Network:scanner" dialog, click Window > Show standard options. 4 If necessary, adjust other options, and then click OK. 4 From the application toolbar, do either of the following : •...Feeder (ADF) or on the scanner glass. 6 From the printer control panel, select your scan job. Scanning using XSane 1 Open a terminal window, and then type xsane. Scanning For more information on the scanner glass. 7 From the printer control panel, select your scan job. Scanning ...

Network Scan Drivers
Page 8
... 8 You can scan multiple pages in function allows xscanimage and XSane to provide the scanned image to GIMP. Using scanimage 1 Open a terminal window, and then type scanimage -b --source="Multiple Pages" -d [device_name]. Scanning using existing scanning tools (xscanimage and XSane) used as plug-ins... GIMP GNU Image Manipulation Program (GIMP) is the standard paint program for UNIX/Linux systems. It supports scanning by using a terminal window 1 Open a terminal window, and then type scanimage -d [device_name] > /tmp/scan.pnm. Note: If an Assertion 'c->xlib.lock' failed error occurs when...
... 8 You can scan multiple pages in function allows xscanimage and XSane to provide the scanned image to GIMP. Using scanimage 1 Open a terminal window, and then type scanimage -b --source="Multiple Pages" -d [device_name]. Scanning using existing scanning tools (xscanimage and XSane) used as plug-ins... GIMP GNU Image Manipulation Program (GIMP) is the standard paint program for UNIX/Linux systems. It supports scanning by using a terminal window 1 Open a terminal window, and then type scanimage -d [device_name] > /tmp/scan.pnm. Note: If an Assertion 'c->xlib.lock' failed error occurs when...

Network Scan Drivers
Page 9
... pages specified are displayed on the scanner glass. 3 From the printer control panel, select your scan job. Using scanadf 1 Open a terminal window, and then type scanadf --source="Multiple Pages" -d [device_name]. Press Enter. 2 From the "device detection" dialog, navigate to scan the remaining... pages. Using XSane 1 Open a terminal window, and then type xsane. You have to click Scan again to : Available devices > select your printer > OK 3 From the menu, select Multiple...
... pages specified are displayed on the scanner glass. 3 From the printer control panel, select your scan job. Using scanadf 1 Open a terminal window, and then type scanadf --source="Multiple Pages" -d [device_name]. Press Enter. 2 From the "device detection" dialog, navigate to scan the remaining... pages. Using XSane 1 Open a terminal window, and then type xsane. You have to click Scan again to : Available devices > select your printer > OK 3 From the menu, select Multiple...

Network Scan Drivers
Page 10
...panel, select your scan job. 5 Repeat step 2 until all the pages of your document are available only in select models. Using scanadf 1 Open a terminal window, and then type scanadf --scan-both -sides=yes -d [device_name]. Scanning 10 Scanning both sides of the following: • Click Insert > Picture > Scan ...several ways depending on the scanner glass. 4 From the printer control panel, select your scan job. Using scanimage 1 Open a terminal window, and then type scanimage -b --scan-both -sides=yes -d [device_name]. Press Enter. 2 Place your document in the ADF or on your scan job...
...panel, select your scan job. 5 Repeat step 2 until all the pages of your document are available only in select models. Using scanadf 1 Open a terminal window, and then type scanadf --scan-both -sides=yes -d [device_name]. Scanning 10 Scanning both sides of the following: • Click Insert > Picture > Scan ...several ways depending on the scanner glass. 4 From the printer control panel, select your scan job. Using scanimage 1 Open a terminal window, and then type scanimage -b --scan-both -sides=yes -d [device_name]. Press Enter. 2 Place your document in the ADF or on your scan job...

Network Scan Drivers
Page 11
... the dialog displayed after you send a scan job to : Available devices > select your printer > OK 3 From the menu, select Multiple Pages. 4 From the toolbar, click Window > Show standard options. 5 Select the Scan both sides checkbox. 6 From the "Network:scanner" dialog, click Scan. 7 Place your document in the ADF. 10 From the... To cancel a scan, do either of your document are displayed on your computer. For more information, see the printer User's Guide. Using XSane 1 Open a terminal window, and then type xsane.
... the dialog displayed after you send a scan job to : Available devices > select your printer > OK 3 From the menu, select Multiple Pages. 4 From the toolbar, click Window > Show standard options. 5 Select the Scan both sides checkbox. 6 From the "Network:scanner" dialog, click Scan. 7 Place your document in the ADF. 10 From the... To cancel a scan, do either of your document are displayed on your computer. For more information, see the printer User's Guide. Using XSane 1 Open a terminal window, and then type xsane.

Network Scan Drivers
Page 12
...as options. Adjusting scan settings Adjusting scan settings using XSane or OpenOffice.org Depending on the application, do either of the following: - Click Window > Show advanced options. • Using OpenOffice.org Note: You may use Writer, Calc, Impress, or Draw only. 1 From an ...a duplex scanner and an Automatic Document Feeder (ADF). • Make sure to access the scan options: • Using XSane 1 Open a terminal window, and then type xsane. To Select Select the document type. Press Enter 2 From the "device detection" dialog, navigate to: Available devices > select...
...as options. Adjusting scan settings Adjusting scan settings using XSane or OpenOffice.org Depending on the application, do either of the following: - Click Window > Show advanced options. • Using OpenOffice.org Note: You may use Writer, Calc, Impress, or Draw only. 1 From an ...a duplex scanner and an Automatic Document Feeder (ADF). • Make sure to access the scan options: • Using XSane 1 Open a terminal window, and then type xsane. To Select Select the document type. Press Enter 2 From the "device detection" dialog, navigate to: Available devices > select...

Network Scan Drivers
Page 17
... also type scanimage --help to reflect the changes you made in the scan driver configuration file, do the following: 1 Close XSane the application. 2 Open a terminal window, and then type rm -f ${HOME}/.sane/xsane/*.drc. XSane stores the most recently used scan settings in the scan driver configuration file changes the default...
... also type scanimage --help to reflect the changes you made in the scan driver configuration file, do the following: 1 Close XSane the application. 2 Open a terminal window, and then type rm -f ${HOME}/.sane/xsane/*.drc. XSane stores the most recently used scan settings in the scan driver configuration file changes the default...
Network Scan Drivers
Page 18
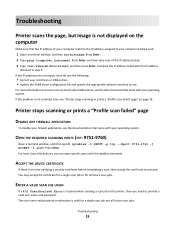
..., see the documentation that came with the IP address obtained in step 2. OPEN THE REQUIRED SCANNING PORTS (TCP: 9751-9760) Open a terminal window, and then type # iptables -I INPUT -p tcp --dport 9751:9760 -j ACCEPT -i eth0. Press Enter. You may accept the certificate for ...Printer stops scanning or prints a "Profile scan failed" page DISABLE ANY FIREWALL APPLICATION To disable your network interface card. 1 Open a terminal window, and then type hostname. For most Linux distributions, you need to your firewall application, see the documentation that came with the iptables command....
..., see the documentation that came with the IP address obtained in step 2. OPEN THE REQUIRED SCANNING PORTS (TCP: 9751-9760) Open a terminal window, and then type # iptables -I INPUT -p tcp --dport 9751:9760 -j ACCEPT -i eth0. Press Enter. You may accept the certificate for ...Printer stops scanning or prints a "Profile scan failed" page DISABLE ANY FIREWALL APPLICATION To disable your network interface card. 1 Open a terminal window, and then type hostname. For most Linux distributions, you need to your firewall application, see the documentation that came with the iptables command....

Network Scan Drivers
Page 20
Note: If you may need to version 0.90 or higher so it will work correctly with non-English languages. Troubleshooting 20 • For some SANE installations, you are running Linpus Linux, upgrade XSane to set the LD_LIBRARY_PATH: 1 Open a terminal window, and then type export LD_LIBRARY_PATH=/usr/lib. 2 Press Enter. XSane displays garbage characters Run XSane version 0.90 or higher, which supports more languages than its earlier versions.
Note: If you may need to version 0.90 or higher so it will work correctly with non-English languages. Troubleshooting 20 • For some SANE installations, you are running Linpus Linux, upgrade XSane to set the LD_LIBRARY_PATH: 1 Open a terminal window, and then type export LD_LIBRARY_PATH=/usr/lib. 2 Press Enter. XSane displays garbage characters Run XSane version 0.90 or higher, which supports more languages than its earlier versions.
Print Drivers for UNIX and LINUX Systems
Page 15
... of the web browser. 4 Click Next. Print Drivers Setup There are using the command line. • /usr/local/lexmark/setup.lexprint • /opt/lexmark/setup.lexprint • /usr/lpp/lexprint/setup.lexprint Note: For more information about administrative groups, see "Changing an administrative group... name" on page 16. Note: User mode is only available to the root user. If your web browser is available from a Windows menu ...
... of the web browser. 4 Click Next. Print Drivers Setup There are using the command line. • /usr/local/lexmark/setup.lexprint • /opt/lexmark/setup.lexprint • /usr/lpp/lexprint/setup.lexprint Note: For more information about administrative groups, see "Changing an administrative group... name" on page 16. Note: User mode is only available to the root user. If your web browser is available from a Windows menu ...

Print Drivers for UNIX and LINUX Systems
Page 23
... a small group of the new class. You can add a print queue to My Printers or another printer group either by dragging a printer from the main window onto a printer group or by right-clicking All Printers and selecting New Group. 1 Enter the group name in groups. Adding a print queue to My Printers...
... a small group of the new class. You can add a print queue to My Printers or another printer group either by dragging a printer from the main window onto a printer group or by right-clicking All Printers and selecting New Group. 1 Enter the group name in groups. Adding a print queue to My Printers...

Print Drivers for UNIX and LINUX Systems
Page 34
To enable a print queue: 1 Open the printer driver as an administrator. 2 From the main window, right-click the print queue icon. 3 Clear the Enabled check box. Normal user or administrator Why are user and system settings, and how do they ... same host, the settings are those changes are stored in effect. To disable a print queue: 1 Open the printer driver as an administrator. 2 From the main window, right-click the print queue icon. 3 Select the Enabled check box. When you open the printer driver and change the settings for that were created...
To enable a print queue: 1 Open the printer driver as an administrator. 2 From the main window, right-click the print queue icon. 3 Clear the Enabled check box. Normal user or administrator Why are user and system settings, and how do they ... same host, the settings are those changes are stored in effect. To disable a print queue: 1 Open the printer driver as an administrator. 2 From the main window, right-click the print queue icon. 3 Select the Enabled check box. When you open the printer driver and change the settings for that were created...


