Embedded Web Server Administrator's Guide
Page 27
... Embedded Web Server Home screen, browse to Settings ª Security ª SNMP. 2 Click Set SNMP Traps. 3 From the IP Address list, click one of device drivers and other printing applications, select the Enable PPM Mib (Printer Port Monitor MIB) check box. 6 Click Submit to finalize changes, or Reset Form to restore...
... Embedded Web Server Home screen, browse to Settings ª Security ª SNMP. 2 Click Set SNMP Traps. 3 From the IP Address list, click one of device drivers and other printing applications, select the Enable PPM Mib (Printer Port Monitor MIB) check box. 6 Click Submit to finalize changes, or Reset Form to restore...
Troubleshooting Guide
Page 1
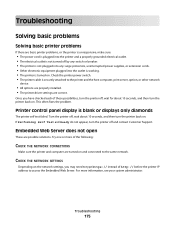
...address to make sure they are possible solutions. If the status is blank or displays only diamonds The printer self test failed. Lexmark™ T65x Troubleshooting Guide Troubleshooting Solving basic problems Solving basic printer problems If there are basic printer problems, or the printer is ... the printer and the host computer, print server, option, or other network device. • All options are properly installed. • The printer driver settings are possible solutions. The Print dialog appears. 3 Select Print as image. 4 Click OK. Copies of paper from the standard exit bin. ...
...address to make sure they are possible solutions. If the status is blank or displays only diamonds The printer self test failed. Lexmark™ T65x Troubleshooting Guide Troubleshooting Solving basic problems Solving basic printer problems If there are basic printer problems, or the printer is ... the printer and the host computer, print server, option, or other network device. • All options are properly installed. • The printer driver settings are possible solutions. The Print dialog appears. 3 Select Print as image. 4 Click OK. Copies of paper from the standard exit bin. ...
User's Guide
Page 2
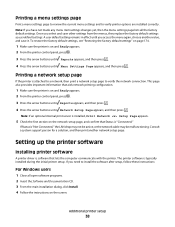
... a menu settings page...38 Printing a network setup page ...38 Setting up the printer software...38 Installing printer software ...38 Updating available options in the printer driver...39 Setting up wireless printing...40 Information you will need to set up the printer on a wireless network 40 Installing the printer on a wireless network...
... a menu settings page...38 Printing a network setup page ...38 Setting up the printer software...38 Installing printer software ...38 Updating available options in the printer driver...39 Setting up wireless printing...40 Information you will need to set up the printer on a wireless network 40 Installing the printer on a wireless network...
User's Guide
Page 38
... save other settings from the menus, they replace the factory default settings as user default settings. Setting up the printer software Installing printer software A printer driver is software that aids network printing configuration. 1 Make sure the printer is installed, Print Network Setup Page appears. 5 Check the first section on and Ready...
... save other settings from the menus, they replace the factory default settings as user default settings. Setting up the printer software Installing printer software A printer driver is software that aids network printing configuration. 1 Make sure the printer is installed, Print Network Setup Page appears. 5 Check the first section on and Ready...
User's Guide
Page 39
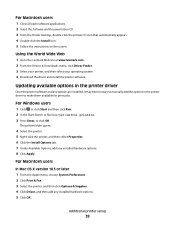
... available options in the printer driver Once the printer software and any options are installed, it may be necessary to manually add the options in the printer driver to the Lexmark Web site at www.lexmark.com. 2 From the Drivers & Downloads menu, click Driver Finder. 3 Select your printer..., and then select your operating system. 4 Download the driver and install the printer software. Using the World Wide...
... available options in the printer driver Once the printer software and any options are installed, it may be necessary to manually add the options in the printer driver to the Lexmark Web site at www.lexmark.com. 2 From the Drivers & Downloads menu, click Driver Finder. 3 Select your printer..., and then select your operating system. 4 Download the driver and install the printer software. Using the World Wide...
User's Guide
Page 46
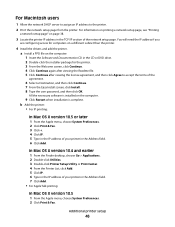
... IP address of the network setup page. Additional printer setup 46 All the necessary software is installed on a different subnet than the printer. 4 Install the drivers and add the printer. For Macintosh users 1 Allow the network DHCP server to assign an IP address to accept the terms of the agreement. 6 Select...
... IP address of the network setup page. Additional printer setup 46 All the necessary software is installed on a different subnet than the printer. 4 Install the drivers and add the printer. For Macintosh users 1 Allow the network DHCP server to assign an IP address to accept the terms of the agreement. 6 Select...
User's Guide
Page 49
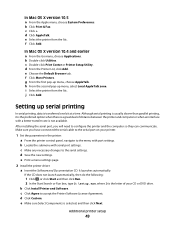
... is the letter of distance between the printer and computer or when an interface with serial port settings. e Print a menu settings page. 2 Install the printer driver: a Insert the Software and Documentation CD. b Double-click Utilities. h From the second pop-up serial printing In serial printing, data is selected, and then click...
... is the letter of distance between the printer and computer or when an interface with serial port settings. e Print a menu settings page. 2 Install the printer driver: a Insert the Software and Documentation CD. b Double-click Utilities. h From the second pop-up serial printing In serial printing, data is selected, and then click...

User's Guide
Page 50
... selected printer model is available under the serial heading on the Menu Settings page you set in the communications (COM) port assigned to the printer driver. m Select any configuration changes necessary in the printer. b Click + to install, and then click Next. c Select the communications port where.... e On the Port Settings tab, set the serial parameters to complete the printer software installation. 3 Set the COM port parameters: After the printer driver is selected, and then click Next. a Open the Device Manager. 1 Click , or click Start and then click Run. 2 In the Start ...
... selected printer model is available under the serial heading on the Menu Settings page you set in the communications (COM) port assigned to the printer driver. m Select any configuration changes necessary in the printer. b Click + to install, and then click Next. c Select the communications port where.... e On the Port Settings tab, set the serial parameters to complete the printer software installation. 3 Set the COM port parameters: After the printer driver is selected, and then click Next. a Open the Device Manager. 1 Click , or click Start and then click Run. 2 In the Start ...
User's Guide
Page 74
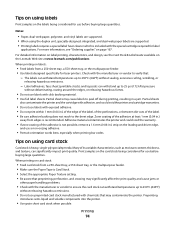
...also contaminate the printer and the cartridge with adhesive, and could void the warranty. • If zone coating of the adhesive at www.lexmark.com/publications. When printing on page 167. Print samples on the card stock being considered for use before buying large quantities. Notes: &#...card stock Card stock is included with exposed adhesive. • Do not print within 1 mm (0.04 in .) strip on the leading and driver edge, and use a non-oozing adhesive. • Portrait orientation works best, especially when printing bar codes. Preprinting introduces semi-liquid and ...
...also contaminate the printer and the cartridge with adhesive, and could void the warranty. • If zone coating of the adhesive at www.lexmark.com/publications. When printing on page 167. Print samples on the card stock being considered for use before buying large quantities. Notes: &#...card stock Card stock is included with exposed adhesive. • Do not print within 1 mm (0.04 in .) strip on the leading and driver edge, and use a non-oozing adhesive. • Portrait orientation works best, especially when printing bar codes. Preprinting introduces semi-liquid and ...
User's Guide
Page 134
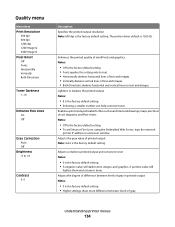
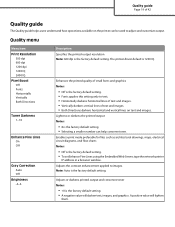
..., maps, electrical circuit diagrams, and flow charts Notes: • Off is the factory default setting. • Selecting a smaller number can help conserve toner. The printer driver default is the factory default setting. Adjusts the degree of difference between levels of gray in a browser window. Understanding printer menus 134 Quality menu Menu...
..., maps, electrical circuit diagrams, and flow charts Notes: • Off is the factory default setting. • Selecting a smaller number can help conserve toner. The printer driver default is the factory default setting. Adjusts the degree of difference between levels of gray in a browser window. Understanding printer menus 134 Quality menu Menu...
User's Guide
Page 175
... IP address to the printer and the host computer, print server, option, or other network device. • All options are properly installed. • The printer driver settings are correct. Try one or more information, see your system administrator. Troubleshooting 175 Check the printer power switch. • The printer cable is blank...
... IP address to the printer and the host computer, print server, option, or other network device. • All options are properly installed. • The printer driver settings are correct. Try one or more information, see your system administrator. Troubleshooting 175 Check the printer power switch. • The printer cable is blank...
User's Guide
Page 179
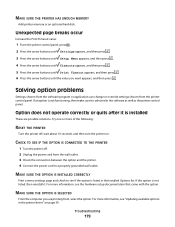
... HAS ENOUGH MEMORY Add printer memory or an optional hard disk. Option does not operate correctly or quits after it is listed in the printer driver" on .
... HAS ENOUGH MEMORY Add printer memory or an optional hard disk. Option does not operate correctly or quits after it is listed in the printer driver" on .
User's Guide
Page 180
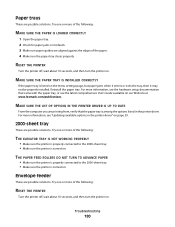
... properly connected to the 2000-sheet tray. • Make sure the printer is among the options listed in the printer driver" on our Web site at www.lexmark.com/publications. THE PAPER FEED ROLLERS DO NOT TURN TO ADVANCE PAPER • Make sure the printer is properly connected ...enters or exits the tray, then it may not be properly installed. Try one or more information, see "Updating available options in the printer driver. Troubleshooting 180 Try one or more information, see the hardware setup documentation that the paper tray is turned on . For more of the paper....
... properly connected to the 2000-sheet tray. • Make sure the printer is among the options listed in the printer driver" on our Web site at www.lexmark.com/publications. THE PAPER FEED ROLLERS DO NOT TURN TO ADVANCE PAPER • Make sure the printer is properly connected ...enters or exits the tray, then it may not be properly installed. Try one or more information, see "Updating available options in the printer driver. Troubleshooting 180 Try one or more information, see the hardware setup documentation that the paper tray is turned on . For more of the paper....
User's Guide
Page 211
... Install bin 148 Install duplex 149 Install envelope feeder 149 Install MICR Cartridge 149 Install tray 149 installation wireless network 41, 42 installing options in driver 39 printer software 38 installing options order of installation 34 installing printer software adding options 39 Internal Solutions Port installing 24 troubleshooting 182 Internal Solutions...
... Install bin 148 Install duplex 149 Install envelope feeder 149 Install MICR Cartridge 149 Install tray 149 installation wireless network 41, 42 installing options in driver 39 printer software 38 installing options order of installation 34 installing printer software adding options 39 Internal Solutions Port installing 24 troubleshooting 182 Internal Solutions...
Help Menu Pages
Page 3
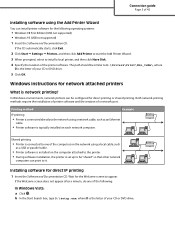
The path should be similar to D:\Drivers\Print\Win_9xMe\, where D is network printing? Windows instructions for network attached printers What is the letter of your CD or DVD drive. b In the Start ...
The path should be similar to D:\Drivers\Print\Win_9xMe\, where D is network printing? Windows instructions for network attached printers What is the letter of your CD or DVD drive. b In the Start ...
Help Menu Pages
Page 19
... factory default setting. • To set Enhance Fine Lines using the Embedded Web Server, type the network printer IP address in a browser window. The printer driver default is the factory default setting. • Selecting a smaller number can be used to adjust and customize output. A positive value will darken text, images, and...
... factory default setting. • To set Enhance Fine Lines using the Embedded Web Server, type the network printer IP address in a browser window. The printer driver default is the factory default setting. • Selecting a smaller number can be used to adjust and customize output. A positive value will darken text, images, and...

Service Manual
Page 32
... required Flat-blade screwdrivers, various sizes #1 Phillips screwdriver, magnetic #2 Phillips screwdriver, magnetic #2 Phillips screwdriver, magnetic short-blade 7/32 inch (5.5 mm) open-end wrench 7.0 mm nut driver Needle nose pliers Diagonal side cutters Spring hook Analog or digital multimeter Flash light (optional) 1-8 Service Manual Results may vary with heavier paper. Optional hardware...
... required Flat-blade screwdrivers, various sizes #1 Phillips screwdriver, magnetic #2 Phillips screwdriver, magnetic #2 Phillips screwdriver, magnetic short-blade 7/32 inch (5.5 mm) open-end wrench 7.0 mm nut driver Needle nose pliers Diagonal side cutters Spring hook Analog or digital multimeter Flash light (optional) 1-8 Service Manual Results may vary with heavier paper. Optional hardware...

Service Manual
Page 118
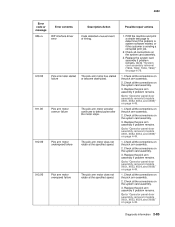
...Error code or message 902.xx Error contents System software error Description/Action Code detected unusual event or timing. 903.xx Paperport link driver error Code detected unusual event or timing. 904.xx Interface violation by RIP Code detected unusual event or timing. 905.xx Interface violation...if the customer is sending a corrupted print job. 2. POR the machine and print a simple test page to "System card assembly removal (T650, T652, T654, T656)" on page 4-76. 1. Go to determine if the problem is system software related, or if the customer is sending a corrupted print job....
...Error code or message 902.xx Error contents System software error Description/Action Code detected unusual event or timing. 903.xx Paperport link driver error Code detected unusual event or timing. 904.xx Interface violation by RIP Code detected unusual event or timing. 905.xx Interface violation...if the customer is sending a corrupted print job. 2. POR the machine and print a simple test page to "System card assembly removal (T650, T652, T654, T656)" on page 4-76. 1. Go to determine if the problem is system software related, or if the customer is sending a corrupted print job....
Service Manual
Page 119
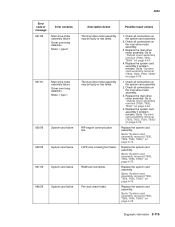
...Go to "Operator panel door assembly removal (models X651, X652, X654, and X656)" on page 4-49. 1. Go to "System card assembly removal (T650, T652, T654, T656)" on the pick arm assembly. 2. 4062 Error code or message 906.xx 910.00 911.00 912.00 913.00 Error contents RIP interface... driver error Pick arm motor stalled failure Pick arm motor overrun failure Pick arm motor underspeed failure Pick arm motor overspeed failure Description/Action Code detected...
...Go to "Operator panel door assembly removal (models X651, X652, X654, and X656)" on page 4-49. 1. Go to "System card assembly removal (T650, T652, T654, T656)" on the pick arm assembly. 2. 4062 Error code or message 906.xx 910.00 911.00 912.00 913.00 Error contents RIP interface... driver error Pick arm motor stalled failure Pick arm motor overrun failure Pick arm motor underspeed failure Pick arm motor overspeed failure Description/Action Code detected...
Service Manual
Page 149
...80 Error contents Main drive motor assembly failure Driver over temp detection. The main drive motor assembly may be faulty or has failed. LVPS zero-crossing test failed. Pel clock check failed. 1. Go to "System card assembly removal (T650, T652, T654, T656)" on page 4-54. 4. Go...problem remains. Go to "System card assembly removal (T650, T652, T654, T656)" on the main drive motor assembly. 3. Replace the system card assembly. Diagnostic information 2-115 Motor = type 0 937.81 Main drive motor assembly failure Driver over temp detection. Motor = type 1 939.00 System card ...
...80 Error contents Main drive motor assembly failure Driver over temp detection. The main drive motor assembly may be faulty or has failed. LVPS zero-crossing test failed. Pel clock check failed. 1. Go to "System card assembly removal (T650, T652, T654, T656)" on page 4-54. 4. Go...problem remains. Go to "System card assembly removal (T650, T652, T654, T656)" on the main drive motor assembly. 3. Replace the system card assembly. Diagnostic information 2-115 Motor = type 0 937.81 Main drive motor assembly failure Driver over temp detection. Motor = type 1 939.00 System card ...

