Embedded Web Server Administrator's Guide
Page 9
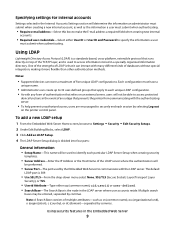
...)-separated by commas. Notes: • Supported devices can interact with many different kinds of five unique LDAP configurations. The default LDAP port is a standards-based, cross-platform, extensible protocol that it can store a maximum of databases without special integration, making it more .... Specifying settings for internal accounts Settings selected in the Internal Accounts Settings section will be performed. • Server Port-The port used by the Embedded Web Server to communicate with the LDAP server. Each configuration must submit when authenticating. Multiple search...
...)-separated by commas. Notes: • Supported devices can interact with many different kinds of five unique LDAP configurations. The default LDAP port is a standards-based, cross-platform, extensible protocol that it can store a maximum of databases without special integration, making it more .... Specifying settings for internal accounts Settings selected in the Internal Accounts Settings section will be performed. • Server Port-The port used by the Embedded Web Server to communicate with the LDAP server. Each configuration must submit when authenticating. Multiple search...

Embedded Web Server Administrator's Guide
Page 11
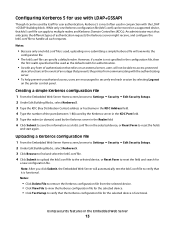
...that prevents the printer from communicating with any form of five unique LDAP + GSSAPI configurations. Multiple search bases may be performed. • Server Port-The port used by selecting Log out on the printer control panel. Each configuration must have a unique name. • As with the authenticating server. &#...Address-Enter the IP Address or the Host Name of the LDAP server where the authentication will not be used for access. The default LDAP port is 389. • Use SSL/TLS-From the drop-down menu select None, SSL/TLS (Secure Sockets Layer/Transport Layer Security), or ...
...that prevents the printer from communicating with any form of five unique LDAP + GSSAPI configurations. Multiple search bases may be performed. • Server Port-The port used by selecting Log out on the printer control panel. Each configuration must have a unique name. • As with the authenticating server. &#...Address-Enter the IP Address or the Host Name of the LDAP server where the authentication will not be used for access. The default LDAP port is 389. • Use SSL/TLS-From the drop-down menu select None, SSL/TLS (Secure Sockets Layer/Transport Layer Security), or ...
Embedded Web Server Administrator's Guide
Page 13
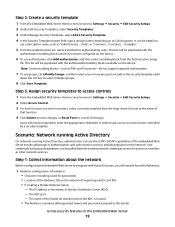
... Kerberos 5. 3 Type the KDC (Key Distribution Center) address or hostname in the KDC Address field. 4 Type the number of the port (between 1-88) used by the Kerberos server in the KDC Port field. 5 Type the realm (or domain) used by the Kerberos server in the Realm field 6 Click Submit to save the...
... Kerberos 5. 3 Type the KDC (Key Distribution Center) address or hostname in the KDC Address field. 4 Type the number of the port (between 1-88) used by the Kerberos server in the KDC Port field. 5 Type the realm (or domain) used by the Kerberos server in the Realm field 6 Click Submit to save the...
Embedded Web Server Administrator's Guide
Page 19
... IP address or hostname of that function. 4 Click Submit to save changes, or Reset Form to include in the Embedded Web Server 19 The KDC port - The name of the Realm (or domain) where the KDC is located • The Kerberos username (distinguished name) and password assigned to any function controlled...
... IP address or hostname of that function. 4 Click Submit to save changes, or Reset Form to include in the Embedded Web Server 19 The KDC port - The name of the Realm (or domain) where the KDC is located • The Kerberos username (distinguished name) and password assigned to any function controlled...

Embedded Web Server Administrator's Guide
Page 20
... gathered in step 1. Using security features in step 1. 2 LDAP server information • The IP address or hostname of the LDAP server • The LDAP server port (the default is 389) • A list of up to three object classes stored on the LDAP server, which will be used to authorize user for...
... gathered in step 1. Using security features in step 1. 2 LDAP server information • The IP address or hostname of the LDAP server • The LDAP server port (the default is 389) • A list of up to three object classes stored on the LDAP server, which will be used to authorize user for...
Embedded Web Server Administrator's Guide
Page 25
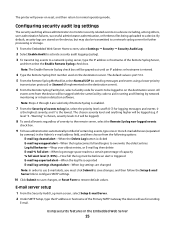
... Embedded Web Server 25 By default, security logs are valid only if Remote Syslog is entered. 4 Type the Remote Syslog Port number used on the destination server. The default value is port 514. 5 From the Remote Syslog Method list, select Normal UDP (to send log messages and events using a lower-priority transmission...
... Embedded Web Server 25 By default, security logs are valid only if Remote Syslog is entered. 4 Type the Remote Syslog Port number used on the destination server. The default value is port 514. 5 From the Remote Syslog Method list, select Normal UDP (to send log messages and events using a lower-priority transmission...
Embedded Web Server Administrator's Guide
Page 26
... protocols the printer will be sent using an encrypted link. 8 If your network under Device Credentials. Note: Server certificate validation is port 25. 4 If using digital certificates to establish a secure connection to the authentication server, you want to log in the Embedded Web... Server 26 For more information on configuring digital certificates, see "Managing certificates" on the authenticating server. 3 Type the Primary SMTP Gateway Port number of the current syslog, click Export Log. • To delete the current syslog, click Delete Log. Note: If using a...
... protocols the printer will be sent using an encrypted link. 8 If your network under Device Credentials. Note: Server certificate validation is port 25. 4 If using digital certificates to establish a secure connection to the authentication server, you want to log in the Embedded Web... Server 26 For more information on configuring digital certificates, see "Managing certificates" on the authenticating server. 3 Type the Primary SMTP Gateway Port number of the current syslog, click Export Log. • To delete the current syslog, click Delete Log. Note: If using a...
Embedded Web Server Administrator's Guide
Page 27
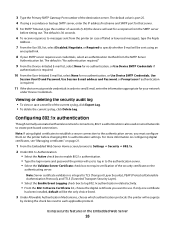
...; SNMP. 2 Click Set SNMP Traps. 3 From the IP Address list, click one of device drivers and other printing applications, select the Enable PPM Mib (Printer Port Monitor MIB) check box. 6 Click Submit to finalize changes, or Reset Form to restore default values. SNMP Version 1, 2c 1 From the Embedded Web Server Home...
...; SNMP. 2 Click Set SNMP Traps. 3 From the IP Address list, click one of device drivers and other printing applications, select the Enable PPM Mib (Printer Port Monitor MIB) check box. 6 Click Submit to finalize changes, or Reset Form to restore default values. SNMP Version 1, 2c 1 From the Embedded Web Server Home...
Embedded Web Server Administrator's Guide
Page 30
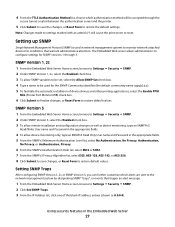
...Lock. Controls the ability to the Paper menu from the printer control panel. When disabled, it does Protects access to the Network/Ports section of the Settings menu from the Embedded Web Server The Solution 1 through Solution 10 Access Controls can be assigned to the Option... from the printer control panel Protects access to manage certificates using remote management tools. When protected, no longer possible to the Network/Ports section of the Settings menu from the Embedded Web Server When disabled, all device settings changes requested by LDSS. Controls access to ...
...Lock. Controls the ability to the Paper menu from the printer control panel. When disabled, it does Protects access to the Network/Ports section of the Settings menu from the Embedded Web Server The Solution 1 through Solution 10 Access Controls can be assigned to the Option... from the printer control panel Protects access to manage certificates using remote management tools. When protected, no longer possible to the Network/Ports section of the Settings menu from the Embedded Web Server When disabled, all device settings changes requested by LDSS. Controls access to ...
Troubleshooting Guide
Page 1
Lexmark™ T65x Troubleshooting Guide Troubleshooting Solving basic problems Solving basic printer problems If there are running a supported operating system and using a USB port, make sure the network is unresponsive, make sure they are correct. Printer control panel display is Not Connected, ... wait about 10 seconds, and then turn the printer off and contact Customer Support. Try one or more information, visit the Lexmark Web site at www.lexmark.com. Contact your system administrator. The Print dialog appears. 3 Select Print as image. 4 Click OK. Copies of the ...
Lexmark™ T65x Troubleshooting Guide Troubleshooting Solving basic problems Solving basic printer problems If there are running a supported operating system and using a USB port, make sure the network is unresponsive, make sure they are correct. Printer control panel display is Not Connected, ... wait about 10 seconds, and then turn the printer off and contact Customer Support. Try one or more information, visit the Lexmark Web site at www.lexmark.com. Contact your system administrator. The Print dialog appears. 3 Select Print as image. 4 Click OK. Copies of the ...
Troubleshooting Guide
Page 4
... the LexmarkTM Internal Solutions Port (ISP) does not operate correctly, then these are using the correct cable and that came with the option, or go to www.lexmark.com/publications to view the option instruction sheet. Reinstall the 5-bin mailbox. For more information, see the chapter about installing...arrow button while turning the printer on sequence, and then Config Menu appears. Hard disk with the 5-bin mailbox, or go to www.lexmark.com/publications to view the 5-bin mailbox instruction sheet. THE PAPER MAY HAVE ABSORBED MOISTURE DUE TO HIGH HUMIDITY • Load paper from...
... the LexmarkTM Internal Solutions Port (ISP) does not operate correctly, then these are using the correct cable and that came with the option, or go to www.lexmark.com/publications to view the option instruction sheet. Reinstall the 5-bin mailbox. For more information, see the chapter about installing...arrow button while turning the printer on sequence, and then Config Menu appears. Hard disk with the 5-bin mailbox, or go to www.lexmark.com/publications to view the 5-bin mailbox instruction sheet. THE PAPER MAY HAVE ABSORBED MOISTURE DUE TO HIGH HUMIDITY • Load paper from...
User's Guide
Page 2
...to install internal options...18 Installing a memory card ...20 Installing a flash memory or firmware card...21 Installing an Internal Solutions Port...24 Installing a printer hard disk ...30 Installing hardware options...34 Order of installation ...34 Installing paper drawers...34 Installing an optional...Installing the printer on a wireless network (Macintosh 42 Installing the printer on a wired network...45 Changing port settings after installing a new network Internal Solutions Port 47 Setting up serial printing...49 Loading paper and specialty media 51 Setting the Paper Size and Paper ...
...to install internal options...18 Installing a memory card ...20 Installing a flash memory or firmware card...21 Installing an Internal Solutions Port...24 Installing a printer hard disk ...30 Installing hardware options...34 Order of installation ...34 Installing paper drawers...34 Installing an optional...Installing the printer on a wireless network (Macintosh 42 Installing the printer on a wired network...45 Changing port settings after installing a new network Internal Solutions Port 47 Setting up serial printing...49 Loading paper and specialty media 51 Setting the Paper Size and Paper ...

User's Guide
Page 4
... ...99 Paper Weight menu ...101 Paper Loading menu ...103 Custom Types menu...105 Universal Setup menu...105 Bin Setup menu ...106 Reports menu...107 Network/Ports menu...108 Active NIC menu...108 Standard Network or Network menus ...108 Network Reports menu ...110 Network Card menu...110 TCP/IP menu ...111 IPv6...
... ...99 Paper Weight menu ...101 Paper Loading menu ...103 Custom Types menu...105 Universal Setup menu...105 Bin Setup menu ...106 Reports menu...107 Network/Ports menu...108 Active NIC menu...108 Standard Network or Network menus ...108 Network Reports menu ...110 Network Card menu...110 TCP/IP menu ...111 IPv6...

User's Guide
Page 7
5-bin mailbox ...181 Output options ...181 Memory card ...181 Flash memory card...181 Hard disk with adapter...182 Internal Solutions Port ...182 Solving paper feed problems...182 Paper frequently jams ...182 Paper jam message remains after jam is cleared ...183 Page that jammed does not reprint ...
5-bin mailbox ...181 Output options ...181 Memory card ...181 Flash memory card...181 Hard disk with adapter...182 Internal Solutions Port ...182 Solving paper feed problems...182 Paper frequently jams ...182 Paper jam message remains after jam is cleared ...183 Page that jammed does not reprint ...
User's Guide
Page 9
... the wall outlet before continuing. You must understand the section in your operating instructions that heats the print media, and the heat may result in ports. Do not recharge, disassemble, or incinerate a lithium battery. CAUTION-POTENTIAL INJURY: The printer weight is greater than those specified herein may cause the media to...
... the wall outlet before continuing. You must understand the section in your operating instructions that heats the print media, and the heat may result in ports. Do not recharge, disassemble, or incinerate a lithium battery. CAUTION-POTENTIAL INJURY: The printer weight is greater than those specified herein may cause the media to...

User's Guide
Page 16
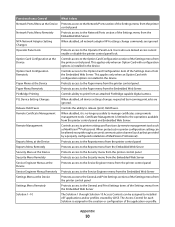
Learning about the printer 16 Note: Only the front USB port supports flash drives. Item 8 Menu 9 USB port Description Opens the menu index Note: The menus are available only when the printer is in the Ready state. Insert a flash drive into the front of the printer to print saved files.
Learning about the printer 16 Note: Only the front USB port supports flash drives. Item 8 Menu 9 USB port Description Opens the menu index Note: The menus are available only when the printer is in the Ready state. Insert a flash drive into the front of the printer to print saved files.
User's Guide
Page 17
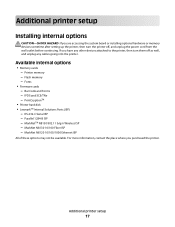
... these options may not be available. Additional printer setup 17 Printer memory - Fonts • Firmware cards - PrintCryptionTM • Printer hard disk • LexmarkTM Internal Solutions Ports (ISP) - Additional printer setup Installing internal options CAUTION-SHOCK HAZARD: If you are accessing the system board or installing optional hardware or memory devices sometime...
... these options may not be available. Additional printer setup 17 Printer memory - Fonts • Firmware cards - PrintCryptionTM • Printer hard disk • LexmarkTM Internal Solutions Ports (ISP) - Additional printer setup Installing internal options CAUTION-SHOCK HAZARD: If you are accessing the system board or installing optional hardware or memory devices sometime...
User's Guide
Page 19
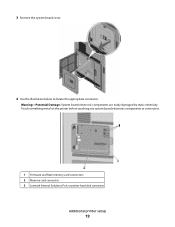
Touch something metal on the printer before touching any system board electronic components or connectors. 1 Firmware and flash memory card connectors 2 Memory card connector 3 Lexmark Internal Solutions Port or printer hard disk connector Additional printer setup 19 3 Remove the system board cover. 4 Use the illustration below to locate the appropriate connector. Warning-Potential Damage: System board electronic components are easily damaged by static electricity.
Touch something metal on the printer before touching any system board electronic components or connectors. 1 Firmware and flash memory card connectors 2 Memory card connector 3 Lexmark Internal Solutions Port or printer hard disk connector Additional printer setup 19 3 Remove the system board cover. 4 Use the illustration below to locate the appropriate connector. Warning-Potential Damage: System board electronic components are easily damaged by static electricity.
User's Guide
Page 24
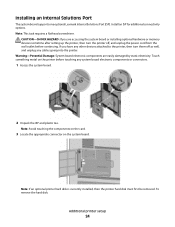
..., then turn them off , and unplug the power cord from the wall outlet before touching any cables going into the printer. Installing an Internal Solutions Port The system board supports one optional Lexmark Internal Solutions Port (ISP).
..., then turn them off , and unplug the power cord from the wall outlet before touching any cables going into the printer. Installing an Internal Solutions Port The system board supports one optional Lexmark Internal Solutions Port (ISP).
User's Guide
Page 30
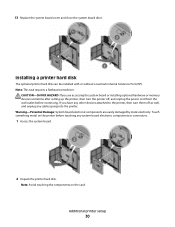
... the printer. If you are easily damaged by static electricity. Installing a printer hard disk The optional printer hard disk can be installed with or without a Lexmark Internal Solutions Port (ISP). Touch something metal on the card. Additional printer setup 30
... the printer. If you are easily damaged by static electricity. Installing a printer hard disk The optional printer hard disk can be installed with or without a Lexmark Internal Solutions Port (ISP). Touch something metal on the card. Additional printer setup 30


