User's Reference
Page 4
Contents Ordering a charge roll 84 Ordering a transfer roller 84 Ordering pick rollers 84 Ordering a label fuser cleaner 85 Ordering staple cartridges 85 Storing supplies ...85 Storing the print cartridge 86 Replacing the print cartridge 86 ...Removing the used print cartridge 86 Cleaning the printer 87 Installing the new print cartridge 88 Replacing the charge roll 90 Replacing the transfer roller 94 Replacing the pick rollers 98 Replacing the label fuser cleaner 101 Replacing the staple cartridge 104 Removing a used staple cartridge 105 Installing a new staple cartridge ...
Contents Ordering a charge roll 84 Ordering a transfer roller 84 Ordering pick rollers 84 Ordering a label fuser cleaner 85 Ordering staple cartridges 85 Storing supplies ...85 Storing the print cartridge 86 Replacing the print cartridge 86 ...Removing the used print cartridge 86 Cleaning the printer 87 Installing the new print cartridge 88 Replacing the charge roll 90 Replacing the transfer roller 94 Replacing the pick rollers 98 Replacing the label fuser cleaner 101 Replacing the staple cartridge 104 Removing a used staple cartridge 105 Installing a new staple cartridge ...
User's Reference
Page 84
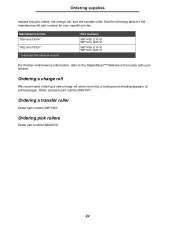
... refer to the StapleSmart™ Reference that came with your specific printer. Order Lexmark part number 99A1017. See the following table for the maintenance kit part number for : T630 and T630n* T632 and T632n* * n denotes the network version. Ordering a charge roll We ...recommend ordering a new charge roll when toner fog or background shading appears on printed pages. Maintenance kit for your finisher. Ordering pick rollers Order part number 99A0070. 84 Ordering a transfer roller Order ...
... refer to the StapleSmart™ Reference that came with your specific printer. Order Lexmark part number 99A1017. See the following table for the maintenance kit part number for : T630 and T630n* T632 and T632n* * n denotes the network version. Ordering a charge roll We ...recommend ordering a new charge roll when toner fog or background shading appears on printed pages. Maintenance kit for your finisher. Ordering pick rollers Order part number 99A0070. 84 Ordering a transfer roller Order ...
User's Reference
Page 87
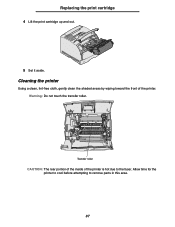
Replacing the print cartridge 4 Lift the print cartridge up and out. 5 Set it aside. Allow time for the printer to cool before attempting to the fuser. Transfer roller CAUTION: The rear portion of the inside of the printer. Warning: Do not touch the transfer roller. Cleaning the printer Using a clean, lint-free cloth, gently clean the shaded areas by wiping toward the front of the printer is hot due to remove parts in this area. 87
Replacing the print cartridge 4 Lift the print cartridge up and out. 5 Set it aside. Allow time for the printer to cool before attempting to the fuser. Transfer roller CAUTION: The rear portion of the inside of the printer. Warning: Do not touch the transfer roller. Cleaning the printer Using a clean, lint-free cloth, gently clean the shaded areas by wiping toward the front of the printer is hot due to remove parts in this area. 87

User's Reference
Page 94
Refer to the documentation that comes with the transfer roller for information on ordering a transfer roller. Replacing the transfer roller Replacing the transfer roller Order a new transfer roller when light print, toner fog, or background shading appears on the lower floor of the print cartridge housing...the left side of small tool.) 94 Complete the following steps to loosen it. (Use any kind of the transfer roller up from its slot to replace the transfer roller. See Ordering supplies for detailed installation information. 1 Turn the printer off and unplug the printer power cord. ...
Refer to the documentation that comes with the transfer roller for information on ordering a transfer roller. Replacing the transfer roller Replacing the transfer roller Order a new transfer roller when light print, toner fog, or background shading appears on the lower floor of the print cartridge housing...the left side of small tool.) 94 Complete the following steps to loosen it. (Use any kind of the transfer roller up from its slot to replace the transfer roller. See Ordering supplies for detailed installation information. 1 Turn the printer off and unplug the printer power cord. ...

User's Reference
Page 95
Set it straight out of the printer. Replacing the transfer roller 5 Pull the transfer roller to the left to loosen the right side and then pull it aside. 6 Remove any packaging from the new transfer roller. 95
Set it straight out of the printer. Replacing the transfer roller 5 Pull the transfer roller to the left to loosen the right side and then pull it aside. 6 Remove any packaging from the new transfer roller. 95

User's Reference
Page 96
Replacing the transfer roller 7 Grasp the transfer roller on the left side as shown. 8 Locate the small hole and insert the metal tab on the right side of the transfer roller into the hole. 96
Replacing the transfer roller 7 Grasp the transfer roller on the left side as shown. 8 Locate the small hole and insert the metal tab on the right side of the transfer roller into the hole. 96

User's Reference
Page 97
Replacing the transfer roller 9 Lower the transfer roller gently until the left metal tab fits into a properly grounded electrical outlet. 12 Reset the maintenance counter. You may have to push it down for a secure fit. 10 Reinstall the print cartridge and close the front doors. 11 Plug the printer power cord into the slot. See Resetting the maintenance counter. 97
Replacing the transfer roller 9 Lower the transfer roller gently until the left metal tab fits into a properly grounded electrical outlet. 12 Reset the maintenance counter. You may have to push it down for a secure fit. 10 Reinstall the print cartridge and close the front doors. 11 Plug the printer power cord into the slot. See Resetting the maintenance counter. 97

User's Reference
Page 283
...tray 49 multipurpose feeder 55, 61 transparencies input tray 49 multipurpose feeder 61 Local Printer Setup Utility 185 drivers CD 185 Help 186 Lexmark Web site 185 values 186 Finishing Settings 186 Paper Settings 186 Parallel Settings 186 PCL Emulation Settings 186 PostScript Settings 186 Quality Settings ...Prebate 83 regular 83 print cartridge installing a new one 88 storing 86 maintenance charge roll 90 label fuser cleaner 101 pick rollers 98 staple cartridge 104 transfer roll 94 maximum stack height 60 memory Print and Hold function 187 Menu button 208 menu settings page, printing 25 menus ...
...tray 49 multipurpose feeder 55, 61 transparencies input tray 49 multipurpose feeder 61 Local Printer Setup Utility 185 drivers CD 185 Help 186 Lexmark Web site 185 values 186 Finishing Settings 186 Paper Settings 186 Parallel Settings 186 PCL Emulation Settings 186 PostScript Settings 186 Quality Settings ...Prebate 83 regular 83 print cartridge installing a new one 88 storing 86 maintenance charge roll 90 label fuser cleaner 101 pick rollers 98 staple cartridge 104 transfer roll 94 maximum stack height 60 memory Print and Hold function 187 Menu button 208 menu settings page, printing 25 menus ...

User's Reference
Page 288
... Menu) 263 R recommended papers 30 Remove Held Jobs (Utilities Menu) 228 repeat print 188 replacing charge roll 90 label fuser cleaner 101 pick rollers 98 staple cartridge 104 transfer roll 94 reserve print 189 Reset Active Bin (Job Menu) 233 Reset Printer (Job Menu) 232 resetting printer 232 resident fonts 178 Resource...
... Menu) 263 R recommended papers 30 Remove Held Jobs (Utilities Menu) 228 repeat print 188 replacing charge roll 90 label fuser cleaner 101 pick rollers 98 staple cartridge 104 transfer roll 94 reserve print 189 Reset Active Bin (Job Menu) 233 Reset Printer (Job Menu) 232 resetting printer 232 resident fonts 178 Resource...
Service Manual
Page 63
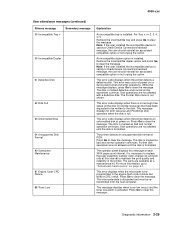
... the printer detects a defective disk. Further disk operations are available as bad and normal operation continues. For more information, go to replace the fuser assembly, transfer roller, charge roll, and pick rolls at each 300K page count interval. Remove the incompatible duplex option and press Go to clear the message. Diagnostic information...
... the printer detects a defective disk. Further disk operations are available as bad and normal operation continues. For more information, go to replace the fuser assembly, transfer roller, charge roll, and pick rolls at each 300K page count interval. Remove the incompatible duplex option and press Go to clear the message. Diagnostic information...

Service Manual
Page 114
...in the following order: • Developer drive assembly • Main drive gearbox assembly Replace the FRUs in the main drive gearbox. Check the transfer roll for correct operation. This can be on the main drive motor. Replace the FRUs in the following order: • Main drive gearbox... main drive motor. Replace the main drive gearbox assembly. Symptom 1 Random marks Action Check the print cartridge for any feed roller, or in the transfer roll bearings or transfer roll. Print quality-evenly spaced horizontal lines or marks FRU 1 Lines spaced 3.19 mm (.126 inch) apart 2 Lines ...
...in the following order: • Developer drive assembly • Main drive gearbox assembly Replace the FRUs in the main drive gearbox. Check the transfer roll for correct operation. This can be on the main drive motor. Replace the FRUs in the following order: • Main drive gearbox... main drive motor. Replace the main drive gearbox assembly. Symptom 1 Random marks Action Check the print cartridge for any feed roller, or in the transfer roll bearings or transfer roll. Print quality-evenly spaced horizontal lines or marks FRU 1 Lines spaced 3.19 mm (.126 inch) apart 2 Lines ...
Service Manual
Page 235
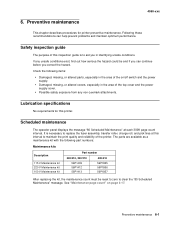
...safety exposure from any unsafe conditions exist, find out how serious the hazard could be reset to zero to replace the fuser assembly, transfer roller, charge roll, and pick tires at each 300K page count interval. Scheduled maintenance The operator panel displays the message "80 Scheduled ...Maintenance" at this printer. 4060-xxx 6. Safety inspection guide The purpose of the printer. If any non-Lexmark attachments. It is to maintain the print quality and reliability of this inspection guide is necessary to clear the "80 Scheduled Maintenance" ...
...safety exposure from any unsafe conditions exist, find out how serious the hazard could be reset to zero to replace the fuser assembly, transfer roller, charge roll, and pick tires at each 300K page count interval. Scheduled maintenance The operator panel displays the message "80 Scheduled ...Maintenance" at this printer. 4060-xxx 6. Safety inspection guide The purpose of the printer. If any non-Lexmark attachments. It is to maintain the print quality and reliability of this inspection guide is necessary to clear the "80 Scheduled Maintenance" ...

Service Manual
Page 243
..., main cap 3 Parts packet, screw 1 Support, right stacker plate, 000/010 1 Support, right stacker plate, 200/210/400/410 1 Transfer plate assembly 4 Pad, machine mounting 1 Smart cartridge contact assembly w/cable 1 Cartridge fan 1 Toner sensor assembly 1 Parts packet, contact kit •...roll (1) • Block, contact mounting (4) • Screw, contact mounting (5) 1 Spring, tray bias 2 Spring, cartridge hold down 1 Tray bias arm assembly 2 Roller, developer support 1 Deflector, upper PF 1 Deflector, inner, 000/010 1 Deflector, inner, 200/210/400/410 1 Sensor, input 1 Shield, gear #60/MPF ...
..., main cap 3 Parts packet, screw 1 Support, right stacker plate, 000/010 1 Support, right stacker plate, 200/210/400/410 1 Transfer plate assembly 4 Pad, machine mounting 1 Smart cartridge contact assembly w/cable 1 Cartridge fan 1 Toner sensor assembly 1 Parts packet, contact kit •...roll (1) • Block, contact mounting (4) • Screw, contact mounting (5) 1 Spring, tray bias 2 Spring, cartridge hold down 1 Tray bias arm assembly 2 Roller, developer support 1 Deflector, upper PF 1 Deflector, inner, 000/010 1 Deflector, inner, 200/210/400/410 1 Sensor, input 1 Shield, gear #60/MPF ...

Service Manual
Page 335
... 99A0119 Wear strips 7-43 99A0120 Restraint pad 7-19, 7-21, 7-43, 7-45 99A0121 Clip, 250-sheet tray wear 7-19, 7-43 99A0122 Shaft assembly, drive roller 7-75, 7-77 99A0124 Plate, snap-in 7-19, 7-21, 7-43, 7-45 99A0125 Frame assembly, right side 7-75 99A0126 Finger, autosize 7-19, 7-21,...7-43 99A0134 Shaft, power takeoff 250, 000/010 7-23 99A0137 Frame assembly, left side 7-75 99A0181 Spring, transfer roll left 7-27 99A0184 Spring, transfer roll right 7-27 99A0185 Shaft, transfer pivot 7-27 99A0188 Guide, rear paper, use with 99A0219 7-67 99A0197 Shaft, drive rear 7-75, 7-77 99A0208...
... 99A0119 Wear strips 7-43 99A0120 Restraint pad 7-19, 7-21, 7-43, 7-45 99A0121 Clip, 250-sheet tray wear 7-19, 7-43 99A0122 Shaft assembly, drive roller 7-75, 7-77 99A0124 Plate, snap-in 7-19, 7-21, 7-43, 7-45 99A0125 Frame assembly, right side 7-75 99A0126 Finger, autosize 7-19, 7-21,...7-43 99A0134 Shaft, power takeoff 250, 000/010 7-23 99A0137 Frame assembly, left side 7-75 99A0181 Spring, transfer roll left 7-27 99A0184 Spring, transfer roll right 7-27 99A0185 Shaft, transfer pivot 7-27 99A0188 Guide, rear paper, use with 99A0219 7-67 99A0197 Shaft, drive rear 7-75, 7-77 99A0208...

Service Manual
Page 336
...7-15 99A0267 Parts packet, retainer (aligner assembly 7-45, 7-71 99A0267 Parts packet, retainer (pivot shaft 7-27 99A0267 Parts packet, retainer (roller 7-71 99A0267 Parts packet, retainers 7-88 99A0268 Parts packet, springs paper feed 7-88 99A0269 Parts packet, duplex option fan mounting 7-88 99A0271... thru 7-73 99A0292 Strip, wear 7-21 99A0292 Wear strips 7-45 99A0299 Parts packet, duplex option cam follower assembly 7-88 99A0349 Arm, transfer roll assembly right 7-27 99A0350 Sensor, paper low 7-41, 7-45 99A0351 Sensor, output expander pass thru 7-55 99A0351 Sensor, stacker pass...
...7-15 99A0267 Parts packet, retainer (aligner assembly 7-45, 7-71 99A0267 Parts packet, retainer (pivot shaft 7-27 99A0267 Parts packet, retainer (roller 7-71 99A0267 Parts packet, retainers 7-88 99A0268 Parts packet, springs paper feed 7-88 99A0269 Parts packet, duplex option fan mounting 7-88 99A0271... thru 7-73 99A0292 Strip, wear 7-21 99A0292 Wear strips 7-45 99A0299 Parts packet, duplex option cam follower assembly 7-88 99A0349 Arm, transfer roll assembly right 7-27 99A0350 Sensor, paper low 7-41, 7-45 99A0351 Sensor, output expander pass thru 7-55 99A0351 Sensor, stacker pass...

Service Manual
Page 340
...Shaft, power takeoff 500, 200/210/400/410 7-23 99A1576 Tray assembly 500-sheet 7-21 99A1576 Tray assembly, 500-sheet 7-45 99A1578 Arm, transfer roll left 7-27 99A1580 Flag, output paper level 7-53 99A1582 Slider, autosize 500-sheet 7-21, 7-45 99A1583 Plate, 500-sheet tray wear ...77 99A1647 Rib assembly, 250-sheet special media tray 7-86 99A1654 Tray, universal adjustable 250-sheet 7-86 99A1658 Cover, fuser wiper cavity 7-25 99A1664 Bellcrank, roller release 7-47 99A1665 Deflector, base 500 7-47 99A1666 Label, options 7-45, 7-51, 7-53, 7-57, 7-61, 7-73 99A1666 Label, tray options 7-...
...Shaft, power takeoff 500, 200/210/400/410 7-23 99A1576 Tray assembly 500-sheet 7-21 99A1576 Tray assembly, 500-sheet 7-45 99A1578 Arm, transfer roll left 7-27 99A1580 Flag, output paper level 7-53 99A1582 Slider, autosize 500-sheet 7-21, 7-45 99A1583 Plate, 500-sheet tray wear ...77 99A1647 Rib assembly, 250-sheet special media tray 7-86 99A1654 Tray, universal adjustable 250-sheet 7-86 99A1658 Cover, fuser wiper cavity 7-25 99A1664 Bellcrank, roller release 7-47 99A1665 Deflector, base 500 7-47 99A1666 Label, options 7-45, 7-51, 7-53, 7-57, 7-61, 7-73 99A1666 Label, tray options 7-...


