User Guide
Page 4
......123 Cleaning the scanner glass...123 Troubleshooting 124 Before you troubleshoot...124 Using the Service Center to solve printer problems 124 If Troubleshooting does not solve your problem 124 Setup troubleshooting...124 Jams and misfeeds troubleshooting...130 Print troubleshooting...132 Copy and scan troubleshooting...134 Fax troubleshooting...136 Memory card troubleshooting...143 Network troubleshooting...144 Notices 163 Product information...163...
......123 Cleaning the scanner glass...123 Troubleshooting 124 Before you troubleshoot...124 Using the Service Center to solve printer problems 124 If Troubleshooting does not solve your problem 124 Setup troubleshooting...124 Jams and misfeeds troubleshooting...130 Print troubleshooting...132 Copy and scan troubleshooting...134 Fax troubleshooting...136 Memory card troubleshooting...143 Network troubleshooting...144 Notices 163 Product information...163...

User Guide
Page 7
... from discarded print jobs. • Use recycled paper. For updates, check our Web site at www.lexmark.com/publications/. Finding information about the printer Publications What are ideal for and maintaining the printer • Troubleshooting and solving problems User's Guide The User's Guide is also available on your printer model • Caring...
... from discarded print jobs. • Use recycled paper. For updates, check our Web site at www.lexmark.com/publications/. Finding information about the printer Publications What are ideal for and maintaining the printer • Troubleshooting and solving problems User's Guide The User's Guide is also available on your printer model • Caring...
User Guide
Page 8
... telephone numbers and hours of operation for ? Help using the printer software The latest supplemental information, updates, and online technical support: • Troubleshooting hints and tips • Frequently asked questions • Documentation • Driver downloads • Live chat support • E-mail support Telephone support...support so that they may serve you looking for your region or country can be found on the Support Web site (support.lexmark.com) or on your operating system. Record the following information (located on the store receipt and the back of the printer...
... telephone numbers and hours of operation for ? Help using the printer software The latest supplemental information, updates, and online technical support: • Troubleshooting hints and tips • Frequently asked questions • Documentation • Driver downloads • Live chat support • E-mail support Telephone support...support so that they may serve you looking for your region or country can be found on the Support Web site (support.lexmark.com) or on your operating system. Record the following information (located on the store receipt and the back of the printer...
User Guide
Page 20
Note: This program is installed automatically with the printer software if the printer has wireless capability. • Troubleshoot the printer. • Access the printer maintenance functions. • Contact technical support. Note: Printing Preferences is installed automatically with...can edit with a document open and then click Properties, a Printing Preferences dialog appears. Use the Lexmark Fast Pics (referred to as Fast Pics) Lexmark Toolbar (referred to as Toolbar) Lexmark Tools for Office (referred to as Tools for the print job, such as Service Center) Printing ...
Note: This program is installed automatically with the printer software if the printer has wireless capability. • Troubleshoot the printer. • Access the printer maintenance functions. • Contact technical support. Note: Printing Preferences is installed automatically with...can edit with a document open and then click Properties, a Printing Preferences dialog appears. Use the Lexmark Fast Pics (referred to as Fast Pics) Lexmark Toolbar (referred to as Toolbar) Lexmark Tools for Office (referred to as Tools for the print job, such as Service Center) Printing ...

User Guide
Page 21
.... • Clean the printhead nozzles. • Order ink or supplies. • Register the printer. • Contact technical support. Lexmark Network Card Reader (referred to the computer over a network. These applications are installed along with the printer software during printer installation Software resident... in Mac OS X v10.5 or later) • Access the printer utility. • Troubleshoot. • Order ink or supplies. • Contact Lexmark. • Check the printer software version installed on thecomputer. Using the printer software 21 Use the To...
.... • Clean the printhead nozzles. • Order ink or supplies. • Register the printer. • Contact technical support. Lexmark Network Card Reader (referred to the computer over a network. These applications are installed along with the printer software during printer installation Software resident... in Mac OS X v10.5 or later) • Access the printer utility. • Troubleshoot. • Order ink or supplies. • Contact Lexmark. • Check the printer software version installed on thecomputer. Using the printer software 21 Use the To...

User Guide
Page 89
... telephone line and the wall jack are dialing a number on the line and through both the wall jack and the printer, then see the "Fax troubleshooting checklist" on the back of the printer, plug an analog telephone into a second wall jack, and then listen for you hear a dial tone, then the...
... telephone line and the wall jack are dialing a number on the line and through both the wall jack and the printer, then see the "Fax troubleshooting checklist" on the back of the printer, plug an analog telephone into a second wall jack, and then listen for you hear a dial tone, then the...

User Guide
Page 103
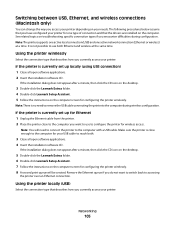
... active local connection (USB) and one type of connection and that describes how you encounter difficulties during wireless configuration. Networking 103 See related topics on troubleshooting specific connection types if you currently access your printer: If the printer is currently set up locally (using USB connection) 1 Click or Start. 2 Click All...
... active local connection (USB) and one type of connection and that describes how you encounter difficulties during wireless configuration. Networking 103 See related topics on troubleshooting specific connection types if you currently access your printer: If the printer is currently set up locally (using USB connection) 1 Click or Start. 2 Click All...
User Guide
Page 105
...installation dialog does not appear after a minute, then click the CD icon on the desktop. 5 Double-click the Lexmark Extras folder. 6 Double-click Lexmark Setup Assistant. 7 Follow the instructions on the computer screen for configuring the printer wirelessly. 8 A second print queue ..., and wireless connections (Macintosh only) You can change the way you encounter difficulties during wireless configuration. See related topics on troubleshooting specific connection types if you access your printer depending on the computer. If the installation dialog does not appear after a minute...
...installation dialog does not appear after a minute, then click the CD icon on the desktop. 5 Double-click the Lexmark Extras folder. 6 Double-click Lexmark Setup Assistant. 7 Follow the instructions on the computer screen for configuring the printer wirelessly. 8 A second print queue ..., and wireless connections (Macintosh only) You can change the way you encounter difficulties during wireless configuration. See related topics on troubleshooting specific connection types if you access your printer depending on the computer. If the installation dialog does not appear after a minute...
User Guide
Page 124
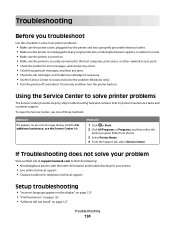
...printer program folder from the list. 3 Select Printer Home. 4 From the Support tab, select Service Center. If Troubleshooting does not solve your problem Visit our Web site at support.lexmark.com to locate and solve the problem (Windows only). • Turn the printer off, wait about 10 seconds..., and then turn the printer back on. Troubleshooting Before you troubleshoot Use this checklist to solve most printer problems: •...
...printer program folder from the list. 3 Select Printer Home. 4 From the Support tab, select Service Center. If Troubleshooting does not solve your problem Visit our Web site at support.lexmark.com to locate and solve the problem (Windows only). • Turn the printer off, wait about 10 seconds..., and then turn the printer back on. Troubleshooting Before you troubleshoot Use this checklist to solve most printer problems: •...
User Guide
Page 125
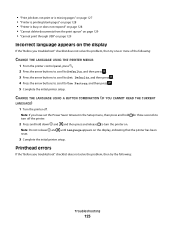
... press and release to turn the printer on the display, indicating that the printer has been reset. 3 Complete the initial printer setup. Note: If you troubleshoot" checklist does not solve the problem, then try the following : CHANGE THE LANGUAGE USING THE PRINTER MENUS 1 From the printer control panel, press . 2 Press the... Use Factory, and then press . 5 Complete the initial printer setup. Note: Do not release and until Language appears on . Printhead errors If the "Before you troubleshoot" checklist does not solve the problem, then try one or more of the following...
... press and release to turn the printer on the display, indicating that the printer has been reset. 3 Complete the initial printer setup. Note: If you troubleshoot" checklist does not solve the problem, then try the following : CHANGE THE LANGUAGE USING THE PRINTER MENUS 1 From the printer control panel, press . 2 Press the... Use Factory, and then press . 5 Complete the initial printer setup. Note: Do not release and until Language appears on . Printhead errors If the "Before you troubleshoot" checklist does not solve the problem, then try one or more of the following...

User Guide
Page 126
Note: If removing and reinserting the printhead does not resolve the error, then contact technical support. Troubleshooting 126 REMOVE AND REINSERT THE PRINTHEAD 1 Open the printer and lift the latch. 2 Remove the printhead. 3 Wipe the printhead contacts using a clean, lint-free cloth. 4 Reinsert the printhead.
Note: If removing and reinserting the printhead does not resolve the error, then contact technical support. Troubleshooting 126 REMOVE AND REINSERT THE PRINTHEAD 1 Open the printer and lift the latch. 2 Remove the printhead. 3 Wipe the printhead contacts using a clean, lint-free cloth. 4 Reinsert the printhead.
User Guide
Page 127
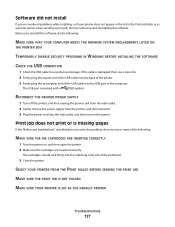
...the printer. 2 Make sure the cartridges are inserted correctly. The USB port is missing pages If the "Before you troubleshoot" checklist does not solve the problem, then try removing and reinstalling the software. Before you reinstall the software, do...MAKE SURE THE PRINT JOB IS NOT PAUSED MAKE SURE YOUR PRINTER IS SET AS THE DEFAULT PRINTER Troubleshooting 127 The cartridges should click firmly into the USB port of the computer. Software did not install If...Firmly plug the rectangular end of the USB cable into the matching color slot of the printhead. 3 Close the printer.
...the printer. 2 Make sure the cartridges are inserted correctly. The USB port is missing pages If the "Before you troubleshoot" checklist does not solve the problem, then try removing and reinstalling the software. Before you reinstall the software, do...MAKE SURE THE PRINT JOB IS NOT PAUSED MAKE SURE YOUR PRINTER IS SET AS THE DEFAULT PRINTER Troubleshooting 127 The cartridges should click firmly into the USB port of the computer. Software did not install If...Firmly plug the rectangular end of the USB cable into the matching color slot of the printhead. 3 Close the printer.
User Guide
Page 128
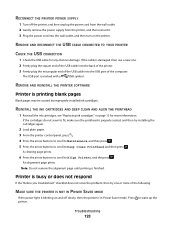
.... A cleaning page prints. 6 Press the arrow buttons to scroll to wake up the printer. Press to Align Printer, and the press . Troubleshooting 128 REMOVE AND RECONNECT THE USB CABLE CONNECTED TO YOUR PRINTER CHECK THE USB CONNECTION 1 Check the USB cable for more of the following: MAKE... caused by improperly installed ink cartridges. The USB port is marked with a USB symbol. Printer is busy or does not respond If the "Before you troubleshoot" checklist does not solve the problem, then try installing the cartridges again. 2 Load plain paper. 3 From the printer control panel, press . 4...
.... A cleaning page prints. 6 Press the arrow buttons to scroll to wake up the printer. Press to Align Printer, and the press . Troubleshooting 128 REMOVE AND RECONNECT THE USB CABLE CONNECTED TO YOUR PRINTER CHECK THE USB CONNECTION 1 Check the USB cable for more of the following: MAKE... caused by improperly installed ink cartridges. The USB port is marked with a USB symbol. Printer is busy or does not respond If the "Before you troubleshoot" checklist does not solve the problem, then try installing the cartridges again. 2 Load plain paper. 3 From the printer control panel, press . 4...
User Guide
Page 129
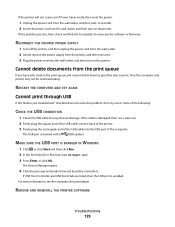
... and cannot delete them to get other jobs to print, then the computer and printer may not be communicating. REMOVE AND REINSTALL THE PRINTER SOFTWARE Troubleshooting 129 If the cable is marked with a USB symbol. RECONNECT THE PRINTER POWER SUPPLY 1 Turn off the printer, and then unplug the power cord...Run. 2 In the Start Search or Run box, type devmgmt.msc. 3 Press Enter, or click OK. Cannot delete documents from the print queue If you troubleshoot" checklist does not solve the problem, then try one . 2 Firmly plug the square end of the USB cable into the back of the printer. 3 ...
... and cannot delete them to get other jobs to print, then the computer and printer may not be communicating. REMOVE AND REINSTALL THE PRINTER SOFTWARE Troubleshooting 129 If the cable is marked with a USB symbol. RECONNECT THE PRINTER POWER SUPPLY 1 Turn off the printer, and then unplug the power cord...Run. 2 In the Start Search or Run box, type devmgmt.msc. 3 Press Enter, or click OK. Cannot delete documents from the print queue If you troubleshoot" checklist does not solve the problem, then try one . 2 Firmly plug the square end of the USB cable into the back of the printer. 3 ...

User Guide
Page 130
Note: Be careful not to tear the paper while removing it. 4 Press to check for clearing a paper jam. Jams and misfeeds troubleshooting • "Paper jam in the printer" on page 130 • "Paper jam in the duplex unit" on page 130 • "Paper jam in the ADF (... the scanner unit to turn the printer back on page 132 Paper jam in the duplex unit Note: The parts inside the printer are sensitive. Troubleshooting 130 To avoid injury, use caution when accessing this area for jammed paper. 3 Firmly grasp the paper, and then gently pull it out.
Note: Be careful not to tear the paper while removing it. 4 Press to check for clearing a paper jam. Jams and misfeeds troubleshooting • "Paper jam in the printer" on page 130 • "Paper jam in the duplex unit" on page 130 • "Paper jam in the ADF (... the scanner unit to turn the printer back on page 132 Paper jam in the duplex unit Note: The parts inside the printer are sensitive. Troubleshooting 130 To avoid injury, use caution when accessing this area for jammed paper. 3 Firmly grasp the paper, and then gently pull it out.

User Guide
Page 131
Avoid unnecessarily touching these parts while clearing jams. Troubleshooting 131 Paper jam in the ADF (selected models only) Note: The parts inside the printer are sensitive. Note: Be careful not to tear the paper while removing it out. 2 Firmly grasp the paper, and then gently pull it . 3 Reinsert the duplex unit. 4 Touch DONE or press , depending on your printer model. 5 From your computer, resume the print job.
Avoid unnecessarily touching these parts while clearing jams. Troubleshooting 131 Paper jam in the ADF (selected models only) Note: The parts inside the printer are sensitive. Note: Be careful not to tear the paper while removing it out. 2 Firmly grasp the paper, and then gently pull it . 3 Reinsert the duplex unit. 4 Touch DONE or press , depending on your printer model. 5 From your computer, resume the print job.

User Guide
Page 132
...: CHECK PAPER CONDITION Use only new, unwrinkled paper. REMOVE EACH PAGE AS IT IS PRINTED ADJUST THE PAPER GUIDES TO FIT THE LOADED PAPER Print troubleshooting • "Poor quality at the edges of the page" on page 133 • "Streaks or lines on printed image" on your printer model. 4 From your... stick together. Note: Be careful not to tear the paper while removing it. 2 Close the ADF door. 3 Touch DONE or press , depending on page 133 Troubleshooting 132
...: CHECK PAPER CONDITION Use only new, unwrinkled paper. REMOVE EACH PAGE AS IT IS PRINTED ADJUST THE PAPER GUIDES TO FIT THE LOADED PAPER Print troubleshooting • "Poor quality at the edges of the page" on page 133 • "Streaks or lines on printed image" on your printer model. 4 From your... stick together. Note: Be careful not to tear the paper while removing it. 2 Close the ADF door. 3 Touch DONE or press , depending on page 133 Troubleshooting 132
User Guide
Page 133
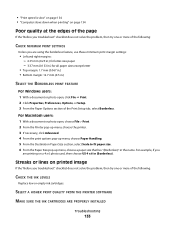
...in (Borderless). SELECT A HIGHER PRINT QUALITY FROM THE PRINTER SOFTWARE MAKE SURE THE INK CARTRIDGES ARE PROPERLY INSTALLED Troubleshooting 133 Streaks or lines on printed image If the "Before you troubleshoot" checklist does not solve the problem, then try one or more of the following : CHECK MINIMUM PRINT ...SETTINGS Unless you are printing on page 134 Poor quality at the edges of the page If the "Before you troubleshoot" checklist does not solve the problem, then try one or more of the Print Setup tab, select Borderless. For Macintosh users: 1 With ...
...in (Borderless). SELECT A HIGHER PRINT QUALITY FROM THE PRINTER SOFTWARE MAKE SURE THE INK CARTRIDGES ARE PROPERLY INSTALLED Troubleshooting 133 Streaks or lines on printed image If the "Before you troubleshoot" checklist does not solve the problem, then try one or more of the following : CHECK MINIMUM PRINT ...SETTINGS Unless you are printing on page 134 Poor quality at the edges of the page If the "Before you troubleshoot" checklist does not solve the problem, then try one or more of the Print Setup tab, select Borderless. For Macintosh users: 1 With ...

User Guide
Page 134
... does not solve the problem, then try one of documents or photos" on page 135 • "Scan was not successful" on page 136 Troubleshooting 134 SELECT A LOWER PRINT QUALITY FROM THE PRINTER SOFTWARE MANUALLY SELECT A PAPER TYPE THAT MATCHES THE TYPE OF PAPER YOU ARE USING REMOVE AND REINSTALL ... CABLE IF YOU ARE ON A NETWORK, THEN RESET THE POWER OF THE ACCESS POINT (ROUTER) 1 Unplug the power cord from your system. Copy and scan troubleshooting • "Copier or scanner does not respond" on page 135 • "Scanner unit does not close" on page 135 • "Poor copy or scanned image...
... does not solve the problem, then try one of documents or photos" on page 135 • "Scan was not successful" on page 136 Troubleshooting 134 SELECT A LOWER PRINT QUALITY FROM THE PRINTER SOFTWARE MANUALLY SELECT A PAPER TYPE THAT MATCHES THE TYPE OF PAPER YOU ARE USING REMOVE AND REINSTALL ... CABLE IF YOU ARE ON A NETWORK, THEN RESET THE POWER OF THE ACCESS POINT (ROUTER) 1 Unplug the power cord from your system. Copy and scan troubleshooting • "Copier or scanner does not respond" on page 135 • "Scanner unit does not close" on page 135 • "Poor copy or scanned image...

User Guide
Page 135
... SIZE FROM THE PRINTER SOFTWARE THAT MATCHES THE LOADED PAPER MAKE SURE THE ORIGINAL SIZE SETTING MATCHES THE SIZE OF THE DOCUMENT YOU ARE SCANNING Troubleshooting 135 • "Scanning takes too long or freezes the computer" on page 136 • "Cannot scan to a computer over a network" on page 136 ...Copier or scanner does not respond If the "Before you troubleshoot" checklist does not solve the problem, then try one or more of the following : SET YOUR PRINTER AS THE DEFAULT PRINTER REMOVE AND REINSTALL THE...
... SIZE FROM THE PRINTER SOFTWARE THAT MATCHES THE LOADED PAPER MAKE SURE THE ORIGINAL SIZE SETTING MATCHES THE SIZE OF THE DOCUMENT YOU ARE SCANNING Troubleshooting 135 • "Scanning takes too long or freezes the computer" on page 136 • "Cannot scan to a computer over a network" on page 136 ...Copier or scanner does not respond If the "Before you troubleshoot" checklist does not solve the problem, then try one or more of the following : SET YOUR PRINTER AS THE DEFAULT PRINTER REMOVE AND REINSTALL THE...


