

Service Manual
Page 4
... 4-6 Cover open sensor 4-8 Door mount removal 4-9 Duplex removal 4-11 Duplex/main motor gear drive interface removal 4-13 Fan removal 4-16 Front access door removal 4-17 Fuser removal 4-20 Left side cover removal 4-23 Lower front cover removal 4-25 LVPS/HVPS removal 4-27 Main motor gear drive removal 4-30 Manual feed clutch... 4-34 Media ACM ASM feeder removal 4-37 Media feed clutch with cable removal 4-40 Media manual input sensor 4-42 Multipurpose feeder (MPF) removal 4-45 iv Lexmark™ E360d, E360dn
... 4-6 Cover open sensor 4-8 Door mount removal 4-9 Duplex removal 4-11 Duplex/main motor gear drive interface removal 4-13 Fan removal 4-16 Front access door removal 4-17 Fuser removal 4-20 Left side cover removal 4-23 Lower front cover removal 4-25 LVPS/HVPS removal 4-27 Main motor gear drive removal 4-30 Manual feed clutch... 4-34 Media ACM ASM feeder removal 4-37 Media feed clutch with cable removal 4-40 Media manual input sensor 4-42 Multipurpose feeder (MPF) removal 4-45 iv Lexmark™ E360d, E360dn
Service Manual
Page 34
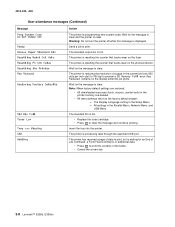
...the Parallel Menu, Network Menu, and USB Menu The standard bin is reducing the resolution of the buffer. • Cancel the current job. 2-8 Lexmark™ E360d, E360dn Warning: Do not turn the printer off while this message is processing data through the specified USB port. Send a job to clear the message and... wear on the display while the job prints. Wait for the message to reset. The printer is resetting the counter that tracks wear on the fuser. All settings in the current job from 600 dots per inch (dpi) to 300 dpi to the factory default except: - The printer is ...
...the Parallel Menu, Network Menu, and USB Menu The standard bin is reducing the resolution of the buffer. • Cancel the current job. 2-8 Lexmark™ E360d, E360dn Warning: Do not turn the printer off while this message is processing data through the specified USB port. Send a job to clear the message and... wear on the display while the job prints. Wait for the message to reset. The printer is resetting the counter that tracks wear on the fuser. All settings in the current job from 600 dots per inch (dpi) to 300 dpi to the factory default except: - The printer is ...

Service Manual
Page 38
...at the exit sensor. 202.02 Exit sensor never broke from sheet ahead of page heading toward the exit sensor. See "Fuser removal" on page 4-48. 2-12 Lexmark™ E360d, E360dn While feeding along the media, and immediately after it was detected during warm-up ) 202.25 Exit sensor never broke ...from the other parts. 202.01 Exit sensor never broke on page 4-20. 201.27 Page at the fuser, rear door, exit guide, ...
...at the exit sensor. 202.02 Exit sensor never broke from sheet ahead of page heading toward the exit sensor. See "Fuser removal" on page 4-48. 2-12 Lexmark™ E360d, E360dn While feeding along the media, and immediately after it was detected during warm-up ) 202.25 Exit sensor never broke ...from the other parts. 202.01 Exit sensor never broke on page 4-20. 201.27 Page at the fuser, rear door, exit guide, ...

Service Manual
Page 42
...check failure. This applies to the fuser and belt fusers. This applies to the fuser and belt fusers. The ADC failed to the fuser and belt fusers. Possible noisy thermistor signal. See "Cooling fan service check" on page 2-37. 2-16 Lexmark™ E360d, E360dn Main fan capture data is invalid, ...and speed control is at maximum in time (new enhanced control). If the error persists, then replace the toner level sensor. See "Fuser service check" hot roll lamp detection. Open ...
...check failure. This applies to the fuser and belt fusers. This applies to the fuser and belt fusers. The ADC failed to the fuser and belt fusers. Possible noisy thermistor signal. See "Cooling fan service check" on page 2-37. 2-16 Lexmark™ E360d, E360dn Main fan capture data is invalid, ...and speed control is at maximum in time (new enhanced control). If the error persists, then replace the toner level sensor. See "Fuser service check" hot roll lamp detection. Open ...

Service Manual
Page 44
...boot code Failure to update the firmware, or replace the controller board. See "Operator panel service check" on page 2-22. 2-18 Lexmark™ E360d, E360dn See "Controller board service check" on page 2-22. 952.xx A recoverable MVRAM Cyclic Redundancy Check error Performing POR will clear this... an uncorrectible multi-bit failure. Install a new controller bored or operator panel. See "Main motor service check" on belt fuser model Controller board and operator panel service errors 948.xx 949.xx Failed engine board Replace the controller board. See "LVPS/HVPS...
...boot code Failure to update the firmware, or replace the controller board. See "Operator panel service check" on page 2-22. 2-18 Lexmark™ E360d, E360dn See "Controller board service check" on page 2-22. 952.xx A recoverable MVRAM Cyclic Redundancy Check error Performing POR will clear this... an uncorrectible multi-bit failure. Install a new controller bored or operator panel. See "Main motor service check" on belt fuser model Controller board and operator panel service errors 948.xx 949.xx Failed engine board Replace the controller board. See "LVPS/HVPS...

Service Manual
Page 46
...on page 2-27. See "Fuser service check" on page 2-27. Main motor does not come on . Note: Investigate any displayed codes before proceeding with these symptoms. For example, a missing toner cartridge will prevent POST from completing. 2-20 Lexmark™ E360d, E360dn The specified device has detected ...an equipment check in the specified device, but the LCD does not come on . Symptom tables POST symptom table Symptom The main motor, cooling fan, and fuser do not come on . Fan does...
...on page 2-27. See "Fuser service check" on page 2-27. Main motor does not come on . Note: Investigate any displayed codes before proceeding with these symptoms. For example, a missing toner cartridge will prevent POST from completing. 2-20 Lexmark™ E360d, E360dn The specified device has detected ...an equipment check in the specified device, but the LCD does not come on . Symptom tables POST symptom table Symptom The main motor, cooling fan, and fuser do not come on . Fan does...

Service Manual
Page 48
... the operator panel and controller board at the same time. Turn the printer off before plugging or unplugging any connectors. 2-22 Lexmark™ E360d, E360dn If the cable is powered and good. 5. Settings are lost when both the cable and the card connector are not correct on...checks Service checks which identifies the output voltages and grounds for a good controller board. Power to display lights or activate the drive motor, fuser, or fan, then check the following order: 1. Disconnect the LVPS/HVPS cable from the other conductors of the manual which involve measuring...
... the operator panel and controller board at the same time. Turn the printer off before plugging or unplugging any connectors. 2-22 Lexmark™ E360d, E360dn If the cable is powered and good. 5. Settings are lost when both the cable and the card connector are not correct on...checks Service checks which identifies the output voltages and grounds for a good controller board. Power to display lights or activate the drive motor, fuser, or fan, then check the following order: 1. Disconnect the LVPS/HVPS cable from the other conductors of the manual which involve measuring...

Service Manual
Page 58
...damage from finger oils or hand lotion. Make sure recommended media is being used . Check the media settings in the printer driver. 2-32 Lexmark™ E360d, E360dn Place a sheet of damage, or fatigue. Variation in the left and right transfer roll bearings. Note: Do not touch the transfer roll .... Inspect the transfer roll for more information. See"LVPS/HVPS service check" on page 2-25 for signs of image FRU Fuser Media (not a FRU) Action The fuser may not be operating at its ends. Check the media settings in the printer driver. If toner cartridge is not blocked....
...damage from finger oils or hand lotion. Make sure recommended media is being used . Check the media settings in the printer driver. 2-32 Lexmark™ E360d, E360dn Place a sheet of damage, or fatigue. Variation in the left and right transfer roll bearings. Note: Do not touch the transfer roll .... Inspect the transfer roll for more information. See"LVPS/HVPS service check" on page 2-25 for signs of image FRU Fuser Media (not a FRU) Action The fuser may not be operating at its ends. Check the media settings in the printer driver. If toner cartridge is not blocked....

Service Manual
Page 60
...may be getting low on back of the page. Check the paper path around the fuser entry. Vertical white lines may be defective. Replace the PC kit. 2-34 Lexmark™ E360d, E360dn Blurred characters Blurred images, including characters, are parallel and match the two intended ghost ...images, then the Form Type may be defective. Inspect the fuser at its entry for debris. See "Toner on toner:...
...may be getting low on back of the page. Check the paper path around the fuser entry. Vertical white lines may be defective. Replace the PC kit. 2-34 Lexmark™ E360d, E360dn Blurred characters Blurred images, including characters, are parallel and match the two intended ghost ...images, then the Form Type may be defective. Inspect the fuser at its entry for debris. See "Toner on toner:...

Service Manual
Page 92
4513-420, -430 8. Remove the door mounts. 4-10 Lexmark™ E360d, E360dn C 9. Disconnect the fuser link (C). Remove the three screws (D) from the left side of the printer. 10.
4513-420, -430 8. Remove the door mounts. 4-10 Lexmark™ E360d, E360dn C 9. Disconnect the fuser link (C). Remove the three screws (D) from the left side of the printer. 10.

Service Manual
Page 100
Disconnect the fuser link (A) from the lower front cover. 7. A 4-18 Lexmark™ E360d, E360dn 4513-420, -430 6. Disconnect the MPF from the front access door.
Disconnect the fuser link (A) from the lower front cover. 7. A 4-18 Lexmark™ E360d, E360dn 4513-420, -430 6. Disconnect the MPF from the front access door.

Service Manual
Page 102
Remove the two screws (A). 3. See "Rear exit guide assembly with sensor and reversing solenoid removal" on the cable connector cover (B), and remove. 4-20 Lexmark™ E360d, E360dn Partially pull the fuser forward for better access. 4. 4513-420, -430 Fuser removal 1. Push in on page 4-56. 2. Remove the rear exit guide.
Remove the two screws (A). 3. See "Rear exit guide assembly with sensor and reversing solenoid removal" on the cable connector cover (B), and remove. 4-20 Lexmark™ E360d, E360dn Partially pull the fuser forward for better access. 4. 4513-420, -430 Fuser removal 1. Push in on page 4-56. 2. Remove the rear exit guide.

Service Manual
Page 104
Remove the fuser. Note: • Be careful to not damage the gears during the fuser installation. • Be sure to reinstall the AC cable during the fuser installation. 4-22 Lexmark™ E360d, E360dn E 8. Disconnect the exit sensor cable (E) from the controller board. 4513-420, -430 7.
Remove the fuser. Note: • Be careful to not damage the gears during the fuser installation. • Be sure to reinstall the AC cable during the fuser installation. 4-22 Lexmark™ E360d, E360dn E 8. Disconnect the exit sensor cable (E) from the controller board. 4513-420, -430 7.

Service Manual
Page 112
Disconnect the fuser link (A) from the main motor gear drive. Remove the four screws (B) from the front access door. A 3. B 4-30 Lexmark™ E360d, E360dn See "Left side cover removal" on its right side. Note: Be careful to not mar the finish of the printer. 4. Remove the left side cover. Place the printer on page 4-23. 2. 4513-420, -430 Main motor gear drive removal 1.
Disconnect the fuser link (A) from the main motor gear drive. Remove the four screws (B) from the front access door. A 3. B 4-30 Lexmark™ E360d, E360dn See "Left side cover removal" on its right side. Note: Be careful to not mar the finish of the printer. 4. Remove the left side cover. Place the printer on page 4-23. 2. 4513-420, -430 Main motor gear drive removal 1.

Service Manual
Page 114
Remove the left side cover. Place the printer on page 4-23. 2. B 5. 4513-420, -430 Manual feed clutch removal 1. Note: Be careful to access the manual feed solenoid. 4-32 Lexmark™ E360d, E360dn Remove the four screws (B) from the main motor gear drive. Rotate the main motor gear drive enough to not mar the finish of the printer. 4. See "Left side cover removal" on its right side. A 3. Open the front access door, and disconnect the fuser link (A).
Remove the left side cover. Place the printer on page 4-23. 2. B 5. 4513-420, -430 Manual feed clutch removal 1. Note: Be careful to access the manual feed solenoid. 4-32 Lexmark™ E360d, E360dn Remove the four screws (B) from the main motor gear drive. Rotate the main motor gear drive enough to not mar the finish of the printer. 4. See "Left side cover removal" on its right side. A 3. Open the front access door, and disconnect the fuser link (A).

Service Manual
Page 159
... 40X5360 40X5392 40X5385 40X5347 40X5349 40X5361 40X5362 40X5366 40X5369 40X5371 40X5370 40X5387 Units/ mach Units/ FRU Description 1 LCD operator panel assembly, E360d/E360dn 1 LCD operator panel assembly, E360d/E360dn DBCS 1 Fuser assembly, 115 V 1 Fuser assembly, 230 V 1 Fuser assembly, 100 V 1 1 Duplex and media sensor assembly 1 1 Access door open sensor assembly 1 1 Cooling fan (screws included) 1 1 Toner low sensor 1 1 Controller...
... 40X5360 40X5392 40X5385 40X5347 40X5349 40X5361 40X5362 40X5366 40X5369 40X5371 40X5370 40X5387 Units/ mach Units/ FRU Description 1 LCD operator panel assembly, E360d/E360dn 1 LCD operator panel assembly, E360d/E360dn DBCS 1 Fuser assembly, 115 V 1 Fuser assembly, 230 V 1 Fuser assembly, 100 V 1 1 Duplex and media sensor assembly 1 1 Access door open sensor assembly 1 1 Cooling fan (screws included) 1 1 Toner low sensor 1 1 Controller...

Service Manual
Page 166
... cover interlock switch 2-23 dead machine 2-24 fuser 2-25 LVPS/HVPS 2-25 main motor 2-26 operator panel 2-27 paper feed 2-27 paper jam during POST 2-27 paper never picks 2-28 paper picks but stops 2-27 paper picks sheets 2-28 paper trees, curls 2-29 I-2 Lexmark™ E360d, E360dn parallel port 2-29 print quality 2-30 black...
... cover interlock switch 2-23 dead machine 2-24 fuser 2-25 LVPS/HVPS 2-25 main motor 2-26 operator panel 2-27 paper feed 2-27 paper jam during POST 2-27 paper never picks 2-28 paper picks but stops 2-27 paper picks sheets 2-28 paper trees, curls 2-29 I-2 Lexmark™ E360d, E360dn parallel port 2-29 print quality 2-30 black...

Service Manual
Page 167
..., Canada 7-9 Parallel cable, packaged (3 m) (E460dn only 7-8 USB cable, packaged (2 m 7-8 Tray 2 wear strips (550-sheet tray only 7-3 Fuser assembly, 115 V 7-5 Fuser assembly, 230 V 7-5 Fuser assembly, 100 V 7-5 Controller board, E360d 7-5 Controller board, E360dn 7-5 LCD operator panel assembly, E360d/E360dn 7-5 LCD bezel cover, E360d 7-3 MPF tray assembly 7-7 Nameplate cover 7-3 Access door open sensor assembly 7-5 LVPS/HVPS card assembly, 110 V/100 V 7-5 LVPS...
..., Canada 7-9 Parallel cable, packaged (3 m) (E460dn only 7-8 USB cable, packaged (2 m 7-8 Tray 2 wear strips (550-sheet tray only 7-3 Fuser assembly, 115 V 7-5 Fuser assembly, 230 V 7-5 Fuser assembly, 100 V 7-5 Controller board, E360d 7-5 Controller board, E360dn 7-5 LCD operator panel assembly, E360d/E360dn 7-5 LCD bezel cover, E360d 7-3 MPF tray assembly 7-7 Nameplate cover 7-3 Access door open sensor assembly 7-5 LVPS/HVPS card assembly, 110 V/100 V 7-5 LVPS...


