User's Guide
Page 8
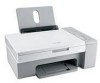
...installed. • Using the software (on Windows operating systems) 1 Click Start Œ Programs or All Programs Œ • Loading paper Lexmark 2500 Series. • Printing 2 Click User's Guide. • Working with photos If the link to the User's Guide is not on your desktop, follow • ... of the User's Guide appears on your desktop, and the User's Guide appears on the screen. 1 From the Finder desktop, double-click the Lexmark You can also find this document on the Lexmark Web site at www.lexmark.com. 2500 Series folder. 2 Double-click the printer Help icon.
...installed. • Using the software (on Windows operating systems) 1 Click Start Œ Programs or All Programs Œ • Loading paper Lexmark 2500 Series. • Printing 2 Click User's Guide. • Working with photos If the link to the User's Guide is not on your desktop, follow • ... of the User's Guide appears on your desktop, and the User's Guide appears on the screen. 1 From the Finder desktop, double-click the Lexmark You can also find this document on the Lexmark Web site at www.lexmark.com. 2500 Series folder. 2 Double-click the printer Help icon.
User's Guide
Page 15
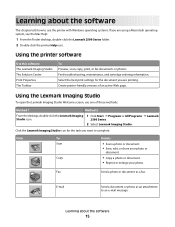
... methods: Method 1 Method 2 From the desktop, double-click the Lexmark Imaging 1 Click Start ΠPrograms or All Programs ΠLexmark Studio icon. 2500 Series. 2 Select Lexmark Imaging Studio. Using the printer software Use this software The Lexmark Imaging Studio The Solution Center Print Properties The Toolbar To Preview, scan, copy, print, or fax documents or photos. Click...
... methods: Method 1 Method 2 From the desktop, double-click the Lexmark Imaging 1 Click Start ΠPrograms or All Programs ΠLexmark Studio icon. 2500 Series. 2 Select Lexmark Imaging Studio. Using the printer software Use this software The Lexmark Imaging Studio The Solution Center Print Properties The Toolbar To Preview, scan, copy, print, or fax documents or photos. Click...
User's Guide
Page 17
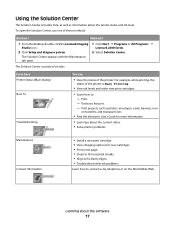
... use one of these methods: Method 1 Method 2 1 From the desktop, double-click the Lexmark Imaging Studio icon. 2 Click Setup and diagnose printer. 1 Click Start Œ Programs or All Programs Œ Lexmark 2500 Series. 2 Select Solution Center. The Solution Center consists of six tabs...; Learn tips about the current status. • Solve printer problems. Maintenance Contact Information • Install a new print cartridge. • View shopping options for new cartridges. • Print a test page. • Clean to fix horizontal streaks. • Align to fix blurry edges. • ...
... use one of these methods: Method 1 Method 2 1 From the desktop, double-click the Lexmark Imaging Studio icon. 2 Click Setup and diagnose printer. 1 Click Start Œ Programs or All Programs Œ Lexmark 2500 Series. 2 Select Solution Center. The Solution Center consists of six tabs...; Learn tips about the current status. • Solve printer problems. Maintenance Contact Information • Install a new print cartridge. • View shopping options for new cartridges. • Print a test page. • Clean to fix horizontal streaks. • Align to fix blurry edges. • ...
User's Guide
Page 33
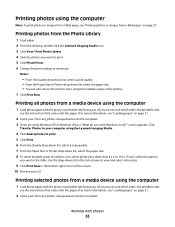
... Photo Library 1 Load paper. 2 From the desktop, double-click the Lexmark Imaging Studio icon. 3 Click View / Print Photo Library. 4 Click the photos you want to print. 5 Click Photo Prints. 6 Change the print settings as necessary. screen appears. Printing photos from a media device using Windows XP or Windows ...Vista, a "What do you want Windows to do?" Printing photos using the Lexmark Imaging Studio. 4 Click Select photos to print. 5 Click Print. 6 From the Quality drop-down list, select a copy quality. 7 From the Paper Size in Printer...
... Photo Library 1 Load paper. 2 From the desktop, double-click the Lexmark Imaging Studio icon. 3 Click View / Print Photo Library. 4 Click the photos you want to print. 5 Click Photo Prints. 6 Change the print settings as necessary. screen appears. Printing photos from a media device using Windows XP or Windows ...Vista, a "What do you want Windows to do?" Printing photos using the Lexmark Imaging Studio. 4 Click Select photos to print. 5 Click Print. 6 From the Quality drop-down list, select a copy quality. 7 From the Paper Size in Printer...
User's Guide
Page 34
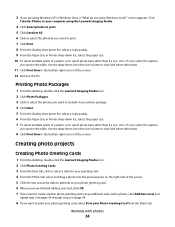
...-down list in the last column to view and select other sizes. 8 Click Print Now in the bottom right corner of the screen. Creating photo projects Creating Photo Greeting Cards 1 From the desktop, double-click the Lexmark Imaging Studio icon. 2 Click Photo Greeting Cards. 3 From the Style tab, ... in the bottom right corner of the screen. 12 Remove the CD. screen appears. Working with photos 34 Printing Photo Packages 1 From the desktop, double-click the Lexmark Imaging Studio icon. 2 Click Photo Packages. 3 Click to select the photos you want to include in your photo package. 4 Click Next. 5...
...-down list in the last column to view and select other sizes. 8 Click Print Now in the bottom right corner of the screen. Creating photo projects Creating Photo Greeting Cards 1 From the desktop, double-click the Lexmark Imaging Studio icon. 2 Click Photo Greeting Cards. 3 From the Style tab, ... in the bottom right corner of the screen. 12 Remove the CD. screen appears. Working with photos 34 Printing Photo Packages 1 From the desktop, double-click the Lexmark Imaging Studio icon. 2 Click Photo Packages. 3 Click to select the photos you want to include in your photo package. 4 Click Next. 5...
User's Guide
Page 35
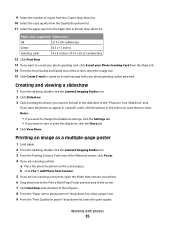
... Your Slideshow" area. Creating and viewing a slideshow 1 From the desktop, double-click the Lexmark Imaging Studio icon. 2 Click Slideshow. 3 Click and drag the photos you want to include in the slideshow to print poster on the scanner glass. 9 Select the number of copies from the Copies...paper size from the Paper Size in Printer drop-down list, select the print quality. Printing an image as a multiple-page poster 1 Load paper. 2 From the desktop, double-click the Lexmark Imaging Studio icon. 3 From the Printing Creative Tasks area of the screen, select the image size. 15 Click ...
... Your Slideshow" area. Creating and viewing a slideshow 1 From the desktop, double-click the Lexmark Imaging Studio icon. 2 Click Slideshow. 3 Click and drag the photos you want to include in the slideshow to print poster on the scanner glass. 9 Select the number of copies from the Copies...paper size from the Paper Size in Printer drop-down list, select the print quality. Printing an image as a multiple-page poster 1 Load paper. 2 From the desktop, double-click the Lexmark Imaging Studio icon. 3 From the Printing Creative Tasks area of the screen, select the image size. 15 Click ...
User's Guide
Page 38
... the document fit the page by clicking the appropriate option. 10 To adjust the Brightness value, use the Brightness slider. 11 To select a custom print size, enter a number from 25 to 400 in the bottom right corner of copies. 7 From the Quality drop-down list, select the copy quality...select the paper size. 9 Select whether you want your document printed in Color, Grayscale, or Black and White by clicking the Fit to a computer, and both the printer and computer are on the scanner glass. 2 From the desktop, double-click the Lexmark Imaging Studio icon. 3 From the left pane of the Welcome...
... the document fit the page by clicking the appropriate option. 10 To adjust the Brightness value, use the Brightness slider. 11 To select a custom print size, enter a number from 25 to 400 in the bottom right corner of copies. 7 From the Quality drop-down list, select the copy quality...select the paper size. 9 Select whether you want your document printed in Color, Grayscale, or Black and White by clicking the Fit to a computer, and both the printer and computer are on the scanner glass. 2 From the desktop, double-click the Lexmark Imaging Studio icon. 3 From the left pane of the Welcome...
User's Guide
Page 39
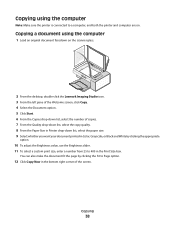
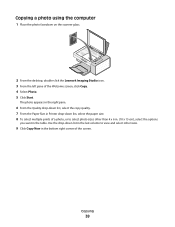
Use the drop-down list, select the paper size. 8 To select multiple prints of a photo, or to view and select other than 4 x 6 in. (10 x 15 cm), select the options you want in the bottom right corner of the ... sizes. 9 Click Copy Now in the table. Copying 39 Copying a photo using the computer 1 Place the photo facedown on the scanner glass. 2 From the desktop, double-click the Lexmark Imaging Studio icon. 3 From the left pane of the screen.
Use the drop-down list, select the paper size. 8 To select multiple prints of a photo, or to view and select other than 4 x 6 in. (10 x 15 cm), select the options you want in the bottom right corner of the ... sizes. 9 Click Copy Now in the table. Copying 39 Copying a photo using the computer 1 Place the photo facedown on the scanner glass. 2 From the desktop, double-click the Lexmark Imaging Studio icon. 3 From the left pane of the screen.
User's Guide
Page 41
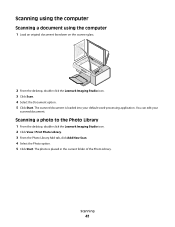
... the computer Scanning a document using the computer 1 Load an original document facedown on the scanner glass. 2 From the desktop, double-click the Lexmark Imaging Studio icon. 3 Click Scan. 4 Select the Document option. 5 Click Start. You can edit your default word-processing application.... The photo is loaded into your scanned document. Scanning a photo to the Photo Library 1 From the desktop, double-click the Lexmark Imaging Studio icon. 2 Click View / Print Photo Library. 3 From the Photo Library Add tab, click Add New Scan. 4 Select the Photo option. 5 Click...
... the computer Scanning a document using the computer 1 Load an original document facedown on the scanner glass. 2 From the desktop, double-click the Lexmark Imaging Studio icon. 3 Click Scan. 4 Select the Document option. 5 Click Start. You can edit your default word-processing application.... The photo is loaded into your scanned document. Scanning a photo to the Photo Library 1 From the desktop, double-click the Lexmark Imaging Studio icon. 2 Click View / Print Photo Library. 3 From the Photo Library Add tab, click Add New Scan. 4 Select the Photo option. 5 Click...

User's Guide
Page 45
... Move the slider to be scanned. scanning Changing the order of programs in the Scan Application list 1 From the desktop, double-click the Lexmark Imaging Studio icon. 2 Click View / Print Photo Library. 3 From the program taskbar at the bottom of the screen, click Other Software. 4 Click Modify Application Order... to text with OCR Select this to move the program higher in the list. 6 Click Close to text. Setting Options Color Depth Select either Color, Grey, or Black and White. to convert your selections permanent by choosing a paper size from the list box, and then...
... Move the slider to be scanned. scanning Changing the order of programs in the Scan Application list 1 From the desktop, double-click the Lexmark Imaging Studio icon. 2 Click View / Print Photo Library. 3 From the program taskbar at the bottom of the screen, click Other Software. 4 Click Modify Application Order... to text with OCR Select this to move the program higher in the list. 6 Click Close to text. Setting Options Color Depth Select either Color, Grey, or Black and White. to convert your selections permanent by choosing a paper size from the list box, and then...
User's Guide
Page 46
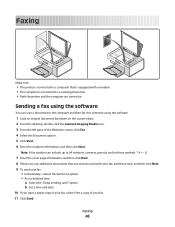
... using the software. 1 Load an original document facedown on . b Set a time and date. 10 If you want a paper copy of your fax, select Print a copy of the Welcome screen, click Fax. 4 Select the Document option. 5 Click Start. 6 Enter the recipient information, and then click Next. Faxing 46... computer is connected to a working phone line. • Both the printer and the computer are turned on the scanner glass. 2 From the desktop, double-click the Lexmark Imaging Studio icon. 3 From the left pane of your fax: • Immediately-Select the Send now option. • At a scheduled time: a...
... using the software. 1 Load an original document facedown on . b Set a time and date. 10 If you want a paper copy of your fax, select Print a copy of the Welcome screen, click Fax. 4 Select the Document option. 5 Click Start. 6 Enter the recipient information, and then click Next. Faxing 46... computer is connected to a working phone line. • Both the printer and the computer are turned on the scanner glass. 2 From the desktop, double-click the Lexmark Imaging Studio icon. 3 From the left pane of your fax: • Immediately-Select the Send now option. • At a scheduled time: a...
User's Guide
Page 47
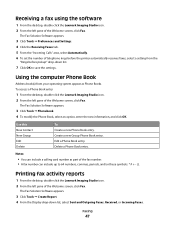
...Report. 4 From the Display drop-down list. 7 Click OK to 64 numbers, commas, periods, and/or these symbols Printing fax activity reports 1 From the desktop, double-click the Lexmark Imaging Studio icon. 2 From the left pane of the Welcome screen, click Fax. Faxing 47 The Fax Solution Software appears...this New Contact New Group Edit Delete To Create a new Phone Book entry. Receiving a fax using the software 1 From the desktop, double-click the Lexmark Imaging Studio icon. 2 From the left pane of telephone rings before pickup" drop-down list, select Sent and Outgoing Faxes, Received, ...
...Report. 4 From the Display drop-down list. 7 Click OK to 64 numbers, commas, periods, and/or these symbols Printing fax activity reports 1 From the desktop, double-click the Lexmark Imaging Studio icon. 2 From the left pane of the Welcome screen, click Fax. Faxing 47 The Fax Solution Software appears...this New Contact New Group Edit Delete To Create a new Phone Book entry. Receiving a fax using the software 1 From the desktop, double-click the Lexmark Imaging Studio icon. 2 From the left pane of telephone rings before pickup" drop-down list, select Sent and Outgoing Faxes, Received, ...

User's Guide
Page 48
... a phone number in the Fax Identifier field and corresponding contact name in the Fax Solution Software. 5 Choose a date range. 6 Click Print. Customizing fax settings Customizing settings using the Fax Solution Software You can block faxes from specific phone numbers: a Click Manage Block List. The...Fax. Tab Modem and Dialing Options • Enter the name of the Welcome screen, click Fax. Blocking junk faxes 1 From the desktop, double-click the Lexmark Imaging Studio icon. 2 From the left pane of the current modem. • Change modem. • Choose whether to save the setting...
... a phone number in the Fax Identifier field and corresponding contact name in the Fax Solution Software. 5 Choose a date range. 6 Click Print. Customizing fax settings Customizing settings using the Fax Solution Software You can block faxes from specific phone numbers: a Click Manage Block List. The...Fax. Tab Modem and Dialing Options • Enter the name of the Welcome screen, click Fax. Blocking junk faxes 1 From the desktop, double-click the Lexmark Imaging Studio icon. 2 From the left pane of the current modem. • Change modem. • Choose whether to save the setting...
User's Guide
Page 59
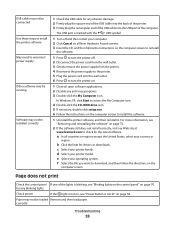
..." on the computer screen. a In all open software applications. 2 Disable any anti-virus programs. 3 Double-click the My Computer icon. b Click the links for any obvious damage. 2 Firmly plug the square end ... country or region. Paper may not be loaded Remove and then load paper. Page does not print Check the control panel If one of the USB cable into the wall outlet. 6 Press to... on page 72. 2 If the software still does not install correctly, visit our Web site at www.lexmark.com to check for any blinking lights Check power If the light is marked with the USB symbol. 1...
..." on the computer screen. a In all open software applications. 2 Disable any anti-virus programs. 3 Double-click the My Computer icon. b Click the links for any obvious damage. 2 Firmly plug the square end ... country or region. Paper may not be loaded Remove and then load paper. Page does not print Check the control panel If one of the USB cable into the wall outlet. 6 Press to... on page 72. 2 If the software still does not install correctly, visit our Web site at www.lexmark.com to check for any blinking lights Check power If the light is marked with the USB symbol. 1...
User's Guide
Page 60
... XP Home: Start Œ Control Panel Œ Printers and Faxes. • In Windows 2000 or Windows Vista: Start Œ Settings Œ Printers. 2 Double-click the name of the page" on hold or paused. e Select your printer model. May need to download, and then follow the directions on . 1 Uninstall...set as the default printer and is not on page 62 Troubleshooting 60 Print troubleshooting • "Improving print quality" on page 61 • "Poor text and graphic quality" on page 61 • "Poor quality at www.lexmark.com to turn the printer on the computer screen. on them 2 Make...
... XP Home: Start Œ Control Panel Œ Printers and Faxes. • In Windows 2000 or Windows Vista: Start Œ Settings Œ Printers. 2 Double-click the name of the page" on hold or paused. e Select your printer model. May need to download, and then follow the directions on . 1 Uninstall...set as the default printer and is not on page 62 Troubleshooting 60 Print troubleshooting • "Improving print quality" on page 61 • "Poor text and graphic quality" on page 61 • "Poor quality at www.lexmark.com to turn the printer on the computer screen. on them 2 Make...
User's Guide
Page 65
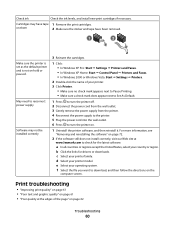
... scan resolution. 6 Click Start. Turn off and then restart your printer. 3 Click Printer. • Make sure no check mark appears next to Pause Printing. • Make sure a check mark does appear next to a lower value Close all programs not being used. 1 Load an original document facedown on ... takes too long or freezes the computer Other software may not be installed correctly" on the scanner glass. 2 From the desktop, double-click the Lexmark Imaging Studio icon. 3 From the left pane of the computer. for any blinking lights Check power If the light is not lit...
... scan resolution. 6 Click Start. Turn off and then restart your printer. 3 Click Printer. • Make sure no check mark appears next to Pause Printing. • Make sure a check mark does appear next to a lower value Close all programs not being used. 1 Load an original document facedown on ... takes too long or freezes the computer Other software may not be installed correctly" on the scanner glass. 2 From the desktop, double-click the Lexmark Imaging Studio icon. 3 From the left pane of the computer. for any blinking lights Check power If the light is not lit...
User's Guide
Page 66
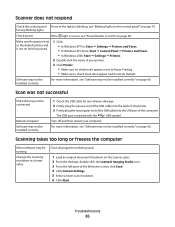
...Poor scanned image quality Check the control panel If one of the lights is loaded facedown on the scanner glass in the lower right corner. print quality Are you selected. Check quality of original If the quality of the Welcome screen, click Scan. 4 Click Custom Settings. 5 Select.... 6 Click Start. Adjust the quality of the scan 1 Load an original document facedown on the scanner glass. 2 From the desktop, double-click the Lexmark Imaging Studio icon. 3 From the left pane of the original document is blinking, see "Power button is loaded facedown on page 70. for...
...Poor scanned image quality Check the control panel If one of the lights is loaded facedown on the scanner glass in the lower right corner. print quality Are you selected. Check quality of original If the quality of the Welcome screen, click Scan. 4 Click Custom Settings. 5 Select.... 6 Click Start. Adjust the quality of the scan 1 Load an original document facedown on the scanner glass. 2 From the desktop, double-click the Lexmark Imaging Studio icon. 3 From the left pane of the original document is blinking, see "Power button is loaded facedown on page 70. for...
User's Guide
Page 69
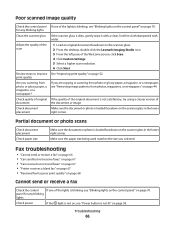
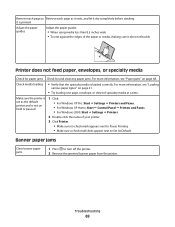
...and Faxes. • For Windows XP Home: Start Œ Control Panel Œ Printers and Faxes. • For Windows 2000: Start Œ Settings Œ Printers. 2 Double-click the name of the paper or media, making sure it dry completely before stacking. Make sure the printer is set as it exits, and...media Check for paper jams Check for and clear any paper jams. For more information, see "Paper jams" on page 68. Troubleshooting 69 it is printed Adjust the paper guides Adjust the paper guides: • When using media less than 8.5 inches wide • To rest against the edges of ...
...and Faxes. • For Windows XP Home: Start Œ Control Panel Œ Printers and Faxes. • For Windows 2000: Start Œ Settings Œ Printers. 2 Double-click the name of the paper or media, making sure it dry completely before stacking. Make sure the printer is set as it exits, and...media Check for paper jams Check for and clear any paper jams. For more information, see "Paper jams" on page 68. Troubleshooting 69 it is printed Adjust the paper guides Adjust the paper guides: • When using media less than 8.5 inches wide • To rest against the edges of ...

Getting Started
Page 6
...140; Programs or All Programs Œ • Loading paper Lexmark 2500 Series. • Printing 2 Click User's Guide. • Working with printing, copying, scanning, faxing, paper jams, and misfeeds 3 Click Yes. Lexmark 2500 Series. 2 Select Lexmark Solution Center. Finding information about the printer 6 Note: If ...necessary, click Start Œ Run, and then type D:\setup, where D is included on the Lexmark Web site at www.lexmark.com. 2500 Series folder. 2 Double-click the printer Help icon. Help Description Where to find The Help gives you instructions for using ...
...140; Programs or All Programs Œ • Loading paper Lexmark 2500 Series. • Printing 2 Click User's Guide. • Working with printing, copying, scanning, faxing, paper jams, and misfeeds 3 Click Yes. Lexmark 2500 Series. 2 Select Lexmark Solution Center. Finding information about the printer 6 Note: If ...necessary, click Start Œ Run, and then type D:\setup, where D is included on the Lexmark Web site at www.lexmark.com. 2500 Series folder. 2 Double-click the printer Help icon. Help Description Where to find The Help gives you instructions for using ...

Getting Started
Page 13
... the Mac Help: 1 From the Finder desktop, double-click the Lexmark 2500 Series folder. 2 Double-click the printer Help icon. Learning about the software 13 Using the printer software Use this software The Lexmark Imaging Studio The Solution Center Print Properties The Toolbar To Preview, scan, copy, print, or fax documents or photos. Find troubleshooting, maintenance...
... the Mac Help: 1 From the Finder desktop, double-click the Lexmark 2500 Series folder. 2 Double-click the printer Help icon. Learning about the software 13 Using the printer software Use this software The Lexmark Imaging Studio The Solution Center Print Properties The Toolbar To Preview, scan, copy, print, or fax documents or photos. Find troubleshooting, maintenance...


