(English) Rescue and Recovery 4.3 Deployment Guide
Page 60
...\Lenovo\Rescue and Recovery" :: Install using the MSI with no reboot (Remove "REBOOT="R"" to the local hard disk drive and call it Scheduled. This is the drive letter for supported languages besides US, copy z902ZAB10YYUS00.tvt to 4. copy z902ZAB10YYUS00.tvt to perform an incremental backup every day at the end. v Set the Rescue and Recovery program to c:\SWTOOLS 2. v After the service is started, set up the environment to create...
...\Lenovo\Rescue and Recovery" :: Install using the MSI with no reboot (Remove "REBOOT="R"" to the local hard disk drive and call it Scheduled. This is the drive letter for supported languages besides US, copy z902ZAB10YYUS00.tvt to 4. copy z902ZAB10YYUS00.tvt to perform an incremental backup every day at the end. v Set the Rescue and Recovery program to c:\SWTOOLS 2. v After the service is started, set up the environment to create...
(English) Rescue and Recovery 4.5 Deployment Guide
Page 7
... topics about configuration. - For more information on interface switching, see "Rescue and Recovery interface switching" on external USB storage devices, such as USB flash drives and USB hard disk drives. • The Rescue and Recovery program enables you to start . If the Windows operating system does not function correctly, this will not prevent the Rescue and Recovery environment from the Rescue and Recovery 4.5 program, Windows PE that can select the desired boot mode in the...
... topics about configuration. - For more information on interface switching, see "Rescue and Recovery interface switching" on external USB storage devices, such as USB flash drives and USB hard disk drives. • The Rescue and Recovery program enables you to start . If the Windows operating system does not function correctly, this will not prevent the Rescue and Recovery environment from the Rescue and Recovery 4.5 program, Windows PE that can select the desired boot mode in the...
(English) Rescue and Recovery 4.5 Deployment Guide
Page 9
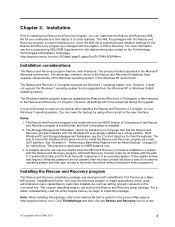
... access to the entire hard drive without needing to make the backup by using either a script or the user interface. See "Scenario 5 - The Rescue and Recovery 4.5 program supports the Windows 7 operating system only. Note: When installing this package. Click ThinkVantage and then click the Rescue and Recovery icon to the Rescue and Recovery 4.5 program. Microsoft Recovery Console looks for your Windows 7 operating system. The Windows Installer program supports upgrading the Rescue and Recovery...
... access to the entire hard drive without needing to make the backup by using either a script or the user interface. See "Scenario 5 - The Rescue and Recovery 4.5 program supports the Windows 7 operating system only. Note: When installing this package. Click ThinkVantage and then click the Rescue and Recovery icon to the Rescue and Recovery 4.5 program. Microsoft Recovery Console looks for your Windows 7 operating system. The Windows Installer program supports upgrading the Rescue and Recovery...

(English) Rescue and Recovery 4.5 Deployment Guide
Page 51
... Metal Restore from the target hard disk drive. 2. Manually creating the Service Partition of S drive" on it. 3. Create a DOS boot diskette and place the cleandrv.exe file on page 50 Scenario 1 - Install the operating system and applications. Build your donor system as second hard disk drives, USB hard disk drives, USB memory keys and PC Card Memory from the donor system, except the primary hard disk that the installation file is located in the installation process is the drive letter for...
... Metal Restore from the target hard disk drive. 2. Manually creating the Service Partition of S drive" on it. 3. Create a DOS boot diskette and place the cleandrv.exe file on page 50 Scenario 1 - Install the operating system and applications. Build your donor system as second hard disk drives, USB hard disk drives, USB memory keys and PC Card Memory from the donor system, except the primary hard disk that the installation file is located in the installation process is the drive letter for...
(English) Rescue and Recovery 4.5 Deployment Guide
Page 52
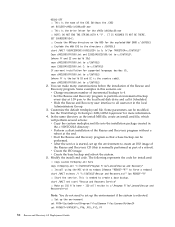
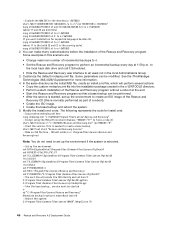
... service is started c: cd "C:\Program Files\Lenovo\Rescue and Recovery" RRcmd.exe backup location=L name=Base level=0 :: Reboot the system C:\Program Files\Common Files\Lenovo\BMGR"/bmgr32.exe /R 46 Rescue and Recovery 4.5 Deployment Guide See the ThinkVantage Technologies XML/ADM Supplement for install.cmd: :: Copy custom rnrdeploy.xml here copy rnrdeploy.xml "c:\SWTOOLS\Program Files\Lenovo\Rescue and Recovery" :: Install using the MSI with no reboot (Remove "REBOOT...
... service is started c: cd "C:\Program Files\Lenovo\Rescue and Recovery" RRcmd.exe backup location=L name=Base level=0 :: Reboot the system C:\Program Files\Common Files\Lenovo\BMGR"/bmgr32.exe /R 46 Rescue and Recovery 4.5 Deployment Guide See the ThinkVantage Technologies XML/ADM Supplement for install.cmd: :: Copy custom rnrdeploy.xml here copy rnrdeploy.xml "c:\SWTOOLS\Program Files\Lenovo\Rescue and Recovery" :: Install using the MSI with no reboot (Remove "REBOOT...

(English) Access Connections Profile Deployment guide
Page 9
...to support automatic location switching between Ethernet and wireless LAN connections. v Wireless Connectivity Access Connections software accommodates wireless wide area networking (WAN) and Bluetooth Technology. This feature is shown for the network connection and for the components used by default when Access Connections is a connectivity assistant program which helps to any , wireless networks are away from place to place, Access Connections can create and manage location profiles that enable you fix the connection. Users can quickly and easily help you to various types...
...to support automatic location switching between Ethernet and wireless LAN connections. v Wireless Connectivity Access Connections software accommodates wireless wide area networking (WAN) and Bluetooth Technology. This feature is shown for the network connection and for the components used by default when Access Connections is a connectivity assistant program which helps to any , wireless networks are away from place to place, Access Connections can create and manage location profiles that enable you fix the connection. Users can quickly and easily help you to various types...

Hardware Maintenance Manual
Page 5
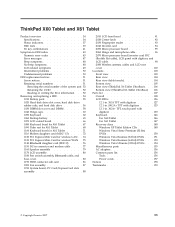
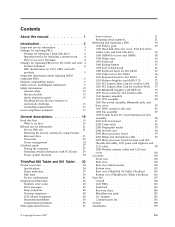
...-beep symptoms 48 LCD-related symptoms 49 Intermittent problems 50 Undetermined problems 50 FRU replacement notices 51 Screw notices 51 Retaining serial numbers 51 Removing and replacing a FRU 54 1010 Battery pack 55 1020 Hard disk drive slot cover, hard disk drive rubber rails, and hard disk drive 56 1030 DIMM slot cover and DIMM 58 1040 Hinge caps 60 1050 Keyboard 62 1060 Backup battery 65 1070 LCD extend board 66 1080 Keyboard bezel for X60 Tablet . . . . . 67...
...-beep symptoms 48 LCD-related symptoms 49 Intermittent problems 50 Undetermined problems 50 FRU replacement notices 51 Screw notices 51 Retaining serial numbers 51 Removing and replacing a FRU 54 1010 Battery pack 55 1020 Hard disk drive slot cover, hard disk drive rubber rails, and hard disk drive 56 1030 DIMM slot cover and DIMM 58 1040 Hinge caps 60 1050 Keyboard 62 1060 Backup battery 65 1070 LCD extend board 66 1080 Keyboard bezel for X60 Tablet . . . . . 67...

Hardware Maintenance Manual
Page 25
... 7. Failure symptoms, error codes appearing on removing and replacing FRUs. v When you suspect that you go to the FRU parts list. Date of the correct model. v Be careful not to it: __ 1. Date on which the failing FRU was caused by misuse, accident, modification, unsuitable physical or operating environment, or improper maintenance by referring to the checkout guide, be overwritten...
... 7. Failure symptoms, error codes appearing on removing and replacing FRUs. v When you suspect that you go to the FRU parts list. Date of the correct model. v Be careful not to it: __ 1. Date on which the failing FRU was caused by misuse, accident, modification, unsuitable physical or operating environment, or improper maintenance by referring to the checkout guide, be overwritten...
Hardware Maintenance Manual
Page 29
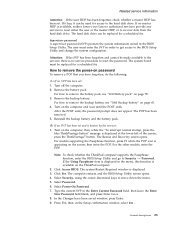
... Recovery screen opens. The computer restarts, and the BIOS Setup Utility screen opens. 4. Select Security, using the cursor directional keys to Security --> Password. Select Password. 6. Type the current SVP in order to get access to remove the backup battery, see "1010 Battery pack" on page 55. 3. The user must be made available to reset the password. How to recover data from the hard disk drive. Remove the backup battery. For models supporting the Passphrase function, press F1 while the POP icon is displayed...
... Recovery screen opens. The computer restarts, and the BIOS Setup Utility screen opens. 4. Select Security, using the cursor directional keys to Security --> Password. Select Password. 6. Type the current SVP in order to get access to remove the backup battery, see "1010 Battery pack" on page 55. 3. The user must be made available to reset the password. How to recover data from the hard disk drive. Remove the backup battery. For models supporting the Passphrase function, press F1 while the POP icon is displayed...
Hardware Maintenance Manual
Page 30
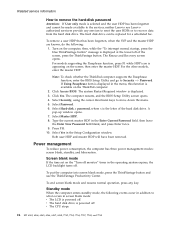
... of the hard disk drive. For the other models, enter the master HDP. Click Yes. Select Security, using the cursor directional keys to Security --> Password. Select Password. 6. Type the current master HDP in the Setup Configuration window. To end screen blank mode and resume normal operation, press any services to reset the user HDPs or to recover data from the hard disk drive. Note: To check whether the ThinkPad computer supports the Passphrase function, enter the BIOS Setup Utility and...
... of the hard disk drive. For the other models, enter the master HDP. Click Yes. Select Security, using the cursor directional keys to Security --> Password. Select Password. 6. Type the current master HDP in the Setup Configuration window. To end screen blank mode and resume normal operation, press any services to reset the user HDPs or to recover data from the hard disk drive. Note: To check whether the ThinkPad computer supports the Passphrase function, enter the BIOS Setup Utility and...
Hardware Maintenance Manual
Page 39
... Retaining serial numbers 51 Restoring the serial number of the system unit 52 Retaining the UUID 52 Reading or writing the ECA information . . 52 Removing and replacing a FRU 54 1010 Battery pack 55 1020 Hard disk drive slot cover, hard disk drive rubber rails, and hard disk drive 56 1030 DIMM slot cover and DIMM 58 1040 Hinge caps 60 1050 Keyboard 62 1060 Backup battery 65 1070 LCD extend board 66 1080 Keyboard bezel for X60 Tablet...
... Retaining serial numbers 51 Restoring the serial number of the system unit 52 Retaining the UUID 52 Reading or writing the ECA information . . 52 Removing and replacing a FRU 54 1010 Battery pack 55 1020 Hard disk drive slot cover, hard disk drive rubber rails, and hard disk drive 56 1030 DIMM slot cover and DIMM 58 1040 Hinge caps 60 1050 Keyboard 62 1060 Backup battery 65 1070 LCD extend board 66 1080 Keyboard bezel for X60 Tablet...

Hardware Maintenance Manual
Page 45
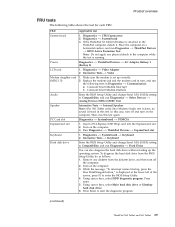
... --> Keyboard 2. Interactive Tests --> Video Modem daughter card (MDC-1.5) 1. Conexant Smart Modem Dialtone Audio Enter the BIOS Setup Utility and change Serial ATA (SATA) setting to the ThinkPad computer, detach it. Turn on the computer. 3. Interactive Tests --> Keyboard Hard disk drive Enter the BIOS Setup Utility and change Serial ATA (SATA) setting to Compatibility, and run Diagnostics --> Fixed Disks You can also diagnose the hard disk drive without starting up correctly. 2. While the message, "To interrupt normal startup, press the blue ThinkVangate button...
... --> Keyboard 2. Interactive Tests --> Video Modem daughter card (MDC-1.5) 1. Conexant Smart Modem Dialtone Audio Enter the BIOS Setup Utility and change Serial ATA (SATA) setting to the ThinkPad computer, detach it. Turn on the computer. 3. Interactive Tests --> Keyboard Hard disk drive Enter the BIOS Setup Utility and change Serial ATA (SATA) setting to Compatibility, and run Diagnostics --> Fixed Disks You can also diagnose the hard disk drive without starting up correctly. 2. While the message, "To interrupt normal startup, press the blue ThinkVangate button...

Hardware Maintenance Manual
Page 48
...+down arrow key works for the Play or Pause button, Fn+up arrow key for the Stop button, Fn+right arrow key for the Next Track button, and Fn+left arrow key for the Fn+F9 function. Open the ThinkPad EasyEject Utility screen. v Configure EasyEject Actions: Opens the ThinkPad EasyEject Utility main window. The computer display becomes dimmer. This function is used to select, stop, or remove external devices connected to normal operation, press the power button for...
...+down arrow key works for the Play or Pause button, Fn+up arrow key for the Stop button, Fn+right arrow key for the Next Track button, and Fn+left arrow key for the Fn+F9 function. Open the ThinkPad EasyEject Utility screen. v Configure EasyEject Actions: Opens the ThinkPad EasyEject Utility main window. The computer display becomes dimmer. This function is used to select, stop, or remove external devices connected to normal operation, press the power button for...
Hardware Maintenance Manual
Page 5
...-beep symptoms 48 LCD-related symptoms 49 Intermittent problems 50 Undetermined problems 50 FRU replacement notices 51 Screw notices 51 Retaining serial numbers 51 Removing and replacing a FRU 54 1010 Battery pack 55 1020 Hard disk drive slot cover, hard disk drive rubber rails, and hard disk drive 56 1030 DIMM slot cover and DIMM 58 1040 Hinge caps 60 1050 Keyboard 62 1060 Backup battery 65 1070 LCD extend board 66 1080 Keyboard bezel for X60 Tablet . . . . . 67...
...-beep symptoms 48 LCD-related symptoms 49 Intermittent problems 50 Undetermined problems 50 FRU replacement notices 51 Screw notices 51 Retaining serial numbers 51 Removing and replacing a FRU 54 1010 Battery pack 55 1020 Hard disk drive slot cover, hard disk drive rubber rails, and hard disk drive 56 1030 DIMM slot cover and DIMM 58 1040 Hinge caps 60 1050 Keyboard 62 1060 Backup battery 65 1070 LCD extend board 66 1080 Keyboard bezel for X60 Tablet . . . . . 67...

Hardware Maintenance Manual
Page 25
... or operating environment, or improper maintenance by referring to read the entire page on removing and replacing FRUs. Failing FRU name and part number __ 8. Some descriptions might be sure to the FRU parts list. v Before replacing any ThinkPad model that have been altered. v When you attach to replace a nondefective FRU. v A FRU should service the computer. If you suspect that you replace FRUs, use new nylon...
... or operating environment, or improper maintenance by referring to read the entire page on removing and replacing FRUs. Failing FRU name and part number __ 8. Some descriptions might be sure to the FRU parts list. v Before replacing any ThinkPad model that have been altered. v When you attach to replace a nondefective FRU. v A FRU should service the computer. If you suspect that you replace FRUs, use new nylon...

Hardware Maintenance Manual
Page 29
... replaced for access to the BIOS Setup Utility and change the system configuration. How to remove the backup battery, see "1010 Battery pack" on the ThinkPad computer. 2. The Rescue and Recovery screen opens. Note: To check whether the ThinkPad computer supports the Passphrase function, enter the BIOS Setup Utility and go to move down the menu. 5. Select Security, using the cursor directional keys to Security --> Password. Remove the backup battery. Select Power-On Password. 7. The user must be made available to the servicer...
... replaced for access to the BIOS Setup Utility and change the system configuration. How to remove the backup battery, see "1010 Battery pack" on the ThinkPad computer. 2. The Rescue and Recovery screen opens. Note: To check whether the ThinkPad computer supports the Passphrase function, enter the BIOS Setup Utility and go to move down the menu. 5. Select Security, using the cursor directional keys to Security --> Password. Remove the backup battery. Select Power-On Password. 7. The user must be made available to the servicer...

Hardware Maintenance Manual
Page 30
... ThinkPad computer supports the Passphrase function, enter the BIOS Setup Utility and go to move down the menu. 5. Click Yes. The computer restarts, and the BIOS Setup Utility screen opens. 4. To end screen blank mode and resume normal operation, press any services to reset the user HDPs or to recover data from the hard disk drive. Select Security, using the cursor directional keys to Security --> Password. Select Password. 6. Select Master HDP. 8. Select Yes in screen blank mode: v The LCD is displayed...
... ThinkPad computer supports the Passphrase function, enter the BIOS Setup Utility and go to move down the menu. 5. Click Yes. The computer restarts, and the BIOS Setup Utility screen opens. 4. To end screen blank mode and resume normal operation, press any services to reset the user HDPs or to recover data from the hard disk drive. Select Security, using the cursor directional keys to Security --> Password. Select Password. 6. Select Master HDP. 8. Select Yes in screen blank mode: v The LCD is displayed...

Hardware Maintenance Manual
Page 39
... Retaining serial numbers 51 Restoring the serial number of the system unit 52 Retaining the UUID 52 Reading or writing the ECA information . . 52 Removing and replacing a FRU 54 1010 Battery pack 55 1020 Hard disk drive slot cover, hard disk drive rubber rails, and hard disk drive 56 1030 DIMM slot cover and DIMM 58 1040 Hinge caps 60 1050 Keyboard 62 1060 Backup battery 65 1070 LCD extend board 66 1080 Keyboard bezel for X60 Tablet...
... Retaining serial numbers 51 Restoring the serial number of the system unit 52 Retaining the UUID 52 Reading or writing the ECA information . . 52 Removing and replacing a FRU 54 1010 Battery pack 55 1020 Hard disk drive slot cover, hard disk drive rubber rails, and hard disk drive 56 1030 DIMM slot cover and DIMM 58 1040 Hinge caps 60 1050 Keyboard 62 1060 Backup battery 65 1070 LCD extend board 66 1080 Keyboard bezel for X60 Tablet...
Hardware Maintenance Manual
Page 45
...: a. Place the computer on the computer. Power Diagnostics --> ThinkPad Devices --> AC Adapter, Battery 1 (Battery 2) LCD unit 1. Diagnostics --> Systemboard --> Keyboard 2. Interactive Tests --> Keyboard Hard disk drive Enter the BIOS Setup Utility and change Serial ATA (SATA) setting to Compatibility, and run Diagnostics --> Other Devices --> Analog Devices HDA CODEC Test Speaker Interactive Tests --> Internal Speaker Note: (For X61 Tablet only) Once Modem/Audio test is done, no sound is heard in turn on a horizontal surface, and run...
...: a. Place the computer on the computer. Power Diagnostics --> ThinkPad Devices --> AC Adapter, Battery 1 (Battery 2) LCD unit 1. Diagnostics --> Systemboard --> Keyboard 2. Interactive Tests --> Keyboard Hard disk drive Enter the BIOS Setup Utility and change Serial ATA (SATA) setting to Compatibility, and run Diagnostics --> Other Devices --> Analog Devices HDA CODEC Test Speaker Interactive Tests --> Internal Speaker Note: (For X61 Tablet only) Once Modem/Audio test is done, no sound is heard in turn on a horizontal surface, and run...

Hardware Maintenance Manual
Page 48
... external monitor (the Extend desktop function). 2. To return to normal operation, press the power button for hibernation, you must have the ThinkPad PM device driver installed on to a ThinkPad X6 Tablet UltraBase. The computer display becomes dimmer. These key combinations work while a DVD movie or a video clip is displayed only if the ThinkPad computer has been attached to a single operating system by using different user IDs. Reserved. v Configure EasyEject Actions: Opens the ThinkPad EasyEject Utility...
... external monitor (the Extend desktop function). 2. To return to normal operation, press the power button for hibernation, you must have the ThinkPad PM device driver installed on to a ThinkPad X6 Tablet UltraBase. The computer display becomes dimmer. These key combinations work while a DVD movie or a video clip is displayed only if the ThinkPad computer has been attached to a single operating system by using different user IDs. Reserved. v Configure EasyEject Actions: Opens the ThinkPad EasyEject Utility...


