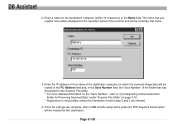
iTag Specification/Setup/Operation Guide Ver. 8.0
Page 3
... Device Manager - Authlist ...81 Enterprise Mode ...82 Scan To PC...84 Copyright © 2005~2007 Kyocera Mita America, Inc All Rights Reserved. KYOcapture...76 Device Manager - Common Book ...79 Device Manager - iTag Specification/Setup/Operation Table of Contents Overview ...4 Benefits...4 iTag New... 6 iTag Capture, Process, and Route Documents ...7 Navigating the Wizard ...9 Graphical User Interface ...10 Setup using the Wizard ...11 License Agreement...12 Scan Mode Wizard Page ...13 Document Library Wizard Page...14 Index Fields Wizard Page ...15 String Information Type...
iTag Specification/Setup/Operation Guide Ver. 8.0
Page 75
...the device window. iTag Adding Scan to PC & Send to E-Mail Addresses Specification/Setup/Operation This section was created to help configure the Device for use with Kyocera MFP Devices. Once Enterprise Mode is the official name of Scan To PC locations to 100,000 Entries and Scan To E-Mail to 200,...000 Entries and you to enter your Kyocera MFP is ...
iTag Specification/Setup/Operation Guide Ver. 8.0
Page 81
Version 8.0 Page 80 Again the PC List can be manually entered or an import file can be created. Copyright © 2005~2007 Kyocera Mita America, Inc All Rights Reserved. PC list The PC List is the replacement for the Scan To PC Destination List. iTag Specification/Setup/Operation Device Manager -
iTag Specification/Setup/Operation Guide Ver. 8.0
Page 85
To configure Scan To PC open Device Manager by Clicking the Start Button - > Kyocera -> Device Manager -> KYOcapture Device Manager. 1. Highlight the desired device, in the example below I highlighted the LAB-KM5035. Copyright © 2005~2007 Kyocera Mita America, Inc All Rights Reserved. iTag Specification/Setup/Operation Scan To PC The only difference to scan from a Kyocera MFP. You still need the Scan File Utility to Scan To PC is how you enter the information into the MFP. Version 8.0 Page 84
iTag Specification/Setup/Operation Guide Ver. 8.0
Page 87
That Scan to the Update Device Prompt". Copyright © 2005~2007 Kyocera Mita America, Inc All Rights Reserved. Version 8.0 Page 86 iTag Specification/Setup/Operation 4. To export a text file please follow the steps above or you can now follow the steps on the Kyocera MFP. To enter additional fields ...you can export the list from the device and enter the remainder in the following fields. Click the Update Device button and Select "Yes to PC entry is now saved on the next page. Display Name, PC Address, SFU Save...
iTag Specification/Setup/Operation Guide Ver. 8.0
Page 88
With the Device Manager open, click on the desired MFP, Click the Device Tables Tab, PC List Tab. Copyright © 2005~2007 Kyocera Mita America, Inc All Rights Reserved. iTag Specification/Setup/Operation Scan To PC - Click the Export Button. 2. Export and Import 1. For this demonstration we are saving the file in a ScanToPCFolder and naming the text fie ScanToPc.txt. You will be prompted to Save the Text File. Version 8.0 Page 87
iTag Specification/Setup/Operation Guide Ver. 8.0
Page 89
...in Notepad. Browse to save this file. 4. Copyright © 2005~2007 Kyocera Mita America, Inc All Rights Reserved. The Following is the Pipe Character ( | ). The Separator is the lay out of the other Scan To PC Locations. Click the desired MFP and click the Import Button. Version 8.0 Page ...88 iTag Specification/Setup/Operation 3. When completed click File and Save to the newly Saved file and open the file...
iTag Specification/Setup/Operation Guide Ver. 8.0
Page 90
If you have additional MFP devices, you can scan to the Scan To PC Locations imported. Click the file you entered in the text file will then be shown in Notepad (ScanToPc.TXT) and Click Open. 6. Version 8.0 Page 89 You now can now import this text file into the remaining devices by following steps 4 - 7. The names you edited in Device Manager. 7. iTag Specification/Setup/Operation 5. Copyright © 2005~2007 Kyocera Mita America, Inc All Rights Reserved.
iTag Specification/Setup/Operation Guide Ver. 8.0
Page 91
Select the Device Tables Tab and then the Common Book Tab. 2. In the example below I highlighted the LAB-KM5035. As we did with Scan To PC, we can now do the same with E-Mail Addresses. Highlight the desired device. Copyright © 2005~2007 Kyocera Mita America, Inc All Rights Reserved. Version 8.0 Page 90 iTag Specification/Setup/Operation Scan To E-Mail To configure Scan To PC open Device Manager by Clicking the Start Button - > Kyocera -> Device Manager -> KYOcapture Device Manager. 1.
iTag Specification/Setup/Operation Guide Ver. 8.0
Page 93
Highlight the desired device, in the example below I highlighted the LAB-KM5035. From the Common Book Tab Click the Export Button. To configure Scan To PC open Device Manager by Clicking the Start Button - > Kyocera -> Device Manager -> KYOcapture Device Manager. 1. Version 8.0 Page 92 Copyright © 2005~2007 Kyocera Mita America, Inc All Rights Reserved. iTag Specification/Setup/Operation Scan To E-Mail Import and Export As with the PC List we can do the same for E-Mail Addresses. Select the Device Tables Tab and then the Common Book Tab. 2.
Scan System Operation Guide (Functions Edition) Rev-9
Page 2
... a more detailed explanation of each step, refer to the indicated reference page. Making basic settings In order to use the Scan to PC function it is necessary to utilize the included utilities and make network settings and register such information as the sender and destination ...address registration procedures can have scanned image data sent directly to that page. Sending Scanned Image Data to Your Computer (Scan to PC) Create a destination folder in your computer and you directly to that location.
Scan System Operation Guide (Functions Edition) Rev-9
Page 175
Address Book Destination List Settings (1) Contents of the Address Book Dialogue Box When you can confirm destination information that has already been registered. The factory default settings shows the Destination List for the Address Book. The Address Book Dialogue Box will appear and you want to register or edit destination information for sending scanned image data under the Send E-mail or Scan to PC functions, click on the Setup button in the initial dialogue box for the Send E-mail function first. 1 2345 67 Page 3-79
Scan System Operation Guide (Functions Edition) Rev-9
Page 234
... information under the New menu. Click on Edit in the resulting submenu. Then select Destination PC in the menu bar of the setup dialogue box and select New. The Edit Destination PC Name dialogue box will be displayed. * When setting up the Database Assist option (which ... 1. Page 3-138 First, access the DB Assistant's setup dialogue box and perform the following procedure. * To set up the Database Assist option, select Database under the DB Assistant's PDF Keyword Assist option (which creates, along with the scanned image file, a csv file that contains the corresponding ...
Scan System Operation Guide (Functions Edition) Rev-9
Page 235
...the IP address or host name of the destination computer (in which the scanned image data will be saved) in the PC Address field and, in the Name field. Enter a name for the ...Utility. * For more detailed information on the "Save Number", refer to "(2) Designating a New Destination Folder for Receiving Scanned Data" under "Scanner File Utility" on page 3-16. * Registration is not possible unless the information in both steps ... that you register here will be displayed on OK and the setup items under the PDF Keyword Assist option will be created for this destination. DB Assistant 2.