User Manual (English)
Page 3
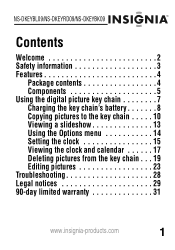
NS-DKEYBL09/NS-DKEYRD09/NS-DKEYBK09 Contents Welcome 2 Safety information 3 Features 4 Package contents 4 Components 5 Using the digital picture key chain 7 Charging the key chain's battery 8 Copying pictures to the key chain . . . . . 10 Viewing a slideshow 13 Using the Options menu 14 Setting the clock 15 Viewing the clock and calendar 17 Deleting pictures from the key chain . . . 19 Editing pictures 23 Troubleshooting 28 Legal notices 29 90-day limited warranty 31 www.insignia-products.com 1
NS-DKEYBL09/NS-DKEYRD09/NS-DKEYBK09 Contents Welcome 2 Safety information 3 Features 4 Package contents 4 Components 5 Using the digital picture key chain 7 Charging the key chain's battery 8 Copying pictures to the key chain . . . . . 10 Viewing a slideshow 13 Using the Options menu 14 Setting the clock 15 Viewing the clock and calendar 17 Deleting pictures from the key chain . . . 19 Editing pictures 23 Troubleshooting 28 Legal notices 29 90-day limited warranty 31 www.insignia-products.com 1
User Manual (English)
Page 4
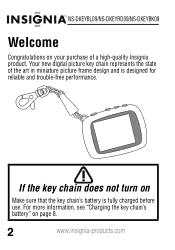
For more information, see "Charging the key chain's battery" on Make sure that the key chain's battery is designed for reliable and trouble-free performance. Your new digital picture key chain represents the state of a high-quality Insignia product. NS-DKEYBL09/NS-DKEYRD09/NS-DKEYBK09 Welcome Congratulations on your purchase of the art in miniature picture frame design and is fully charged before use. If the key chain does not turn on page 8. 2 www.insignia-products.com
For more information, see "Charging the key chain's battery" on Make sure that the key chain's battery is designed for reliable and trouble-free performance. Your new digital picture key chain represents the state of a high-quality Insignia product. NS-DKEYBL09/NS-DKEYRD09/NS-DKEYBK09 Welcome Congratulations on your purchase of the art in miniature picture frame design and is fully charged before use. If the key chain does not turn on page 8. 2 www.insignia-products.com
User Manual (English)
Page 5
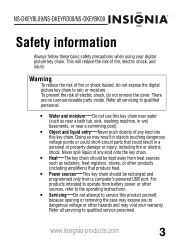
... • Power sources-This key chain should be recharged and programmed only from a computer's powered USB port. Doing so may void your digital picture key chain. www.insignia-products.com 3 For products intended to rain or moisture. Never spill liquid of any kind onto the key chain. • Heat-The key...the operating instructions. • Servicing-Do not attempt to service this key chain. Warning To reduce the risk of fire, electric shock, and injury. NS-DKEYBL09/NS-DKEYRD09/NS-DKEYBK09 Safety information Always follow these basic safety precautions when using your warranty.
... • Power sources-This key chain should be recharged and programmed only from a computer's powered USB port. Doing so may void your digital picture key chain. www.insignia-products.com 3 For products intended to rain or moisture. Never spill liquid of any kind onto the key chain. • Heat-The key...the operating instructions. • Servicing-Do not attempt to service this key chain. Warning To reduce the risk of fire, electric shock, and injury. NS-DKEYBL09/NS-DKEYRD09/NS-DKEYBK09 Safety information Always follow these basic safety precautions when using your warranty.

User Manual (English)
Page 6
NS-DKEYBL09/NS-DKEYRD09/NS-DKEYBK09 Features The digital picture key chain includes these features: • Displays digital ...pictures (JPG/JPEG) in slideshow or static mode • Easy connection to a computer to transfer pictures • Built-in picture management software for your computer • Clock/calendar display mode • Auto power-off to conserve battery charge • Bright TFT LCD... screen • Internal memory for 40 pictures • Key clip with quick release Package contents • Digital picture key chain • User...
NS-DKEYBL09/NS-DKEYRD09/NS-DKEYBK09 Features The digital picture key chain includes these features: • Displays digital ...pictures (JPG/JPEG) in slideshow or static mode • Easy connection to a computer to transfer pictures • Built-in picture management software for your computer • Clock/calendar display mode • Auto power-off to conserve battery charge • Bright TFT LCD... screen • Internal memory for 40 pictures • Key clip with quick release Package contents • Digital picture key chain • User...

User Manual (English)
Page 8
NS-DKEYBL09/NS-DKEYRD09/NS-DKEYBK09 Item Description 1 Mini USB port-Connect to your computer using the mini USB cable to transfer pictures to the key chain and to move the selection right or display the next picture. 6 www.insignia-products.com Press and release to enter the Options menu. 2 Reverse-Press to move the selection left...
NS-DKEYBL09/NS-DKEYRD09/NS-DKEYBK09 Item Description 1 Mini USB port-Connect to your computer using the mini USB cable to transfer pictures to the key chain and to move the selection right or display the next picture. 6 www.insignia-products.com Press and release to enter the Options menu. 2 Reverse-Press to move the selection left...
User Manual (English)
Page 9
NS-DKEYBL09/NS-DKEYRD09/NS-DKEYBK09 Using the digital picture key chain You can use your key chain to: • Play a slideshow of pictures • Display a single picture • Change display settings Before using the key chain for the first time, you should first charge its internal battery. www.insignia-products.com 7 For instructions, see "Charging the key chain's battery" on page 8.
NS-DKEYBL09/NS-DKEYRD09/NS-DKEYBK09 Using the digital picture key chain You can use your key chain to: • Play a slideshow of pictures • Display a single picture • Change display settings Before using the key chain for the first time, you should first charge its internal battery. www.insignia-products.com 7 For instructions, see "Charging the key chain's battery" on page 8.
User Manual (English)
Page 10
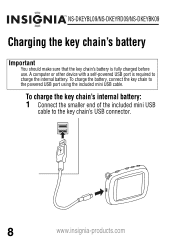
To charge the battery, connect the key chain to charge the internal battery. NS-DKEYBL09/NS-DKEYRD09/NS-DKEYBK09 Charging the key chain's battery Important You should make sure that the key chain's battery is required to the powered USB port using the included mini USB cable. A computer or other device with a self-powered USB port is fully charged before use. To charge the key chain's internal battery: 1 Connect the smaller end of the included mini USB cable to the key chain's USB connector. 8 www.insignia-products.com
To charge the battery, connect the key chain to charge the internal battery. NS-DKEYBL09/NS-DKEYRD09/NS-DKEYBK09 Charging the key chain's battery Important You should make sure that the key chain's battery is required to the powered USB port using the included mini USB cable. A computer or other device with a self-powered USB port is fully charged before use. To charge the key chain's internal battery: 1 Connect the smaller end of the included mini USB cable to the key chain's USB connector. 8 www.insignia-products.com
User Manual (English)
Page 11
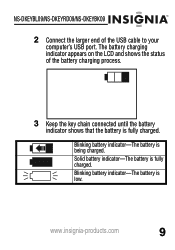
Blinking battery indicator-The battery is fully charged. The battery charging indicator appears on the LCD and shows the status of the USB cable to your computer's USB port. www.insignia-products.com 9 Solid battery indicator-The battery is being charged. NS-DKEYBL09/NS-DKEYRD09/NS-DKEYBK09 2 Connect the larger end of the battery charging process. 3 Keep the key chain connected until the battery indicator shows that the battery is low. Blinking battery indicator-The battery is fully charged.
Blinking battery indicator-The battery is fully charged. The battery charging indicator appears on the LCD and shows the status of the USB cable to your computer's USB port. www.insignia-products.com 9 Solid battery indicator-The battery is being charged. NS-DKEYBL09/NS-DKEYRD09/NS-DKEYBK09 2 Connect the larger end of the battery charging process. 3 Keep the key chain connected until the battery indicator shows that the battery is low. Blinking battery indicator-The battery is fully charged.
User Manual (English)
Page 12
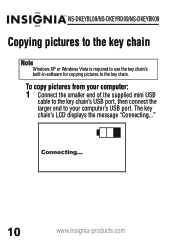
NS-DKEYBL09/NS-DKEYRD09/NS-DKEYBK09 Copying pictures to the key chain Note Windows XP or Windows Vista is required to use the key chain's built-in software for copying pictures to your computer's USB port. The key chain's LCD displays the message "Connecting..." 10 www.insignia-products.com To copy pictures from your computer: 1 Connect the smaller end of the supplied mini USB cable to the key chain's USB port, then connect the larger end to the key chain.
NS-DKEYBL09/NS-DKEYRD09/NS-DKEYBK09 Copying pictures to the key chain Note Windows XP or Windows Vista is required to use the key chain's built-in software for copying pictures to your computer's USB port. The key chain's LCD displays the message "Connecting..." 10 www.insignia-products.com To copy pictures from your computer: 1 Connect the smaller end of the supplied mini USB cable to the key chain's USB port, then connect the larger end to the key chain.
User Manual (English)
Page 13
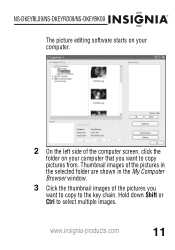
Hold down Shift or Ctrl to the key chain. www.insignia-products.com 11 NS-DKEYBL09/NS-DKEYRD09/NS-DKEYBK09 The picture editing software starts on your computer. 2 On the left side of the pictures you want to copy to select multiple images. Thumbnail images of the pictures in the selected folder are shown in the My Computer Browser window. 3 Click the thumbnail images of the computer screen, click the folder on your computer that you want to copy pictures from.
Hold down Shift or Ctrl to the key chain. www.insignia-products.com 11 NS-DKEYBL09/NS-DKEYRD09/NS-DKEYBK09 The picture editing software starts on your computer. 2 On the left side of the pictures you want to copy to select multiple images. Thumbnail images of the pictures in the selected folder are shown in the My Computer Browser window. 3 Click the thumbnail images of the computer screen, click the folder on your computer that you want to copy pictures from.
User Manual (English)
Page 14
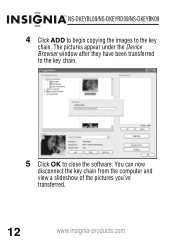
NS-DKEYBL09/NS-DKEYRD09/NS-DKEYBK09 4 Click ADD to begin copying the images to close the software. You can now disconnect the key chain from the computer and view a slideshow of the pictures you've transferred. 12 www.insignia-products.com The pictures appear under the Device Browser window after they have been transferred to the key chain. 5 Click OK to the key chain.
NS-DKEYBL09/NS-DKEYRD09/NS-DKEYBK09 4 Click ADD to begin copying the images to close the software. You can now disconnect the key chain from the computer and view a slideshow of the pictures you've transferred. 12 www.insignia-products.com The pictures appear under the Device Browser window after they have been transferred to the key chain. 5 Click OK to the key chain.
User Manual (English)
Page 15
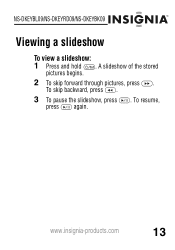
A slideshow of the stored pictures begins. 2 To skip forward through pictures, press . To resume, press again. To skip backward, press . 3 To pause the slideshow, press . www.insignia-products.com 13 NS-DKEYBL09/NS-DKEYRD09/NS-DKEYBK09 Viewing a slideshow To view a slideshow: 1 Press and hold .
A slideshow of the stored pictures begins. 2 To skip forward through pictures, press . To resume, press again. To skip backward, press . 3 To pause the slideshow, press . www.insignia-products.com 13 NS-DKEYBL09/NS-DKEYRD09/NS-DKEYBK09 Viewing a slideshow To view a slideshow: 1 Press and hold .
User Manual (English)
Page 16
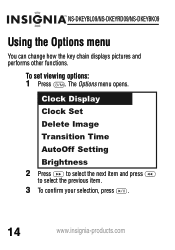
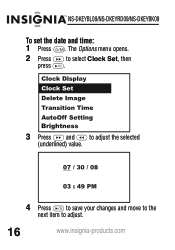
The Options menu opens. To set viewing options: 1 Press . NS-DKEYBL09/NS-DKEYRD09/NS-DKEYBK09 Using the Options menu You can change how the key chain displays pictures and performs other functions. Clock Display Clock Set Delete Image Transition Time AutoOff Setting Brightness 2 Press to select the next item and press to select the previous item. 3 To confirm your selection, press . 14 www.insignia-products.com
The Options menu opens. To set viewing options: 1 Press . NS-DKEYBL09/NS-DKEYRD09/NS-DKEYBK09 Using the Options menu You can change how the key chain displays pictures and performs other functions. Clock Display Clock Set Delete Image Transition Time AutoOff Setting Brightness 2 Press to select the next item and press to select the previous item. 3 To confirm your selection, press . 14 www.insignia-products.com

User Manual (English)
Page 17
... in clock mode. Note When you connect the key chain to the time on your computer, the key chain's clock is displayed during a slideshow. NS-DKEYBL09/NS-DKEYRD09/NS-DKEYBK09 Setup options The following table lists all viewing screens: Menu option Description Clock Display Enters clock/calendar display mode. AutoOff Setting* Sets the amount of... automatically set using the built-in software. Clock Set Sets the date and time for clock display. Delete Image* Deletes the currently displayed image. www.insignia-products.com 15
... in clock mode. Note When you connect the key chain to the time on your computer, the key chain's clock is displayed during a slideshow. NS-DKEYBL09/NS-DKEYRD09/NS-DKEYBK09 Setup options The following table lists all viewing screens: Menu option Description Clock Display Enters clock/calendar display mode. AutoOff Setting* Sets the amount of... automatically set using the built-in software. Clock Set Sets the date and time for clock display. Delete Image* Deletes the currently displayed image. www.insignia-products.com 15
User Manual (English)
Page 18
NS-DKEYBL09/NS-DKEYRD09/NS-DKEYBK09 To set the date and time: 1 Press . The Options menu opens. 2 Press to select Clock Set, then press . 3 Press and to adjust the selected (underlined) value. 4 Press to save your changes and move to the next item to adjust. 16 www.insignia-products.com
NS-DKEYBL09/NS-DKEYRD09/NS-DKEYBK09 To set the date and time: 1 Press . The Options menu opens. 2 Press to select Clock Set, then press . 3 Press and to adjust the selected (underlined) value. 4 Press to save your changes and move to the next item to adjust. 16 www.insignia-products.com
User Manual (English)
Page 19
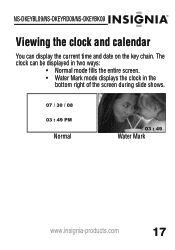
The clock can display the current time and date on the key chain. Normal Water Mark www.insignia-products.com 17 NS-DKEYBL09/NS-DKEYRD09/NS-DKEYBK09 Viewing the clock and calendar You can be displayed in two ways: • Normal mode fills the entire screen. • Water Mark mode displays the clock in the bottom right of the screen during slide shows.
The clock can display the current time and date on the key chain. Normal Water Mark www.insignia-products.com 17 NS-DKEYBL09/NS-DKEYRD09/NS-DKEYBK09 Viewing the clock and calendar You can be displayed in two ways: • Normal mode fills the entire screen. • Water Mark mode displays the clock in the bottom right of the screen during slide shows.
User Manual (English)
Page 20
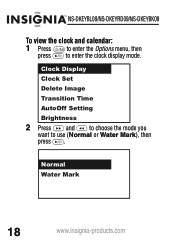
NS-DKEYBL09/NS-DKEYRD09/NS-DKEYBK09 To view the clock and calendar: 1 Press to enter the Options menu, then press to use (Normal or Water Mark), then press . Normal Water Mark 18 www.insignia-products.com Clock Display Clock Set Delete Image Transition Time AutoOff Setting Brightness 2 Press and to choose the mode you want to enter the clock display mode.
NS-DKEYBL09/NS-DKEYRD09/NS-DKEYBK09 To view the clock and calendar: 1 Press to enter the Options menu, then press to use (Normal or Water Mark), then press . Normal Water Mark 18 www.insignia-products.com Clock Display Clock Set Delete Image Transition Time AutoOff Setting Brightness 2 Press and to choose the mode you want to enter the clock display mode.
User Manual (English)
Page 21
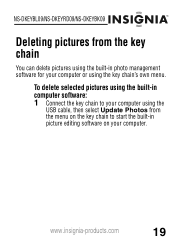
To delete selected pictures using the built-in computer software: 1 Connect the key chain to your computer using the USB cable, then select Update Photos from the key chain You can delete pictures using the built-in picture editing software on the key chain to start the built-in photo management software for your computer. www.insignia-products.com 19 NS-DKEYBL09/NS-DKEYRD09/NS-DKEYBK09 Deleting pictures from the menu on your computer or using the key chain's own menu.
To delete selected pictures using the built-in computer software: 1 Connect the key chain to your computer using the USB cable, then select Update Photos from the key chain You can delete pictures using the built-in picture editing software on the key chain to start the built-in photo management software for your computer. www.insignia-products.com 19 NS-DKEYBL09/NS-DKEYRD09/NS-DKEYBK09 Deleting pictures from the menu on your computer or using the key chain's own menu.

User Manual (English)
Page 22
NS-DKEYBL09/NS-DKEYRD09/NS-DKEYBK09 2 Click to select the pictures on the right side of the screen that you want to delete from the key chain. 20 www.insignia-products.com The pictures are removed from the Device Browser, then click DELETE.
NS-DKEYBL09/NS-DKEYRD09/NS-DKEYBK09 2 Click to select the pictures on the right side of the screen that you want to delete from the key chain. 20 www.insignia-products.com The pictures are removed from the Device Browser, then click DELETE.
User Manual (English)
Page 23
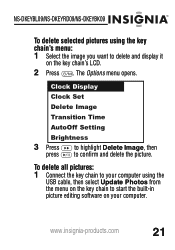
...insignia-products.com 21 Clock Display Clock Set Delete Image Transition Time AutoOff Setting Brightness 3 Press press to highlight Delete Image, then to delete and display it on your computer using the key chain's menu: 1 Select the image you want to confirm and delete the picture. NS-DKEYBL09/NS-DKEYRD09/NS-DKEYBK09... To delete selected pictures using the USB cable, then select Update Photos from the menu on the key chain to start the built-in picture editing software...
...insignia-products.com 21 Clock Display Clock Set Delete Image Transition Time AutoOff Setting Brightness 3 Press press to highlight Delete Image, then to delete and display it on your computer using the key chain's menu: 1 Select the image you want to confirm and delete the picture. NS-DKEYBL09/NS-DKEYRD09/NS-DKEYBK09... To delete selected pictures using the USB cable, then select Update Photos from the menu on the key chain to start the built-in picture editing software...


