Insignia NS-IMK20WH7 Support and Manuals
Get Help and Manuals for this Insignia item

View All Support Options Below
Free Insignia NS-IMK20WH7 manuals!
Problems with Insignia NS-IMK20WH7?
Ask a Question
Free Insignia NS-IMK20WH7 manuals!
Problems with Insignia NS-IMK20WH7?
Ask a Question
Popular Insignia NS-IMK20WH7 Manual Pages
User Guide - Page 1
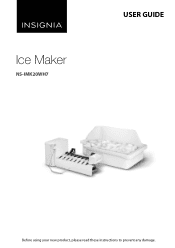
Ice Maker
NS-IMK20WH7
USER GUIDE
Before using your new product, please read these instructions to prevent any damage.
User Guide - Page 2
...
Introduction 2 Important Safety Instructions 2 Features 4
Package contents 4 Installing the ice maker 5
Connecting the ice maker to the water supply 14 Tips for reliable and trouble-free performance.
This symbol indicates that dangerous voltage constituting a risk of electric shock is designed for using your automatic ice maker 17 Troubleshooting 18 Specifications 19 ONE-YEAR...
User Guide - Page 4

... these instructions to three pounds of ice a day, depending on the size of ice • Prevents overflow by automatically detecting when storage bin is full • Works with these Insignia refrigerators: NS-RTM18WH7, NS-RTM18SS7,
and NS-RTM21SS7
Package contents
Ice maker unit Water valve
Ice storage bin
Plastic water supply tubing
Ice Maker
NS-IMK20WH7
USER GUIDE...
User Guide - Page 5
...5303917950) from the freezer. Installing the ice maker
Your Insignia refrigerator comes set up for ice maker installation. www.insigniaproducts.com
5
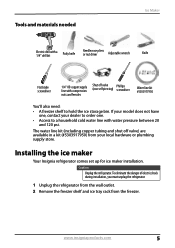
To eliminate the danger of electric shock during installation, you must unplug the ...drill bit
Putty knife
Needle nose pliers
or nut driver
Adjustable wrench
Knife
Flat blade screwdriver
1/4" OD copper supply line with water pressure between...
User Guide - Page 6
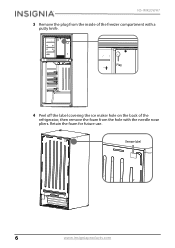
Plug
4 Peel off the label covering the ice maker hole on the back of the refrigerator, then remove the foam from the inside of the freezer compartment with the needle nose pliers. Remove label
6
www.insigniaproducts.com Retain the foam for future use. NS-IMK20WH7 3 Remove the plug from the hole with a
putty knife.
User Guide - Page 8
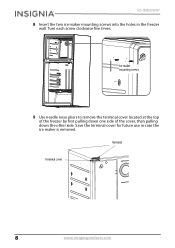
NS-IMK20WH7 8 Insert the two ice maker mounting screws into the holes in case the ice maker is removed. Save the terminal cover for future use in ...
User Guide - Page 10
....
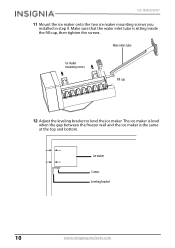
Water inlet tube
Ice maker mounting screws
Fill cup
12 Adjust the leveling bracket to level the ice maker. NS-IMK20WH7
11 Mount the ice maker onto the two ice maker mounting screws you installed in step 9. The ice maker is level when the gap between the freezer wall and the ice maker...
User Guide - Page 12
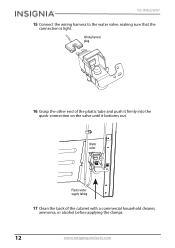
... supply tubing
17 Clean the back of the plastic tube and push it firmly into the quick-connection on the valve until it bottoms out.
NS-IMK20WH7
15 Connect the wiring harness to the water valve, making sure that the connection is tight.
User Guide - Page 14
...: • This water line installation is not warranted by an authorized service technician. • Make sure that the refrigerator is unplugged to eliminate the danger of water
damage. • Water hammer (water banging in the pipe) in areas where temperature falls below freezing. • When using a sharp bit. NS-IMK20WH7
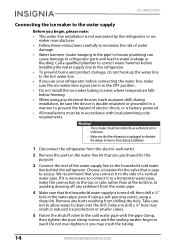
Connecting the ice maker...
User Guide - Page 16
... any connections that leak.
16 Reconnect the refrigerator to the electric wall outlet.
17 To turn on the ice maker, lower the wire signal arm. NS-IMK20WH7 11 Slide a brass compression nut, then a ferrule (sleeve), onto the water
supply line.
1/4" tubing
1/4" compression nut Water inlet valve
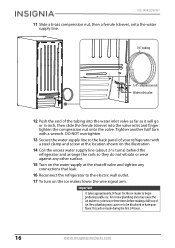
12 Push the end of ice...
User Guide - Page 17
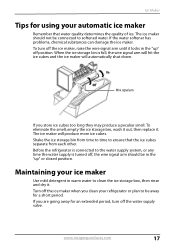
...water supply valve. To eliminate the smell, empty the ice storage bin, wash it out, then replace it locks in warm water to be away for a short period.
The ice maker should be... ice maker
Use mild detergent in the "up " or closed position.
If the water softener has problems, chemical substances can damage the ice maker. Maintaining your refrigerator or plan to clean the ice storage ...
User Guide - Page 18
...bin and discard the old ice
tastes bad
needs cleaning. NS-IMK20WH7
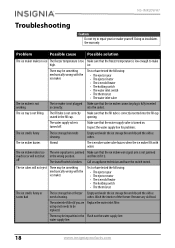
Troubleshooting
Caution
Do not try to be something mechanically wrong with... the socket.
Inspect the water supply line for problems.
The ice smells funny
The ice storage bin needs ...replaced. Wash the interior of the freezer. The water inlet filter (if you are Replace the water inlet filter.
using one) needs to repair...
User Guide - Page 19
... 1.6 A
www.insigniaproducts.com
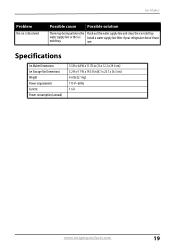
19 Specifications
Ice Maker Dimensions Ice Storage Bin Dimensions Weight Power requirements Current Power consumption (annual)
5.5 H x 4.8 W x 11.7D in (14 x 12.2 x 29.6 cm) 3.2 H x 9.1 W x 14.3 D in the Flush out the water supply line and clean the ice mold tray. water supply line or the ice Install a water supply line filter...
User Guide - Page 20
... • Customer instruction/education • Installation • Set up adjustments • Cosmetic damage • Damage due to weather, lightning, and other acts of God, such as the original packaging. or (2) replace the Product at www.bestbuy.com or www.bestbuy.ca, and is packaged with the Product. If service of Products or parts are not returned...
User Guide - Page 21

REPAIR REPLACEMENT AS PROVIDED UNDER THIS WARRANTY IS YOUR EXCLUSIVE REMEDY FOR BREACH OF WARRANTY.
INSIGNIA PRODUCTS MAKES NO OTHER EXPRESS WARRANTIES ...service please call 1-877-467-4289 www.insigniaproducts.com INSIGNIA is " or "with all faults" • Consumables, including but not limited to batteries (i.e. Made in an area smaller than a private home.
• Modification of any part...
Insignia NS-IMK20WH7 Reviews
We have not received any reviews for Insignia yet.