Hardware Maintenance Manual
Page 3
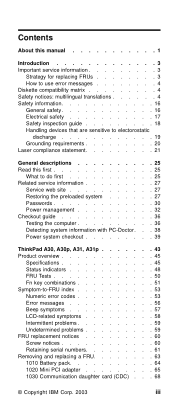
... Power system checkout 39 ThinkPad A30, A30p, A31, A31p 43 Product overview 45 Specifications 45 Status indicators 48 FRU Tests 50 Fn key combinations 51 Symptom-to-FRU index 53 Numeric error codes 53 Error messages 56 Beep symptoms 57 LCD-related symptoms 58 Intermittent problems 59 Undetermined problems 59 FRU replacement notices 60 Screw notices 60 Retaining serial numbers 61 Removing and replacing a FRU 63 1010 Battery...
... Power system checkout 39 ThinkPad A30, A30p, A31, A31p 43 Product overview 45 Specifications 45 Status indicators 48 FRU Tests 50 Fn key combinations 51 Symptom-to-FRU index 53 Numeric error codes 53 Error messages 56 Beep symptoms 57 LCD-related symptoms 58 Intermittent problems 59 Undetermined problems 59 FRU replacement notices 60 Screw notices 60 Retaining serial numbers 61 Removing and replacing a FRU 63 1010 Battery...
Hardware Maintenance Manual
Page 7
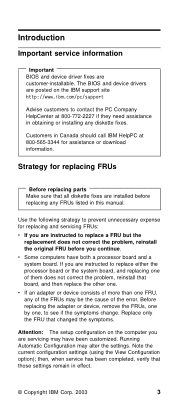
... Important service information Important BIOS and device driver fixes are installed before you are servicing may alter the settings. Before replacing the adapter or device, remove the FRUs, one by one FRU, any FRUs listed in effect. © Copyright IBM Corp. 2003 3 Note the current configuration settings (using the View Configuration option); Strategy for replacing FRUs Before replacing parts Make sure that changed the symptoms. Attention: The setup configuration on the IBM support site http://www.ibm.com/pc/support...
... Important service information Important BIOS and device driver fixes are installed before you are servicing may alter the settings. Before replacing the adapter or device, remove the FRUs, one by one FRU, any FRUs listed in effect. © Copyright IBM Corp. 2003 3 Note the current configuration settings (using the View Configuration option); Strategy for replacing FRUs Before replacing parts Make sure that changed the symptoms. Attention: The setup configuration on the IBM support site http://www.ibm.com/pc/support...
Hardware Maintenance Manual
Page 21
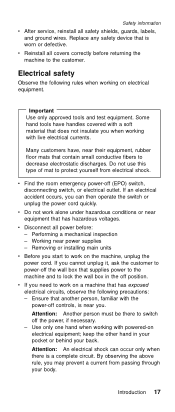
... currents. Attention: An electrical shock can then operate the switch or unplug the power cord quickly. Safety information v After service, reinstall all power before returning the machine to switch off controls, is near equipment that has hazardous voltages. v Reinstall all covers correctly before : - Electrical safety Observe the following precautions: - Performing a mechanical inspection - Removing or installing main units v Before you can occur...
... currents. Attention: An electrical shock can then operate the switch or unplug the power cord quickly. Safety information v After service, reinstall all power before returning the machine to switch off controls, is near equipment that has hazardous voltages. v Reinstall all covers correctly before : - Electrical safety Observe the following precautions: - Performing a mechanical inspection - Removing or installing main units v Before you can occur...
Hardware Maintenance Manual
Page 29
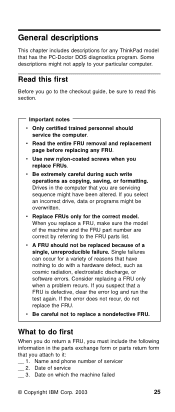
... removal and replacement page before replacing any ThinkPad model that has the PC-Doctor DOS diagnostics program. Date on which the machine failed © Copyright IBM Corp. 2003 25 Drives in the parts exchange form or parts return form that have been altered. If the error does not recur, do return a FRU, you attach to the FRU parts list. Date of servicer __ 2. v Use new...
... removal and replacement page before replacing any ThinkPad model that has the PC-Doctor DOS diagnostics program. Date on which the machine failed © Copyright IBM Corp. 2003 25 Drives in the parts exchange form or parts return form that have been altered. If the error does not recur, do return a FRU, you attach to the FRU parts list. Date of servicer __ 2. v Use new...
Hardware Maintenance Manual
Page 32
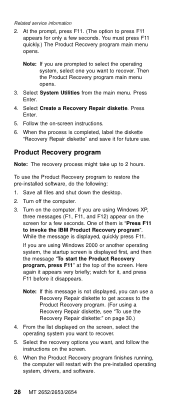
... option to recover. Select System Utilities from the main menu. Press Enter. 5. Select the recovery options you want, and follow the instructions on the screen, select the operating system you want to press F11 appears for a few seconds. Follow the on the computer. Turn on -screen instructions. 6. If you can use a Recovery Repair diskette to get access to the Product Recovery program. (For using a Recovery Repair diskette, see "To use the Product Recovery...
... option to recover. Select System Utilities from the main menu. Press Enter. 5. Select the recovery options you want, and follow the instructions on the screen, select the operating system you want to press F11 appears for a few seconds. Follow the on the computer. Turn on -screen instructions. 6. If you can use a Recovery Repair diskette to get access to the Product Recovery program. (For using a Recovery Repair diskette, see "To use the Product Recovery...
Hardware Maintenance Manual
Page 33
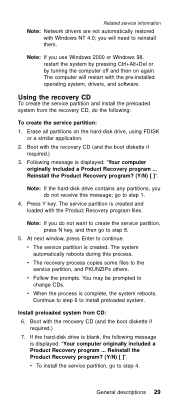
... Recovery program ... If the hard-disk drive is blank, the following : To create the service partition: 1. you use Windows 2000 or Windows 98, restart the system by pressing Ctrl+Alt+Del or by turning the computer off and then on the hard-disk drive, using FDISK or a similar application. 2. Note: If you will restart with Windows NT 4.0; Related service information Note: Network drivers are not automatically restored with the pre-installed operating...
... Recovery program ... If the hard-disk drive is blank, the following : To create the service partition: 1. you use Windows 2000 or Windows 98, restart the system by pressing Ctrl+Alt+Del or by turning the computer off and then on the hard-disk drive, using FDISK or a similar application. 2. Note: If you will restart with Windows NT 4.0; Related service information Note: Network drivers are not automatically restored with the pre-installed operating...
Hardware Maintenance Manual
Page 34
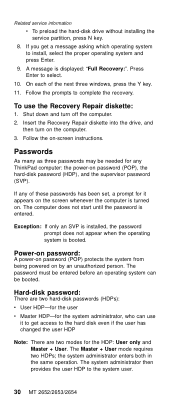
... computer. 3. Hard-disk password: There are two modes for it to get a message asking which operating system to install, select the proper operating system and press Enter. 9. Shut down and turn on -screen instructions. The password must be entered before an operating system can use the Recovery Repair diskette: 1. Related service information v To preload the hard-disk drive without installing the service partition, press N key. 8. If you get access to complete the recovery. A message is entered. On each...
... computer. 3. Hard-disk password: There are two modes for it to get a message asking which operating system to install, select the proper operating system and press Enter. 9. Shut down and turn on -screen instructions. The password must be entered before an operating system can use the Recovery Repair diskette: 1. Related service information v To preload the hard-disk drive without installing the service partition, press N key. 8. If you get access to complete the recovery. A message is entered. On each...

Hardware Maintenance Manual
Page 35
... power-on page 75. 4. Remove the battery pack. If it has, it blank and press Enter twice. 7. Attention: If the SVP has been forgotten and cannot be entered in the IBM BIOS Setup Utility. Turn off the computer. 2. Turn on the computer and wait until the POST ends. How to system configuration settings. Enter the SVP. Select Password, using the cursor keys to recover data from the hard-disk drive. Related service...
... power-on page 75. 4. Remove the battery pack. If it has, it blank and press Enter twice. 7. Attention: If the SVP has been forgotten and cannot be entered in the IBM BIOS Setup Utility. Turn off the computer. 2. Turn on the computer and wait until the POST ends. How to system configuration settings. Enter the SVP. Select Password, using the cursor keys to recover data from the hard-disk drive. Related service...
Hardware Maintenance Manual
Page 36
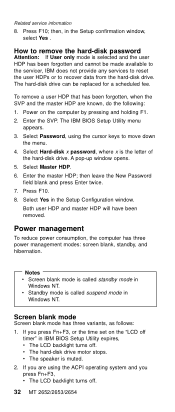
... the computer by pressing and holding F1. 2. Power management To reduce power consumption, the computer has three power management modes: screen blank, standby, and hibernation. v The hard-disk drive motor stops. Both user HDP and master HDP will have been removed. How to recover data from the hard-disk drive. Power on the "LCD off timer" in Windows NT. The IBM BIOS Setup Utility menu appears. 3. A pop-up window opens. 5. Select Master HDP. 6. Press F10. 8. Select...
... the computer by pressing and holding F1. 2. Power management To reduce power consumption, the computer has three power management modes: screen blank, standby, and hibernation. v The hard-disk drive motor stops. Both user HDP and master HDP will have been removed. How to recover data from the hard-disk drive. Power on the "LCD off timer" in Windows NT. The IBM BIOS Setup Utility menu appears. 3. A pop-up window opens. 5. Select Master HDP. 6. Press F10. 8. Select...
Hardware Maintenance Manual
Page 37
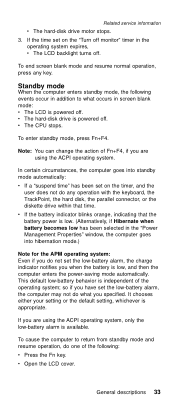
... either your setting or the default setting, whichever is powered off. v The hard-disk drive is available. v The CPU stops. General descriptions 33 so if you have set the low-battery alarm, the charge indicator notifies you do not set the low-battery alarm, the computer may not do what occurs in addition to return from standby mode and resume operation, do any key. v Open the LCD cover. In certain...
... either your setting or the default setting, whichever is powered off. v The hard-disk drive is available. v The CPU stops. General descriptions 33 so if you have set the low-battery alarm, the charge indicator notifies you do not set the low-battery alarm, the computer may not do what occurs in addition to return from standby mode and resume operation, do any key. v Open the LCD cover. In certain...
Hardware Maintenance Manual
Page 40
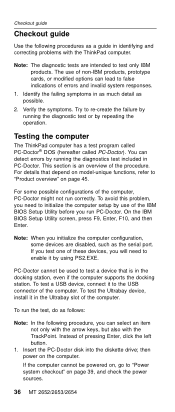
... problem, you need to enable it by repeating the operation. then power on page 39, and check the power sources. 36 MT 2652/2653/2654 If the computer cannot be used to test a device that depend on model-unique functions, refer to false indications of the procedure. Verify the symptoms. Try to re-create the failure by use of non-IBM products, prototype cards, or modified options...
... problem, you need to enable it by repeating the operation. then power on page 39, and check the power sources. 36 MT 2652/2653/2654 If the computer cannot be used to test a device that depend on model-unique functions, refer to false indications of the procedure. Verify the symptoms. Try to re-create the failure by use of non-IBM products, prototype cards, or modified options...
Hardware Maintenance Manual
Page 41
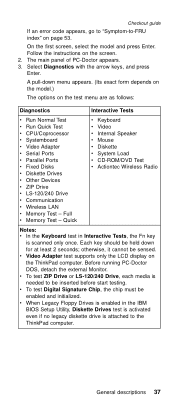
... enabled and initialized. Before running PC-Doctor DOS, detach the external Monitor. General descriptions 37 Checkout guide If an error code appears, go to "Symptom-to-FRU index" on the test menu are as follows: Diagnostics v Run Normal Test v Run Quick Test v CPU/Coprocessor v Systemboard v Video Adapter v Serial Ports v Parallel Ports v Fixed Disks v Diskette Drives v Other Devices v ZIP Drive v LS-120/240 Drive v Communication v Wireless LAN v Memory Test - On the first screen, select the model...
... enabled and initialized. Before running PC-Doctor DOS, detach the external Monitor. General descriptions 37 Checkout guide If an error code appears, go to "Symptom-to-FRU index" on the test menu are as follows: Diagnostics v Run Normal Test v Run Quick Test v CPU/Coprocessor v Systemboard v Video Adapter v Serial Ports v Parallel Ports v Fixed Disks v Diskette Drives v Other Devices v ZIP Drive v LS-120/240 Drive v Communication v Wireless LAN v Memory Test - On the first screen, select the model...
Hardware Maintenance Manual
Page 47
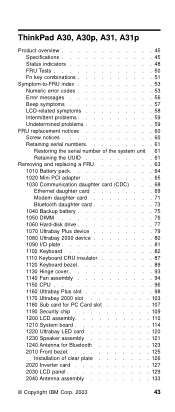
... notices 60 Retaining serial numbers 61 Restoring the serial number of the system unit 61 Retaining the UUID 61 Removing and replacing a FRU 63 1010 Battery pack 64 1020 Mini PCI adapter 65 1030 Communication daughter card (CDC) . . . 68 Ethernet daughter card 69 Modem daughter card 71 Bluetooth daughter card 73 1040 Backup battery 75 1050 DIMM 76 1060 Hard-disk drive 77 1070 Ultrabay Plus device 79 1080 Ultrabay...
... notices 60 Retaining serial numbers 61 Restoring the serial number of the system unit 61 Retaining the UUID 61 Removing and replacing a FRU 63 1010 Battery pack 64 1020 Mini PCI adapter 65 1030 Communication daughter card (CDC) . . . 68 Ethernet daughter card 69 Modem daughter card 71 Bluetooth daughter card 73 1040 Backup battery 75 1050 DIMM 76 1060 Hard-disk drive 77 1070 Ultrabay Plus device 79 1080 Ultrabay...
Hardware Maintenance Manual
Page 54
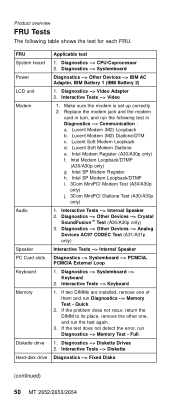
... test again. 3. Diagnostics --> Diskette Drives 2. Lucent Soft Modem Dialtone e. If two DIMMs are installed, remove one , and run Diagnostics --> Memory Test - Full. 1. Replace the modem jack and the modem card in turn, and run Diagnostics --> Memory Test - Lucent Modem (M2) Dialtone/DTM c. Interactive Tests --> Keyboard 1. Quick. 2. Diagnostics --> Video Adapter 2. Diagnostics --> Systemboard Diagnostics --> Other Devices --> IBM AC Adapter, IBM Battery 1 (IBM Battery 2) 1. Make sure the modem is set up correctly. 2. Intel Modem Register...
... test again. 3. Diagnostics --> Diskette Drives 2. Lucent Soft Modem Dialtone e. If two DIMMs are installed, remove one , and run Diagnostics --> Memory Test - Full. 1. Replace the modem jack and the modem card in turn, and run Diagnostics --> Memory Test - Lucent Modem (M2) Dialtone/DTM c. Interactive Tests --> Keyboard 1. Quick. 2. Diagnostics --> Video Adapter 2. Diagnostics --> Systemboard Diagnostics --> Other Devices --> IBM AC Adapter, IBM Battery 1 (IBM Battery 2) 1. Make sure the modem is set up correctly. 2. Intel Modem Register...
Hardware Maintenance Manual
Page 55
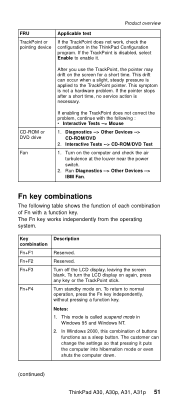
...-ROM or DVD drive Fan If enabling the TrackPoint does not correct the problem, continue with a function key. Interactive Tests --> CD-ROM/DVD Test 1. To return to the TrackPoint pointer. Run Diagnostics --> Other Devices --> IBM Fan. After you use the TrackPoint, the pointer may drift on . Diagnostics --> Other Devices --> CD-ROM/DVD 2. Fn+F4 Turn standby mode on the screen for a short time. If the TrackPoint is disabled, select Enable to enable it...
...-ROM or DVD drive Fan If enabling the TrackPoint does not correct the problem, continue with a function key. Interactive Tests --> CD-ROM/DVD Test 1. To return to the TrackPoint pointer. Run Diagnostics --> Other Devices --> IBM Fan. After you use the TrackPoint, the pointer may drift on . Diagnostics --> Other Devices --> CD-ROM/DVD 2. Fn+F4 Turn standby mode on the screen for a short time. If the TrackPoint is disabled, select Enable to enable it...
Hardware Maintenance Manual
Page 57
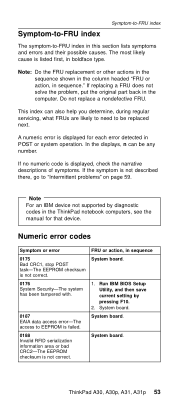
..., during regular servicing, what FRUs are likely to need to be any number. Run IBM BIOS Setup Utility, and then save current setting by diagnostic codes in the ThinkPad notebook computers, see the manual for each error detected in sequence 0175 Bad CRC1, stop POST task-The EEPROM checksum is failed. System board. 0187 EAIA data access error-The access to "Intermittent problems" on page 59. If replacing a FRU...
..., during regular servicing, what FRUs are likely to need to be any number. Run IBM BIOS Setup Utility, and then save current setting by diagnostic codes in the ThinkPad notebook computers, see the manual for each error detected in sequence 0175 Bad CRC1, stop POST task-The EEPROM checksum is failed. System board. 0187 EAIA data access error-The access to "Intermittent problems" on page 59. If replacing a FRU...
Hardware Maintenance Manual
Page 59
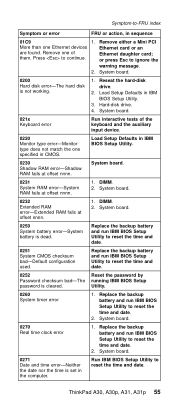
... device. 0220 Monitor type error-Monitor type does not match the one specified in IBM BIOS Setup Utility. 0230 Shadow RAM error-Shadow RAM fails at offset nnnn. System board. 0270 Real time clock error 1. Ethernet card or an Ethernet daughter card; or press Esc to continue. Reseat the hard-disk drive. 2. System board. 021x Keyboard error Run interactive tests of them. Load Setup Defaults in CMOS. Replace the backup battery and run IBM BIOS Setup Utility to reset the time and date. Run IBM BIOS Setup Utility...
... device. 0220 Monitor type error-Monitor type does not match the one specified in IBM BIOS Setup Utility. 0230 Shadow RAM error-Shadow RAM fails at offset nnnn. System board. 0270 Real time clock error 1. Ethernet card or an Ethernet daughter card; or press Esc to continue. Reseat the hard-disk drive. 2. System board. 021x Keyboard error Run interactive tests of them. Load Setup Defaults in CMOS. Replace the backup battery and run IBM BIOS Setup Utility to reset the time and date. Run IBM BIOS Setup Utility...
Hardware Maintenance Manual
Page 63
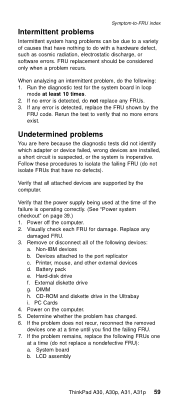
... FRU. 7. System board b. Printer, mouse, and other external devices d. PC Cards 4. If no error is operating correctly. (See "Power system checkout" on the computer. 5. Power on page 39.) 1. Determine whether the problem has changed. 6. Verify that all of causes that have nothing to verify that the power supply being used at least 10 times. 2. External diskette drive g. CD-ROM and diskette drive in loop mode at the time...
... FRU. 7. System board b. Printer, mouse, and other external devices d. PC Cards 4. If no error is operating correctly. (See "Power system checkout" on the computer. 5. Power on page 39.) 1. Determine whether the problem has changed. 6. Verify that all of causes that have nothing to verify that the power supply being used at least 10 times. 2. External diskette drive g. CD-ROM and diskette drive in loop mode at the time...
Hardware Maintenance Manual
Page 65
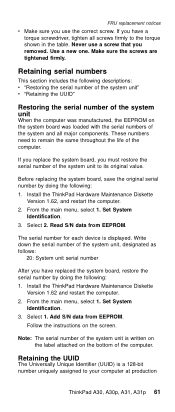
FRU replacement notices v Make sure you removed. Install the ThinkPad Hardware Maintenance Diskette Version 1.62, and restart the computer. 2. Select 2. Add S/N data from EEPROM. Use a new one. Retaining serial numbers This section includes the following descriptions: v "Restoring the serial number of the system unit" v "Retaining the UUID" Restoring the serial number of the system unit When the computer was manufactured, the EEPROM on the system board was loaded with...
FRU replacement notices v Make sure you removed. Install the ThinkPad Hardware Maintenance Diskette Version 1.62, and restart the computer. 2. Select 2. Add S/N data from EEPROM. Use a new one. Retaining serial numbers This section includes the following descriptions: v "Restoring the serial number of the system unit" v "Retaining the UUID" Restoring the serial number of the system unit When the computer was manufactured, the EEPROM on the system board was loaded with...

Hardware Maintenance Manual
Page 130
... front bezel is replaced to install Bluetooth button a , which is contained in the clear plate set must also be installed. there are plates for the front bezel and the LCD rear cover, as "A30" first, and pick the plate suitable for the front bezel TM A30p v Clear plate, rear cover, without Bluetooth feature v Clear plate, rear cover, with a new one, clear plate set . a 1 2 2 1 126 MT 2652/2653/2654...
... front bezel is replaced to install Bluetooth button a , which is contained in the clear plate set must also be installed. there are plates for the front bezel and the LCD rear cover, as "A30" first, and pick the plate suitable for the front bezel TM A30p v Clear plate, rear cover, without Bluetooth feature v Clear plate, rear cover, with a new one, clear plate set . a 1 2 2 1 126 MT 2652/2653/2654...


