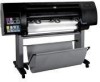
Z6100 Printhead - HP DesignJet Color Inkjet Printer
Related Manual Pages


Similar Questions

Meaning The Message Of Printhead Latch Open
I got the message about Printhead Latch Open in my Printer HP Business Inkjet 2300, what is the mean...
I got the message about Printhead Latch Open in my Printer HP Business Inkjet 2300, what is the mean...
(Posted by sirajumgaya 6 years ago)

Printheads Keep Going Due To Lack Of Knowledge On Maintenance.
We have a HPZ6100 (i do not operate it by the way). I would like to know how to get the most out of ...
We have a HPZ6100 (i do not operate it by the way). I would like to know how to get the most out of ...
(Posted by mariegriffiths 9 years ago)

Where Are The Printheads On An Hp Z6100 Ps Plotter
(Posted by havCPRAUT 9 years ago)

Verify That You Have Closed And Latched The Printhead Cover Is Z6100
(Posted by ronbomar 10 years ago)

C7770b Printhead Error
WHat causes a printhead error on an HP Designjet 500 even after replacing printhead.
WHat causes a printhead error on an HP Designjet 500 even after replacing printhead.
(Posted by amoury 11 years ago)
Related Terms
The following terms were also used when searching for Z6100 Printhead - HP DesignJet Color Inkjet Printer:- designjet z6100
- hp designjet z6100
- hp designjet z6100ps
- designjet z6100ps
- hp z6100 printer
- hp designjet z6100 ps
- hp z6100 ps
- hp designjet z6100 printer
- z6100 printer
- hp z6100 ink
- designjet z6100 printer
- z6100 service manual
- designjet z6100 ps
- hp designjet z6100 driver
- hp z6100 plotter
- z6100 plotter
- z6100 firmware
- z6100 printhead
- designjet z6100 42
- designjet z6100 driver
- designjet z6100 ink
- designjet z6100 service manual
- hp designjet z6100 42
- hp designjet z6100 60
- hp designjet z6100 drivers
- hp designjet z6100 ink
- hp z6100 firmware
- designjet z6100 60
- designjet z6100 firmware
- hp designjet z6100ps 60
- z6100 driver
- hp designjet z6100 firmware
- hp designjet z6100 service manual
- hp z6100 designjet
- z6100 designjet
- z6100 manual
- z6100 review
- designjet z6100 paper
- hp designjet z6100 paper
- hp designjet z6100 price
- hp z6100 manual
- hp z6100 service manual
- z6100 error codes
- z6100 maintenance cartridge
- z6100 paper
- z6100 parts
- z6100 print head
- z6100 printheads
- hp designjet z6100 photo printer
- hp z6100 printhead
- z6100 reviews
- designjet z6100 banding
- designjet z6100 drivers
- designjet z6100 error codes
- designjet z6100 manual
- designjet z6100 plotter
- designjet z6100 price
- designjet z6100 review
- designjet z6100 reviews
- hp designjet z6100 manual
- hp designjet z6100 plotter
- hp z6100 driver
- hp z6100 maintenance cartridge
- hp z6100 paper
- z6100 inks
- z6100 supplies
- designjet z6100 parts
- designjet z6100 photo printer
- designjet z6100 troubleshooting
- designjet z6100 user maintenance kit
- designjet z6100ps troubleshooting
- hp designjet z6100 review
- hp designjet z6100 reviews
- z6100 print heads
- designjet z6100 24.10 error
- designjet z6100 42 in
- designjet z6100 42 inch
- designjet z6100 42-in printer
- designjet z6100 42-inch take-up reel
- designjet z6100 42in
- designjet z6100 60-in printer
- designjet z6100 79.04 error
- designjet z6100 banding problems
- designjet z6100 carriage belt
- designjet z6100 cartridge expired
- designjet z6100 color inkjet printer
- designjet z6100 color not matching
- designjet z6100 cost
- designjet z6100 cost per copy
- designjet z6100 data sheet
- designjet z6100 dragging
- designjet z6100 driver download
- designjet z6100 driver mac
- designjet z6100 driver windows 7
- designjet z6100 drivers windows 7
- designjet z6100 encoder strip
- designjet z6100 error 79-04
- designjet z6100 error code 79-04
- designjet z6100 firmware update
- designjet z6100 for sale
- designjet z6100 hp
- designjet z6100 ink cartridges
- designjet z6100 inkjet
- designjet z6100 mac address
- designjet z6100 maintenance
- designjet z6100 maintenance cartridge
- designjet z6100 maintenance cartridge missing
- designjet z6100 maintenance kit
- designjet z6100 memory
- designjet z6100 not accepted printhead
- designjet z6100 not rotating
- designjet z6100 pdf
- designjet z6100 preventive maintenance
- designjet z6100 print heads
- designjet z6100 printer memory
- designjet z6100 printer repair
- designjet z6100 printer series
- designjet z6100 printer/plotter
- designjet z6100 printhead
- designjet z6100 printhead replacement
- designjet z6100 printheads
- designjet z6100 prints with lines
- designjet z6100 processing issue
- designjet z6100 production printer
- designjet z6100 ps driver
- designjet z6100 rip software
- designjet z6100 service mode
- designjet z6100 specifications
- designjet z6100 spindle
- designjet z6100 spindle hub
- designjet z6100 supplies
- designjet z6100 support
- designjet z6100 used price
- designjet z6100 user manual
- designjet z6100 utility
- designjet z6100 windows 7 driver
- designjet z6100+reseat printhead
- designjet z6100ps 42
- designjet z6100ps 42in
- designjet z6100ps 60
- designjet z6100ps 60 in
- designjet z6100ps 60 in driver
- designjet z6100ps driver
- designjet z6100ps driver windows 7
- designjet z6100ps drivers
- designjet z6100ps print heads
- designjet z6100ps user guide
- designjet z6100ps windows 7
- eagle z6100
- hewlett packard designjet z6100
- hewlett packard z6100
- hp designjet q6652a
- hp designjet z6100 42 in
- hp designjet z6100 42 in printer
- hp designjet z6100 42 inch
- hp designjet z6100 42-in printer
- hp designjet z6100 42-inch take-up reel
- hp designjet z6100 42in
- hp designjet z6100 60 in printer
- hp designjet z6100 60 in printer q6652c
- hp designjet z6100 60-in printer
- hp designjet z6100 banding
- hp designjet z6100 cartridge expired
- hp designjet z6100 color inkjet printer
- hp designjet z6100 color not matching
- hp designjet z6100 cost
- hp designjet z6100 cost per copy
- hp designjet z6100 data sheet
- hp designjet z6100 dragging
- hp designjet z6100 driver mac
- hp designjet z6100 driver windows 7
- hp designjet z6100 drivers windows 7
- hp designjet z6100 encoder strip
- hp designjet z6100 error 79-04
- hp designjet z6100 error code 79-04
- hp designjet z6100 error codes
- hp designjet z6100 for sale
- hp designjet z6100 ink cartridges
- hp designjet z6100 mac address
- hp designjet z6100 maintenance cartridge
- hp designjet z6100 maintenance cartridge missing
- hp designjet z6100 not accepted printhead
- hp designjet z6100 parts
- hp designjet z6100 print heads
- hp designjet z6100 printer memory
- hp designjet z6100 printer repair
- hp designjet z6100 printer series
- hp designjet z6100 printer/plotter
- hp designjet z6100 printhead
- hp designjet z6100 printheads
- hp designjet z6100 prints with lines
- hp designjet z6100 production printer
- hp designjet z6100 ps driver
- hp designjet z6100 service mode
- hp designjet z6100 specifications
- hp designjet z6100 spindle hub
- hp designjet z6100 supplies
- hp designjet z6100 support
- hp designjet z6100 troubleshooting
- hp designjet z6100 used price
- hp designjet z6100 user maintenance kit
- hp designjet z6100 user manual
- hp designjet z6100 utility
- hp designjet z6100+reseat printhead
- hp designjet z6100ps 42in
- hp designjet z6100ps 60 in
- hp designjet z6100ps 60 in driver
- hp designjet z6100ps driver
- hp designjet z6100ps driver windows 7
- hp designjet z6100ps drivers
- hp designjet z6100ps print heads
- hp designjet z6100ps troubleshooting
- hp q6651a
- hp z6100
- hp z6100 42
- hp z6100 42:10
- hp z6100 60
- hp z6100 60 printer plotter
- hp z6100 64 bit driver
- hp z6100 64-bit driver
- hp z6100 banding
- hp z6100 belt
- hp z6100 belt replacement
- hp z6100 brochure
- hp z6100 cleaning the line sensor
- hp z6100 designjet printers 42
- hp z6100 drivers
- hp z6100 encoder strip
- hp z6100 error 2.1:10
- hp z6100 error 42 10
- hp z6100 error 42:10
- hp z6100 error 79 04
- hp z6100 error 79-04
- hp z6100 error 86:01
- hp z6100 error code 79-04
- hp z6100 error codes
- hp z6100 expired ink
- hp z6100 firmware update
- hp z6100 for sale
- hp z6100 forum
- hp z6100 ink absorber
- hp z6100 ink cartridges
- hp z6100 ink tubes assembly
- hp z6100 ink what is pk
- hp z6100 inkjet
- hp z6100 inks
- hp z6100 light magenta
- hp z6100 line sensor
- hp z6100 maintenance cartridge missing
- hp z6100 maintenance cartridge missing error
- hp z6100 maintenance kit
- hp z6100 memory
- hp z6100 memory upgrade
- hp z6100 network problems
- hp z6100 parts
- hp z6100 pk
- hp z6100 plotter driver
- hp z6100 plotter error codes
- hp z6100 plotter paper
- hp z6100 preventative maintenance kit
- hp z6100 prices
- hp z6100 print head
- hp z6100 print heads
- hp z6100 print settings
- hp z6100 printer driver windows 7
- hp z6100 printer utility
- hp z6100 printhead issues
- hp z6100 printheads
- hp z6100 problems
- hp z6100 q6708a
- hp z6100 reel
- hp z6100 replace printhead message
- hp z6100 review
- hp z6100 reviews
- hp z6100 service manual free
- hp z6100 service manual pdf
- hp z6100 service mode
- hp z6100 spec
- hp z6100 specifications
- hp z6100 specs
- hp z6100 speed
- hp z6100 spindle
- hp z6100 supplies
- hp z6100 troubleshoot
- hp z6100 troubleshoot printing stripes
- hp z6100 troubleshooting
- hp z6100 utility
- hp z6100ps driver
- hp z6100ps drivers
- hp z6100ps printer
- q6651a
- q6651a hp
- q6651a ink
- q6651a specs
- q6651a weight
- q6651c memory
- q6651c price
- q6651c printer
- q6651c reviews
- q6651c spec
- q6652a pdf
- q6652a spec
- q6652a weight
- q6652c parts
- q6652c printer
- z6100 42:10
- z6100 42:10 error
- z6100 60 printer
- z6100 60 printer plotter
- z6100 60 spindle
- z6100 64 bit driver
- z6100 64-bit driver
- z6100 79-04 error
- z6100 79-04 hp error
- z6100 93.11 error
- z6100 banding
- z6100 banding issues
- z6100 banding problem
- z6100 belt
- z6100 belt replacement
- z6100 black print heads
- z6100 brochure
- z6100 bypass cartridge expired
- z6100 clean encoder strip
- z6100 cleaning the line sensor
- z6100 color sensor
- z6100 default password
- z6100 designjet printers 42
- z6100 drivers
- z6100 encoder strip
- z6100 error 2.1:10
- z6100 error 42 10
- z6100 error 42:10
- z6100 error 61.01
- z6100 error 79 04
- z6100 error 79-04
- z6100 error 86:01
- z6100 error code 79-04
- z6100 expired ink
- z6100 firmware update
- z6100 for sale
- z6100 forum
- z6100 hp
- z6100 hp designjet
- z6100 hp printer
- z6100 ink
- z6100 ink absorber
- z6100 ink cartridge missing
- z6100 ink cartridge missing error
- z6100 ink cartridges
- z6100 ink dropping out
- z6100 ink tubes assembly
- z6100 ink what is pk
- z6100 inkjet
- z6100 light magenta
- z6100 line sensor
- z6100 maintenance #2
- z6100 maintenance cartridge is missing
- z6100 maintenance cartridge missing
- z6100 maintenance cartridge missing error
- z6100 maintenance kit
- z6100 memory
- z6100 memory upgrade
- z6100 network problems
- z6100 not cutting paper type
- z6100 paper size
- z6100 plotter driver
- z6100 plotter error codes
- z6100 plotter ink cartridges expired
- z6100 plotter paper
- z6100 preventative maintenance kit
- z6100 prices
- z6100 print settings
- z6100 print speed
- z6100 printer driver
- z6100 printer driver windows 7
- z6100 printer utility
- z6100 printhead banding
- z6100 printhead issues
- z6100 problems
- z6100 q6651a
- z6100 q6708a
- z6100 reel
- z6100 replace printhead message
- z6100 reseat cartridge
- z6100 resize paper front panel
- z6100 service manual free
- z6100 service manual pdf
- z6100 service menu
- z6100 service mode
- z6100 spec
- z6100 specifications
- z6100 specs
- z6100 speed
- z6100 spindle
- z6100 take-up reel
- z6100 troubleshoot
- z6100 troubleshoot printing stripes
- z6100 troubleshooting
- z6100 user manual
- z6100 utility
- z6100ps driver
- z6100ps drivers
- z6100ps hp designjet
- z6100ps printer