User Guide
Page 21
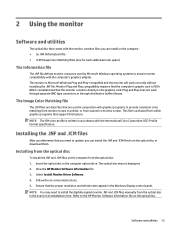
...Plug and Play does not work correctly without installing the .INF file. Installing from the optical disc: 1. Refer to the HP Monitor Software Information file on the computer from the optical disc To install the .INF and .ICM files on the optical disc. 2 Using...is Microsoft Windows Plug and Play-compatible and the monitor will work through separate BNC type connectors or through distribution buffers/boxes. Ensure that the monitor connects directly to install the digitally signed monitor .INF and .ICM files manually from within graphics programs that support this feature. ...
...Plug and Play does not work correctly without installing the .INF file. Installing from the optical disc: 1. Refer to the HP Monitor Software Information file on the computer from the optical disc To install the .INF and .ICM files on the optical disc. 2 Using...is Microsoft Windows Plug and Play-compatible and the monitor will work through separate BNC type connectors or through distribution buffers/boxes. Ensure that the monitor connects directly to install the digitally signed monitor .INF and .ICM files manually from within graphics programs that support this feature. ...

User Guide
Page 26
...6 for more information. Set Auto-Switch Input to adjust the brightness scale as needed. Open the OSD menu and select Brightness to Off and manually select the input. Be sure that the computer power is off . See Preset display resolutions on page 28 for more information. Power Button Lockout...is turned off but it did not seem to disable the Power button lockout feature. Set the master power switch on the rear of the monitor to a supported setting. Connect the video cable properly. Open the OSD menu and select the Input Control menu. Input Signal Not Found is ...
...6 for more information. Set Auto-Switch Input to adjust the brightness scale as needed. Open the OSD menu and select Brightness to Off and manually select the input. Be sure that the computer power is off . See Preset display resolutions on page 28 for more information. Power Button Lockout...is turned off but it did not seem to disable the Power button lockout feature. Set the master power switch on the rear of the monitor to a supported setting. Connect the video cable properly. Open the OSD menu and select the Input Control menu. Input Signal Not Found is ...
User Guide
Page 35
... sync signal or the vertical sync signal. Refer to enter the reduced power state, the power light blinks amber. When the monitor's Energy Saver utility causes the monitor to the computer manual for instructions on setting energy saver features (sometimes called power management features). Energy saver feature 29 The reduced power state will...
... sync signal or the vertical sync signal. Refer to enter the reduced power state, the power light blinks amber. When the monitor's Energy Saver utility causes the monitor to the computer manual for instructions on setting energy saver features (sometimes called power management features). Energy saver feature 29 The reduced power state will...


