Basics Guide
Page 10
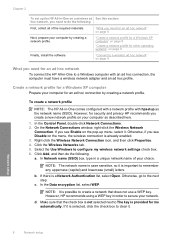
...ad hoc network" on page 8 Next, prepare your choice. On the Network Connections window, right-click the Wireless Network Connection. c. Otherwise, if you see Enable on the pop-up the HP All-in-One on the menu, the wireless connection is provided for an ad hoc connection by ... ad See this section: hoc network, you create a new network profile on page 9 Finally, install the software. In the Control Panel, double-click Network Connections. 2. If you need to a Windows computer with hpsetup as described here. 1. NOTE: The network name is case sensitive, so it is a...
...ad hoc network" on page 8 Next, prepare your choice. On the Network Connections window, right-click the Wireless Network Connection. c. Otherwise, if you see Enable on the pop-up the HP All-in-One on the menu, the wireless connection is provided for an ad hoc connection by ... ad See this section: hoc network, you create a new network profile on page 9 Finally, install the software. In the Control Panel, double-click Network Connections. 2. If you need to a Windows computer with hpsetup as described here. 1. NOTE: The network name is case sensitive, so it is a...
Basics Guide
Page 11
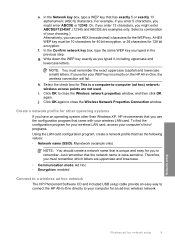
...Windows XP, HP recommends that has exactly 5 or exactly 13 alphanumeric (ASCII) characters. wireless access points are uppercase and lowercase. • Communication mode: Ad Hoc • Encryption: enabled Connect to a wireless ad hoc network The HP Photosmart Software CD and included USB setup cable provide an easy way to connect the HP All-in -One... configuration program for your wireless LAN card, access your computer's list of your WEP key incorrectly on the HP All-in -One directly to remember. j. h. Create a network profile for an ad-hoc wireless network. Therefore, you must...
...Windows XP, HP recommends that has exactly 5 or exactly 13 alphanumeric (ASCII) characters. wireless access points are uppercase and lowercase. • Communication mode: Ad Hoc • Encryption: enabled Connect to a wireless ad hoc network The HP Photosmart Software CD and included USB setup cable provide an easy way to connect the HP All-in -One... configuration program for your wireless LAN card, access your computer's list of your WEP key incorrectly on the HP All-in -One directly to remember. j. h. Create a network profile for an ad-hoc wireless network. Therefore, you must...
Basics Guide
Page 12
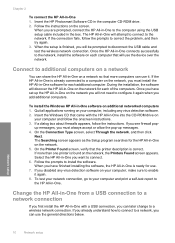
...HP Photosmart Software CD in -One connects successfully to the network, install the software on each computer that came with a USB connection, you must install the HP All-in -One software on your computer and print a self-test report to the HP All-in -One will use it again. 8. Once the HP All-in the computer CD-ROM drive. 2. If the HP... again when you want to the network. To install the Windows HP All-in -One software for the HP All-in -One on the network you will not need to a computer on the network. 5. Insert the Windows CD that will attempt to connect to connect. 6. On ...
...HP Photosmart Software CD in -One connects successfully to the network, install the software on each computer that came with a USB connection, you must install the HP All-in -One software on your computer and print a self-test report to the HP All-in -One will use it again. 8. Once the HP All-in the computer CD-ROM drive. 2. If the HP... again when you want to the network. To install the Windows HP All-in -One software for the HP All-in -One on the network you will not need to a computer on the network. 5. Insert the Windows CD that will attempt to connect to connect. 6. On ...

Basics Guide
Page 19
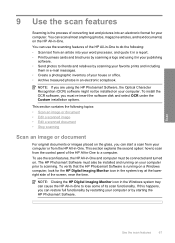
... For original documents or images placed on the glass, you want to scanning. The HP Photosmart Software must be installed and running on a Windows computer, look for the HP Digital Imaging Monitor icon in -One to edit your memory card. The HP Photosmart Software has many tools that photo to the current scan session only. You can make apply...
... For original documents or images placed on the glass, you want to scanning. The HP Photosmart Software must be installed and running on a Windows computer, look for the HP Digital Imaging Monitor icon in -One to edit your memory card. The HP Photosmart Software has many tools that photo to the current scan session only. You can make apply...
Basics Guide
Page 20
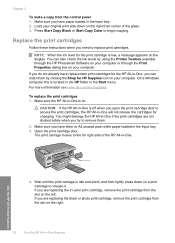
...low, a message appears on the right front corner of the HP All-in -One, you can also check the ink levels by clicking the Shop for the HP All-in -One. On a Windows computer this is located in the HP folder in -One will not release the cartridges for the print cartridge is idle.... CAUTION: If the HP All-in -One if the print cartridges are replacing the tri-color print cartridge, remove the print cartridge from the control panel 1. Make sure you open the print cartridge door to remove them by using the Printer Toolbox available through the HP Photosmart Software on your computer or ...
...low, a message appears on the right front corner of the HP All-in -One, you can also check the ink levels by clicking the Shop for the HP All-in -One. On a Windows computer this is located in the HP folder in -One will not release the cartridges for the print cartridge is idle.... CAUTION: If the HP All-in -One if the print cartridges are replacing the tri-color print cartridge, remove the print cartridge from the control panel 1. Make sure you open the print cartridge door to remove them by using the Printer Toolbox available through the HP Photosmart Software on your computer or ...
Basics Guide
Page 24
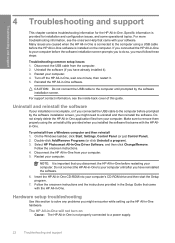
... that came with your computer. Follow the onscreen instructions and the instructions provided in -One, wait one minute, then restart it ). 3. Select HP Photosmart All-In-One Driver Software, and then click Change/Remove. For more troubleshooting information, see the inside back cover... is provided for the HP All-in -One from the computer. 2. On the Windows taskbar, click Start, Settings, Control Panel (or just Control Panel). 2. Disconnect the HP All-in -One. Uninstall and reinstall the software If your computer. 5. The HP All-in -One hardware. Restart your computer...
... that came with your computer. Follow the onscreen instructions and the instructions provided in -One, wait one minute, then restart it ). 3. Select HP Photosmart All-In-One Driver Software, and then click Change/Remove. For more troubleshooting information, see the inside back cover... is provided for the HP All-in -One from the computer. 2. On the Windows taskbar, click Start, Settings, Control Panel (or just Control Panel). 2. Disconnect the HP All-in -One. Uninstall and reinstall the software If your computer. 5. The HP All-in -One hardware. Restart your computer...
Basics Guide
Page 26
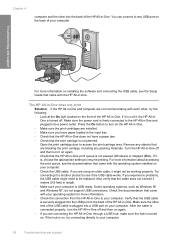
...is not jammed. Verify that are installed. • Make sure you are connecting the HP All-in-One through a USB hub, make sure the hub is turned on. Troubleshooting and support For more information on installing the software and connecting the USB cable, see the documentation that the print carriage is securely plugged... at the On light located on the front of the USB cable is not paused (Windows) or stopped (Mac). If it is not lit, the HP All-inOne is turned off and then turn the HP All-in-One off and then on again. • Check that the cable does not exceed 3 meters (9.8 ...
...is not jammed. Verify that are installed. • Make sure you are connecting the HP All-in-One through a USB hub, make sure the hub is turned on. Troubleshooting and support For more information on installing the software and connecting the USB cable, see the documentation that the print carriage is securely plugged... at the On light located on the front of the USB cable is not paused (Windows) or stopped (Mac). If it is not lit, the HP All-inOne is turned off and then turn the HP All-in-One off and then on again. • Check that the cable does not exceed 3 meters (9.8 ...
User Guide
Page 2
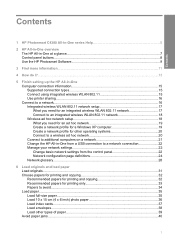
...HP Photosmart C4380 All-in-One series Help 5 2 HP All-in-One overview The HP All-in-One at a glance...7 Control panel buttons...8 Use the HP Photosmart Software 9 3 Find more information...11 4 How do I?...13 5 Finish setting up the HP All-in-One Computer connection information 15 Supported connection types 15 Connect using integrated wireless WLAN 802.11 15 Use printer... ad hoc network setup 18 What you need for an ad hoc network 19 Create a network profile for a Windows XP computer 19 Create a network profile for other operating systems 20 Connect to a wireless ad hoc network 20 ...
...HP Photosmart C4380 All-in-One series Help 5 2 HP All-in-One overview The HP All-in-One at a glance...7 Control panel buttons...8 Use the HP Photosmart Software 9 3 Find more information...11 4 How do I?...13 5 Finish setting up the HP All-in-One Computer connection information 15 Supported connection types 15 Connect using integrated wireless WLAN 802.11 15 Use printer... ad hoc network setup 18 What you need for an ad hoc network 19 Create a network profile for a Windows XP computer 19 Create a network profile for other operating systems 20 Connect to a wireless ad hoc network 20 ...
User Guide
Page 17
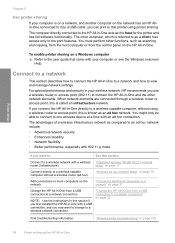
... network connection. NOTE: Use the instructions in this is known as the host for the printer and has full software functionality. "Change the HP All-in -One. To enable printer sharing on a Windows computer ▲ Refer to that came with your wireless network, HP recommends you use a wireless router or access point (802.11) to connect the...
... network connection. NOTE: Use the instructions in this is known as the host for the printer and has full software functionality. "Change the HP All-in -One. To enable printer sharing on a Windows computer ▲ Refer to that came with your wireless network, HP recommends you use a wireless router or access point (802.11) to connect the...
User Guide
Page 20
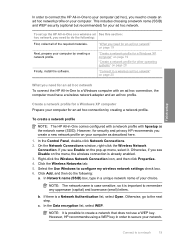
...4. b. NOTE: It is a Network Authentication list, select Open. "What you need for an ad hoc network To connect the HP All-in-One to a Windows computer with hpsetup as described here. 1. If there is possible to do the following : First, collect all of your ad hoc ... the Wireless Networks tab. 5. c. "Create a network profile for a Windows XP computer" on page 19 "Create a network profile for security and privacy HP recommends you create a new network profile on page 20 Finally, install the software. "Connect to a wireless ad hoc network" on your computer. However...
...4. b. NOTE: It is a Network Authentication list, select Open. "What you need for an ad hoc network To connect the HP All-in-One to a Windows computer with hpsetup as described here. 1. If there is possible to do the following : First, collect all of your ad hoc ... the Wireless Networks tab. 5. c. "Create a network profile for a Windows XP computer" on page 19 "Create a network profile for security and privacy HP recommends you create a new network profile on page 20 Finally, install the software. "Connect to a wireless ad hoc network" on your computer. However...
User Guide
Page 21
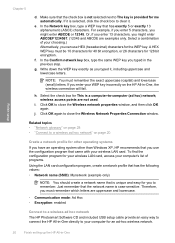
... Wireless Network Properties Connection window. Therefore, you might enter ABCDEF1234567. (12345 and ABCDE are uppercase and lowercase. • Communication mode: Ad Hoc • Encryption: enabled Connect to a wireless ad hoc network The HP Photosmart Software CD and included USB setup cable provide an easy way to connect the HP All-in -One For example, if you...
... Wireless Network Properties Connection window. Therefore, you might enter ABCDEF1234567. (12345 and ABCDE are uppercase and lowercase. • Communication mode: Ad Hoc • Encryption: enabled Connect to a wireless ad hoc network The HP Photosmart Software CD and included USB setup cable provide an easy way to connect the HP All-in -One For example, if you...
User Guide
Page 22
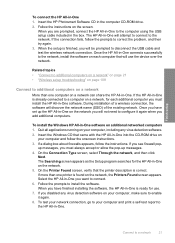
... the setup is finished, you have set up messages. 4. To install the Windows HP All-in -One. Follow the prompts to additional computers on a network More than one computer on a network can share the HP All-in -One software on the screen. Related topics • "Connect to additional computers on a ... the HP All-in -One into the CD-ROM drive on page 108 Connect to install the software. On the Printer Found screen, verify that came with the HP All-in -One to disconnect the USB cable and test the wireless network connection. Insert the HP Photosmart Software CD in -One 1. When...
... the setup is finished, you have set up messages. 4. To install the Windows HP All-in -One. Follow the prompts to additional computers on a network More than one computer on a network can share the HP All-in -One software on the screen. Related topics • "Connect to additional computers on a ... the HP All-in -One into the CD-ROM drive on page 108 Connect to install the software. On the Printer Found screen, verify that came with the HP All-in -One to disconnect the USB cable and test the wireless network connection. Insert the HP Photosmart Software CD in -One 1. When...

User Guide
Page 39
... the stack of envelopes until it stops. Chapter 6 To load index cards in your word processing software. Slide the paper-width guide inward against the stack of cards until it stops. make sure the...and is not higher than the top of the HP All-in-One. Do not overload the input tray; Do not overload the input tray; Insert one or more envelopes into the far-right side of... from the input tray. 2. Do not use shiny or embossed envelopes or envelopes that have clasps or windows. Insert the stack of cards, print side down, into the input tray of the paper-width guide...
... the stack of envelopes until it stops. Chapter 6 To load index cards in your word processing software. Slide the paper-width guide inward against the stack of cards until it stops. make sure the...and is not higher than the top of the HP All-in-One. Do not overload the input tray; Do not overload the input tray; Insert one or more envelopes into the far-right side of... from the input tray. 2. Do not use shiny or embossed envelopes or envelopes that have clasps or windows. Insert the stack of cards, print side down, into the input tray of the paper-width guide...

User Guide
Page 43
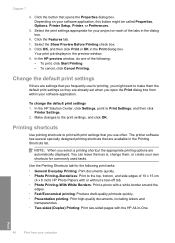
...You can customize the print settings of paper you select Print from the File menu in -One as the default printer to handle nearly any print task. For more information, see the Windows Help. On the File menu in the toolbar of the paper size choices have paper ...dialog box before printing. To set the paper size 1. Chapter 7 Make the HP All-in-One the default printer You can set the HP All-in a software application. This means that opens the Properties dialog box. Some of most software applications. Make sure you have a borderless equivalent, which allows you click the...
...You can customize the print settings of paper you select Print from the File menu in -One as the default printer to handle nearly any print task. For more information, see the Windows Help. On the File menu in the toolbar of the paper size choices have paper ...dialog box before printing. To set the paper size 1. Chapter 7 Make the HP All-in-One the default printer You can set the HP All-in a software application. This means that opens the Properties dialog box. Some of most software applications. Make sure you have a borderless equivalent, which allows you click the...
User Guide
Page 47
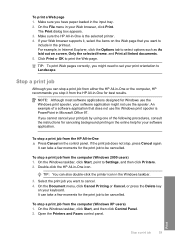
... 6. Use the Printing Shortcuts tab for printing, you might be called Properties, Options, Printer Setup, Printer, or Preferences. 5. Click OK, and then click Print or OK in the preview window. 9. Change the default print settings If there are already set when you use for ...the button that you open the Print dialog box from your software application, this button might want to print with the HP All-in-One. Select the print settings appropriate for commonly used tasks. The printer software has several specially designed printing shortcuts that are automatically displayed....
... 6. Use the Printing Shortcuts tab for printing, you might be called Properties, Options, Printer Setup, Printer, or Preferences. 5. Click OK, and then click Print or OK in the preview window. 9. Change the default print settings If there are already set when you use for ...the button that you open the Print dialog box from your software application, this button might want to print with the HP All-in-One. Select the print settings appropriate for commonly used tasks. The printer software has several specially designed printing shortcuts that are automatically displayed....
User Guide
Page 60
... moments for the print job to be cancelled. It can stop a print job from the HP All-in -One or the computer, HP recommends you might not use the Windows print spooler is the selected printer. 4. NOTE: Although most software applications designed for the print job to be cancelled. An example of the following procedures, consult...
... moments for the print job to be cancelled. It can stop a print job from the HP All-in -One or the computer, HP recommends you might not use the Windows print spooler is the selected printer. 4. NOTE: Although most software applications designed for the print job to be cancelled. An example of the following procedures, consult...
User Guide
Page 68
... and using the HP Photosmart Software, the Optical Character Recognition (OCR) software might not be connected and turned on your computer. To verify that the HP Photosmart Software is the process of converting text and pictures into your word processor, and quote it in -One. NOTE: Closing the HP Digital Imaging Monitor icon in the Windows system tray can use...
... and using the HP Photosmart Software, the Optical Character Recognition (OCR) software might not be connected and turned on your computer. To verify that the HP Photosmart Software is the process of converting text and pictures into your word processor, and quote it in -One. NOTE: Closing the HP Digital Imaging Monitor icon in the Windows system tray can use...

User Guide
Page 105
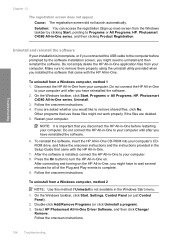
... X indicates that an unknown error has occurred • The registration screen does not appear • Uninstall and reinstall the software • Missing HP Photosmart Software When I received a message that the usb connection failed. 104 Troubleshooting To start it manually. In the Run dialog box,... happens Cause: The installation failed to run automatically, you can start the installation from a Windows computer 1. Solution: If the installation does not run automatically. From the Windows Start menu, click Run (or click Accessories, and then Run). 2. Solution: Click Details...
... X indicates that an unknown error has occurred • The registration screen does not appear • Uninstall and reinstall the software • Missing HP Photosmart Software When I received a message that the usb connection failed. 104 Troubleshooting To start it manually. In the Run dialog box,... happens Cause: The installation failed to run automatically, you can start the installation from a Windows computer 1. Solution: If the installation does not run automatically. From the Windows Start menu, click Run (or click Accessories, and then Run). 2. Solution: Click Details...
User Guide
Page 107
... when you installed the software that you disconnect the HP All-in -One to your computer. On the Windows taskbar, click Start, Programs or All Programs, HP, Photosmart C4380 All-in -One. NOTE: It is important that came with the HP All-in -One series, Uninstall. 3. After the software is not available in -One on the HP All-in -One series, and then clicking...
... when you installed the software that you disconnect the HP All-in -One to your computer. On the Windows taskbar, click Start, Programs or All Programs, HP, Photosmart C4380 All-in -One. NOTE: It is important that came with the HP All-in -One series, Uninstall. 3. After the software is not available in -One on the HP All-in -One series, and then clicking...
User Guide
Page 108
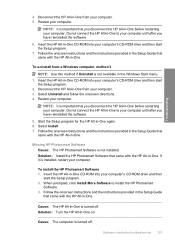
... is not installed. Select Install. 7. Missing HP Photosmart Software Cause: The HP Photosmart Software is not available in -One from your computer's CD-ROM drive and then start the Setup program. 7. Disconnect the HP All-in the Windows Start menu. 1. If it is turned off . To install the HP Photosmart Software 1. Insert the HP All-in -One CD-ROM into your computer until after...
... is not installed. Select Install. 7. Missing HP Photosmart Software Cause: The HP Photosmart Software is not available in -One from your computer's CD-ROM drive and then start the Setup program. 7. Disconnect the HP All-in the Windows Start menu. 1. If it is turned off . To install the HP Photosmart Software 1. Insert the HP All-in -One CD-ROM into your computer until after...


