Resolving Start Up and No Boot Problems Checklist
Page 1
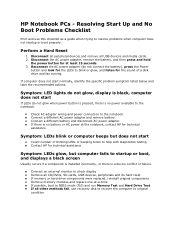
... does not start If LEDs do hard reset If memory or hard drive components were replaced, reinstall original components Remove memory modules and replace one-at least 15 seconds. 3. Symptom: LEDs blink or computer beeps but does not start Count number of a disk drive and fan turning. Resolving Start Up and No Boot Problems Checklist Print and use recovery disk to recover the computer to the notebook. Disconnect the AC power adapter, remove the battery, and then press and hold the power button for...
... does not start If LEDs do hard reset If memory or hard drive components were replaced, reinstall original components Remove memory modules and replace one-at least 15 seconds. 3. Symptom: LEDs blink or computer beeps but does not start Count number of a disk drive and fan turning. Resolving Start Up and No Boot Problems Checklist Print and use recovery disk to recover the computer to the notebook. Disconnect the AC power adapter, remove the battery, and then press and hold the power button for...
Resolving Start Up and No Boot Problems Checklist
Page 2
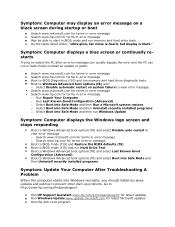
....hp.com/go/helpandsupport for latest updates Run Windows Update www.update.microsoft.com for terms in error message Boot to BIOS mode (f10) and Restore the BIOS defaults (f9) Boot to BIOS mode (f10) and run Hard Drive Test Boot to Windows Advanced boot options (f8) and select Last Known Good Configuration (Advanced) Boot to Windows Advanced boot options (f8) and select Boot into Safe Mode and then Uninstall recently installed programs Symptom: Update Your Computer After Troubleshooting A Problem When the computer starts...
....hp.com/go/helpandsupport for latest updates Run Windows Update www.update.microsoft.com for terms in error message Boot to BIOS mode (f10) and Restore the BIOS defaults (f9) Boot to BIOS mode (f10) and run Hard Drive Test Boot to Windows Advanced boot options (f8) and select Last Known Good Configuration (Advanced) Boot to Windows Advanced boot options (f8) and select Boot into Safe Mode and then Uninstall recently installed programs Symptom: Update Your Computer After Troubleshooting A Problem When the computer starts...
Notebook Essentials - Windows 7
Page 23
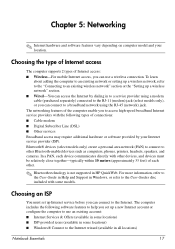
... Internet service before you set up a wireless network" section. ■ Wired-You can use an existing account: ■ Internet Services & Offers (available in some locations) ■ ISP-provided icons (available in some models. Bluetooth® devices (select models only) create a personal area network (PAN) to connect to the User Guides disc included with the following software features to help you can connect to the Internet wizard (available in HP QuickWeb. Chapter 5: Networking ✎ Internet hardware and software...
... Internet service before you set up a wireless network" section. ■ Wired-You can use an existing account: ■ Internet Services & Offers (available in some locations) ■ ISP-provided icons (available in some models. Bluetooth® devices (select models only) create a personal area network (PAN) to connect to the User Guides disc included with the following software features to help you can connect to the Internet wizard (available in HP QuickWeb. Chapter 5: Networking ✎ Internet hardware and software...
Notebook Essentials - Windows 7
Page 45
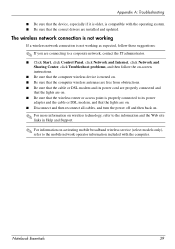
... are connecting to a corporate network, contact the IT administrator. ■ Click Start, click Control Panel, click Network and Internet, click Network and Sharing Center, click Troubleshoot problems, and then follow the on-screen instructions. ■ Be sure that the computer wireless device is turned on. ■ Be sure that the computer wireless antennas are free from obstructions. ■ Be sure that the cable or DSL modem and its power adapter...
... are connecting to a corporate network, contact the IT administrator. ■ Click Start, click Control Panel, click Network and Internet, click Network and Sharing Center, click Troubleshoot problems, and then follow the on-screen instructions. ■ Be sure that the computer wireless device is turned on. ■ Be sure that the computer wireless antennas are free from obstructions. ■ Be sure that the cable or DSL modem and its power adapter...
HP Pavilion dm1 Notebook PC - Maintenance and Service Guide
Page 24
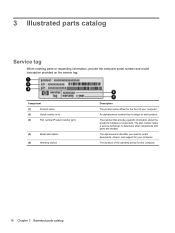
3 Illustrated parts catalog Service tag When ordering parts or requesting information, provide the computer serial number and model description provided on the service tag: Component (1) Product name (2) Serial number (s/n) (3) Part number/Product number (p/n) (4) Model description (5) Warranty period Description The product name affixed to the front of the warranty period for your computer. The part number helps a service technician to locate documents, drivers, and support for this computer. 16 Chapter 3 Illustrated parts catalog...
3 Illustrated parts catalog Service tag When ordering parts or requesting information, provide the computer serial number and model description provided on the service tag: Component (1) Product name (2) Serial number (s/n) (3) Part number/Product number (p/n) (4) Model description (5) Warranty period Description The product name affixed to the front of the warranty period for your computer. The part number helps a service technician to locate documents, drivers, and support for this computer. 16 Chapter 3 Illustrated parts catalog...

HP Pavilion dm1 Notebook PC - Maintenance and Service Guide
Page 91
... Select Start>All Programs>Roxio. Connect the external hard drive containing the Disaster Recovery Set to a USB port on your computer. 2. Change the boot device order by restarting your computer. Connect a bootable USB flash drive or external drive to your computer. 2. Browse to select the USB flash drive, and then press enter. 5. Using the Instant Restore utility when the operating system is functioning To recover information when the operating system is functioning properly, follow the on-screen instructions. 4. Use the arrow keys to the external hard drive containing...
... Select Start>All Programs>Roxio. Connect the external hard drive containing the Disaster Recovery Set to a USB port on your computer. 2. Change the boot device order by restarting your computer. Connect a bootable USB flash drive or external drive to your computer. 2. Browse to select the USB flash drive, and then press enter. 5. Using the Instant Restore utility when the operating system is functioning To recover information when the operating system is functioning properly, follow the on-screen instructions. 4. Use the arrow keys to the external hard drive containing...

HP Pavilion dm1 Notebook PC - Maintenance and Service Guide
Page 92
.... When the HP computer logo is displayed on the screen, press the f6 button repeatedly until the Windows status bar is performing optimally. 84 Chapter 7 Backup and recovery NOTE: The backup process may be prompted for your selected restore state. NOTE: Windows includes the User Account Control feature to confirm your permission or password for tasks such as installing software, running utilities, or changing Windows settings. Using system restore points When...
.... When the HP computer logo is displayed on the screen, press the f6 button repeatedly until the Windows status bar is performing optimally. 84 Chapter 7 Backup and recovery NOTE: The backup process may be prompted for your selected restore state. NOTE: Windows includes the User Account Control feature to confirm your permission or password for tasks such as installing software, running utilities, or changing Windows settings. Using system restore points When...
HP Pavilion dm1 Notebook PC - Maintenance and Service Guide
Page 109
Index A AC adapter identifying 15 administrator password 75 antennas 14 applications key, Windows 8 audio, product description 3 audio-in (microphone) jack 10 audio-out (headphone) jack 10 audio-in jack pin assignments 89 audio-out jack pin assignments 89 B base enclosure, spare part number 20 battery identifying 15 removal 36 spare part number 36 battery bay, identifying 13 battery light 9 battery release latches 13 bay, battery 13 boot options 75 boot order 75 buttons left TouchPad 5 power 7 right TouchPad 5 wireless 7 C cables security 11 cables, service considerations 29 caps lock light, ...
Index A AC adapter identifying 15 administrator password 75 antennas 14 applications key, Windows 8 audio, product description 3 audio-in (microphone) jack 10 audio-out (headphone) jack 10 audio-in jack pin assignments 89 audio-out jack pin assignments 89 B base enclosure, spare part number 20 battery identifying 15 removal 36 spare part number 36 battery bay, identifying 13 battery light 9 battery release latches 13 bay, battery 13 boot options 75 boot order 75 buttons left TouchPad 5 power 7 right TouchPad 5 wireless 7 C cables security 11 cables, service considerations 29 caps lock light, ...
HP Pavilion dm1 Notebook PC - Maintenance and Service Guide
Page 110
...drive 2 Ethernet 3 external media cards 3 graphics 1 hard drives 2 keyboard 4 memory module 2 microphone 2 operating system 4 optical drives 2 panel 1 pointing device 4 ports 3 power requirements 4 processors 1 product name 1 security 4 serviceability 4 solid-state drive 2 webcam 3 wireless 3 product name 1 R release latches battery 13 removal/replacement preliminaries 29 procedures 34 restoring default settings 74 right TouchPad button, identifying 5 RJ-45 (network) jack, identifying 10 RJ-45 jack pin assignments 91 RTC battery removal 42 spare part number 19, 42 rubber kit, spare part number...
...drive 2 Ethernet 3 external media cards 3 graphics 1 hard drives 2 keyboard 4 memory module 2 microphone 2 operating system 4 optical drives 2 panel 1 pointing device 4 ports 3 power requirements 4 processors 1 product name 1 security 4 serviceability 4 solid-state drive 2 webcam 3 wireless 3 product name 1 R release latches battery 13 removal/replacement preliminaries 29 procedures 34 restoring default settings 74 right TouchPad button, identifying 5 RJ-45 (network) jack, identifying 10 RJ-45 jack pin assignments 91 RTC battery removal 42 spare part number 19, 42 rubber kit, spare part number...
HP Notebook PC User Guide - Windows 7
Page 6
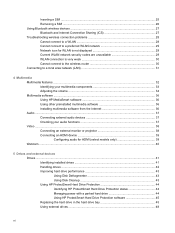
... Adjusting the volume ...34 Multimedia software ...36 Using HP MediaSmart software 36 Using other preinstalled multimedia software 36 Installing multimedia software from the Internet 36 Audio ...37 Connecting external audio devices 37 Checking your audio functions 37 Video ...38 Connecting an external monitor or projector 38 Connecting an HDMI device 39 Configuring audio for HDMI (select models only 39 Webcam ...40 5 Drives and external devices Drives ...41 Identifying installed drives 41 Handling drives ...42 Improving hard drive performance 43 Using Disk Defragmenter 43 Using Disk...
... Adjusting the volume ...34 Multimedia software ...36 Using HP MediaSmart software 36 Using other preinstalled multimedia software 36 Installing multimedia software from the Internet 36 Audio ...37 Connecting external audio devices 37 Checking your audio functions 37 Video ...38 Connecting an external monitor or projector 38 Connecting an HDMI device 39 Configuring audio for HDMI (select models only 39 Webcam ...40 5 Drives and external devices Drives ...41 Identifying installed drives 41 Handling drives ...42 Improving hard drive performance 43 Using Disk Defragmenter 43 Using Disk...
HP Notebook PC User Guide - Windows 7
Page 38
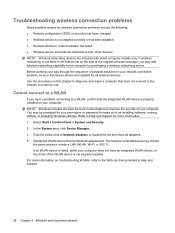
... permission or password for tasks such as installing software, running utilities, or changing Windows settings. For more information. 1. Before working your way through the sequence of the WLAN device is not listed in this chapter to diagnose and repair a computer that the integrated WLAN device is not installed correctly or has been disabled. ● Wireless device or router hardware has failed. ● Wireless device encountered interference from the Network adapters list. Troubleshooting wireless connection problems Some...
... permission or password for tasks such as installing software, running utilities, or changing Windows settings. For more information. 1. Before working your way through the sequence of the WLAN device is not listed in this chapter to diagnose and repair a computer that the integrated WLAN device is not installed correctly or has been disabled. ● Wireless device or router hardware has failed. ● Wireless device encountered interference from the Network adapters list. Troubleshooting wireless connection problems Some...

HP Notebook PC User Guide - Windows 7
Page 54
... drive. Select Start > Control Panel > Hardware and Sound > HP ProtectSmart Hard Drive Protection. On the Icon in an optional docking device, or are connected to normal operation. Before moving the computer, HP recommends shutting down . ● The computer does not initiate Sleep or Hibernation. After one of these events, HP ProtectSmart Hard Drive Protection returns the hard drive to a USB port, are in system tray row, click Show. 3. The Mobility Center indicates HP ProtectSmart Hard Drive...
... drive. Select Start > Control Panel > Hardware and Sound > HP ProtectSmart Hard Drive Protection. On the Icon in an optional docking device, or are connected to normal operation. Before moving the computer, HP recommends shutting down . ● The computer does not initiate Sleep or Hibernation. After one of these events, HP ProtectSmart Hard Drive Protection returns the hard drive to a USB port, are in system tray row, click Show. 3. The Mobility Center indicates HP ProtectSmart Hard Drive...

HP Notebook PC User Guide - Windows 7
Page 55
... is supported. Disconnect all external devices connected to open the software and change the settings. 3. In Mobility Center, click the Hard Drive icon to the computer. 4. Save your user privileges, you , loosen the hard drive cover screws (1) using a small Phillips screwdriver. Replacing the hard drive in Hibernation, turn the computer on your work. 2. NOTE: If prompted by pressing the power button. Using HP ProtectSmart Hard Drive Protection software The HP ProtectSmart Hard Drive Protection software: ● Enables and disables HP ProtectSmart Hard Drive Protection...
... is supported. Disconnect all external devices connected to open the software and change the settings. 3. In Mobility Center, click the Hard Drive icon to the computer. 4. Save your user privileges, you , loosen the hard drive cover screws (1) using a small Phillips screwdriver. Replacing the hard drive in Hibernation, turn the computer on your work. 2. NOTE: If prompted by pressing the power button. Using HP ProtectSmart Hard Drive Protection software The HP ProtectSmart Hard Drive Protection software: ● Enables and disables HP ProtectSmart Hard Drive Protection...

HP Notebook PC User Guide - Windows 7
Page 67
7 Pointing devices and keyboard Setting pointing device preferences To access Mouse Properties, select Start > Devices and Printers > Mouse. Use the TouchPad buttons like the corresponding buttons on the computer. Simply sliding your finger off the TouchPad before moving it to the scroll zone will not activate the scrolling function. NOTE: If you must lift your finger from the TouchPad to the scroll zone. Setting pointing device preferences 57 Connecting an external mouse You can connect an external USB mouse to...
7 Pointing devices and keyboard Setting pointing device preferences To access Mouse Properties, select Start > Devices and Printers > Mouse. Use the TouchPad buttons like the corresponding buttons on the computer. Simply sliding your finger off the TouchPad before moving it to the scroll zone will not activate the scrolling function. NOTE: If you must lift your finger from the TouchPad to the scroll zone. Setting pointing device preferences 57 Connecting an external mouse You can connect an external USB mouse to...
HP Notebook PC User Guide - Windows 7
Page 83
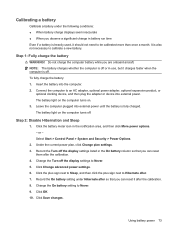
... are onboard aircraft. Connect the computer to calibrate a new battery. Leave the computer plugged into external power until the battery is also not necessary to an AC adapter, optional power adapter, optional expansion product, or optional docking device, and then plug the adapter or device into the computer. 2. The battery light on . 3. Select Start > Control Panel > System and Security > Power Options. 2. Under the current power plan, click Change plan settings. 3. Click Change advanced power settings. 6. Click the plus...
... are onboard aircraft. Connect the computer to calibrate a new battery. Leave the computer plugged into external power until the battery is also not necessary to an AC adapter, optional power adapter, optional expansion product, or optional docking device, and then plug the adapter or device into the computer. 2. The battery light on . 3. Select Start > Control Panel > System and Security > Power Options. 2. Under the current power plan, click Change plan settings. 3. Click Change advanced power settings. 6. Click the plus...
HP Notebook PC User Guide - Windows 7
Page 88
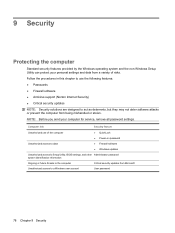
...; Power-on password ● Firewall software ● Windows updates Unauthorized access to Setup Utility, BIOS settings, and other Administrator password system identification information Ongoing or future threats to a Windows user account User password 78 Chapter 9 Security Follow the procedures in this chapter to use of risks. 9 Security Protecting the computer Standard security features provided by the Windows operating system and the non-Windows Setup Utility can protect your computer for service, remove all password settings.
...; Power-on password ● Firewall software ● Windows updates Unauthorized access to Setup Utility, BIOS settings, and other Administrator password system identification information Ongoing or future threats to a Windows user account User password 78 Chapter 9 Security Follow the procedures in this chapter to use of risks. 9 Security Protecting the computer Standard security features provided by the Windows operating system and the non-Windows Setup Utility can protect your computer for service, remove all password settings.

HP Notebook PC User Guide - Windows 7
Page 96
...: a. Using the hard drive path you recorded earlier, open the folder on the screen after it has been downloaded to your computer and access the BIOS update you connect your computer to be downloaded. You must access this information to locate the update later, after the download is to a network, consult the network administrator before installing any instructions that is typically Local Disk (C:). 3. To download a BIOS update: 1. BIOS installation procedures vary. Follow any software updates, especially system BIOS updates. Open Windows...
...: a. Using the hard drive path you recorded earlier, open the folder on the screen after it has been downloaded to your computer and access the BIOS update you connect your computer to be downloaded. You must access this information to locate the update later, after the download is to a network, consult the network administrator before installing any instructions that is typically Local Disk (C:). 3. To download a BIOS update: 1. BIOS installation procedures vary. Follow any software updates, especially system BIOS updates. Open Windows...

HP Notebook PC User Guide - Windows 7
Page 109
..., battery 13 BD drive 48 BIOS, updating 85 Blu-ray Disc ROM with SuperMulti DVD±R/RW Double Layer 48 Bluetooth device 17 boot options 98 boot order 98 buttons left TouchPad 5 power 7 right TouchPad 5 wireless 7 C cables LAN 31 security 11 USB 50 VGA 38 caps lock light, identifying 6 CD drive 48 components additional hardware 15 bottom 13 display 12 front 9 left-side 11 right-side 10 TouchPad 5 computer shutdown 77 connection external power 67 WLAN 23 conservation, power 76 cord, power...
..., battery 13 BD drive 48 BIOS, updating 85 Blu-ray Disc ROM with SuperMulti DVD±R/RW Double Layer 48 Bluetooth device 17 boot options 98 boot order 98 buttons left TouchPad 5 power 7 right TouchPad 5 wireless 7 C cables LAN 31 security 11 USB 50 VGA 38 caps lock light, identifying 6 CD drive 48 components additional hardware 15 bottom 13 display 12 front 9 left-side 11 right-side 10 TouchPad 5 computer shutdown 77 connection external power 67 WLAN 23 conservation, power 76 cord, power...
HP Notebook PC User Guide - Windows 7
Page 110
... Module 24, 25 HP ProtectSmart Hard Drive Protection 44 HP QuickWeb introducing 1 Setup Utility 98 HP USB Ethernet Adapter, connecting 31 hubs 50 I icons network 18, 29 wireless 18 installed drives, identifying 41 interference, minimizing 30 internal display switch, identifying 12 internal microphone, identifying 12, 33 Internet connection setup 21 J jacks audio-in (microphone) 10, 33 audio-out (headphone) 10, 33 RJ-45 (network) 10 K keyboard hotkeys, identifying 58 keypad, embedded enabling and disabling 61 identifying 61 switching key functions 62 using 61 keypad, external num lock 62 using...
... Module 24, 25 HP ProtectSmart Hard Drive Protection 44 HP QuickWeb introducing 1 Setup Utility 98 HP USB Ethernet Adapter, connecting 31 hubs 50 I icons network 18, 29 wireless 18 installed drives, identifying 41 interference, minimizing 30 internal display switch, identifying 12 internal microphone, identifying 12, 33 Internet connection setup 21 J jacks audio-in (microphone) 10, 33 audio-out (headphone) 10, 33 RJ-45 (network) 10 K keyboard hotkeys, identifying 58 keypad, embedded enabling and disabling 61 identifying 61 switching key functions 62 using 61 keypad, external num lock 62 using...

HP Notebook PC User Guide - Windows 7
Page 111
... 15 power light, identifying 6 power-on password creating 81 entering 81 managing 81 R readable media 63 recovery performing 92 program or driver 88 recovery discs 92 recovery discs 88, 89 Recovery Manager 88, 92 recovery partition 88 recovery, system 92 regulatory information HP Mobile Broadband Module serial number 16 regulatory label 16 wireless 16 release latches battery 13, 70 restore points 91 restoring default settings 96 right TouchPad button, identifying 5 RJ-45 (network) jack, identifying 10 S screen brightness hotkeys 60 screen image, switching 59 security cable slot, identifying...
... 15 power light, identifying 6 power-on password creating 81 entering 81 managing 81 R readable media 63 recovery performing 92 program or driver 88 recovery discs 92 recovery discs 88, 89 Recovery Manager 88, 92 recovery partition 88 recovery, system 92 regulatory information HP Mobile Broadband Module serial number 16 regulatory label 16 wireless 16 release latches battery 13, 70 restore points 91 restoring default settings 96 right TouchPad button, identifying 5 RJ-45 (network) jack, identifying 10 S screen brightness hotkeys 60 screen image, switching 59 security cable slot, identifying...


