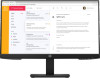
User Guide
Page 2
... an additional warranty. First Edition: October 2019 Document Part Number: L71563-001 Nothing herein should be available on your product. To access the latest user guide, go to http://www.hp.com/support, and follow the instructions to most models. Then select User Guides. HP shall not be liable for HP products and services are trademarks or registered trademarks of Microsoft Corporation in...
... an additional warranty. First Edition: October 2019 Document Part Number: L71563-001 Nothing herein should be available on your product. To access the latest user guide, go to http://www.hp.com/support, and follow the instructions to most models. Then select User Guides. HP shall not be liable for HP products and services are trademarks or registered trademarks of Microsoft Corporation in...

User Guide
Page 5
... stand 6 Attaching the monitor head to a mounting device 7 Connecting the cables ...8 Adjusting the monitor ...11 Installing a security cable ...12 Turning on the monitor ...13 HP watermark and image retention policy 13 2 Using the monitor ...14 Downloading software and utilities ...14 The Information file ...14 The Image Color Matching file ...14 Using the OSD menu ...14 Using the function buttons ...15 Reassigning the function buttons ...16 Changing the power mode setting ...16 Using Auto-Sleep Mode ...16 Adjusting blue light output (select products only 17 3 Support and troubleshooting...
... stand 6 Attaching the monitor head to a mounting device 7 Connecting the cables ...8 Adjusting the monitor ...11 Installing a security cable ...12 Turning on the monitor ...13 HP watermark and image retention policy 13 2 Using the monitor ...14 Downloading software and utilities ...14 The Information file ...14 The Image Color Matching file ...14 Using the OSD menu ...14 Using the function buttons ...15 Reassigning the function buttons ...16 Changing the power mode setting ...16 Using Auto-Sleep Mode ...16 Adjusting blue light output (select products only 17 3 Support and troubleshooting...

User Guide
Page 6
... Contacting support ...32 vi 4 Maintaining the monitor ...22 Maintenance guidelines ...22 Cleaning the monitor ...22 Shipping the monitor ...23 Appendix A Technical specifications ...24 54.6 cm (21.5 in) model specifications ...24 60.45 cm (23.8 in) model specifications ...24 68.6 cm (27 in) model specifications ...25 Preset display resolutions ...26 Energy saver feature ...27 Appendix B Accessibility ...28 HP and accessibility ...28 Finding the technology tools you need...
... Contacting support ...32 vi 4 Maintaining the monitor ...22 Maintenance guidelines ...22 Cleaning the monitor ...22 Shipping the monitor ...23 Appendix A Technical specifications ...24 54.6 cm (21.5 in) model specifications ...24 60.45 cm (23.8 in) model specifications ...24 68.6 cm (27 in) model specifications ...25 Preset display resolutions ...26 Energy saver feature ...27 Appendix B Accessibility ...28 HP and accessibility ...28 Finding the technology tools you need...

User Guide
Page 7
... a monitor, printer, scanner) to use only a power source and connection appropriate for computer users. 1 Getting started Important safety information A power cord is also available on power cords or cables. Care should be taken to route all power strips provide surge protection; It describes proper workstation setup and proper posture, health, and work habits for this capability. Monitors that might cause disturbing reflections from surrounding light and bright surfaces...
... a monitor, printer, scanner) to use only a power source and connection appropriate for computer users. 1 Getting started Important safety information A power cord is also available on power cords or cables. Care should be taken to route all power strips provide surge protection; It describes proper workstation setup and proper posture, health, and work habits for this capability. Monitors that might cause disturbing reflections from surrounding light and bright surfaces...
User Guide
Page 8
... then remove it with the convenient sliding tab release ● DisplayPort video input ● High-Definition Multimedia Interface (HDMI) video input ● VGA video input ● Audio-in jack (select models only) ● Four on-screen display (OSD) buttons, three that you can reconfigure to quickly allow selection of the monitor for an optional security cable ● On-screen display (OSD) adjustments in several languages for easy setup and screen optimization ● HP Display Assistant software for adjusting monitor settings and enabling...
... then remove it with the convenient sliding tab release ● DisplayPort video input ● High-Definition Multimedia Interface (HDMI) video input ● VGA video input ● Audio-in jack (select models only) ● Four on-screen display (OSD) buttons, three that you can reconfigure to quickly allow selection of the monitor for an optional security cable ● On-screen display (OSD) adjustments in several languages for easy setup and screen optimization ● HP Display Assistant software for adjusting monitor settings and enabling...

User Guide
Page 9
.... (4) Power light White: The monitor is in a reduced power state because of these functions, see Using the function buttons on . The function light icons indicate the default button functions. Amber: Monitor is on page 15. When the OSD menu is open, the Menu light turns on page 16 for more information. Front components Table 1-1 Front components and their descriptions Component Description (1) Menu button Press to open , press the buttons to quickly select...
.... (4) Power light White: The monitor is in a reduced power state because of these functions, see Using the function buttons on . The function light icons indicate the default button functions. Amber: Monitor is on page 15. When the OSD menu is open, the Menu light turns on page 16 for more information. Front components Table 1-1 Front components and their descriptions Component Description (1) Menu button Press to open , press the buttons to quickly select...

User Guide
Page 11
...: To prevent the screen from getting scratched, defaced, or broken and to prevent damage to the stand (1) and tighten the thumbscrew (2). Attaching the monitor stand TIP: Consider the placement of the panel (1). 3. Slide the top of the mounting plate on a flat surface covered with protective sheet foam or a nonabrasive cloth. Attach the base to the control buttons, position the monitor facedown on the...
...: To prevent the screen from getting scratched, defaced, or broken and to prevent damage to the stand (1) and tighten the thumbscrew (2). Attaching the monitor stand TIP: Consider the placement of the panel (1). 3. Slide the top of the mounting plate on a flat surface covered with protective sheet foam or a nonabrasive cloth. Attach the base to the control buttons, position the monitor facedown on the...

User Guide
Page 12
... recess (3). 6 Chapter 1 Getting started Disconnect and remove all cables are disconnected. 1. Removing the monitor stand IMPORTANT: Before disassembling the monitor, be sure that the manufacturer's mounting solution is compliant with the monitor. Position the monitor facedown on a flat surface covered by a UL-listed or CSA-listed wall-mount bracket. For best performance, use four 4 mm, 0.7 pitch, 10 mm-long screws. Slide the stand out of foam or a clean, dry cloth. 3. Swing...
... recess (3). 6 Chapter 1 Getting started Disconnect and remove all cables are disconnected. 1. Removing the monitor stand IMPORTANT: Before disassembling the monitor, be sure that the manufacturer's mounting solution is compliant with the monitor. Position the monitor facedown on a flat surface covered by a UL-listed or CSA-listed wall-mount bracket. For best performance, use four 4 mm, 0.7 pitch, 10 mm-long screws. Slide the stand out of foam or a clean, dry cloth. 3. Swing...

User Guide
Page 18
... to the monitor. NOTE: Use the operating system's display settings to rotate the image on the screen from landscape to attach and remove the lock. 12 Chapter 1 Getting started Installing a security cable You can secure the monitor to landscape. b. Pivot the monitor clockwise 90° from portrait to a fixed object with the base and potentially cause damage to landscape, open the OSD menu and select Image Adjustment, select On-Screen Menu Rotation...
... to the monitor. NOTE: Use the operating system's display settings to rotate the image on the screen from landscape to attach and remove the lock. 12 Chapter 1 Getting started Installing a security cable You can secure the monitor to landscape. b. Pivot the monitor clockwise 90° from portrait to a fixed object with the base and potentially cause damage to landscape, open the OSD menu and select Image Adjustment, select On-Screen Menu Rotation...

User Guide
Page 19
... Switching (IPS) display technology, which input is On), the current preset display resolution, and the recommended preset display resolution. This panel technology, however, is not covered under the HP warranty. Press the Menu button to open the OSD, select Power, select Power LED, and then select Off. ▲ Press the power button on your system, to turn off the monitor when it is not in the OSD menu. Static images may include camera surveillance, video...
... Switching (IPS) display technology, which input is On), the current preset display resolution, and the recommended preset display resolution. This panel technology, however, is not covered under the HP warranty. Press the Menu button to open the OSD, select Power, select Power LED, and then select Off. ▲ Press the power button on your system, to turn off the monitor when it is not in the OSD menu. Static images may include camera surveillance, video...

User Guide
Page 20
....hp.com/support: ● INF (Information) file ● ICM (Image Color Matching) files ● HP Display Assistant: Adjusts the monitor settings and enables theft-deterrence features To download the files: 1. Go to ensure monitor compatibility with the International Color Consortium (ICC) Profile Format specification. 2 Using the monitor Downloading software and utilities You can download and install the following table lists possible menu selections in the OSD, use the buttons at the bottom of the monitor...
....hp.com/support: ● INF (Information) file ● ICM (Image Color Matching) files ● HP Display Assistant: Adjusts the monitor settings and enables theft-deterrence features To download the files: 1. Go to ensure monitor compatibility with the International Color Consortium (ICC) Profile Format specification. 2 Using the monitor Downloading software and utilities You can download and install the following table lists possible menu selections in the OSD, use the buttons at the bottom of the monitor...
User Guide
Page 21
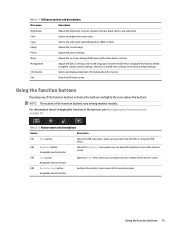
... and lights the icons above the buttons. For information about the monitor. Using the function buttons 15 Table 2-1 OSD menu options and descriptions Main menu Description Brightness+ Adjusts the brightness, contrast, dynamic contrast, black stretch, and video level. Input Selects the video input signal (DisplayPort, HDMI, or VGA). Information Selects and displays important information about changing the function of the monitor screen. (4) Next Active Input button Assignable function button Switches the monitor's input source to the factory default settings...
... and lights the icons above the buttons. For information about the monitor. Using the function buttons 15 Table 2-1 OSD menu options and descriptions Main menu Description Brightness+ Adjusts the brightness, contrast, dynamic contrast, black stretch, and video level. Input Selects the video input signal (DisplayPort, HDMI, or VGA). Information Selects and displays important information about changing the function of the monitor screen. (4) Next Active Input button Assignable function button Switches the monitor's input source to the factory default settings...
User Guide
Page 22
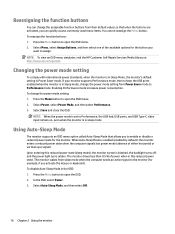
... Menu button to Performance mode. When Auto-Sleep Mode is enabled (enabled by default), the monitor enters a reduced power state when the computer signals low power mode (absence of the available options for the button you can change the assignable function buttons from Power Saver mode to open the OSD menu. 2. Using Auto-Sleep Mode The monitor supports an OSD menu option called Auto-Sleep Mode that when the buttons are activated, you want to keep the USB ports enabled when the monitor is blanked, the backlight turns...
... Menu button to Performance mode. When Auto-Sleep Mode is enabled (enabled by default), the monitor enters a reduced power state when the computer signals low power mode (absence of the available options for the button you can change the assignable function buttons from Power Saver mode to open the OSD menu. 2. Using Auto-Sleep Mode The monitor supports an OSD menu option called Auto-Sleep Mode that when the buttons are activated, you want to keep the USB ports enabled when the monitor is blanked, the backlight turns...

User Guide
Page 24
...does not enter The monitor's power saving control is Video resolution and/or refresh rate displayed on screen. Monitor is off . Be sure that the computer power is off while connecting the video cable. "Input Signal Out of Range" is Open the OSD menu and select Power, select Auto-Sleep into a low-power sleep state. The monitor's OSD Lockout function is incompatible. or Replace the video card or connect the video cable to unlock the feature is displayed. Connect the power cord. Video card is enabled. disabled. 3 Support and troubleshooting Solving common issues...
...does not enter The monitor's power saving control is Video resolution and/or refresh rate displayed on screen. Monitor is off . Be sure that the computer power is off while connecting the video cable. "Input Signal Out of Range" is Open the OSD menu and select Power, select Auto-Sleep into a low-power sleep state. The monitor's OSD Lockout function is incompatible. or Replace the video card or connect the video cable to unlock the feature is displayed. Connect the power cord. Video card is enabled. disabled. 3 Support and troubleshooting Solving common issues...
User Guide
Page 25
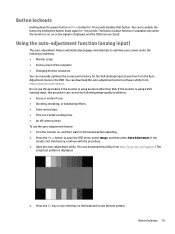
...: ● Monitor setup ● Factory reset of the computer ● Changing monitor resolution You can re-enable the button by holding the button down the power button or Menu button for the VGA (analog) input at any other than VGA. Do not use the auto-adjustment feature: 1. Press the Menu button to exit the test pattern. If the result is closed. Button lockouts 19 You can manually optimize the screen performance for 10 seconds disables that button. Press...
...: ● Monitor setup ● Factory reset of the computer ● Changing monitor resolution You can re-enable the button by holding the button down the power button or Menu button for the VGA (analog) input at any other than VGA. Do not use the auto-adjustment feature: 1. Press the Menu button to exit the test pattern. If the result is closed. Button lockouts 19 You can manually optimize the screen performance for 10 seconds disables that button. Press...

User Guide
Page 26
... video flickering or blurring. To restore the factory settings, press the Menu button to open the OSD menu, then select Management, select Factory Reset, and select Yes. To remove flickering or blurring (Phase): 1. Flickering or blurring may not be set correctly because the Phase settings are not adjustable for digital inputs. Press the Menu button to open the OSD menu, select Image, and then select Image Position. 20 Chapter 3 Support and troubleshooting NOTE: When using the auto-adjustment pattern software utility. Press the Menu button...
... video flickering or blurring. To restore the factory settings, press the Menu button to open the OSD menu, then select Management, select Factory Reset, and select Yes. To remove flickering or blurring (Phase): 1. Flickering or blurring may not be set correctly because the Phase settings are not adjustable for digital inputs. Press the Menu button to open the OSD menu, select Image, and then select Image Position. 20 Chapter 3 Support and troubleshooting NOTE: When using the auto-adjustment pattern software utility. Press the Menu button...

User Guide
Page 27
... software problem, go to contact HP and open a support case. Contacting support 21 The Horizontal Position shifts the image left or right; Use this section, you may need these numbers when contacting HP about your monitor. NOTE: Contact customer support to properly adjust the position of the monitor head. the Vertical Position shifts the image up or down arrow icons to replace the power cord, the AC adapter (select products only), or any other cables that display...
... software problem, go to contact HP and open a support case. Contacting support 21 The Horizontal Position shifts the image left or right; Use this section, you may need these numbers when contacting HP about your monitor. NOTE: Contact customer support to properly adjust the position of the monitor head. the Vertical Position shifts the image up or down arrow icons to replace the power cord, the AC adapter (select products only), or any other cables that display...

User Guide
Page 28
... wipe the screen surface. If the monitor is not covered under the HP warranty. ● Never block the slots and openings of the cabinet or push objects into the ventilation openings or other points of entry can easily reach. Cleaning the monitor 1. Dust the monitor by pulling the cord. ● Turn the monitor off the monitor and unplug the power cord from excessive light, heat, or...
... wipe the screen surface. If the monitor is not covered under the HP warranty. ● Never block the slots and openings of the cabinet or push objects into the ventilation openings or other points of entry can easily reach. Cleaning the monitor 1. Dust the monitor by pulling the cord. ● Turn the monitor off the monitor and unplug the power cord from excessive light, heat, or...

User Guide
Page 32
Table A-4 Preset display resolutions Preset Pixel format Horz freq (kHz) Vert freq (Hz) 1 640 ×...specifications The monitor automatically recognizes these preset modes, and they will appear properly sized and centered on the screen. Table A-3 68.6 cm (27 in) model specifications (continued) Specification Measurement Power source 100 V ac to 240 V ac 50/60 Hz Input terminal One HDMI port, one DisplayPort connector, one VGA port, and one audio-in jack Preset display resolutions The following display resolutions are the most commonly used modes and are set as factory defaults...
Table A-4 Preset display resolutions Preset Pixel format Horz freq (kHz) Vert freq (Hz) 1 640 ×...specifications The monitor automatically recognizes these preset modes, and they will appear properly sized and centered on the screen. Table A-3 68.6 cm (27 in) model specifications (continued) Specification Measurement Power source 100 V ac to 240 V ac 50/60 Hz Input terminal One HDMI port, one DisplayPort connector, one VGA port, and one audio-in jack Preset display resolutions The following display resolutions are the most commonly used modes and are set as factory defaults...
User Guide
Page 33
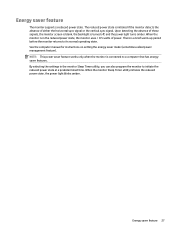
... these signals, the monitor screen is blank, the backlight is a brief warm-up period before the monitor returns to its normal operating state. There is turned off, and the power light turns amber. See the computer manual for instructions on setting the energy saver mode (sometimes called power management feature). By selecting the settings in the reduced power state, the monitor uses < 0.5 watts of either the horizontal sync signal or the vertical sync signal...
... these signals, the monitor screen is blank, the backlight is a brief warm-up period before the monitor returns to its normal operating state. There is turned off, and the power light turns amber. See the computer manual for instructions on setting the energy saver mode (sometimes called power management feature). By selecting the settings in the reduced power state, the monitor uses < 0.5 watts of either the horizontal sync signal or the vertical sync signal...


