User Guide
Page 4
...Microsoft Corporation. Install the product securely on the control panel have simple text or icon labels that make it accessible for HP products and services are no one can be damaged. 8. For users who are color blind, colored buttons and tabs used in this material is accessible... for the Mac OS, visit the Apple Web site at www.hp.com/ accessibility. The software also supports Windows accessibility options such as screen ...
...Microsoft Corporation. Install the product securely on the control panel have simple text or icon labels that make it accessible for HP products and services are no one can be damaged. 8. For users who are color blind, colored buttons and tabs used in this material is accessible... for the Mac OS, visit the Apple Web site at www.hp.com/ accessibility. The software also supports Windows accessibility options such as screen ...
User Guide
Page 5
...Install the accessories Install the duplexer ...11 Install Tray 2 ...11 Turn on accessories in the print driver 12 To turn on accessories on Windows computers 13 To turn on accessories on Macintosh computers 13 3 Use the device Use control panel menus ...14 Control-panel message types 14 Status... messages ...14 Warning messages ...15 Error messages ...15 Critical error messages ...15 Change device settings ...15 Use the HP Solution Center (Windows 16 Use the HP photo and imaging software 16 Load originals ...17 Load an original on the scanner glass 17 Select print media ...18 Tips...
...Install the accessories Install the duplexer ...11 Install Tray 2 ...11 Turn on accessories in the print driver 12 To turn on accessories on Windows computers 13 To turn on accessories on Macintosh computers 13 3 Use the device Use control panel menus ...14 Control-panel message types 14 Status... messages ...14 Warning messages ...15 Error messages ...15 Critical error messages ...15 Change device settings ...15 Use the HP Solution Center (Windows 16 Use the HP photo and imaging software 16 Load originals ...17 Load an original on the scanner glass 17 Select print media ...18 Tips...
User Guide
Page 6
... Administer the device ...44 Use device management tools 44 Toolbox (Windows) ...45 Open the Toolbox ...45 Toolbox tabs ...45 HP Printer Utility (Mac OS 46 Open the HP Printer Utility 46 HP Printer Utility panels 46 HP Instant Support ...47 Security and privacy 47 To gain access to HP Instant Support 47 myPrintMileage ...48 Understand the self-test diagnostic...
... Administer the device ...44 Use device management tools 44 Toolbox (Windows) ...45 Open the Toolbox ...45 Toolbox tabs ...45 HP Printer Utility (Mac OS 46 Open the HP Printer Utility 46 HP Printer Utility panels 46 HP Instant Support ...47 Security and privacy 47 To gain access to HP Instant Support 47 myPrintMileage ...48 Understand the self-test diagnostic...
User Guide
Page 7
Contents Configure the device (Windows 50 Direct connection ...50 Install the software before connecting the device (recommended 50 Connect the device before installing the software 51 Share the device on a ...
Contents Configure the device (Windows 50 Direct connection ...50 Install the software before connecting the device (recommended 50 Connect the device before installing the software 51 Share the device on a ...
User Guide
Page 10
... the document is provided with the device software. For more information, see Toolbox (Windows). The HP Printer Utility is typically installed with the device software as an available installation option. Available through any standard Web browser or through the Toolbox (Windows). The Toolbox is typically installed with the device. Self-Test diagnostic page •...
... the document is provided with the device software. For more information, see Toolbox (Windows). The HP Printer Utility is typically installed with the device software as an available installation option. Available through any standard Web browser or through the Toolbox (Windows). The Toolbox is typically installed with the device. Self-Test diagnostic page •...
User Guide
Page 14
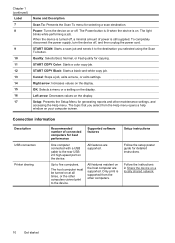
...Starts a color copy job. Right arrow: Increases values on the display. Connection information Description USB connection Printer sharing Recommended number of power is supported from the Help menu opens a help window on at all times, or the other computers. Cancel: Stops a job, exits a menu, ...or exits settings. Setup: Presents the Setup Menu for best performance Supported software features One computer connected with a USB cable to five...
...Starts a color copy job. Right arrow: Increases values on the display. Connection information Description USB connection Printer sharing Recommended number of power is supported from the Help menu opens a help window on at all times, or the other computers. Cancel: Stops a job, exits a menu, ...or exits settings. Setup: Presents the Setup Menu for best performance Supported software features One computer connected with a USB cable to five...
User Guide
Page 16
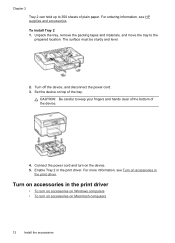
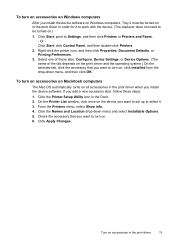
... the device, and disconnect the power cord. 3. Enable Tray 2 in the print driver. For more information, see HP supplies and accessories. Turn on accessories in the print driver • To turn on accessories on Windows computers • To turn on accessories in the print driver. Set the device on Macintosh computers 12...
... the device, and disconnect the power cord. 3. Enable Tray 2 in the print driver. For more information, see HP supplies and accessories. Turn on accessories in the print driver • To turn on accessories on Windows computers • To turn on accessories in the print driver. Set the device on Macintosh computers 12...
User Guide
Page 17
... After you install the device software on Windows computers, Tray 2 must be turned on , click Installed from the drop-down menu and select Installable Options. 5. Select one of these steps: 1. To turn on accessories on Macintosh computers The Mac OS automatically turns on accessories in the print ... turn on the device you want to turn on .) 1. Click the Printer Setup Utility icon in the print driver when you want to set up to Settings, and then click Printers or Printers and Faxes. - On the Printer List window, click once on . 6. Check the accessory that you install the device...
... After you install the device software on Windows computers, Tray 2 must be turned on , click Installed from the drop-down menu and select Installable Options. 5. Select one of these steps: 1. To turn on accessories on Macintosh computers The Mac OS automatically turns on accessories in the print ... turn on the device you want to turn on .) 1. Click the Printer Setup Utility icon in the print driver when you want to set up to Settings, and then click Printers or Printers and Faxes. - On the Printer List window, click once on . 6. Check the accessory that you install the device...

User Guide
Page 18
... topics: • Use control panel menus • Control-panel message types • Change device settings • Use the HP Solution Center (Windows) • Use the HP photo and imaging software • Load originals • Select print media • Load media • Configure trays •...no pending warning messages, the status message READY appears if the device is turned on the control-panel display. Some destinations require the HP Photosmart Software to be loaded. • Copy menu: Menu options include: • Selecting copy quantities • Reducing/enlarging •...
... topics: • Use control panel menus • Control-panel message types • Change device settings • Use the HP Solution Center (Windows) • Use the HP photo and imaging software • Load originals • Select print media • Load media • Configure trays •...no pending warning messages, the status message READY appears if the device is turned on the control-panel display. Some destinations require the HP Photosmart Software to be loaded. • Copy menu: Menu options include: • Selecting copy quantities • Reducing/enlarging •...
User Guide
Page 19
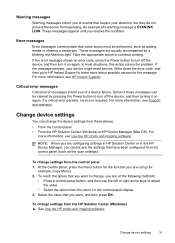
These messages are usually accompanied by pressing the Power button to adjust the value. • Select the option from these messages can change , use one of the following methods: • Press a control-panel button, and then use the left or right arrow keys to turn off the device, and ...then turn off the device, and then turning it on again. Some of these places: • From the control panel. • From the HP Solution Center (Windows) or HP Device Manager (Mac OS). At the control panel, press the menu button for the function you are configuring settings in...
These messages are usually accompanied by pressing the Power button to adjust the value. • Select the option from these messages can change , use one of the following methods: • Press a control-panel button, and then use the left or right arrow keys to turn off the device, and ...then turn off the device, and then turning it on again. Some of these places: • From the control panel. • From the HP Solution Center (Windows) or HP Device Manager (Mac OS). At the control panel, press the menu button for the function you are configuring settings in...
User Guide
Page 20
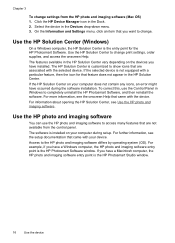
...the entry point for that are not available from the HP photo and imaging software (Mac OS) 1. Click the HP Device Manager icon in the Devices drop-down menu. 3. Use the HP Solution Center (Windows) On a Windows computer, the HP Solution Center is installed on the devices you want to ... Center vary depending on your computer does not contain any icons, an error might have a Windows computer, the HP photo and imaging software entry point is the HP Photosmart Studio window. 16 Use the device Chapter 3 To change settings from the control panel. Select the device in the ...
...the entry point for that are not available from the HP photo and imaging software (Mac OS) 1. Click the HP Device Manager icon in the Devices drop-down menu. 3. Use the HP Solution Center (Windows) On a Windows computer, the HP Solution Center is installed on the devices you want to ... Center vary depending on your computer does not contain any icons, an error might have a Windows computer, the HP photo and imaging software entry point is the HP Photosmart Studio window. 16 Use the device Chapter 3 To change settings from the control panel. Select the device in the ...
User Guide
Page 21
...is not equipped with the selected device. Do one HP device installed, select the tab with your device from the Device drop-down menu. If you have installed. For more than one of the following: • On the Windows desktop, double-click the HP Photosmart Software icon. • In the ...system tray at the far right of the Windows taskbar, double-click the HP Digital Imaging Monitor icon. • On the taskbar, click...
...is not equipped with the selected device. Do one HP device installed, select the tab with your device from the Device drop-down menu. If you have installed. For more than one of the following: • On the Windows desktop, double-click the HP Photosmart Software icon. • In the ...system tray at the far right of the Windows taskbar, double-click the HP Digital Imaging Monitor icon. • On the taskbar, click...
User Guide
Page 23
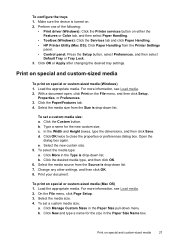
... and more memory is too lightweight or stretches easily Cards and envelopes • Avoid envelopes that have a very slick finish, self-stick adhesives, clasps, or windows. Custom-sized media • Use only custom-sized media that is supported by the device. • If your application supports custom-sized media, set the...
... and more memory is too lightweight or stretches easily Cards and envelopes • Avoid envelopes that have a very slick finish, self-stick adhesives, clasps, or windows. Custom-sized media • Use only custom-sized media that is supported by the device. • If your application supports custom-sized media, set the...
User Guide
Page 27
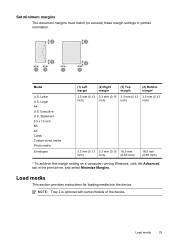
...) inch) inch) inch) 3.3 mm (0.13 3.3 mm (0.13 16.5 mm inch) inch) (0.65 inch) 16.5 mm (0.65 inch) * To achieve this margin setting on a computer running Windows, click the Advanced tab in portrait orientation. Load media 23 Letter U.S. NOTE: Tray 2 is optional with some models of the device. Load media This section...
...) inch) inch) inch) 3.3 mm (0.13 3.3 mm (0.13 16.5 mm inch) inch) (0.65 inch) 16.5 mm (0.65 inch) * To achieve this margin setting on a computer running Windows, click the Advanced tab in portrait orientation. Load media 23 Letter U.S. NOTE: Tray 2 is optional with some models of the device. Load media This section...
User Guide
Page 31
..., see Load media. 2. Perform one of the following: • Print driver (Windows): Click the Printer services button on either the Features or Color tab, and then select Paper Handling. • Toolbox (Windows): Click the Services tab and click Paper Handling. • HP Printer Utility (Mac OS): Click Paper Handling...for the new custom size. To configure the trays 1. Make sure the device is drop-down menu. Select the media source from the Printer Settings panel. • Control panel: Press the Setup button, select Preferences, and then select Default Tray or Tray Lock. 3. Load...
..., see Load media. 2. Perform one of the following: • Print driver (Windows): Click the Printer services button on either the Features or Color tab, and then select Paper Handling. • Toolbox (Windows): Click the Services tab and click Paper Handling. • HP Printer Utility (Mac OS): Click Paper Handling...for the new custom size. To configure the trays 1. Make sure the device is drop-down menu. Select the media source from the Printer Settings panel. • Control panel: Press the Setup button, select Preferences, and then select Default Tray or Tray Lock. 3. Load...
User Guide
Page 32
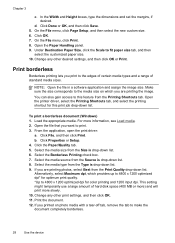
NOTE: Open the file in a software application and assign the image size. To print a borderless document (Windows) 1. Select the media size from the Size is drop-down list. 9. This setting might temporarily use a large amount of standard media sizes. If you ...Print. For more slowly. 10. Click File, and then click Print. Select the media type from the Print Quality drop-down list. 8. Chapter 3 c. Open the printer driver, select the Printing Shortcuts tab, and select the printing shortcut for color printing and 1200 input dpi. Click Properties or Setup. 4. If you want...
NOTE: Open the file in a software application and assign the image size. To print a borderless document (Windows) 1. Select the media size from the Size is drop-down list. 9. This setting might temporarily use a large amount of standard media sizes. If you ...Print. For more slowly. 10. Click File, and then click Print. Select the media type from the Print Quality drop-down list. 8. Chapter 3 c. Open the printer driver, select the Printing Shortcuts tab, and select the printing shortcut for color printing and 1200 input dpi. Click Properties or Setup. 4. If you want...
User Guide
Page 34
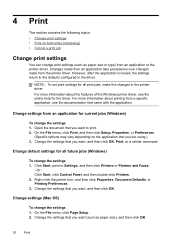
... Change the settings that came with the application. Or Click Start, click Control Panel, and then double-click Printers. 2. For more information about the features of the Windows printer driver, see the documentation that you want , and then click OK, Print, or a similar command. For...type) from a specific application, see the online help for all future jobs (Windows) To change the settings 1. Click Start, point to the defaults configured in the printer driver. Change settings from the printer driver. Change settings (Mac OS) To change the settings 1. On the File...
... Change the settings that came with the application. Or Click Start, click Control Panel, and then double-click Printers. 2. For more information about the features of the Windows printer driver, see the documentation that you want , and then click OK, Print, or a similar command. For...type) from a specific application, see the online help for all future jobs (Windows) To change the settings 1. Click Start, point to the defaults configured in the printer driver. Change settings from the printer driver. Change settings (Mac OS) To change the settings 1. On the File...
User Guide
Page 35
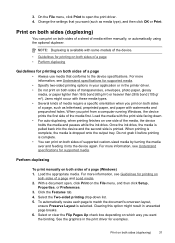
Jams might result in the printer driver. • Do not print on one side of a page and Load media. 2. Load the appropriate media. Click...that you print on both sides (duplexing) You can print on which way you print from a computer running Windows, the device prints the first side of a page, such as media type), and then click OK or ...with some models of the device. • Guidelines for printing on both sides of a sheet of a page (Windows) 1. For more information, see Understand specifications for examples. See the graphics in the print driver for supported media....
Jams might result in the printer driver. • Do not print on one side of a page and Load media. 2. Load the appropriate media. Click...that you print on both sides (duplexing) You can print on which way you print from a computer running Windows, the device prints the first side of a page, such as media type), and then click OK or ...with some models of the device. • Guidelines for printing on both sides of a sheet of a page (Windows) 1. For more information, see Understand specifications for examples. See the graphics in the print driver for supported media....

User Guide
Page 36
Chapter 4 7. Change any other settings, and then click Print. 32 Print To print automatically on both sides of a page (Windows) 1. Make sure the duplexer is selected. Print your document. Select the option to match the document's onscreen layout, ensure Preserve Layout is properly installed. Change ...
Chapter 4 7. Change any other settings, and then click Print. 32 Print To print automatically on both sides of a page (Windows) 1. Make sure the duplexer is selected. Print your document. Select the option to match the document's onscreen layout, ensure Preserve Layout is properly installed. Change ...

User Guide
Page 37
Windows: Double-click the printer icon that the device is currently processing. Mac OS: Double-click the printer in the lower-right corner of the following methods. Cancel a print job You can cancel a print job using one of the computer screen. Select the print job, and then press the Delete key on the keyboard. Select the print job, click Hold, and then click Delete. Cancel a print job 33 It does not affect jobs waiting to be processed. Control panel: Press (Cancel button). This clears the job that appears in the Printer Setup Utility.
Windows: Double-click the printer icon that the device is currently processing. Mac OS: Double-click the printer in the lower-right corner of the following methods. Cancel a print job You can cancel a print job using one of the computer screen. Select the print job, and then press the Delete key on the keyboard. Select the print job, click Hold, and then click Delete. Cancel a print job 33 It does not affect jobs waiting to be processed. Control panel: Press (Cancel button). This clears the job that appears in the Printer Setup Utility.


