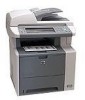
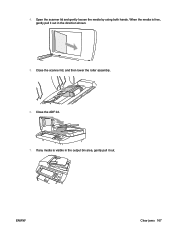
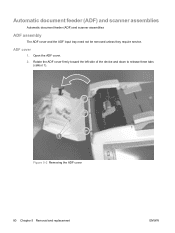
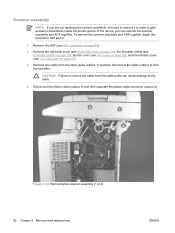
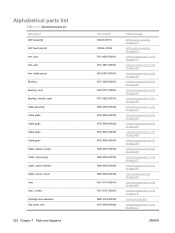
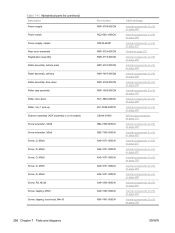
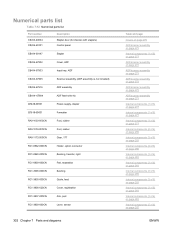
HP M3035 Adf Assembly - LaserJet MFP B W Laser
HP M3035 Adf Assembly
Related Manual Pages


Similar Questions

How To Change The Adf Assembly On A Cm2320nf Mfp
(Posted by Iflowgp 9 years ago)

Why Do I Need To Calibrate My Hp Laserjet M3035 Control Panel Assembly Every
time i turn it off?
time i turn it off?
(Posted by viklynne 10 years ago)


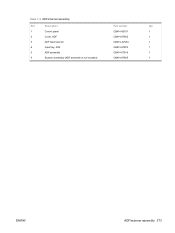
Whats The Part Number For The Adf Assembly
the pickup roller assembly under the flip open cover on top of the adf assembly is broken. what is t...
the pickup roller assembly under the flip open cover on top of the adf assembly is broken. what is t...
(Posted by randyjlee 11 years ago)

Adf On My Hp Laserjet M3035xs
The ADF on my HP laserjet M3035xs MFP is no longer taking up one sheet of paper at a time - it grabs...
The ADF on my HP laserjet M3035xs MFP is no longer taking up one sheet of paper at a time - it grabs...
(Posted by MD85869 12 years ago)