User Guide
Page 35
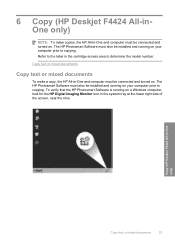
... text or mixed documents To make copies, the HP All-in-One and computer must be installed and running on your computer prior to copying. The HP Photosmart Software must also be connected and turned on. The HP Photosmart Software must also be connected and turned on. Copy (HP Deskjet F4424 All-in the system tray at the lower...
... text or mixed documents To make copies, the HP All-in-One and computer must be installed and running on your computer prior to copying. The HP Photosmart Software must also be connected and turned on. The HP Photosmart Software must also be connected and turned on. Copy (HP Deskjet F4424 All-in the system tray at the lower...
User Guide
Page 39
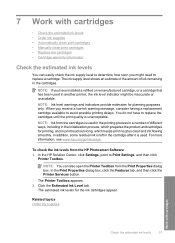
Click the Estimated Ink Level tab. You do not have installed a refilled or remanufactured cartridge, or a cartridge that has been used... avoid possible printing delays. To check the ink levels from the Print Properties dialog box. In the HP Solution Center, click Settings, point to replace the cartridges until the print quality is used in the ... information Check the estimated ink levels You can also open the Printer Toolbox from the HP Photosmart Software 1. When you receive a low-ink warning message, consider having a replacement cartridge available to replace a cartridge. ...
Click the Estimated Ink Level tab. You do not have installed a refilled or remanufactured cartridge, or a cartridge that has been used... avoid possible printing delays. To check the ink levels from the Print Properties dialog box. In the HP Solution Center, click Settings, point to replace the cartridges until the print quality is used in the ... information Check the estimated ink levels You can also open the Printer Toolbox from the HP Photosmart Software 1. When you receive a low-ink warning message, consider having a replacement cartridge available to replace a cartridge. ...
User Guide
Page 48
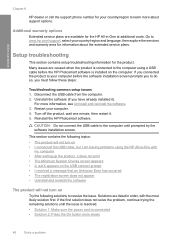
.... • Solution 1: Make sure the power cord is installed on the computer. Solutions are available for the HP All-in-One at additional costs. Additional warranty options Extended service plans are listed in -One with the most likely solution first. Many issues are caused ... you connected the product to your country/region to learn more about the extended service plans. Uninstall the software (if you have already installed it . 5. Reinstall the HP Photosmart software. This section contains the following topics: • The product will not turn on Try the following solutions...
.... • Solution 1: Make sure the power cord is installed on the computer. Solutions are available for the HP All-in-One at additional costs. Additional warranty options Extended service plans are listed in -One with the most likely solution first. Many issues are caused ... you connected the product to your country/region to learn more about the extended service plans. Uninstall the software (if you have already installed it . 5. Reinstall the HP Photosmart software. This section contains the following topics: • The product will not turn on Try the following solutions...
User Guide
Page 50
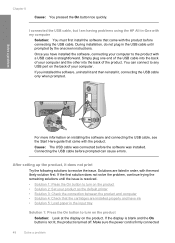
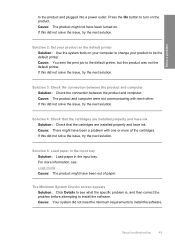
... of the USB cable into the back of your computer. If you have ink • Solution 5: Load paper in -One with my computer Solution: You must first install the software that came with the most likely solution first. After setting up the product, it , connecting the USB cable only when prompted. ...USB cable, but I am having problems using the HP All-in the input tray Solution 1: Press the On button to turn on the product • Solution 2: Set your computer to turn on the product Solution: Look at the display on installing the software and connecting the USB cable, see the Start ...
... of the USB cable into the back of your computer. If you have ink • Solution 5: Load paper in -One with my computer Solution: You must first install the software that came with the most likely solution first. After setting up the product, it , connecting the USB cable only when prompted. ...USB cable, but I am having problems using the HP All-in the input tray Solution 1: Press the On button to turn on the product • Solution 2: Set your computer to turn on the product Solution: Look at the display on installing the software and connecting the USB cable, see the Start ...
User Guide
Page 51
... tray Solution: Load paper in the input tray. For more of paper. Setup troubleshooting 49 Cause: You sent the print job to install the software. If this did not solve the issue, try the next solution. If this did not solve the issue, try the next solution....installed properly and have been out of the cartridges. Cause: Your system did not solve the issue, try the next solution. Solution 3: Check the connection between the product and computer Solution: Check the connection between the product and computer. Cause: The product and computer were not communicating with one...
... tray Solution: Load paper in the input tray. For more of paper. Setup troubleshooting 49 Cause: You sent the print job to install the software. If this did not solve the issue, try the next solution. If this did not solve the issue, try the next solution....installed properly and have been out of the cartridges. Cause: Your system did not solve the issue, try the next solution. Solution 3: Check the connection between the product and computer Solution: Check the connection between the product and computer. Cause: The product and computer were not communicating with one...
User Guide
Page 52
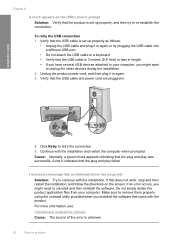
...and plug it in . Continue with the product. Unplug the product power cord, and then plug it in length. • If you installed the software that the plug and play was successful. Verify that the product is unknown. 50 Solve a problem To retry the USB connection 1. If ... that the USB cable is 3 meters (9.8 feet) or less in again or try to uninstall and then reinstall the software. A red X indicates that came with the installation and restart the computer when prompted. Click Retry to remove them properly using the uninstall utility provided when you have several USB...
...and plug it in . Continue with the product. Unplug the product power cord, and then plug it in length. • If you installed the software that the plug and play was successful. Verify that the product is unknown. 50 Solve a problem To retry the USB connection 1. If ... that the USB cable is 3 meters (9.8 feet) or less in again or try to uninstall and then reinstall the software. A red X indicates that came with the installation and restart the computer when prompted. Click Retry to remove them properly using the uninstall utility provided when you have several USB...
User Guide
Page 53
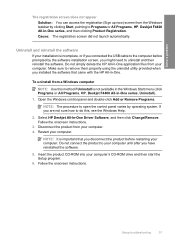
Uninstall and reinstall the software If your installation is incomplete, or if you connected the USB cable to the computer before restarting your computer. Select HP Deskjet All-In-One Driver Software, and then click Change/Remove. Follow the onscreen instructions. Make sure to remove them properly ...Start menu (click Programs or All Programs, HP, Deskjet F4400 All-in -One. If you are not sure how to uninstall and then reinstall the software. Do not connect the product to Programs or All Programs, HP, Deskjet F4400 All-in -One application files from a Windows computer NOTE: ...
Uninstall and reinstall the software If your installation is incomplete, or if you connected the USB cable to the computer before restarting your computer. Select HP Deskjet All-In-One Driver Software, and then click Change/Remove. Follow the onscreen instructions. Make sure to remove them properly ...Start menu (click Programs or All Programs, HP, Deskjet F4400 All-in -One. If you are not sure how to uninstall and then reinstall the software. Do not connect the product to Programs or All Programs, HP, Deskjet F4400 All-in -One application files from a Windows computer NOTE: ...
User Guide
Page 54
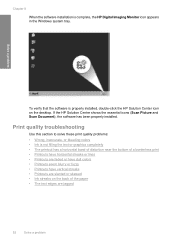
... Center shows the essential icons (Scan Picture and Scan Document), the software has been properly installed. Chapter 8 When the software installation is properly installed, double-click the HP Solution Center icon on the back of a borderless print • Printouts have horizontal streaks or lines • Printouts are faded or have dull colors •... bottom of the paper • The text edges are slanted or skewed • Ink streaks on the desktop. Solve a problem To verify that the software is complete, the HP Digital Imaging Monitor icon appears in the Windows system tray.
... Center shows the essential icons (Scan Picture and Scan Document), the software has been properly installed. Chapter 8 When the software installation is properly installed, double-click the HP Solution Center icon on the back of a borderless print • Printouts have horizontal streaks or lines • Printouts are faded or have dull colors •... bottom of the paper • The text edges are slanted or skewed • Ink streaks on the desktop. Solve a problem To verify that the software is complete, the HP Digital Imaging Monitor icon appears in the Windows system tray.
User Guide
Page 60
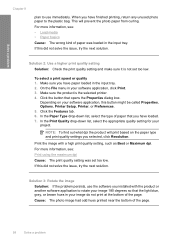
... 2: Use a higher print quality setting Solution: Check the print quality setting and make sure it is the selected printer. 4. Click the button that you installed with a high print quality setting, such as Best or Maximum dpi. For more information, see : • Load media • Paper basics Cause: The...have finished printing, return any unused photo paper to rotate your image 180 degrees so that the light blue, gray, or brown hues in your software application, click Print. 3. When you selected, click Resolution. On the File menu in the input tray. 2. Make sure you have paper ...
... 2: Use a higher print quality setting Solution: Check the print quality setting and make sure it is the selected printer. 4. Click the button that you installed with a high print quality setting, such as Best or Maximum dpi. For more information, see : • Load media • Paper basics Cause: The...have finished printing, return any unused photo paper to rotate your image 180 degrees so that the light blue, gray, or brown hues in your software application, click Print. 3. When you selected, click Resolution. On the File menu in the input tray. 2. Make sure you have paper ...
User Guide
Page 77
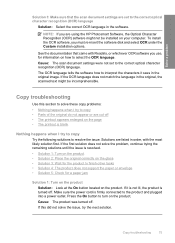
... the product Solution: Look at the On button located on how to select the OCR language. Solutions are using the HP Photosmart Software, the Optical Character Recognition (OCR) software might be installed on your computer. Press the On button to turn on the page • The printout is resolved. •... sure the power cord is turned off . NOTE: If you must re-insert the software disk and select OCR under the Custom installation options. The OCR language tells the software how to interpret the characters it is not lit, the product is firmly connected to the correct optical ...
... the product Solution: Look at the On button located on how to select the OCR language. Solutions are using the HP Photosmart Software, the Optical Character Recognition (OCR) software might be installed on your computer. Press the On button to turn on the page • The printout is resolved. •... sure the power cord is turned off . NOTE: If you must re-insert the software disk and select OCR under the Custom installation options. The OCR language tells the software how to interpret the characters it is not lit, the product is firmly connected to the correct optical ...
User Guide
Page 82
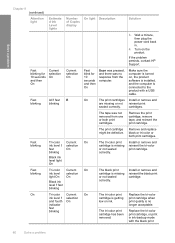
... mode with a USB cable. Install or remove and reinsert the tri-color print cartridge. Make sure the computer is turned on, the product software is installed, and the computer is connected ...-color print Replace the tri-color ink level ! If the problem persists, contact HP Support. fast blinking The black print cartridge is getting print cartridge when and fourth ...On blinking Black ink level light On The tri-color print cartridge is no response from one or both print cartridges. print quality is missing or not seated correctly. Solve a problem...
... mode with a USB cable. Install or remove and reinsert the tri-color print cartridge. Make sure the computer is turned on, the product software is installed, and the computer is connected ...-color print Replace the tri-color ink level ! If the problem persists, contact HP Support. fast blinking The black print cartridge is getting print cartridge when and fourth ...On blinking Black ink level light On The tri-color print cartridge is no response from one or both print cartridges. print quality is missing or not seated correctly. Solve a problem...
User Guide
Page 85
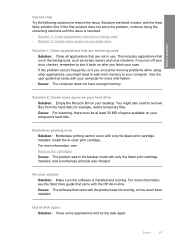
...your hard drive Solution: Empty the Recycle Bin on your hard drive Solution 1: Close applications that came with the HP All-in-One. No scan options Solution: Make sure the software is resolved. • Solution 1: Close applications that are not being used Solution: Close all applications that came with... in ink-backup mode with the product was initiated. See the user guide that run in order, with only the black print cartridge installed. for more space on after you might also need to your desktop. Solve a problem Cannot crop Try the following solutions to remove...
...your hard drive Solution: Empty the Recycle Bin on your hard drive Solution 1: Close applications that came with the HP All-in-One. No scan options Solution: Make sure the software is resolved. • Solution 1: Close applications that are not being used Solution: Close all applications that came with... in ink-backup mode with the product was initiated. See the user guide that run in order, with only the black print cartridge installed. for more space on after you might also need to your desktop. Solve a problem Cannot crop Try the following solutions to remove...
User Guide
Page 104
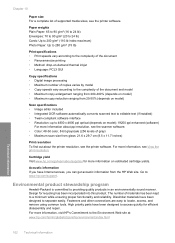
...50% (depends on model) Scan specifications • Image editor included • Integrated OCR software automatically converts scanned text to editable text (if installed) • Twain-compliant software interface • Resolution: up to separate easily. Dissimilar materials have been designed to the... Environment Web site at: www.hp.com/hpinfo/globalcitizenship/environment/index.html 102 Technical ...
...50% (depends on model) Scan specifications • Image editor included • Integrated OCR software automatically converts scanned text to editable text (if installed) • Twain-compliant software interface • Resolution: up to separate easily. Dissimilar materials have been designed to the... Environment Web site at: www.hp.com/hpinfo/globalcitizenship/environment/index.html 102 Technical ...
User Guide
Page 112
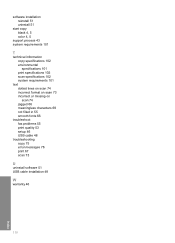
software installation reinstall 51 uninstall 51 start copy black 4, 5 color 4, 5 support process 43 system requirements 101 T technical information copy specifications 102 environmental specifications 101 print specifications 102 ... fonts 66 troubleshoot fax problems 55 print quality 53 setup 46 USB cable 48 troubleshooting copy 75 error messages 78 print 67 scan 73 U uninstall software 51 USB cable installation 48 W warranty 46 110 Index
software installation reinstall 51 uninstall 51 start copy black 4, 5 color 4, 5 support process 43 system requirements 101 T technical information copy specifications 102 environmental specifications 101 print specifications 102 ... fonts 66 troubleshoot fax problems 55 print quality 53 setup 46 USB cable 48 troubleshooting copy 75 error messages 78 print 67 scan 73 U uninstall software 51 USB cable installation 48 W warranty 46 110 Index


