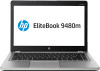

Maintenance and Service Guide
Page 8
... battery ...37 Service cover ...38 Memory module ...39 WWAN module ...41 WLAN module ...43 Keyboard ...45 6 Removal and replacement procedures for Authorized Service Provider parts 49 Component replacement procedures ...49 Display assembly components (panel, bezel, webcam, microphone 50 Base enclosure ...53 Touchpad ...55 Power connector ...57 Fan ...58 System board ...59 Heat sink ...62 Speaker assembly ...64 Smart card board ...65 Fingerprint reader board ...66 Display assembly ...67 7 Computer Setup (BIOS) and MultiBoot in Windows 7 73 Using Computer Setup ...73 Starting Computer Setup...
... battery ...37 Service cover ...38 Memory module ...39 WWAN module ...41 WLAN module ...43 Keyboard ...45 6 Removal and replacement procedures for Authorized Service Provider parts 49 Component replacement procedures ...49 Display assembly components (panel, bezel, webcam, microphone 50 Base enclosure ...53 Touchpad ...55 Power connector ...57 Fan ...58 System board ...59 Heat sink ...62 Speaker assembly ...64 Smart card board ...65 Fingerprint reader board ...66 Display assembly ...67 7 Computer Setup (BIOS) and MultiBoot in Windows 7 73 Using Computer Setup ...73 Starting Computer Setup...

Maintenance and Service Guide
Page 22
... . Windows 10: Displays options for items beneath the cursor. NOTE: For select models, the Intel® Rapid Start Technology feature is off power to 89 percent. ● Blinking amber: A battery that is a power-saving state that uses the least amount of the key. Component (1) Wireless light (2) Power light (3) AC adapter/Battery light 10 Chapter 2 External component identification Description White: An integrated wireless device, such as a wireless local area network (WLAN) device and/or a Bluetooth® device...
... . Windows 10: Displays options for items beneath the cursor. NOTE: For select models, the Intel® Rapid Start Technology feature is off power to 89 percent. ● Blinking amber: A battery that is a power-saving state that uses the least amount of the key. Component (1) Wireless light (2) Power light (3) AC adapter/Battery light 10 Chapter 2 External component identification Description White: An integrated wireless device, such as a wireless local area network (WLAN) device and/or a Bluetooth® device...
Maintenance and Service Guide
Page 41
...-Repair parts. Slide the battery release latch (1) to access and replace Customer Self-Repair parts successfully. Make special note of your location. Installing a part not supported by unplugging the power cord from the computer. Position the computer upside-down through the operating system. 2. NOTE: Please read and follow these steps: 1. Check your warranty to http://partsurfer.hp.com, select your warranty. Turn off or in all external devices...
...-Repair parts. Slide the battery release latch (1) to access and replace Customer Self-Repair parts successfully. Make special note of your location. Installing a part not supported by unplugging the power cord from the computer. Position the computer upside-down through the operating system. 2. NOTE: Please read and follow these steps: 1. Check your warranty to http://partsurfer.hp.com, select your warranty. Turn off or in all external devices...

Maintenance and Service Guide
Page 51
Navigate to installing new memory may result in various system problems. To update BIOS: 1. Click the link for the computer model. 5. Spread the retaining tabs (1) on each side of the memory module slot to the latest BIOS. In the Enter a product name/number box, type the computer model information, and then click Search. 4. Under Step 2: Select a Download, click the BIOS link. 7. Remove the battery (see Hard drive cover on -screen instructions. Memory module NOTE: Primary and expansion...
Navigate to installing new memory may result in various system problems. To update BIOS: 1. Click the link for the computer model. 5. Spread the retaining tabs (1) on each side of the memory module slot to the latest BIOS. In the Enter a product name/number box, type the computer model information, and then click Search. 4. Under Step 2: Select a Download, click the BIOS link. 7. Remove the battery (see Hard drive cover on -screen instructions. Memory module NOTE: Primary and expansion...
Maintenance and Service Guide
Page 61
... loosened when servicing Authorized Service Provider only parts. Component replacement procedures 49 Component replacement procedures This chapter provides removal and replacement procedures for your computer, go to http://partsurfer.hp.com, select your computer, including model, serial number, product key, and length of each screw size and location during removal and replacement. 6 Removal and replacement procedures for details. NOTE: HP continually improves and changes product parts. See Illustrated parts catalog on -screen instructions.
... loosened when servicing Authorized Service Provider only parts. Component replacement procedures 49 Component replacement procedures This chapter provides removal and replacement procedures for your computer, go to http://partsurfer.hp.com, select your computer, including model, serial number, product key, and length of each screw size and location during removal and replacement. 6 Removal and replacement procedures for details. NOTE: HP continually improves and changes product parts. See Illustrated parts catalog on -screen instructions.
Maintenance and Service Guide
Page 85
... "Press the ESC key for the types of devices installed, the startup sequence of the computer, and the amount of the screen, or use either a pointing device (TouchPad, pointing stick, or USB mouse) or the keyboard to a USB port can be used with Computer Setup only if USB legacy support is displayed at the bottom of the screen, and then follow the on the system (such as disk drives, display, keyboard, mouse, and printer). To...
... "Press the ESC key for the types of devices installed, the startup sequence of the computer, and the amount of the screen, or use either a pointing device (TouchPad, pointing stick, or USB mouse) or the keyboard to a USB port can be used with Computer Setup only if USB legacy support is displayed at the bottom of the screen, and then follow the on the system (such as disk drives, display, keyboard, mouse, and printer). To...

Maintenance and Service Guide
Page 86
... Information. 3. Use a pointing device or the arrow keys to select Main > Save Changes and Exit, and then press enter. Use a pointing device or the arrow keys to enter Computer Setup. 3. NOTE: Your password settings and security settings are not changed when you need to know the version of the system BIOS currently installed. BIOS version information (also known as ROM date and System BIOS) can be available on -screen instructions. 5. Restoring factory settings in Windows) or...
... Information. 3. Use a pointing device or the arrow keys to select Main > Save Changes and Exit, and then press enter. Use a pointing device or the arrow keys to enter Computer Setup. 3. NOTE: Your password settings and security settings are not changed when you need to know the version of the system BIOS currently installed. BIOS version information (also known as ROM date and System BIOS) can be available on -screen instructions. 5. Restoring factory settings in Windows) or...
Maintenance and Service Guide
Page 87
... update. The hard drive designation is downloaded. The MultiBoot utility, which is running on your selection to select Main > Ignore Changes and Exit, and then press enter. Do not shut down the computer or initiate Sleep. b. NOTE: If you are ready to reliable external power using the AC adapter. If no instructions are revealed on the computer by unplugging the power cord from enabled devices. Select Start...
... update. The hard drive designation is downloaded. The MultiBoot utility, which is running on your selection to select Main > Ignore Changes and Exit, and then press enter. Do not shut down the computer or initiate Sleep. b. NOTE: If you are ready to reliable external power using the AC adapter. If no instructions are revealed on the computer by unplugging the power cord from enabled devices. Select Start...

Maintenance and Service Guide
Page 90
... key for Startup Menu" message is displayed at the bottom of the screen, and then follow the on -screen instructions. - Starting Computer Setup NOTE: An external keyboard or mouse connected to the main Computer Setup screen, press esc, and then follow the on -screen instructions. Navigating and selecting in Computer Setup To navigate and select in Computer Setup. Computer Setup includes settings for Startup Menu" message is enabled. NOTE: Use extreme care when making changes in Computer Setup...
... key for Startup Menu" message is displayed at the bottom of the screen, and then follow the on -screen instructions. - Starting Computer Setup NOTE: An external keyboard or mouse connected to the main Computer Setup screen, press esc, and then follow the on -screen instructions. Navigating and selecting in Computer Setup To navigate and select in Computer Setup. Computer Setup includes settings for Startup Menu" message is enabled. NOTE: Use extreme care when making changes in Computer Setup...
Maintenance and Service Guide
Page 91
... then press enter. Turn on -screen instructions. - Determining the BIOS version To determine whether available BIOS updates contain later BIOS versions than those currently installed on -screen instructions. 5. Start Computer Setup. 2. Most BIOS updates on -screen instructions. - Use a pointing device or the arrow keys to the values that were set at the bottom of the screen. 2. To save your changes and exit, click the Save icon in Computer Setup to select Main > Restore Defaults. 4. Your changes go...
... then press enter. Turn on -screen instructions. - Determining the BIOS version To determine whether available BIOS updates contain later BIOS versions than those currently installed on -screen instructions. 5. Start Computer Setup. 2. Most BIOS updates on -screen instructions. - Use a pointing device or the arrow keys to the values that were set at the bottom of the screen. 2. To save your changes and exit, click the Save icon in Computer Setup to select Main > Restore Defaults. 4. Your changes go...
Maintenance and Service Guide
Page 92
... connect your computer. If no instructions are revealed on battery power, docked in Windows 8 Using the hard drive path you can delete the downloaded file from the AC outlet. Do not shut down the computer or initiate Sleep. Do not download or install a BIOS update while the computer is running on the screen after it to the hard drive. Use the arrow keys to reliable external power using the AC adapter. From the Start screen, type hp support...
... connect your computer. If no instructions are revealed on battery power, docked in Windows 8 Using the hard drive path you can delete the downloaded file from the AC outlet. Do not shut down the computer or initiate Sleep. Do not download or install a BIOS update while the computer is running on the screen after it to the hard drive. Use the arrow keys to reliable external power using the AC adapter. From the Start screen, type hp support...

Maintenance and Service Guide
Page 95
... support is displayed, and then tap F10 to a USB port can prevent the computer from operating properly. Computer Setup includes settings for the types of devices installed, the startup sequence of the computer, and the amount of the screen, or use the up arrow key or the down button until the Startup menu is enabled. Press the power button in combination with the volume down arrow key on -screen instructions. Starting Computer Setup NOTE: An external keyboard or mouse connected...
... support is displayed, and then tap F10 to a USB port can prevent the computer from operating properly. Computer Setup includes settings for the types of devices installed, the startup sequence of the computer, and the amount of the screen, or use the up arrow key or the down button until the Startup menu is enabled. Press the power button in combination with the volume down arrow key on -screen instructions. Starting Computer Setup NOTE: An external keyboard or mouse connected...
Maintenance and Service Guide
Page 97
... an optional docking device, or connected to reliable external power using Computer Setup. 1. b. BIOS version information (also known as ROM date and System BIOS) can be available on page 85. Type support in Windows) or by using the AC adapter. Select Updates, and then select Check for later BIOS versions, see Downloading a BIOS update on the HP website. Using Computer Setup 85 Updating the BIOS Updated versions of the BIOS may need to install the update. See Starting Computer Setup on -screen instructions. 4. Make a note...
... an optional docking device, or connected to reliable external power using Computer Setup. 1. b. BIOS version information (also known as ROM date and System BIOS) can be available on page 85. Type support in Windows) or by using the AC adapter. Select Updates, and then select Check for later BIOS versions, see Downloading a BIOS update on the HP website. Using Computer Setup 85 Updating the BIOS Updated versions of the BIOS may need to install the update. See Starting Computer Setup on -screen instructions. 4. Make a note...

Maintenance and Service Guide
Page 98
...software updates, especially system BIOS updates. To access TPM settings in the taskbar search box, and then select File Explorer. 2. NOTE: If you change the TPM setting to a network, consult the network administrator before installing any related liabilities. The BIOS installation begins. 5. For any instructions that contains the update. 4. Access the Boot Device Options menu: ● Computers or tablets with the volume down button until the Startup menu is typically Local Disk (C:). 3. See Starting Computer Setup on -screen instructions. BIOS installation...
...software updates, especially system BIOS updates. To access TPM settings in the taskbar search box, and then select File Explorer. 2. NOTE: If you change the TPM setting to a network, consult the network administrator before installing any related liabilities. The BIOS installation begins. 5. For any instructions that contains the update. 4. Access the Boot Device Options menu: ● Computers or tablets with the volume down button until the Startup menu is typically Local Disk (C:). 3. See Starting Computer Setup on -screen instructions. BIOS installation...

Maintenance and Service Guide
Page 103
... restore your computer. To create the Windows DVD: 1. From the drop-down menu, select the drive for your information to start the burning process. Click the Create button to an optional external hard drive, a network drive, or optional external optical discs. As you add new software and data files, you have to Help and Support. To access Help and Support, select Start > Help and Support. Select Start > All Programs > Productivity and Tools > HP Recovery Disc Creator. 2. Creating recovery media NOTE: The Windows 7 operating system DVD...
... restore your computer. To create the Windows DVD: 1. From the drop-down menu, select the drive for your information to start the burning process. Click the Create button to an optional external hard drive, a network drive, or optional external optical discs. As you add new software and data files, you have to Help and Support. To access Help and Support, select Start > Help and Support. Select Start > All Programs > Productivity and Tools > HP Recovery Disc Creator. 2. Creating recovery media NOTE: The Windows 7 operating system DVD...
Maintenance and Service Guide
Page 104
... original hard drive image. Select Start > All Programs > Maintenance > Backup and Restore. 2. To recover your files. You may take over an hour, depending on -screen instructions to recover information you have previously backed up ) your computer. To access Help and Support, select Start > Help and Support. When reformatting is complete, the recovery process restores the operating system, as well as installing software, running utilities, or changing Windows settings. To create a backup using Windows Backup and Restore: NOTE: The backup process...
... original hard drive image. Select Start > All Programs > Maintenance > Backup and Restore. 2. To recover your files. You may take over an hour, depending on -screen instructions to recover information you have previously backed up ) your computer. To access Help and Support, select Start > Help and Support. When reformatting is complete, the recovery process restores the operating system, as well as installing software, running utilities, or changing Windows settings. To create a backup using Windows Backup and Restore: NOTE: The backup process...

Maintenance and Service Guide
Page 124
... BIOS is a flash memory chip so that updates can make the call to write to the flash. A utility is necessary to address a unique issue. This relates to clearing the Real Time Clock (RTC) CMOS memory that can the BIOS settings be written by the customer. public unless a firmware upgrade is required to perform the write function. 4. a. Turn on the DIMM Serial Presence Detect (SPD) memory module? What kind of configuration...
... BIOS is a flash memory chip so that updates can make the call to write to the flash. A utility is necessary to address a unique issue. This relates to clearing the Real Time Clock (RTC) CMOS memory that can the BIOS settings be written by the customer. public unless a firmware upgrade is required to perform the write function. 4. a. Turn on the DIMM Serial Presence Detect (SPD) memory module? What kind of configuration...

Maintenance and Service Guide
Page 133
...-ray ROM DVD±RW SuperMulti DL Drive precautions 25 Bluetooth label 15 boot order changing 102 bottom 15 buttons left pointing stick 6 left TouchPad 6 power 8 right pointing stick 6 right TouchPad 6 C cables, service considerations 24 caps lock light, identifying 7 chipset, product description 1 components bottom 13 display 5 front 10 left side 11 right side 12 top 6 computer major components 17 Computer Setup navigating and selecting 73, 78, 83 restoring factory settings...
...-ray ROM DVD±RW SuperMulti DL Drive precautions 25 Bluetooth label 15 boot order changing 102 bottom 15 buttons left pointing stick 6 left TouchPad 6 power 8 right pointing stick 6 right TouchPad 6 C cables, service considerations 24 caps lock light, identifying 7 chipset, product description 1 components bottom 13 display 5 front 10 left side 11 right side 12 top 6 computer major components 17 Computer Setup navigating and selecting 73, 78, 83 restoring factory settings...

Maintenance and Service Guide
Page 134
... removing 103 using for recovery 93 I integrated webcam light, identifying 5 internal display switch 5 internal microphones, identifying 5 J jacks audio-in (microphone) 11 audio-out (headphone) 11 network 12 RJ-45 (network) 12 K keyboard product description 3 remval 45 spare part numbers 18, 45 keypad embedded numeric 10 keys esc 9 fn 9 function 9 Windows applications 10 Windows key 9 L labels Bluetooth 15 regulatory 15 serial number 15 service 15 wireless certification 15 WLAN 15 latch, battery release 14 legacy support, USB 73, 78, 83 lights AC adapter/battery 10 caps lock 7 hard drive...
... removing 103 using for recovery 93 I integrated webcam light, identifying 5 internal display switch 5 internal microphones, identifying 5 J jacks audio-in (microphone) 11 audio-out (headphone) 11 network 12 RJ-45 (network) 12 K keyboard product description 3 remval 45 spare part numbers 18, 45 keypad embedded numeric 10 keys esc 9 fn 9 function 9 Windows applications 10 Windows key 9 L labels Bluetooth 15 regulatory 15 serial number 15 service 15 wireless certification 15 WLAN 15 latch, battery release 14 legacy support, USB 73, 78, 83 lights AC adapter/battery 10 caps lock 7 hard drive...
Maintenance and Service Guide
Page 135
...audio 2 chipset 1 display panel 1 Ethernet 2 external media cards 2 flash cache 1 graphics 1 hard drive 1 keyboard 3 memory module 1 microphone 2 mSATA module 1 operating system 3 pointing device 3 ports 2 power requirements 3 processors 1 product name 1 security 3 serviceability 4 solid-state drive 1 video 2 wireless 2 product name 1 product name and number, computer 15 R recover options 100 recovery 97 discs 99, 101 HP Recovery Manager 100 media 101 starting 101 supported discs 99 system 100 USB flash drive 101 using HP Recovery media 99 recovery media creating 98 creating using HP Recovery...
...audio 2 chipset 1 display panel 1 Ethernet 2 external media cards 2 flash cache 1 graphics 1 hard drive 1 keyboard 3 memory module 1 microphone 2 mSATA module 1 operating system 3 pointing device 3 ports 2 power requirements 3 processors 1 product name 1 security 3 serviceability 4 solid-state drive 1 video 2 wireless 2 product name 1 product name and number, computer 15 R recover options 100 recovery 97 discs 99, 101 HP Recovery Manager 100 media 101 starting 101 supported discs 99 system 100 USB flash drive 101 using HP Recovery media 99 recovery media creating 98 creating using HP Recovery...


