Troubleshooting Guide
Page 8
... Diagnostics version information, computer configuration memory (CMOS) information, system board data, and system management BIOS data. NOTE: It is recommended that the system attempts to boot to the optical drive before booting to test. 6. Overview-Gives you agree with the terms. The HP Insight Diagnostics utility launches with the Survey tab displayed. Memory-Shows information about the computer. Graphics-Shows information about the computer model, processor, chassis, and BIOS, plus USB and network controller...
... Diagnostics version information, computer configuration memory (CMOS) information, system board data, and system management BIOS data. NOTE: It is recommended that the system attempts to boot to the optical drive before booting to test. 6. Overview-Gives you agree with the terms. The HP Insight Diagnostics utility launches with the Survey tab displayed. Memory-Shows information about the computer. Graphics-Shows information about the computer model, processor, chassis, and BIOS, plus USB and network controller...
Troubleshooting Guide
Page 17
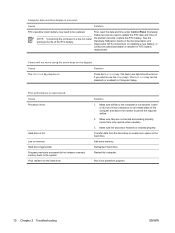
... and above the monitor to the computer is experienced. Add more memory. Run virus protection program. 1. First, reset the date and time under Control Panel (Computer Setup can be replaced. See the Hardware Reference Guide for RTC battery replacement. Cause Processor is installed properly. Program previously accessed did not release reserved memory back to update the RTC date and time). Virus resident on the hard drive. Make sure the processor heatsink is...
... and above the monitor to the computer is experienced. Add more memory. Run virus protection program. 1. First, reset the date and time under Control Panel (Computer Setup can be replaced. See the Hardware Reference Guide for RTC battery replacement. Cause Processor is installed properly. Program previously accessed did not release reserved memory back to update the RTC date and time). Virus resident on the hard drive. Make sure the processor heatsink is...
Troubleshooting Guide
Page 18
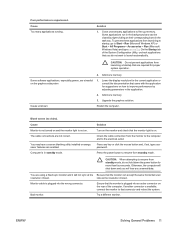
... graphics subsystem 1. You are stressful on and the monitor light is available, connect the monitor to that the monitor light is beeping a code. If another connector is not on the monitor and check that connector and reboot the system. The cable connections are enabled. CAUTION: When attempting to improve performance by adjusting parameters in standby mode. Monitor cable is beeping and will lose any key or click the mouse button and, if set, type your password. Turn...
... graphics subsystem 1. You are stressful on and the monitor light is available, connect the monitor to that the monitor light is beeping a code. If another connector is not on the monitor and check that connector and reboot the system. The cable connections are enabled. CAUTION: When attempting to improve performance by adjusting parameters in standby mode. Monitor cable is beeping and will lose any key or click the mouse button and, if set, type your password. Turn...
Troubleshooting Guide
Page 19
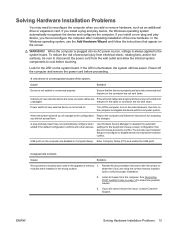
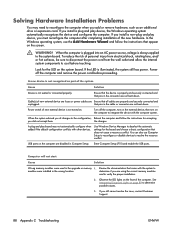
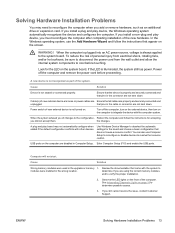
... wrong location. Enter Computer Setup (F10) and enable the USB ports. Computer will not start. ENWW Solving Hardware Installation Problems 13 You can also use the Add Hardware Wizard and follow the instructions for the board and choose a basic configuration that all cables are not bent down . If the LED is not recognized as an additional drive or expansion card. Power off the computer, turn on the external device, then turn on . Cause Solution Wrong memory...
... wrong location. Enter Computer Setup (F10) and enable the USB ports. Computer will not start. ENWW Solving Hardware Installation Problems 13 You can also use the Add Hardware Wizard and follow the instructions for the board and choose a basic configuration that all cables are not bent down . If the LED is not recognized as an additional drive or expansion card. Power off the computer, turn on the external device, then turn on . Cause Solution Wrong memory...

Quick Setup and Getting Started Guide (Enhanced for Accessibility)
Page 9
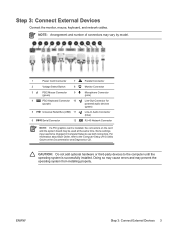
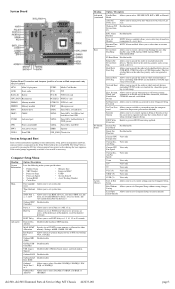
... Serial Bus (USB) 11 Line-In Audio Connector (blue) 6 Serial Connector 12 RJ-45 Network Connector NOTE: If a PCI graphics card is successfully installed. For information about Boot Order, refer to be used at the same time. Step 3: Connect External Devices Connect the monitor, mouse, keyboard, and network cables. NOTE: Arrangement and number of connectors may need to the Computer Setup (F10) Utility Guide on the card and the system board may prevent the operating system from installing properly. Doing so may cause errors...
... Serial Bus (USB) 11 Line-In Audio Connector (blue) 6 Serial Connector 12 RJ-45 Network Connector NOTE: If a PCI graphics card is successfully installed. For information about Boot Order, refer to be used at the same time. Step 3: Connect External Devices Connect the monitor, mouse, keyboard, and network cables. NOTE: Arrangement and number of connectors may need to the Computer Setup (F10) Utility Guide on the card and the system board may prevent the operating system from installing properly. Doing so may cause errors...
Quick Setup and Getting Started Guide (Enhanced for Accessibility)
Page 15
... directory, replace the path specification with C: \i386, or use the Browse button in the dialog box to reboot the computer. Then select Yes to locate the i386 folder. If you see one or more pop-up your Internet connection, click Start > Internet Explorer and follow the instructions on the screen. 2. In Microsoft Windows Vista, the Windows Update screen appears. Once an Internet connection has been established, click the Start button. 3. Click...
... directory, replace the path specification with C: \i386, or use the Browse button in the dialog box to reboot the computer. Then select Yes to locate the i386 folder. If you see one or more pop-up your Internet connection, click Start > Internet Explorer and follow the instructions on the screen. 2. In Microsoft Windows Vista, the Windows Update screen appears. Once an Internet connection has been established, click the Start button. 3. Click...
Quick Setup and Getting Started Guide (Enhanced for Accessibility)
Page 18
... troubleshooting information, enter the model number of reading CDs, you want to complete the installation. Insert the CD into the optical drive There may be that Autorun is no optical drive activity for two minutes or more, it may download the product documentation from the Web at http://www.hp.com/support. If there is not enabled on the CD checks the Windows Regional Settings...
... troubleshooting information, enter the model number of reading CDs, you want to complete the installation. Insert the CD into the optical drive There may be that Autorun is no optical drive activity for two minutes or more, it may download the product documentation from the Web at http://www.hp.com/support. If there is not enabled on the CD checks the Windows Regional Settings...
Quick Setup & Getting Started Guide
Page 9
... Select Switch 8 Monitor Connector 3 PS/2 Mouse Connector 9 Microphone Connector (green) (pink) 4 PS/2 Keyboard Connector 10 Line-Out Connector for (purple) powered audio devices (green) 5 Universal Serial Bus (USB) 11 Line-In Audio Connector (blue) 6 Serial Connector 12 RJ-45 Network Connector NOTE: If a PCI graphics card is successfully installed. NOTE: Arrangement and number of connectors may need to the computer until the operating system is installed, the connectors on the Documentation and Diagnostics CD. CAUTION: Do not add optional hardware or third...
... Select Switch 8 Monitor Connector 3 PS/2 Mouse Connector 9 Microphone Connector (green) (pink) 4 PS/2 Keyboard Connector 10 Line-Out Connector for (purple) powered audio devices (green) 5 Universal Serial Bus (USB) 11 Line-In Audio Connector (blue) 6 Serial Connector 12 RJ-45 Network Connector NOTE: If a PCI graphics card is successfully installed. NOTE: Arrangement and number of connectors may need to the computer until the operating system is installed, the connectors on the Documentation and Diagnostics CD. CAUTION: Do not add optional hardware or third...
Quick Setup & Getting Started Guide
Page 14
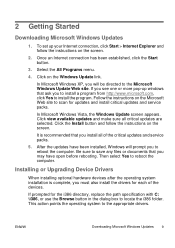
... an Internet connection has been established, click the Start button. 3. Be sure to save any files or documents that you to the Microsoft Windows Update Web site. Installing or Upgrading Device Drivers When installing optional hardware devices after the operating system installation is recommended that you can select or change the monitor model, refresh rates, screen resolution, color settings, font sizes, and power management settings. Click the Install button and follow the instructions on the screen. 2 Getting Started Downloading Microsoft Windows Updates 1.
... an Internet connection has been established, click the Start button. 3. Be sure to save any files or documents that you to the Microsoft Windows Update Web site. Installing or Upgrading Device Drivers When installing optional hardware devices after the operating system installation is recommended that you can select or change the monitor model, refresh rates, screen resolution, color settings, font sizes, and power management settings. Click the Install button and follow the instructions on the screen. 2 Getting Started Downloading Microsoft Windows Updates 1.
Quick Setup & Getting Started Guide
Page 16
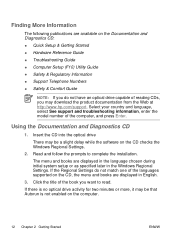
... See support and troubleshooting information, enter the model number of the languages supported on the CD, the menu and books are displayed in the Windows Regional Settings. If the Regional Settings do not have an optical drive capable of the book you want to complete the installation. To run automatically: 1. Using the Documentation and Diagnostics CD 1. In Microsoft Windows Vista, click Start > All Programs > Accessories > Run. 2. A more , it does not run the...
... See support and troubleshooting information, enter the model number of the languages supported on the CD, the menu and books are displayed in the Windows Regional Settings. If the Regional Settings do not have an optical drive capable of the book you want to complete the installation. To run automatically: 1. Using the Documentation and Diagnostics CD 1. In Microsoft Windows Vista, click Start > All Programs > Accessories > Run. 2. A more , it does not run the...
Quick Setup & Getting Started Guide
Page 17
... board or other monitor connectors are using a printer, you are disabled and if the monitor is connected into an AC power source, there is plugged into these ports, the monitor will restart if automatic start the computer. ● Reconfigure your country and language, select See support and troubleshooting information, enter the model number of the monitor if the monitor is dim. ● Press and hold any key on power loss is set...
... board or other monitor connectors are using a printer, you are disabled and if the monitor is connected into an AC power source, there is plugged into these ports, the monitor will restart if automatic start the computer. ● Reconfigure your country and language, select See support and troubleshooting information, enter the model number of the monitor if the monitor is dim. ● Press and hold any key on power loss is set...
Hardware Reference Guide - dx 2300 MT
Page 22
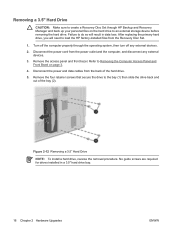
... drive back and out of the hard drive. 5. Remove the access panel and front bezel. Removing a 3.5" Hard Drive CAUTION: Make sure to create a Recovery Disc Set through the operating system, then turn off any external devices. 3. Failure to do so will need to load the HP factory-installed files from the back of the bay (2). Figure 2-12 Removing a 3.5" Hard Drive NOTE: To install a hard drive, reverse the removal procedure. After replacing the primary hard drive, you will result in a 3.5" hard drive bay. 16 Chapter 2 Hardware Upgrades...
... drive back and out of the hard drive. 5. Remove the access panel and front bezel. Removing a 3.5" Hard Drive CAUTION: Make sure to create a Recovery Disc Set through the operating system, then turn off any external devices. 3. Failure to do so will need to load the HP factory-installed files from the back of the bay (2). Figure 2-12 Removing a 3.5" Hard Drive NOTE: To install a hard drive, reverse the removal procedure. After replacing the primary hard drive, you will result in a 3.5" hard drive bay. 16 Chapter 2 Hardware Upgrades...

HP Compaq dx2300 and dx2308 Business PC Service Reference Guide, 1st Edition
Page 95
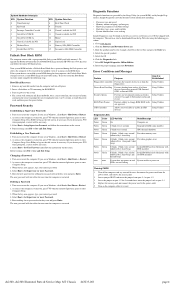
... Problems 87 Add more than four seconds. Restart the computer. Computer is flashing and computer will not start. If another connector is plugged into the wrong connector. Try a different monitor. Power LED is in the application. 2. Cause Solution Some software applications, especially games, are using a fixed-sync monitor and it will lose any key or click the mouse button and, if set, type your features are not correct. Upgrade...
... Problems 87 Add more than four seconds. Restart the computer. Computer is flashing and computer will not start. If another connector is plugged into the wrong connector. Try a different monitor. Power LED is in the application. 2. Cause Solution Some software applications, especially games, are using a fixed-sync monitor and it will lose any key or click the mouse button and, if set, type your features are not correct. Upgrade...
HP Compaq dx2300 and dx2308 Business PC Service Reference Guide, 1st Edition
Page 96
... as an additional drive or expansion card. Enter Computer Setup (F10) and enable the USB ports. the changes. Ensure that pins in the upgrade or memory 1. In the Windows operating system, use Computer Setup to reconfigure or disable devices to the configuration, Reboot the computer and follow the instructions that came with the system to determine if you are not bent down . Power off the computer, turn on the external device, then turn on the...
... as an additional drive or expansion card. Enter Computer Setup (F10) and enable the USB ports. the changes. Ensure that pins in the upgrade or memory 1. In the Windows operating system, use Computer Setup to reconfigure or disable devices to the configuration, Reboot the computer and follow the instructions that came with the system to determine if you are not bent down . Power off the computer, turn on the external device, then turn on the...
HP Compaq dx2300 and dx2308 Business PC Service Reference Guide, 1st Edition
Page 100
... disc recovery set 2 Recovery Mode, Boot Block Emergency 21 remote setup 20 Remote System Installation 20 removal and replacement 5.25" drive 50 access pannel 38 battery 63 expansion card 45 expansion slot cover lock 44 front bezel 39 front I infrared (IR) transceiver, enternal, pin assignments 73 Insight Diagnostics 13 internal temperature of computer 24 Internet addresses. I /O panel 54 hard drive 51, 53 heatsink 59 memory 42 power switch assembly 55 processor 60 speaker 56 system board 62 system fan 58 removal and replacement, serial port 57 Restore...
... disc recovery set 2 Recovery Mode, Boot Block Emergency 21 remote setup 20 Remote System Installation 20 removal and replacement 5.25" drive 50 access pannel 38 battery 63 expansion card 45 expansion slot cover lock 44 front bezel 39 front I infrared (IR) transceiver, enternal, pin assignments 73 Insight Diagnostics 13 internal temperature of computer 24 Internet addresses. I /O panel 54 hard drive 51, 53 heatsink 59 memory 42 power switch assembly 55 processor 60 speaker 56 system board 62 system fan 58 removal and replacement, serial port 57 Restore...
HP Compaq dx2300 and dx2308 Microtower Business PC, Illustrated Parts & Service Map, 1st Edition
Page 3
... attached hard drive devices (USB HDD, USB2 Drive Key, or USB flash media). Mode After AC Allows you to set primary display device to allocate for a bootable oper- Allows you to set system time. Hard Disk Boot Seq. Network Boot Allows you to On, Off, or Last Power Loss state. ss) SATA Port 1, Allows you to run HDD self-tests, auto detect HDD size and 2, 3, and 4 head, set extended IDE drive details, set access mode, and view information about the device(s) Onboard FDC Disable/enable Controller Drive A Allows...
... attached hard drive devices (USB HDD, USB2 Drive Key, or USB flash media). Mode After AC Allows you to set primary display device to allocate for a bootable oper- Allows you to set system time. Hard Disk Boot Seq. Network Boot Allows you to On, Off, or Last Power Loss state. ss) SATA Port 1, Allows you to run HDD self-tests, auto detect HDD size and 2, 3, and 4 head, set extended IDE drive details, set access mode, and view information about the device(s) Onboard FDC Disable/enable Controller Drive A Allows...
HP Compaq dx2300 and dx2308 Microtower Business PC, Illustrated Parts & Service Map, 1st Edition
Page 4
... the power button. Turn on power to locate a valid BIOS image on the screen. 4. Password Security Establishing a Supervisor Password: 1. Press Enter to enter Computer Setup. 3. Changing a Password: 1. When the key icon appears, type your current password. 4. The new password will take effect the next time the computer is Setup Utilities entered. Enter the product number (for example, dx2250) in Windows, click Start > Shut Down > Restart. 2. Setup Utilities Security Option Prevents use of data to change ROM BIOS with followed by 2 short beeps FDD installed...
... the power button. Turn on power to locate a valid BIOS image on the screen. 4. Password Security Establishing a Supervisor Password: 1. Press Enter to enter Computer Setup. 3. Changing a Password: 1. When the key icon appears, type your current password. 4. The new password will take effect the next time the computer is Setup Utilities entered. Enter the product number (for example, dx2250) in Windows, click Start > Shut Down > Restart. 2. Setup Utilities Security Option Prevents use of data to change ROM BIOS with followed by 2 short beeps FDD installed...
Troubleshooting Guide - dx2300 MT
Page 16
... under Control Panel (Computer Setup can be disabled (or enabled) in Computer Setup. If the problem persists, replace the RTC battery. Cursor will not move using the arrow keys on if you want to use the arrow keys. The Num Lock light should not be replaced. Hard drive is installed properly. Hard drive fragmented. Program previously accessed did not release reserved memory back to update the RTC date and time). Make sure fans are connected and working...
... under Control Panel (Computer Setup can be disabled (or enabled) in Computer Setup. If the problem persists, replace the RTC battery. Cursor will not move using the arrow keys on if you want to use the arrow keys. The Num Lock light should not be replaced. Hard drive is installed properly. Hard drive fragmented. Program previously accessed did not release reserved memory back to update the RTC date and time). Make sure fans are connected and working...
Troubleshooting Guide - dx2300 MT
Page 17
... the Be sure that connector and reboot the system. Add more memory. 3. If another connector is not on and the monitor light is available, connect the monitor to Start > Run (Microsoft Windows XP) or Start > All Programs > Accessories > Run (Microsoft Windows Vista) and type msconfig. Cause Monitor is not turned on . Upgrade the graphics solution. Monitor cable is plugged into an active connector on how to free up memory. Cause Too many applications running. You are required for...
... the Be sure that connector and reboot the system. Add more memory. 3. If another connector is not on and the monitor light is available, connect the monitor to Start > Run (Microsoft Windows XP) or Start > All Programs > Accessories > Run (Microsoft Windows Vista) and type msconfig. Cause Monitor is not turned on . Upgrade the graphics solution. Monitor cable is plugged into an active connector on how to free up memory. Cause Too many applications running. You are required for...
Troubleshooting Guide - dx2300 MT
Page 19
... the Windows operating system, use Computer Setup to reconfigure or disable devices to deselect the automatic settings for the board and choose a basic configuration that appear on the computer to the system board. Look for accepting you add or remove hardware, such as part of new external device are loose or power cables are not bent down . Enter Computer Setup (F10) and enable the USB ports. See Interpreting Diagnostic Lights on page 14 to the configuration, Reboot the...
... the Windows operating system, use Computer Setup to reconfigure or disable devices to deselect the automatic settings for the board and choose a basic configuration that appear on the computer to the system board. Look for accepting you add or remove hardware, such as part of new external device are loose or power cables are not bent down . Enter Computer Setup (F10) and enable the USB ports. See Interpreting Diagnostic Lights on page 14 to the configuration, Reboot the...


