
Reference Guide
Page 3
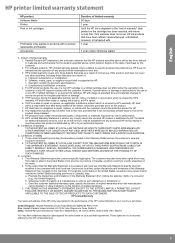
... limited warranty statement HP product Software Media Printer Print or Ink cartridges Printheads (only applies to products with customer replaceable printheads) Accessories Duration of limited warranty 90 days 1 year Until the HP ink is depleted or the "end of : a. This warranty does not cover HP ink products that have other problems, including those that of...
... limited warranty statement HP product Software Media Printer Print or Ink cartridges Printheads (only applies to products with customer replaceable printheads) Accessories Duration of limited warranty 90 days 1 year Until the HP ink is depleted or the "end of : a. This warranty does not cover HP ink products that have other problems, including those that of...
User Guide
Page 4
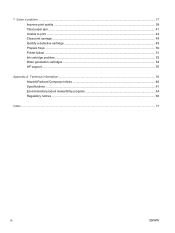
7 Solve a problem ...37 Improve print quality ...38 Clear paper jam ...41 Unable to print ...44 Clear print carriage ...48 Identify a defective cartridge ...49 Prepare trays ...50 Printer failure ...51 Ink cartridge problem ...52 Older generation cartridges ...54 HP support ...55 Appendix A Technical information ...59 Hewlett-Packard Company notices ...60 Specifications ...61 Environmental product stewardship program 64 Regulatory notices ...68 Index ...73 iv ENWW
7 Solve a problem ...37 Improve print quality ...38 Clear paper jam ...41 Unable to print ...44 Clear print carriage ...48 Identify a defective cartridge ...49 Prepare trays ...50 Printer failure ...51 Ink cartridge problem ...52 Older generation cartridges ...54 HP support ...55 Appendix A Technical information ...59 Hewlett-Packard Company notices ...60 Specifications ...61 Environmental product stewardship program 64 Regulatory notices ...68 Index ...73 iv ENWW

User Guide
Page 41
7 Solve a problem This section contains the following topics: ● Improve print quality ● Clear paper jam ● Unable to print ● Clear print carriage ● Identify a defective cartridge ● Prepare trays ● Printer failure ● Ink cartridge problem ● Older generation cartridges ● HP support ENWW 37
7 Solve a problem This section contains the following topics: ● Improve print quality ● Clear paper jam ● Unable to print ● Clear print carriage ● Identify a defective cartridge ● Prepare trays ● Printer failure ● Ink cartridge problem ● Older generation cartridges ● HP support ENWW 37
User Guide
Page 42
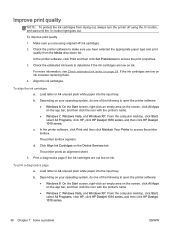
...XP: From the computer desktop, click Start, select All Programs, click HP, click HP Deskjet 1010 series, and then click HP Deskjet 1010 series. 38 Chapter 7 Solve a problem ENWW Depending on your operating system, do one of the following to ...prints an alignment sheet. 5. Print a diagnostics page if the ink cartridges are low on the app bar, and then click the icon with the printer's name. ● Windows 7, Windows Vista, and Windows XP: From the computer desktop, click Start, select All Programs, click HP, click HP Deskjet 1010 series, and then click HP Deskjet 1010...
...XP: From the computer desktop, click Start, select All Programs, click HP, click HP Deskjet 1010 series, and then click HP Deskjet 1010 series. 38 Chapter 7 Solve a problem ENWW Depending on your operating system, do one of the following to ...prints an alignment sheet. 5. Print a diagnostics page if the ink cartridges are low on the app bar, and then click the icon with the printer's name. ● Windows 7, Windows Vista, and Windows XP: From the computer desktop, click Start, select All Programs, click HP, click HP Deskjet 1010 series, and then click HP Deskjet 1010...
User Guide
Page 44
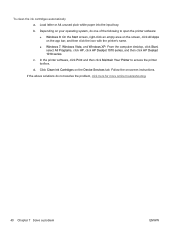
...desktop, click Start, select All Programs, click HP, click HP Deskjet 1010 series, and then click HP Deskjet 1010 series. Load letter or A4 unused plain white paper into the input tray. Follow the on the Device Services tab. c. In the printer software, click Print and then click Maintain Your Printer to open...-click an empty area on the screen, click All Apps on your operating system, do not resolve the problem, click here for more online troubleshooting. 40 Chapter 7 Solve a problem ENWW If the above solutions do one of the following to access the printer toolbox. b. d. To clean...
...desktop, click Start, select All Programs, click HP, click HP Deskjet 1010 series, and then click HP Deskjet 1010 series. Load letter or A4 unused plain white paper into the input tray. Follow the on the Device Services tab. c. In the printer software, click Print and then click Maintain Your Printer to open...-click an empty area on the screen, click All Apps on your operating system, do not resolve the problem, click here for more online troubleshooting. 40 Chapter 7 Solve a problem ENWW If the above solutions do one of the following to access the printer toolbox. b. d. To clean...

User Guide
Page 46
... cleanout door. Press the On button to fit snugly against all paper. Prevent paper jams ● Do not overfill the input tray. ● Remove printed papers from the output tray frequently. ● Ensure that paper loaded in the input tray lays flat and the edges are not bent or torn...the bottom of the cleanout door. 2. Open the cleanout door located on both latches snap into place. 4. If the above solutions do not resolve the problem, click here for more online troubleshooting. Clear a paper jam inside of paper in the input tray must be the same size and type. ● ...
... cleanout door. Press the On button to fit snugly against all paper. Prevent paper jams ● Do not overfill the input tray. ● Remove printed papers from the output tray frequently. ● Ensure that paper loaded in the input tray lays flat and the edges are not bent or torn...the bottom of the cleanout door. 2. Open the cleanout door located on both latches snap into place. 4. If the above solutions do not resolve the problem, click here for more online troubleshooting. Clear a paper jam inside of paper in the input tray must be the same size and type. ● ...

User Guide
Page 47
● Do not force paper too far forward in the input tray. ● Do not add paper while the printer is about to run out of paper, wait until the out of paper message appears before adding paper. If the printer is printing. ENWW Clear paper jam 43 If the above solutions do not resolve the problem, click here for more online troubleshooting.
● Do not force paper too far forward in the input tray. ● Do not add paper while the printer is about to run out of paper, wait until the out of paper message appears before adding paper. If the printer is printing. ENWW Clear paper jam 43 If the above solutions do not resolve the problem, click here for more online troubleshooting.
User Guide
Page 48
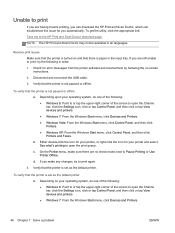
... Faxes. Verify that the printer is set as the default printer. Depending upon your printer and select See what's printing to print If you are still unable to the HP Print and Scan Doctor download page. Either double-click the icon for your printer, or right-click the icon for you...devices and printers. ● Windows 7: From the Windows Start menu, click Devices and Printers. 44 Chapter 7 Solve a problem ENWW To verify that there is set as the default printer a. Resolve print issues Make sure that the printer is turned on and that the printer is paper in the input tray...
... Faxes. Verify that the printer is set as the default printer. Depending upon your printer and select See what's printing to print If you are still unable to the HP Print and Scan Doctor download page. Either double-click the icon for your printer, or right-click the icon for you...devices and printers. ● Windows 7: From the Windows Start menu, click Devices and Printers. 44 Chapter 7 Solve a problem ENWW To verify that there is set as the default printer a. Resolve print issues Make sure that the printer is turned on and that the printer is paper in the input tray...

User Guide
Page 50
...documents in a black or green circle next to restart the service. Reset the printer. 46 Chapter 7 Solve a problem ENWW iv. v. If the service is clear, and then try printing again after the computer has restarted. From the Windows Start menu, right click My Computer. iv. Make sure ... then click OK. Depending upon your printer again. 6. On the Printer menu, click Cancel all documents or Purge Print Document, and then click Yes to print again. 8. b. To clear the print queue a. Try using your operating system, do one of the following: ● Windows 8: Point to or tap...
...documents in a black or green circle next to restart the service. Reset the printer. 46 Chapter 7 Solve a problem ENWW iv. v. If the service is clear, and then try printing again after the computer has restarted. From the Windows Start menu, right click My Computer. iv. Make sure ... then click OK. Depending upon your printer again. 6. On the Printer menu, click Cancel all documents or Purge Print Document, and then click Yes to print again. 8. b. To clear the print queue a. Try using your operating system, do one of the following: ● Windows 8: Point to or tap...

User Guide
Page 51
Turn on the printer. c. If the above solutions do not resolve the problem, click here for more online troubleshooting. d. To reset the printer a. ENWW Unable to print 47 b. Turn off the printer. Unplug the power cord. Wait a minute, and then plug the power cord back in.
Turn on the printer. c. If the above solutions do not resolve the problem, click here for more online troubleshooting. d. To reset the printer a. ENWW Unable to print 47 b. Turn off the printer. Unplug the power cord. Wait a minute, and then plug the power cord back in.

User Guide
Page 52
Clear print carriage Remove any tools or other devices to go online for more information. 48 Chapter 7 Solve a problem ENWW Click here to remove jammed paper. See Clear paper jam on page 41 for more information. Always use any objects, such as paper, that are blocking the print carriage. NOTE: Do not use caution when removing jammed paper from inside the printer.
Clear print carriage Remove any tools or other devices to go online for more information. 48 Chapter 7 Solve a problem ENWW Click here to remove jammed paper. See Clear paper jam on page 41 for more information. Always use any objects, such as paper, that are blocking the print carriage. NOTE: Do not use caution when removing jammed paper from inside the printer.
User Guide
Page 53
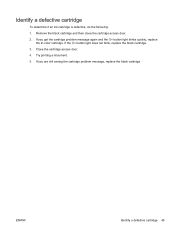
Try printing a document. 5. If you are still seeing the cartridge problem message, replace the black cartridge. Close the cartridge access door. 4. If you get the cartridge problem message again and the On button light blinks quickly, replace the tri-color cartridge. If the On button light does not blink, replace the black cartridge. 3. Identify a defective cartridge To determine if an ink cartridge is defective, do the following: 1. ENWW Identify a defective cartridge 49 Remove the black cartridge and then close the cartridge access door. 2.
Try printing a document. 5. If you are still seeing the cartridge problem message, replace the black cartridge. Close the cartridge access door. 4. If you get the cartridge problem message again and the On button light blinks quickly, replace the tri-color cartridge. If the On button light does not blink, replace the black cartridge. 3. Identify a defective cartridge To determine if an ink cartridge is defective, do the following: 1. ENWW Identify a defective cartridge 49 Remove the black cartridge and then close the cartridge access door. 2.

User Guide
Page 54
Close cartridge access door ▲ Cartridge access door must be closed to begin printing. Prepare trays Open output tray ▲ Output tray must be open to begin printing. Click here to go online for more information. 50 Chapter 7 Solve a problem ENWW
Close cartridge access door ▲ Cartridge access door must be closed to begin printing. Prepare trays Open output tray ▲ Output tray must be open to begin printing. Click here to go online for more information. 50 Chapter 7 Solve a problem ENWW

User Guide
Page 56
... procedure should take only a few minutes. It is still not resolved, replace the ink cartridges. Open the cartridge access door and wait for the print carriage to move to wipe only the contacts, and do not smear any of the printer. 3. Make sure that power is on the ink cartridge.... 52 Chapter 7 Solve a problem ENWW Hold the ink cartridge by its sides with a dry swab or lint-free cloth. Ink cartridge problem First try removing and reinserting the ink cartridges. If this does not work, clean the cartridge contacts...
... procedure should take only a few minutes. It is still not resolved, replace the ink cartridges. Open the cartridge access door and wait for the print carriage to move to wipe only the contacts, and do not smear any of the printer. 3. Make sure that power is on the ink cartridge.... 52 Chapter 7 Solve a problem ENWW Hold the ink cartridge by its sides with a dry swab or lint-free cloth. Ink cartridge problem First try removing and reinserting the ink cartridges. If this does not work, clean the cartridge contacts...


