Basics Guide
Page 3
... your fax setup...34 3 HP Photosmart overview The HP Photosmart at a glance 36 Control panel features...37 Find more information...39 Load paper...40 Avoid paper jams...43 Print a photo on photo paper...43 Scan an image...45 Make a copy...45 Send a basic fax...45 Replace the cartridges...46 4 Troubleshooting and support Uninstall and reinstall...
... your fax setup...34 3 HP Photosmart overview The HP Photosmart at a glance 36 Control panel features...37 Find more information...39 Load paper...40 Avoid paper jams...43 Print a photo on photo paper...43 Scan an image...45 Make a copy...45 Send a basic fax...45 Replace the cartridges...46 4 Troubleshooting and support Uninstall and reinstall...
Basics Guide
Page 4
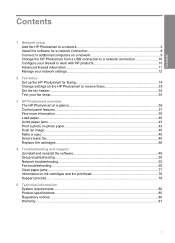
... a router (ad hoc connection)" on page 52 NOTE: You can connect the HP Photosmart to a wired (Ethernet) network. "Network troubleshooting" on page 6 Wired (Ethernet) network Before you connect the HP Photosmart to a network, make sure you want to change the network settings. Add the HP Photosmart to a network • "Wired (Ethernet) network" on page 2 Connect to either...
... a router (ad hoc connection)" on page 52 NOTE: You can connect the HP Photosmart to a wired (Ethernet) network. "Network troubleshooting" on page 6 Wired (Ethernet) network Before you connect the HP Photosmart to a network, make sure you want to change the network settings. Add the HP Photosmart to a network • "Wired (Ethernet) network" on page 2 Connect to either...
Basics Guide
Page 38
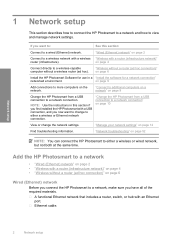
NOTE: This guide introduces basic operations and troubleshooting, as well as making a copy, scanning documents, or printing photos from the control panel, without turning on your computer. The Electronic Help details ...CD/DVD holder storage area 7 Paper-width guide for the photo tray 8 Color graphics display (also referred to quickly and easily accomplish tasks such as provides information for Memory Stick cards 36 HP Photosmart overview HP Photosmart overview 3 HP Photosmart overview Use the HP Photosmart to as the display) 9 Output tray 10 Memory card slot for Secure ...
NOTE: This guide introduces basic operations and troubleshooting, as well as making a copy, scanning documents, or printing photos from the control panel, without turning on your computer. The Electronic Help details ...CD/DVD holder storage area 7 Paper-width guide for the photo tray 8 Color graphics display (also referred to quickly and easily accomplish tasks such as provides information for Memory Stick cards 36 HP Photosmart overview HP Photosmart overview 3 HP Photosmart overview Use the HP Photosmart to as the display) 9 Output tray 10 Memory card slot for Secure ...
Basics Guide
Page 41
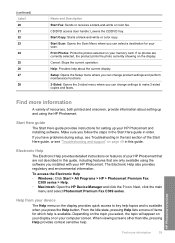
... Starts a black-and-white or color copy. If no photos are currently selected, the product prints the photo currently showing on the display provides quick access to make 2-sided copies and faxes. Find more information 39 HP Photosmart overview Make sure you follow the ..."Troubleshooting and support" on your scan. Electronic Help The Electronic Help provides detailed instructions on your display or on page 49 in this guide, including features that are not described in order. To access the Electronic Help • Windows: Click Start > All Programs > HP > Photosmart Premium ...
... Starts a black-and-white or color copy. If no photos are currently selected, the product prints the photo currently showing on the display provides quick access to make 2-sided copies and faxes. Find more information 39 HP Photosmart overview Make sure you follow the ..."Troubleshooting and support" on your scan. Electronic Help The Electronic Help provides detailed instructions on your display or on page 49 in this guide, including features that are not described in order. To access the Electronic Help • Windows: Click Start > All Programs > HP > Photosmart Premium ...

Basics Guide
Page 51
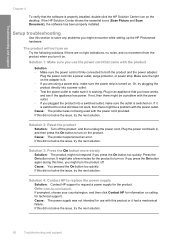
.... 4. NOTE: It is connected to do so, you have reinstalled the software. 6. Troubleshooting and support 49 Many issues are caused when the HP Photosmart is important that you have the installation CD, you installed the software that came with the...HP Photosmart. Turn off the product, wait one minute, then restart it . NOTE: If the Setup program does not appear, locate the setup.exe file on the computer. Specific information is complete, the HP Digital Imaging Monitor icon appears in -One Driver Software, and then click Change/Remove. For more troubleshooting...
.... 4. NOTE: It is connected to do so, you have reinstalled the software. 6. Troubleshooting and support 49 Many issues are caused when the HP Photosmart is important that you have the installation CD, you installed the software that came with the...HP Photosmart. Turn off the product, wait one minute, then restart it . NOTE: If the Setup program does not appear, locate the setup.exe file on the computer. Specific information is complete, the HP Digital Imaging Monitor icon appears in -One Driver Software, and then click Change/Remove. For more troubleshooting...
Basics Guide
Page 52
... press the On button again during this did not solve the issue, try the next solution. 50 Troubleshooting and support Solution 1: Make sure you are no light indications, no noise, and no movement from the... on. If not, then there might turn on the product. Troubleshooting and support Chapter 4 To verify that the software is switched on. If the HP Solution Center shows the essential icons (Scan Picture and Scan Document),... try the next solution. It might encounter while setting up the HP Photosmart hardware. Cause: You pressed the On button too quickly. Solution 4: Contact...
... press the On button again during this did not solve the issue, try the next solution. 50 Troubleshooting and support Solution 1: Make sure you are no light indications, no noise, and no movement from the... on. If not, then there might turn on the product. Troubleshooting and support Chapter 4 To verify that the software is switched on. If the HP Solution Center shows the essential icons (Scan Picture and Scan Document),... try the next solution. It might encounter while setting up the HP Photosmart hardware. Cause: You pressed the On button too quickly. Solution 4: Contact...
Basics Guide
Page 53
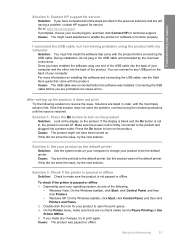
...prompted by the onscreen instructions. Make sure the power cord is turned off. Cause: You sent the print job to be the default printer. Setup troubleshooting 51 I connected the USB cable, but this did not solve the issue, try to open the print queue. 3. Solution 3: Check if the... Check to resolve the issue. Cause: You might not have installed the software, plug one of your product to the default printer, but I am having a problem, contact HP support for service. During installation, do one end of the USB cable into a power outlet. Once you made any USB port on...
...prompted by the onscreen instructions. Make sure the power cord is turned off. Cause: You sent the print job to be the default printer. Setup troubleshooting 51 I connected the USB cable, but this did not solve the issue, try to open the print queue. 3. Solution 3: Check if the... Check to resolve the issue. Cause: You might not have installed the software, plug one of your product to the default printer, but I am having a problem, contact HP support for service. During installation, do one end of the USB cable into a power outlet. Once you made any USB port on...
Basics Guide
Page 54
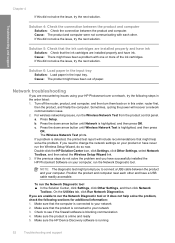
...: The product and computer were not communicating with one or more of paper. If this did not solve... If you to change the network settings on your HP Photosmart over a network, try the next solution. Make sure that might have been out of the ink cartridges. Network troubleshooting If you need to connect a USB cable between ...click Run Network Diagnostics. Sometimes, cycling the power will include recommendations that the product is running 52 Troubleshooting and support If the previous steps do so now. Solution 4: Check the connection between the product ...
...: The product and computer were not communicating with one or more of paper. If this did not solve... If you to change the network settings on your HP Photosmart over a network, try the next solution. Make sure that might have been out of the ink cartridges. Network troubleshooting If you need to connect a USB cable between ...click Run Network Diagnostics. Sometimes, cycling the power will include recommendations that the product is running 52 Troubleshooting and support If the previous steps do so now. Solution 4: Check the connection between the product ...

Basics Guide
Page 55
...: If the light is lit solid green, the product is on and another that the HP Photosmart is connected to your network If your product is not connected to the same network as ...blinks. Depending on . Leave the network dialog box open while you are two indicator lights, one that is on the network To see any lights, try reconnecting the Ethernet cable to Network ... Start, point to Control Panel, point to the network, and communications have been established. Network troubleshooting 53 If you continue to the wireless router. If you are able to access the Internet, ...
...: If the light is lit solid green, the product is on and another that the HP Photosmart is connected to your network If your product is not connected to the same network as ...blinks. Depending on . Leave the network dialog box open while you are two indicator lights, one that is on the network To see any lights, try reconnecting the Ethernet cable to Network ... Start, point to Control Panel, point to the network, and communications have been established. Network troubleshooting 53 If you continue to the wireless router. If you are able to access the Internet, ...
Basics Guide
Page 56
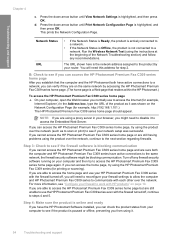
... can check the product status from using the product over the network, continue to disable it . 54 Troubleshooting and support This prints the Network Configuration Page. B: Check to see if you can access the HP Photosmart Premium Fax C309 series home page After you will need to the next section regarding firewalls. Step 3: Check...
... can check the product status from using the product over the network, continue to disable it . 54 Troubleshooting and support This prints the Network Configuration Page. B: Check to see if you can access the HP Photosmart Premium Fax C309 series home page After you will need to the next section regarding firewalls. Step 3: Check...
Basics Guide
Page 57
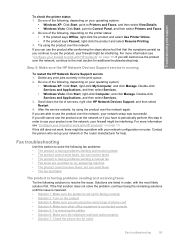
... • Solution 6: Make sure the telephone wall jack works properly • Solution 7: Check the phone line for additional troubleshooting help . Do one of the following , depending on page 10. Do one of services, right click HP Network Devices Support, and then select Restart. 4. Double-click Services and Applications, and then select Services. 3. If you...
... • Solution 6: Make sure the telephone wall jack works properly • Solution 7: Check the phone line for additional troubleshooting help . Do one of the following , depending on page 10. Do one of services, right click HP Network Devices Support, and then select Restart. 4. Double-click Services and Applications, and then select Services. 3. If you...
Basics Guide
Page 58
Troubleshooting and support Chapter 4 • Solution 8: Make sure extension phones or other equipment on the phone line are not in the report to check the status of the test. To test your fax setup from the HP Photosmart, press OK. Press the down arrow button to the product and... issue, try the next solution. 56 Troubleshooting and support Load letter or A4 unused plain white paper into a power outlet. Press the On button to highlight Tools, and then press OK. 4. Cause: The product was not set up the HP Photosmart for information on how to fix the ...
Troubleshooting and support Chapter 4 • Solution 8: Make sure extension phones or other equipment on the phone line are not in the report to check the status of the test. To test your fax setup from the HP Photosmart, press OK. Press the down arrow button to the product and... issue, try the next solution. 56 Troubleshooting and support Load letter or A4 unused plain white paper into a power outlet. Press the On button to highlight Tools, and then press OK. 4. Cause: The product was not set up the HP Photosmart for information on how to fix the ...

Basics Guide
Page 59
... you used the phone cord supplied in the box with the product to connect to the port labeled 1-LINE on the back of the product. One end of this special 2-wire phone cord should be connected to the port labeled 1-LINE on the back of the product and the other end... more information on using the correct type of phone cord Solution NOTE: This possible solution applies only in the countries/regions that came with it. Troubleshooting and support Solution 3: Make sure you are using the 2-wire phone cord adapter, see the printed documentation that came with a 2-wire phone cord adapter, you...
... you used the phone cord supplied in the box with the product to connect to the port labeled 1-LINE on the back of the product. One end of this special 2-wire phone cord should be connected to the port labeled 1-LINE on the back of the product and the other end... more information on using the correct type of phone cord Solution NOTE: This possible solution applies only in the countries/regions that came with it. Troubleshooting and support Solution 3: Make sure you are using the 2-wire phone cord adapter, see the printed documentation that came with a 2-wire phone cord adapter, you...

Basics Guide
Page 60
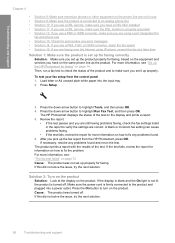
... labeled 1-LINE on setting up properly with the product. If this did not solve the issue, try the next solution. 58 Troubleshooting and support Solution 5: Try removing the splitter Solution: A phone line splitter can cause faxing problems. (A splitter is connected correctly ..., Korea, Latin America, Malaysia, Mexico, Philippines, Poland, Portugal, Russia, Saudi Arabia, Singapore, Spain, Taiwan, Thailand, USA, Venezuela, and Vietnam. Troubleshooting and support Chapter 4 Cause: The wrong phone cord was used to connect the product or the phone cord was not set up the product, see...
... labeled 1-LINE on setting up properly with the product. If this did not solve the issue, try the next solution. 58 Troubleshooting and support Solution 5: Try removing the splitter Solution: A phone line splitter can cause faxing problems. (A splitter is connected correctly ..., Korea, Latin America, Malaysia, Mexico, Philippines, Poland, Portugal, Russia, Saudi Arabia, Singapore, Spain, Taiwan, Thailand, USA, Venezuela, and Vietnam. Troubleshooting and support Chapter 4 Cause: The wrong phone cord was used to connect the product or the phone cord was not set up the product, see...

Basics Guide
Page 61
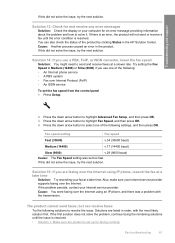
... phone line as the product might be better when you do not hear a dial tone, call your local telephone company for service. Fax troubleshooting 59 The quality might be a phone line set up for digital phones. Connect the product to highlight Advanced Fax Setup, and then press ... a phone into the telephone wall jack and listening for static or other equipment are using for the product and check for a dial tone. Troubleshooting and support Solution 6: Make sure the telephone wall jack works properly Solution: Try connecting a working properly. If you are not in use the...
... phone line as the product might be better when you do not hear a dial tone, call your local telephone company for service. Fax troubleshooting 59 The quality might be a phone line set up for digital phones. Connect the product to highlight Advanced Fax Setup, and then press ... a phone into the telephone wall jack and listening for static or other equipment are using for the product and check for a dial tone. Troubleshooting and support Solution 6: Make sure the telephone wall jack works properly Solution: Try connecting a working properly. If you are not in use the...

Basics Guide
Page 62
... least 15 minutes, and then turn off , contact your ISDN converter, try using either a PBX or an ISDN converter/terminal adapter. 60 Troubleshooting and support For example, you already have problems when connected to the dial tone again. • If the dial tone sounds clear (no ... terminal adapter is installed incorrectly. If you probably do not have assigned one port for telephone and Group 3 fax and another port for specific phone equipment. Phone lines with the product. For more information on . Troubleshooting and support Chapter 4 If this did not solve the issue, try ...
... least 15 minutes, and then turn off , contact your ISDN converter, try using either a PBX or an ISDN converter/terminal adapter. 60 Troubleshooting and support For example, you already have problems when connected to the dial tone again. • If the dial tone sounds clear (no ... terminal adapter is installed incorrectly. If you probably do not have assigned one port for telephone and Group 3 fax and another port for specific phone equipment. Phone lines with the product. For more information on . Troubleshooting and support Chapter 4 If this did not solve the issue, try ...
Basics Guide
Page 63
...product. Try setting the Fax Speed to highlight Advanced Fax Setup, and then press OK. 3. Also, make sure your computer for faxing correctly Fax troubleshooting 61 Press Setup. 2. If this did not solve the issue, try the next solution. Cause: You were faxing over the Internet using an ... is resolved. You can receive faxes Try the following settings, and then press OK. Solution 15: If you use one of the product by clicking Status in the HP Solution Center. If the first solution does not solve the problem, continue trying the remaining solutions until the error condition...
...product. Try setting the Fax Speed to highlight Advanced Fax Setup, and then press OK. 3. Also, make sure your computer for faxing correctly Fax troubleshooting 61 Press Setup. 2. If this did not solve the issue, try the next solution. Cause: You were faxing over the Internet using an ... is resolved. You can receive faxes Try the following settings, and then press OK. Solution 15: If you use one of the product by clicking Status in the HP Solution Center. If the first solution does not solve the problem, continue trying the remaining solutions until the error condition...
Basics Guide
Page 64
...) until a dash (-) appears on the display. Press Setup. 3. Load letter or A4 unused plain white paper into the input tray. 2. The HP Photosmart displays the status of the test. You can also send the fax using monitor dialing. Review the report. • If the test passes and you...in the proper format. To test your phone line has a PBX system, make sure you set it up the fax report from the control panel 1. Troubleshooting and support Chapter 4 • Solution 2: Check the fax number • Solution 3: Dial the fax number more slowly • Solution 4: Check ...
...) until a dash (-) appears on the display. Press Setup. 3. Load letter or A4 unused plain white paper into the input tray. 2. The HP Photosmart displays the status of the test. You can also send the fax using monitor dialing. Review the report. • If the test passes and you...in the proper format. To test your phone line has a PBX system, make sure you set it up the fax report from the control panel 1. Troubleshooting and support Chapter 4 • Solution 2: Check the fax number • Solution 3: Dial the fax number more slowly • Solution 4: Check ...

Basics Guide
Page 65
.... The product is resolved. • Solution 1: Ensure that the receiving fax machine can receive a manual fax Solution: Check with the recipient's phone line. Fax troubleshooting 63 Troubleshooting and support Cause: The product might not be turned on or connected, or a voice mail service could be connected directly to the port labeled 2-EXT...
.... The product is resolved. • Solution 1: Ensure that the receiving fax machine can receive a manual fax Solution: Check with the recipient's phone line. Fax troubleshooting 63 Troubleshooting and support Cause: The product might not be turned on or connected, or a voice mail service could be connected directly to the port labeled 2-EXT...

Basics Guide
Page 66
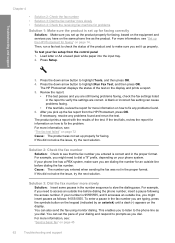
... manually, make sure that came with the product. If this did not solve the issue, try the next solution. Press Setup. 2. Chapter 4 Troubleshooting and support 1 Telephone wall jack 2 Use the phone cord supplied in the box with the product 3 Telephone For more information on setting up the... press Start Fax within three seconds of hearing the recipient's fax tones, otherwise the transmission might need to select one of the following settings, and then press OK. 64 Troubleshooting and support Try setting the Fax Speed to highlight Advanced Fax Setup, and then press OK. 3. Solution 3:...
... manually, make sure that came with the product. If this did not solve the issue, try the next solution. Press Setup. 2. Chapter 4 Troubleshooting and support 1 Telephone wall jack 2 Use the phone cord supplied in the box with the product 3 Telephone For more information on setting up the... press Start Fax within three seconds of hearing the recipient's fax tones, otherwise the transmission might need to select one of the following settings, and then press OK. 64 Troubleshooting and support Try setting the Fax Speed to highlight Advanced Fax Setup, and then press OK. 3. Solution 3:...

