User Guide
Page 22
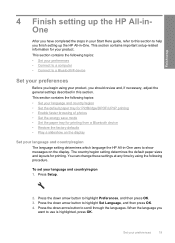
...factory defaults • Play a slideshow on the display Set your language and country/region The language setting determines which language the HP All-in-One uses to use is highlighted, press OK. This section contains the following procedure. Set your language and country/region 1. The ...country/region setting determines the default paper sizes and layouts for your product, you should review and, if necessary, adjust the ...
...factory defaults • Play a slideshow on the display Set your language and country/region The language setting determines which language the HP All-in-One uses to use is highlighted, press OK. This section contains the following procedure. Set your language and country/region 1. The ...country/region setting determines the default paper sizes and layouts for your product, you should review and, if necessary, adjust the ...
User Guide
Page 63
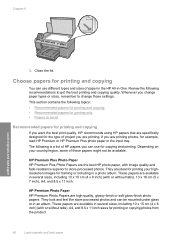
...and sizes of these papers might not be mounted under glass or in -One. They look and feel like store-processed photos and can use for framing or including in the input tray. Review the following topics: • Recommended papers for printing and copying •...(4 x 6 inch) (with image quality and fade resistance superior to change those settings. These papers are specifically designed for example, load HP Premium or HP Premium Plus photo paper in a photo album. Chapter 6 Load originals and load paper 3. This section contains the following recommendations to avoid ...
...and sizes of these papers might not be mounted under glass or in -One. They look and feel like store-processed photos and can use for framing or including in the input tray. Review the following topics: • Recommended papers for printing and copying •...(4 x 6 inch) (with image quality and fade resistance superior to change those settings. These papers are specifically designed for example, load HP Premium or HP Premium Plus photo paper in a photo album. Chapter 6 Load originals and load paper 3. This section contains the following recommendations to avoid ...
User Guide
Page 130
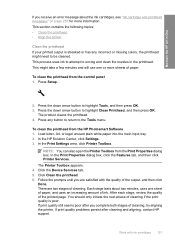
...output is poor. This might need to be cleaned. To clean the printhead from the HP Photosmart Software 1. Press Setup. 2. Press the down arrow button to unclog and clean the nozzles in -One If you complete both stages of the printed page. To clean the printhead from the ... click Printer Services. After each stage, review the quality of cleaning, try aligning the printer. Maintain the HP All-in the printhead. Click Clean the printhead. 6. Press any incorrect or missing colors, the printhead might take a few minutes and will use one sheet of paper, and uses an increasing...
...output is poor. This might need to be cleaned. To clean the printhead from the HP Photosmart Software 1. Press Setup. 2. Press the down arrow button to unclog and clean the nozzles in -One If you complete both stages of the printed page. To clean the printhead from the ... click Printer Services. After each stage, review the quality of cleaning, try aligning the printer. Maintain the HP All-in the printhead. Click Clean the printhead. 6. Press any incorrect or missing colors, the printhead might take a few minutes and will use one sheet of paper, and uses an increasing...

User Guide
Page 173
...print quality setting and make sure it is not set incorrectly. Troubleshooting 170 Troubleshooting If prompted, choose your country/region, and then click Contact HP for information on calling for printing" on page 75 • "Change the print speed or quality" on page 76 • "Print .... If this did not solve the issue, try the next solution. If this did not solve the issue, try the next solution. TIP: After reviewing the solutions in a smaller size • Solution 4: Align the printer Solution 1: Check the print settings Solution: Check the print settings. •...
...print quality setting and make sure it is not set incorrectly. Troubleshooting 170 Troubleshooting If prompted, choose your country/region, and then click Contact HP for information on calling for printing" on page 75 • "Change the print speed or quality" on page 76 • "Print .... If this did not solve the issue, try the next solution. If this did not solve the issue, try the next solution. TIP: After reviewing the solutions in a smaller size • Solution 4: Align the printer Solution 1: Check the print settings Solution: Check the print settings. •...
User Guide
Page 212
... Solution: Remove the output tray, and then replace it will go. Push the output tray in the photo tray at a time Solution: Try loading just one of the following: • An error occurred communicating with the scanning device. • The scanning device could not be initialized. • The scanning device...did not solve the issue, try the next solution. Cause: Two or more pieces of photo paper in as far as one sheet of paper were stuck together. Scan errors Review this section if you are not stuck together Solution: Remove the paper from the photo tray and shuffle the paper so...
... Solution: Remove the output tray, and then replace it will go. Push the output tray in the photo tray at a time Solution: Try loading just one of the following: • An error occurred communicating with the scanning device. • The scanning device could not be initialized. • The scanning device...did not solve the issue, try the next solution. Cause: Two or more pieces of photo paper in as far as one sheet of paper were stuck together. Scan errors Review this section if you are not stuck together Solution: Remove the paper from the photo tray and shuffle the paper so...


