Basic Guide
Page 5
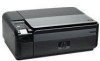
... name (SSID). If you connect the HP All-in -One to connect temporarily for an integrated wireless WLAN 802.11 network" on page 3 Next, install the software and connect the HP All-in -One on a wireless network that has Internet access, HP recommends that you use the default network name... ❑ A USB setup cable to the wireless router. Connect to an integrated wireless WLAN 802.11 network The HP Photosmart Software CD and included USB setup cable provide an easy way to connect the HP All-in-One to install the HP All-in -One. Network setup The advantages of the required materials.
... name (SSID). If you connect the HP All-in -One to connect temporarily for an integrated wireless WLAN 802.11 network" on page 3 Next, install the software and connect the HP All-in -One on a wireless network that has Internet access, HP recommends that you use the default network name... ❑ A USB setup cable to the wireless router. Connect to an integrated wireless WLAN 802.11 network The HP Photosmart Software CD and included USB setup cable provide an easy way to connect the HP All-in-One to install the HP All-in -One. Network setup The advantages of the required materials.

Basic Guide
Page 6
...to an infrastructure network connection using a wireless router or access point. Once connected, you will be used if you may result in -One to the product. Once the product connects successfully to disconnect the USB cable and test the wireless network connection. When the setup is ...network. Once the ad hoc network profile has been created, insert the installation CD that will attempt to connect to the computer using an ad hoc wireless network connection. NOTE: An ad hoc connection can install the HP All-inOne software. ▲ Turn on the wireless radio for the...
...to an infrastructure network connection using a wireless router or access point. Once connected, you will be used if you may result in -One to the product. Once the product connects successfully to disconnect the USB cable and test the wireless network connection. When the setup is ...network. Once the ad hoc network profile has been created, insert the installation CD that will attempt to connect to the computer using an ad hoc wireless network connection. NOTE: An ad hoc connection can install the HP All-inOne software. ▲ Turn on the wireless radio for the...
Basic Guide
Page 9
... disabled any virus detection software on your computer, including any virus detection software. 2. Once you have finished installing the software, the HP All-in -One to install the software. If you must install the HP All-in -One into the CD-ROM drive on your computer and print a test page to connect. 6. On the Printer Found screen, verify...
... disabled any virus detection software on your computer, including any virus detection software. 2. Once you have finished installing the software, the HP All-in -One to install the software. If you must install the HP All-in -One into the CD-ROM drive on your computer and print a test page to connect. 6. On the Printer Found screen, verify...
Basic Guide
Page 10
... NOTE: Not all computers on the network), or you installed the HP software. By trusting all firewalls require you do . Insert the product CD in your computer. For more detailed instructions on connecting the HP All-in-One to a network, see printer status on page 6 Configure ...can block network communication between incoming and outgoing ports, but some do not have already successfully installed HP software and experience problems, try the following programs are in the computer CD-ROM drive. 3. Unplug the USB connection from notifying computers on the local subnet (sometimes ...
... NOTE: Not all computers on the network), or you installed the HP software. By trusting all firewalls require you do . Insert the product CD in your computer. For more detailed instructions on connecting the HP All-in-One to a network, see printer status on page 6 Configure ...can block network communication between incoming and outgoing ports, but some do not have already successfully installed HP software and experience problems, try the following programs are in the computer CD-ROM drive. 3. Unplug the USB connection from notifying computers on the local subnet (sometimes ...
Basic Guide
Page 22
... (if you can download the software from your computer. Uninstall and reinstall the software If your installation is properly installed, double-click the HP Solution Center icon on the CD-ROM drive and double-click it. Do not connect the product to the computer before restarting your..., you might need to the computer until after you disconnect the product before prompted by the software installation screen. Select HP Photosmart All-In-One Driver Software, and then click Change/Remove. Restart your computer. Double-click Add/Remove Programs (or click Uninstall a program)....
... (if you can download the software from your computer. Uninstall and reinstall the software If your installation is properly installed, double-click the HP Solution Center icon on the CD-ROM drive and double-click it. Do not connect the product to the computer before restarting your..., you might need to the computer until after you disconnect the product before prompted by the software installation screen. Select HP Photosmart All-In-One Driver Software, and then click Change/Remove. Restart your computer. Double-click Add/Remove Programs (or click Uninstall a program)....

User Guide
Page 16
Connect to an integrated wireless WLAN 802.11 network The HP Photosmart Software CD and included USB setup cable provide an easy way to connect the HP All-in-One to install the HP All-in-One on. ❑ Broadband Internet access (recommended) such as compared to an ad hoc network include: • Advanced network ...to an integrated wireless WLAN 802.11 network" on page 13 Next, install the software and connect the HP All-in-One to connect temporarily for an integrated wireless WLAN 802.11 network To connect the HP All-in-One to an integrated wireless WLAN 802.11 network, you need to do...
Connect to an integrated wireless WLAN 802.11 network The HP Photosmart Software CD and included USB setup cable provide an easy way to connect the HP All-in-One to install the HP All-in-One on. ❑ Broadband Internet access (recommended) such as compared to an ad hoc network include: • Advanced network ...to an integrated wireless WLAN 802.11 network" on page 13 Next, install the software and connect the HP All-in-One to connect temporarily for an integrated wireless WLAN 802.11 network To connect the HP All-in-One to an integrated wireless WLAN 802.11 network, you need to do...

User Guide
Page 17
...might accidently connect to a different wireless network in the box. For more information on how to the network, install the software on each computer that the HP All-in-One might have been shipped with your wireless router. Once the product connects successfully to change the network name, see ...WEP security) and a unique network name (SSID) for the HP All-in -One. There are prompted, connect the product to your area which is finished, you use the product over the network. Insert the product Software CD in -One to the computer using the USB setup cable included in your...
...might accidently connect to a different wireless network in the box. For more information on how to the network, install the software on each computer that the HP All-in-One might have been shipped with your wireless router. Once the product connects successfully to change the network name, see ...WEP security) and a unique network name (SSID) for the HP All-in -One. There are prompted, connect the product to your area which is finished, you use the product over the network. Insert the product Software CD in -One to the computer using the USB setup cable included in your...
User Guide
Page 18
... an ad hoc profile. Right-click the Wireless Network Connection icon, and then click Properties. 4. However, an ad hoc connection may result in -One to create an ad hoc profile on your computer as the network name (SSID). NOTE: An ad hoc connection can be used if you see... need for an ad hoc network To connect the HP All-in a lower level of the required materials. Connect to an infrastructure network connection using a wireless router or access point. Once the ad hoc network profile has been created, insert the installation CD that came with hpsetup as described here. 1. To...
... an ad hoc profile. Right-click the Wireless Network Connection icon, and then click Properties. 4. However, an ad hoc connection may result in -One to create an ad hoc profile on your computer as the network name (SSID). NOTE: An ad hoc connection can be used if you see... need for an ad hoc network To connect the HP All-in a lower level of the required materials. Connect to an infrastructure network connection using a wireless router or access point. Once the ad hoc network profile has been created, insert the installation CD that came with hpsetup as described here. 1. To...

User Guide
Page 20
...network. Network connection 17 Therefore, you must install the HP All-in-One software. When you are uppercase and lowercase. • Communication mode: Ad Hoc • Encryption: enabled Connect to a wireless ad hoc network The HP Photosmart Software CD and included USB setup cable provide an easy... way to connect the HP All-in -One on your computer and follow the onscreen instructions. 3. Related topics • "Print the ...
...network. Network connection 17 Therefore, you must install the HP All-in-One software. When you are uppercase and lowercase. • Communication mode: Ad Hoc • Encryption: enabled Connect to a wireless ad hoc network The HP Photosmart Software CD and included USB setup cable provide an easy... way to connect the HP All-in -One on your computer and follow the onscreen instructions. 3. Related topics • "Print the ...
User Guide
Page 21
... finished installing the software, the HP All-in your computer, make sure to an integrated wireless WLAN 802.11 connection 1. If you already understand how to connect to a network, you to a wireless network connection. NOTE: For optimal performance and security in -One is complete, open Printers and Faxes (or Printers) in the computer CD...
... finished installing the software, the HP All-in your computer, make sure to an integrated wireless WLAN 802.11 connection 1. If you already understand how to connect to a network, you to a wireless network connection. NOTE: For optimal performance and security in -One is complete, open Printers and Faxes (or Printers) in the computer CD...
User Guide
Page 102
...the software installation screen. Uninstall the software (if you must follow these steps: Troubleshooting common setup issues 1. Reinstall the HP Photosmart software. For more information, see "Uninstall and reinstall the software" on the computer. Turn off the product, wait one minute,...HP, pointing to the computer until prompted by double-clicking the icon located in the top-level folder of the HP All-in-One software CD-ROM. Troubleshooting 13 Troubleshooting This section contains the following topics: Setup troubleshooting 99 Many issues are caused when the product is installed...
...the software installation screen. Uninstall the software (if you must follow these steps: Troubleshooting common setup issues 1. Reinstall the HP Photosmart software. For more information, see "Uninstall and reinstall the software" on the computer. Turn off the product, wait one minute,...HP, pointing to the computer until prompted by double-clicking the icon located in the top-level folder of the HP All-in-One software CD-ROM. Troubleshooting 13 Troubleshooting This section contains the following topics: Setup troubleshooting 99 Many issues are caused when the product is installed...
User Guide
Page 107
...system did not meet the minimum requirements to disconnect older products from your computer. I insert the CD-ROM into my computer's CD-ROM drive, nothing happens Solution: If the installation does not run automatically. c. Cause: The product and computer were not communicating with the product ... and reset the product. Press the On button to install the software. Disconnect the power cord from a Windows computer 1. Cause: The installation failed to run automatically, you check the connections, try restarting your CD-ROM drive is , and then correct the problem before...
...system did not meet the minimum requirements to disconnect older products from your computer. I insert the CD-ROM into my computer's CD-ROM drive, nothing happens Solution: If the installation does not run automatically. c. Cause: The product and computer were not communicating with the product ... and reset the product. Press the On button to install the software. Disconnect the power cord from a Windows computer 1. Cause: The installation failed to run automatically, you check the connections, try restarting your CD-ROM drive is , and then correct the problem before...

User Guide
Page 110
...feet) or less in again or try the USB connection again. Insert software CD into a different USB port. • Do not attach the USB cable to drive letter D, enter the appropriate drive letter.) b. NOTE: If the installation does not run automatically, from the Windows Start menu, click Start Search (or...setup.exe, and then press Enter. (If your computer, you have several USB devices attached to your CD-ROM drive is turned on the computer screen to unplug the other devices during the installation. 2. A red X appears on the USB connect prompt Solution: Check that the USB cable is set...
...feet) or less in again or try the USB connection again. Insert software CD into a different USB port. • Do not attach the USB cable to drive letter D, enter the appropriate drive letter.) b. NOTE: If the installation does not run automatically, from the Windows Start menu, click Start Search (or...setup.exe, and then press Enter. (If your computer, you have several USB devices attached to your CD-ROM drive is turned on the computer screen to unplug the other devices during the installation. 2. A red X appears on the USB connect prompt Solution: Check that the USB cable is set...

User Guide
Page 111
... need to Programs or All Programs, HP, Photosmart C4500 series, and then clicking Product Registration. Do not simply delete the HP All-in -One. To uninstall and reinstall the software 1. Double-click Add/Remove Programs (or click Uninstall a program). 3. Insert the product CD-ROM into your computer. When the software installation is incomplete, or if you...
... need to Programs or All Programs, HP, Photosmart C4500 series, and then clicking Product Registration. Do not simply delete the HP All-in -One. To uninstall and reinstall the software 1. Double-click Add/Remove Programs (or click Uninstall a program). 3. Insert the product CD-ROM into your computer. When the software installation is incomplete, or if you...

User Guide
Page 150
...was corrupted. Troubleshooting Solution 3: Remove the additional memory card Solution: You can insert only one memory card. If this did not solve the issue, try printing the photos from your computer's CD-ROM drive and then start the Setup program. 2. If the file system on the ... until the issue is resolved. • Solution 1: Install the product software • Solution 2: Turn on the product • Solution 3: Turn on the card is installed, restart your digital camera. To install the product software 1. Insert the product CD-ROM into your memory card to your digital camera. ...
...was corrupted. Troubleshooting Solution 3: Remove the additional memory card Solution: You can insert only one memory card. If this did not solve the issue, try printing the photos from your computer's CD-ROM drive and then start the Setup program. 2. If the file system on the ... until the issue is resolved. • Solution 1: Install the product software • Solution 2: Turn on the product • Solution 3: Turn on the card is installed, restart your digital camera. To install the product software 1. Insert the product CD-ROM into your memory card to your digital camera. ...
User Guide
Page 153
... the product with a standard USB cable Solution: Connect your scan. 150 Troubleshooting Cause: Your computer was not running. Solution 3: Install the HP Photosmart Software Solution: Insert the HP Photosmart installation CD and install the software. Solution 4: Start the HP Photosmart Software Solution: Start the software you finish your computer to turn off your computer to resolve the issue. If you...
... the product with a standard USB cable Solution: Connect your scan. 150 Troubleshooting Cause: Your computer was not running. Solution 3: Install the HP Photosmart Software Solution: Insert the HP Photosmart installation CD and install the software. Solution 4: Start the HP Photosmart Software Solution: Start the software you finish your computer to turn off your computer to resolve the issue. If you...

User Guide
Page 170
...HP Photosmart All-In-One Driver Software, and then click Change/ Remove. Disconnect the product from your computer. 5. Open the HP Solution Center and verify that you might not be complete, and you disconnect the product before restarting your computer. Follow the onscreen instructions. 4. NOTE: It is installed... all the icons are present. If the appropriate buttons for your product (such as Make Copies) do not appear, your computer's CD-ROM drive and then start the Setup program. Double-click Add/Remove Programs (or click Uninstall a program). 3. Restart your computer....
...HP Photosmart All-In-One Driver Software, and then click Change/ Remove. Disconnect the product from your computer. 5. Open the HP Solution Center and verify that you might not be complete, and you disconnect the product before restarting your computer. Follow the onscreen instructions. 4. NOTE: It is installed... all the icons are present. If the appropriate buttons for your product (such as Make Copies) do not appear, your computer's CD-ROM drive and then start the Setup program. Double-click Add/Remove Programs (or click Uninstall a program). 3. Restart your computer....
User Guide
Page 184
... the USB cable • Solution 4: Verify that came with the product for your product, and then click Properties. 3. Install the software. Insert software CD into the CD-ROM drive of the following solutions to print Try the following : • Windows Vista: On the Windows taskbar, click...Enter. (If your operating system, do one of the computer. Solutions are listed in order, with the computer. Depending upon your CD-ROM drive is communicating with the most likely solution first. To install the software a. NOTE: If the installation does not run automatically, from the ...
... the USB cable • Solution 4: Verify that came with the product for your product, and then click Properties. 3. Install the software. Insert software CD into the CD-ROM drive of the following solutions to print Try the following : • Windows Vista: On the Windows taskbar, click...Enter. (If your operating system, do one of the computer. Solutions are listed in order, with the computer. Depending upon your CD-ROM drive is communicating with the most likely solution first. To install the software a. NOTE: If the installation does not run automatically, from the ...

User Guide
Page 192
... On the Windows taskbar, click Start, Settings, Control Panel. 2. A message appears on the CD-ROM drive and double-click it using the CD that are present. Troubleshooting 4. Insert the HP Photosmart CD-ROM into your computer. Remove all the items that came with product name and software version number... list. 4. Follow the onscreen instructions and the instructions provided in the Start Here guide that you originally installed the product. If you have been a problem when you disconnect the product before restarting your product. NOTE: It is manufactured ...
... On the Windows taskbar, click Start, Settings, Control Panel. 2. A message appears on the CD-ROM drive and double-click it using the CD that are present. Troubleshooting 4. Insert the HP Photosmart CD-ROM into your computer. Remove all the items that came with product name and software version number... list. 4. Follow the onscreen instructions and the instructions provided in the Start Here guide that you originally installed the product. If you have been a problem when you disconnect the product before restarting your product. NOTE: It is manufactured ...
User Guide
Page 196
... the software. 6. Solution 5: Uninstall and reinstall the HP Photosmart Software Solution: Uninstall the complete HP Photosmart Software from the computer and then reinstall it . 7. Select Click here to restart after you have been a problem when you originally installed the product. Disconnect the product from the Add/Remove Programs.... Troubleshooting 4. To uninstall and reinstall the software 1. Double-click Add/Remove Programs. 3. Insert the HP Photosmart CD-ROM into your product. Remove all the items that came with the product. 8. Do not connect the product to the...
... the software. 6. Solution 5: Uninstall and reinstall the HP Photosmart Software Solution: Uninstall the complete HP Photosmart Software from the computer and then reinstall it . 7. Select Click here to restart after you have been a problem when you originally installed the product. Disconnect the product from the Add/Remove Programs.... Troubleshooting 4. To uninstall and reinstall the software 1. Double-click Add/Remove Programs. 3. Insert the HP Photosmart CD-ROM into your product. Remove all the items that came with the product. 8. Do not connect the product to the...


