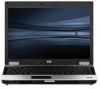
6930p Memory Slots - HP EliteBook Core 2 Duo 2 8 GHz
Related Manual Pages


Similar Questions


Hp Notebook Pcs 6930p How Many Memory Slots
(Posted by Sherlbs 9 years ago)

Where Is The Second Memory Slot On Hp Elitebook 6930p
(Posted by louburb2 10 years ago)

How Many Laptop Memory Slots Available In Hp 6930p
(Posted by meeeesimonm 10 years ago)

How Do I Know How Many Memory Slots Board In My Laptop 8460p
(Posted by Sabrug 10 years ago)
Related Terms
The following terms were also used when searching for 6930p Memory Slots - HP EliteBook Core 2 Duo 2 8 GHz:- elitebook 6930p
- hp elitebook 6930p
- hp elitebook 6930p bios
- hp elitebook 6930p notebook pc
- hp 6930p laptop
- hp elitebook 6930p notebook
- elitebook 6930p battery
- 6930p laptop
- hp 6930p elitebook
- elitebook 6930p notebook
- elitebook 6930p notebook pc
- elitebook 6930p wireless
- hp 6930p battery
- hp elitebook 6930p review
- elitebook 6930p bios
- hp elitebook 6930p battery
- 6930p elitebook
- hp 6930p drivers
- 6930p battery
- 6930p bluetooth
- elitebook 6930p drivers
- elitebook 6930p memory
- hp 6930p memory
- hp elitebook 6930p drivers
- 6930p docking station
- 6930p review
- hp 6930p bluetooth
- elitebook 6930p price
- 6930p memory
- elitebook 6930p docking station
- hp 6930p docking station
- hp 6930p review
- 6930p drivers
- 6930p manual
- elitebook 6930p wireless switch
- elitebook 6930p manual
- fm897ut aba
- fm897ut#aba
- hp elitebook 6930p docking station
- hp elitebook 6930p wireless switch
- 6930p specs
- elitebook 6930p review
- fn044ut aba
- fn044ut#aba
- hp elitebook 6930p specs
- 6930p service manual
- elitebook 6930p specs
- hp 6930p manual
- hp elitebook 6930p manual
- 6930p network issue
- elitebook 6930p reset bios password
- hp 6930p specs
- 6930p 14 laptop
- 6930p 601 battery error
- 6930p admin password
- 6930p base system device
- 6930p base system device driver
- 6930p base system device driver windows 7
- 6930p battery not charging
- 6930p battery part number
- 6930p battery replacement
- 6930p bios
- 6930p bios admin reset
- 6930p bios download
- 6930p bios error 501
- 6930p bios lock
- 6930p bios password
- 6930p bios password reset
- 6930p bios reset
- 6930p bios update
- 6930p bios update download
- 6930p bios update driver
- 6930p charger
- 6930p core 2 duo
- 6930p cpu upgrade
- 6930p dim screen
- 6930p disassembly
- 6930p display dim
- 6930p display driver
- 6930p driver
- 6930p driver download
- 6930p drivers and downloads
- 6930p drivers download
- 6930p drivers hp
- 6930p drivers pci serial port
- 6930p drivers windows 7
- 6930p drivers windows 8
- 6930p drivers xp
- 6930p elitebook dual monitors
- 6930p elitebook specs
- 6930p enable wireless
- 6930p end of life
- 6930p fingerprint driver
- 6930p fingerprint reader
- 6930p fingerprint sensor driver
- 6930p fingerprint software
- 6930p gpt uefi
- 6930p graphics driver
- 6930p hard drive
- 6930p hdmi
- 6930p hinge replacement
- 6930p hinges
- 6930p hp
- 6930p hp battery replacement
- 6930p hp driver
- 6930p hp drivers
- 6930p hp elite won't turn on
- 6930p hp elitebook
- 6930p hp laptop
- 6930p hp review
- 6930p keyboard
- 6930p keyboard removal
- 6930p laptop price
- 6930p laptop reviews
- 6930p laptop specifications
- 6930p laptop specs
- 6930p laptops
- 6930p lcd replacement
- 6930p led blink code
- 6930p max ram
- 6930p memory capacity
- 6930p memory max
- 6930p memory slots
- 6930p memory upgrade
- 6930p motherboard
- 6930p no sound
- 6930p not charging
- 6930p notebook
- 6930p parts
- 6930p parts list
- 6930p password bios
- 6930p pci drivers
- 6930p pci serial port
- 6930p pci serial port driver
- 6930p pci serial port driver download
- 6930p pci simple communication controller
- 6930p power adapter
- 6930p power supply
- 6930p price
- 6930p product number
- 6930p ram
- 6930p ram install
- 6930p ram upgrade
- 6930p recovery disk
- 6930p recovery disk download
- 6930p release date
- 6930p remove keyboard
- 6930p repair guide
- 6930p replacement battery
- 6930p replacement keyboard
- 6930p reset bios password
- 6930p reset factory bios password
- 6930p reviews
- 6930p screen
- 6930p screen replacement
- 6930p screen size
- 6930p sd card driver
- 6930p simple communication control drivers
- 6930p sound card
- 6930p spec
- 6930p specifications
- 6930p unknown device
- 6930p used prices
- 6930p video driver
- 6930p webcam
- 6930p webcam driver
- 6930p weight
- 6930p wifi switch
- 6930p windows 7 drivers
- 6930p windows 8 drivers
- 6930p wireless button not working
- 6930p wireless card
- 6930p wireless drivers
- 6930p wireless fix
- 6930p wireless not working
- 6930p wireless problem
- 6930p wireless switch
- elitebook 6930p 14.1
- elitebook 6930p 3 monitors
- elitebook 6930p ac adapter
- elitebook 6930p ahci controllers
- elitebook 6930p ambient light sensor
- elitebook 6930p audio driver
- elitebook 6930p base system device
- elitebook 6930p base system device driver
- elitebook 6930p battery not charging
- elitebook 6930p battery problems
- elitebook 6930p battery replacement
- elitebook 6930p bios password
- elitebook 6930p bios password reset
- elitebook 6930p bios update
- elitebook 6930p bios virtualization
- elitebook 6930p bluetooth
- elitebook 6930p bluetooth driver
- elitebook 6930p boot disks
- elitebook 6930p brightness control
- elitebook 6930p camera not working
- elitebook 6930p charger
- elitebook 6930p core 2 duo
- elitebook 6930p display driver
- elitebook 6930p driver
- elitebook 6930p drivers download
- elitebook 6930p drivers for windows 7
- elitebook 6930p drivers vista
- elitebook 6930p drivers windows 7
- elitebook 6930p drivers windows 7 64-bit
- elitebook 6930p drivers windows 7 download
- elitebook 6930p drivers windows 8
- elitebook 6930p drivers windows 8.1
- elitebook 6930p ebay
- elitebook 6930p enable wireless
- elitebook 6930p factory reset
- elitebook 6930p factory restore
- elitebook 6930p fingerprint driver
- elitebook 6930p fingerprint drivers
- elitebook 6930p fingerprint reader
- elitebook 6930p fingerprint scanner driver
- elitebook 6930p fingerprint sensor
- elitebook 6930p fingerprint software
- elitebook 6930p forgot windows password
- elitebook 6930p graphics
- elitebook 6930p hard drive
- elitebook 6930p hard drive replacement
- elitebook 6930p have webcam
- elitebook 6930p how to change brightness
- elitebook 6930p keyboard
- elitebook 6930p keyboard removal
- elitebook 6930p keyboard replacement
- elitebook 6930p laptop
- elitebook 6930p laptop w/14.1
- elitebook 6930p latch
- elitebook 6930p led on keyboard
- elitebook 6930p locked bios
- elitebook 6930p manual download
- elitebook 6930p memory installation
- elitebook 6930p memory slots
- elitebook 6930p memory upgrade
- elitebook 6930p motherboard
- elitebook 6930p parts
- elitebook 6930p pci serial port driver
- elitebook 6930p power adapter
- elitebook 6930p power cord
- elitebook 6930p power supply
- elitebook 6930p price in india
- elitebook 6930p prices
- elitebook 6930p quickspecs
- elitebook 6930p ram
- elitebook 6930p ram slots
- elitebook 6930p ram upgrade
- elitebook 6930p recovery disc
- elitebook 6930p recovery disk
- elitebook 6930p remove keyboard
- elitebook 6930p replace keyboard
- elitebook 6930p restore keys
- elitebook 6930p reviews
- elitebook 6930p screen brightness
- elitebook 6930p screen brightness problems
- elitebook 6930p screen goes black
- elitebook 6930p screen replacement
- elitebook 6930p screen resolution
- elitebook 6930p screen size
- elitebook 6930p screen type
- elitebook 6930p screen won't come on
- elitebook 6930p serial port
- elitebook 6930p service manual
- elitebook 6930p sim card
- elitebook 6930p sim card driver
- elitebook 6930p specification
- elitebook 6930p specifications
- elitebook 6930p ssd upgrade
- elitebook 6930p support
- elitebook 6930p touchpad driver
- elitebook 6930p tpm
- elitebook 6930p turn on wireless
- elitebook 6930p unknown device
- elitebook 6930p unknown devices
- elitebook 6930p user guide
- elitebook 6930p user manual
- elitebook 6930p video drivers
- elitebook 6930p webcam
- elitebook 6930p webcam driver
- elitebook 6930p webcam software
- elitebook 6930p weight
- elitebook 6930p wifi driver
- elitebook 6930p wifi problem
- elitebook 6930p wifi switch
- elitebook 6930p windows 10
- elitebook 6930p windows 7
- elitebook 6930p windows 7 drivers
- elitebook 6930p windows 8 drivers
- elitebook 6930p wireless card
- elitebook 6930p wireless driver
- elitebook 6930p wireless problem
- elitebook 6930p won't turn on
- fm897ut aba number
- fm897ut aba specs
- fm897ut aba warranty
- fm897ut pdf
- fm897ut price
- fm897ut review
- fm897ut specifications
- fm897ut specs
- fn044ut aba hp
- fn044ut aba number
- fn044ut aba specs
- fn044ut price
- fn044ut specs
- fn044ut#aba specs
- hp 6930p
- hp 6930p 14 laptop
- hp 6930p base system device
- hp 6930p base system device driver
- hp 6930p base system device driver windows 7
- hp 6930p battery not charging
- hp 6930p battery part number
- hp 6930p battery replacement
- hp 6930p bios
- hp 6930p bios admin reset
- hp 6930p bios download
- hp 6930p bios error 501
- hp 6930p bios password
- hp 6930p bios password reset
- hp 6930p bios update
- hp 6930p bios update download
- hp 6930p bios update driver
- hp 6930p charger
- hp 6930p core 2 duo
- hp 6930p cpu upgrade
- hp 6930p dim screen
- hp 6930p disassembly
- hp 6930p display dim
- hp 6930p display driver
- hp 6930p driver
- hp 6930p driver download
- hp 6930p drivers download
- hp 6930p drivers pci serial port
- hp 6930p drivers windows 7
- hp 6930p drivers windows 8
- hp 6930p elitebook dual monitors
- hp 6930p elitebook specs
- hp 6930p enable wireless
- hp 6930p end of life
- hp 6930p fingerprint reader
- hp 6930p fingerprint sensor driver
- hp 6930p fingerprint software
- hp 6930p gpt uefi
- hp 6930p graphics driver
- hp 6930p hard drive
- hp 6930p hdmi
- hp 6930p hinges
- hp 6930p keyboard
- hp 6930p keyboard removal
- hp 6930p laptop price
- hp 6930p laptop reviews
- hp 6930p laptop specifications
- hp 6930p laptop specs
- hp 6930p lcd replacement
- hp 6930p led blink code
- hp 6930p memory capacity
- hp 6930p memory slots
- hp 6930p memory upgrade
- hp 6930p motherboard
- hp 6930p network issue
- hp 6930p no sound
- hp 6930p not charging
- hp 6930p notebook
- hp 6930p parts list
- hp 6930p pci drivers
- hp 6930p pci serial port
- hp 6930p pci serial port driver
- hp 6930p pci serial port driver download
- hp 6930p power adapter
- hp 6930p price
- hp 6930p product number
- hp 6930p ram
- hp 6930p ram install
- hp 6930p ram upgrade
- hp 6930p recovery disk
- hp 6930p recovery disk download
- hp 6930p release date
- hp 6930p repair guide
- hp 6930p replacement keyboard
- hp 6930p reset factory bios password
- hp 6930p reviews
- hp 6930p screen
- hp 6930p screen replacement
- hp 6930p screen size
- hp 6930p sd card driver
- hp 6930p service manual
- hp 6930p simple communication control drivers
- hp 6930p sound card
- hp 6930p specifications
- hp 6930p unknown device
- hp 6930p used prices
- hp 6930p video driver
- hp 6930p weight
- hp 6930p wifi switch
- hp 6930p windows 7 drivers
- hp 6930p windows 8 drivers
- hp 6930p wireless button not working
- hp 6930p wireless card
- hp 6930p wireless drivers
- hp 6930p wireless not working
- hp 6930p wireless switch
- hp elitebook 6930p ambient light sensor
- hp elitebook 6930p base system device
- hp elitebook 6930p base system device driver
- hp elitebook 6930p battery not charging
- hp elitebook 6930p battery replacement
- hp elitebook 6930p bios password reset
- hp elitebook 6930p bluetooth
- hp elitebook 6930p bluetooth driver
- hp elitebook 6930p boot disks
- hp elitebook 6930p brightness control
- hp elitebook 6930p camera not working
- hp elitebook 6930p charger
- hp elitebook 6930p core 2 duo
- hp elitebook 6930p display driver
- hp elitebook 6930p driver
- hp elitebook 6930p drivers download
- hp elitebook 6930p drivers for windows 7
- hp elitebook 6930p drivers vista
- hp elitebook 6930p drivers windows 7
- hp elitebook 6930p drivers windows 7 64-bit
- hp elitebook 6930p drivers windows 8
- hp elitebook 6930p factory reset
- hp elitebook 6930p factory restore
- hp elitebook 6930p fingerprint driver
- hp elitebook 6930p fingerprint drivers
- hp elitebook 6930p fingerprint reader
- hp elitebook 6930p fingerprint scanner driver
- hp elitebook 6930p fingerprint software
- hp elitebook 6930p forgot windows password
- hp elitebook 6930p graphics
- hp elitebook 6930p hard drive
- hp elitebook 6930p have webcam
- hp elitebook 6930p laptop
- hp elitebook 6930p led on keyboard
- hp elitebook 6930p locked bios
- hp elitebook 6930p manual download
- hp elitebook 6930p memory
- hp elitebook 6930p memory installation
- hp elitebook 6930p memory slots
- hp elitebook 6930p memory upgrade
- hp elitebook 6930p parts
- hp elitebook 6930p pci serial port driver
- hp elitebook 6930p power adapter
- hp elitebook 6930p power cord
- hp elitebook 6930p power supply
- hp elitebook 6930p price
- hp elitebook 6930p price in india
- hp elitebook 6930p prices
- hp elitebook 6930p ram
- hp elitebook 6930p ram upgrade
- hp elitebook 6930p recovery disk
- hp elitebook 6930p restore keys
- hp elitebook 6930p reviews
- hp elitebook 6930p screen brightness problems
- hp elitebook 6930p screen won't come on
- hp elitebook 6930p sim card
- hp elitebook 6930p specification
- hp elitebook 6930p specifications
- hp elitebook 6930p support
- hp elitebook 6930p touchpad driver
- hp elitebook 6930p turn on wireless
- hp elitebook 6930p user guide
- hp elitebook 6930p user manual
- hp elitebook 6930p webcam
- hp elitebook 6930p webcam driver
- hp elitebook 6930p webcam software
- hp elitebook 6930p wifi switch
- hp elitebook 6930p windows 10
- hp fm897ut#aba
- hp fn044ut aba
- hp fn044ut#aba