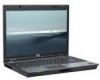
6910p Fan Control - HP Compaq Business Notebook
Related Manual Pages
Similar Questions

Hp Probook 4420s How To Control Fan By Bios
(Posted by Omerea 9 years ago)

How To Install Pci Simple Communications Controller Hp Compaq 6910p Drivers
(Posted by trejaick 10 years ago)

I Need A Fan For My Compaq Cq 57 Presario Laptop
does the fan plug in to the mother board or what?
does the fan plug in to the mother board or what?
(Posted by tammymelton1972 10 years ago)

Fan Needed!
Where can I purchase a fan for my HP Dv-4 1140go lap top?
Where can I purchase a fan for my HP Dv-4 1140go lap top?
(Posted by bcfev57 11 years ago)
Related Terms
The following terms were also used when searching for 6910p Fan Control - HP Compaq Business Notebook:- hp 6910p battery
- hp 6910p laptop
- hp 6910p bios
- hp 6910p memory
- 6910p bios
- 6910p battery
- 6910p memory
- hp 6910p drivers
- 6910p laptop
- hp 6910p ram
- 6910p manual
- gh715aw aba
- gh715aw#aba
- 6910p drivers
- hp 6910p docking station
- hp 6910p manual
- 6910p docking station
- 6910p service manual
- 6910p specs
- hp 6910p review
- 6910p review
- rm237ua aba
- rm237ua#aba
- 6910p bios password reset
- hp 6910p specs
- 6910p base system device driver
- 6910p windows 7 drivers
- 6910p
- 6910p 14.1 laptop
- 6910p 14.1 laptop computer
- 6910p avis
- 6910p base system device
- 6910p base system device driver windows 7
- 6910p base system device windows 7
- 6910p battery life
- 6910p battery not charging
- 6910p battery not detected
- 6910p bios change ram timing
- 6910p bios chip
- 6910p bios flash
- 6910p bios problem
- 6910p bios update
- 6910p bios-update
- 6910p black screen
- 6910p charger
- 6910p compaq hp notebook parts screen
- 6910p cpu upgrade
- 6910p disable touch keys
- 6910p disassembly
- 6910p display driver
- 6910p display driver for windows 7
- 6910p display driver for windows 8.1
- 6910p driver
- 6910p driver download
- 6910p drivers download
- 6910p drivers vista
- 6910p drivers windows 7
- 6910p drivers windows 8
- 6910p drivers xp
- 6910p dvd driver
- 6910p fan always on
- 6910p fan always running
- 6910p fan control
- 6910p fingerprint driver
- 6910p fingerprint driver windows 7
- 6910p fingerprint software
- 6910p firmware
- 6910p graphics driver
- 6910p hard drive
- 6910p hp
- 6910p hp integrated module
- 6910p hp laptop
- 6910p hp specs
- 6910p installing windows 7
- 6910p keyboard
- 6910p keyboard removal video
- 6910p laptop computer
- 6910p laptop manual
- 6910p laptop price
- 6910p laptop review
- 6910p laptop specifications
- 6910p laptop specs
- 6910p manual download
- 6910p max ram
- 6910p memory install
- 6910p memory slots
- 6910p memory specs
- 6910p memory upgrade
- 6910p motherboard
- 6910p network controller driver
- 6910p notebook
- 6910p other devices base system device
- 6910p owner's manual
- 6910p pci serial port
- 6910p pci serial port driver
- 6910p pointing stick
- 6910p power adapter
- 6910p power supply
- 6910p price
- 6910p prices
- 6910p printer
- 6910p quick specs
- 6910p ram
- 6910p ram type
- 6910p ram upgrade
- 6910p recovery disk
- 6910p release date
- 6910p replacement screen
- 6910p reviews
- 6910p screen
- 6910p screen replacement
- 6910p sd card driver
- 6910p sd card reader does not work
- 6910p sd card reader driver
- 6910p software bios reset
- 6910p specifications
- 6910p support
- 6910p t7300
- 6910p t7500
- 6910p touchpad not working
- 6910p unknown device
- 6910p update manager
- 6910p updates
- 6910p user guide
- 6910p user manual
- 6910p video card
- 6910p video driver
- 6910p video driver vista
- 6910p webcam
- 6910p wifi button
- 6910p wifi button troubleshoot
- 6910p wifi switch
- 6910p windows 10
- 6910p windows 8
- 6910p windows 8 drivers
- 6910p wireless button
- 6910p wireless button does not work
- 6910p wireless switch
- 6910p won't recognize sd card
- 6910p xp drivers
- 6910p+biometric
- compaq 6910p drivers
- gh715aw - aba
- gh715aw aba hp
- gh715aw aba memory
- gh715aw aba number
- gh715aw aba parts
- gh715aw aba specs
- gh715aw aba warranty
- gh715aw docking station
- gh715aw hp us
- gh715aw specs
- gh715aw warranty
- gh715aw# aba
- gh715aw#aba specs
- gh715aw#aba-r
- hp 6910p
- hp 6910p 14.1 laptop
- hp 6910p avis
- hp 6910p base system device
- hp 6910p base system device driver
- hp 6910p base system device driver windows 7
- hp 6910p battery not charging
- hp 6910p bios change ram timing
- hp 6910p bios flash
- hp 6910p bios problem
- hp 6910p bios update
- hp 6910p black screen
- hp 6910p charger
- hp 6910p cpu upgrade
- hp 6910p disable touch keys
- hp 6910p disassembly
- hp 6910p display driver for windows 7
- hp 6910p display driver for windows 8.1
- hp 6910p driver
- hp 6910p drivers download
- hp 6910p drivers windows 7
- hp 6910p drivers windows 8
- hp 6910p drivers xp
- hp 6910p fan
- hp 6910p fan always on
- hp 6910p fan always running
- hp 6910p fan control
- hp 6910p fingerprint driver windows 7
- hp 6910p hard drive
- hp 6910p ink
- hp 6910p keyboard
- hp 6910p keyboard removal video
- hp 6910p laptop manual
- hp 6910p laptop price
- hp 6910p laptop review
- hp 6910p laptop specifications
- hp 6910p laptop specs
- hp 6910p manual download
- hp 6910p memory install
- hp 6910p memory slots
- hp 6910p memory upgrade
- hp 6910p notebook
- hp 6910p other devices base system device
- hp 6910p owner's manual
- hp 6910p pci serial port driver
- hp 6910p pdf
- hp 6910p pointing stick
- hp 6910p power adapter
- hp 6910p power supply
- hp 6910p price
- hp 6910p printer
- hp 6910p ram upgrade
- hp 6910p recovery disk
- hp 6910p release date
- hp 6910p reviews
- hp 6910p screen
- hp 6910p sd card reader driver
- hp 6910p service manual
- hp 6910p software bios reset
- hp 6910p specifications
- hp 6910p support
- hp 6910p t7300
- hp 6910p t7500
- hp 6910p touchpad not working
- hp 6910p unknown device
- hp 6910p update manager
- hp 6910p user guide
- hp 6910p user manual
- hp 6910p video driver vista
- hp 6910p webcam
- hp 6910p wifi button
- hp 6910p wifi switch
- hp 6910p windows 10
- hp 6910p windows 7
- hp 6910p windows 7 drivers
- hp 6910p windows 8 drivers
- hp 6910p wireless button
- hp 6910p wireless switch
- hp 6910p won't recognize sd card
- hp 6910p+biometric
- hp compaq 6910p notebook pc
- hp gh715aw#aba
- rm237ua aba number
- rm237ua aba specs
- rm237ua battery
- rm237ua specs