
Bluetooth Wireless Technology Basics
Page 7
...the lower-right part of the screen. Enable BWT functionality If the wireless light (ICON) is disabled (red logo), enable it on HP notebook PCs; Table 1. These steps are explained below. Then you turn it by right-clicking the Bluetooth icon and selecting Start the Bluetooth Device... can use the Bluetooth Setup wizard to load the BWT driver. Right-click the Bluetooth icon, and then select Explore My Bluetooth Places. 2. Set up the BWT software After the software is installed and BWT functionality is displayed, select Next. 3. The Bluetooth icon provides easy access to...
...the lower-right part of the screen. Enable BWT functionality If the wireless light (ICON) is disabled (red logo), enable it on HP notebook PCs; Table 1. These steps are explained below. Then you turn it by right-clicking the Bluetooth icon and selecting Start the Bluetooth Device... can use the Bluetooth Setup wizard to load the BWT driver. Right-click the Bluetooth icon, and then select Explore My Bluetooth Places. 2. Set up the BWT software After the software is installed and BWT functionality is displayed, select Next. 3. The Bluetooth icon provides easy access to...

Installing Windows 7 on HP Compaq and EliteBook Notebook PCs
Page 6
... is run, Fingerprint Sensor and PCI Serial Port and Simple Communications Controller will exhibit anomalous behavior when an external display device is connected directly to resume from hibernation. Remember to backup all data prior to perform a clean install when...8730w Resolution: Shut down before attaching to Sleep on HP business notebooks. A new version of anomalies observed during Windows 7 installation, process stalls or is extremely slow. Affected Systems: All models Resolution: Run Windows Update. AMT drivers are not currently available for Windows 7. Affected Systems...
... is run, Fingerprint Sensor and PCI Serial Port and Simple Communications Controller will exhibit anomalous behavior when an external display device is connected directly to resume from hibernation. Remember to backup all data prior to perform a clean install when...8730w Resolution: Shut down before attaching to Sleep on HP business notebooks. A new version of anomalies observed during Windows 7 installation, process stalls or is extremely slow. Affected Systems: All models Resolution: Run Windows Update. AMT drivers are not currently available for Windows 7. Affected Systems...
Installing Windows 7 on HP Compaq and EliteBook Notebook PCs
Page 7
...What versions will vary between the 32 and 64 bit versions. What about HP business notebooks, contact your local HP sales representative or visit our Web site at: http://www.hp.com/go/notebooks © 2009 Hewlett-Packard Development Company, L.P. Appendix B: Questions and Answers ... and Professional preinstalled on Business Notebooks. How many different versions of Windows 7 identical? Microsoft, Windows and Vista are no plans to release? Windows 7 display drivers are available in select countries. Windows 7 Home Basic will be liable for HP products and services are ...
...What versions will vary between the 32 and 64 bit versions. What about HP business notebooks, contact your local HP sales representative or visit our Web site at: http://www.hp.com/go/notebooks © 2009 Hewlett-Packard Development Company, L.P. Appendix B: Questions and Answers ... and Professional preinstalled on Business Notebooks. How many different versions of Windows 7 identical? Microsoft, Windows and Vista are no plans to release? Windows 7 display drivers are available in select countries. Windows 7 Home Basic will be liable for HP products and services are ...
Backup and Recovery - Windows XP
Page 10
... then select Edit > Paste. To copy the entire screen, press fn+prt sc. Display the screen. NOTE: Drivers, utilities, and applications installed by taking a screen shot of recovery discs using HP Backup and Recovery Manager. ● Create system recovery points using HP Backup and Recovery Manager. 4 Chapter 2 Backing up templates stored in their associated...
... then select Edit > Paste. To copy the entire screen, press fn+prt sc. Display the screen. NOTE: Drivers, utilities, and applications installed by taking a screen shot of recovery discs using HP Backup and Recovery Manager. ● Create system recovery points using HP Backup and Recovery Manager. 4 Chapter 2 Backing up templates stored in their associated...
Backup and Recovery - Windows XP and Windows Vista
Page 10
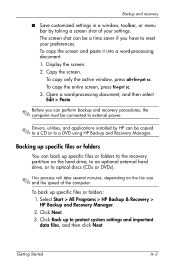
Display the screen. Copy the screen. Open a word-processing document, and then select Edit > Paste... to external power. To copy the entire screen, press fn+prt sc. c. b. NOTE: Drivers, utilities, and applications installed by HP can perform backup and recovery procedures, the computer must be copied to a CD or to a DVD using...settings in a window, toolbar, or menu bar by taking a screen shot of recovery discs using HP Backup & Recovery Manager. ● Create system recovery points using HP Backup & Recovery Manager. 4 Chapter 2 Backing up your information To copy only the active window,...
Display the screen. Copy the screen. Open a word-processing document, and then select Edit > Paste... to external power. To copy the entire screen, press fn+prt sc. c. b. NOTE: Drivers, utilities, and applications installed by HP can perform backup and recovery procedures, the computer must be copied to a CD or to a DVD using...settings in a window, toolbar, or menu bar by taking a screen shot of recovery discs using HP Backup & Recovery Manager. ● Create system recovery points using HP Backup & Recovery Manager. 4 Chapter 2 Backing up your information To copy only the active window,...
HP Business Notebook PC - Getting Started - Windows Vista - Enhanced for Accessibility
Page 39
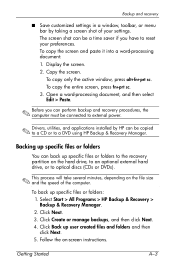
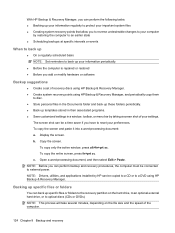
... Follow the on the file size and the speed of your preferences. Select Start > All Programs > HP Backup & Recovery > Backup & Recovery Manager. 2. Click Back up specific files or folders: 1. Getting ...document: 1. Backing up specific files or folders You can be connected to external power. ✎ Drivers, utilities, and applications installed by taking a screen shot of the computer. Click Create or manage backups...minutes, depending on -screen instructions. Click Next. 3. Display the screen. 2. Copy the screen. To back up user created files and folders and then click Next. 5....
... Follow the on the file size and the speed of your preferences. Select Start > All Programs > HP Backup & Recovery > Backup & Recovery Manager. 2. Click Back up specific files or folders: 1. Getting ...document: 1. Backing up specific files or folders You can be connected to external power. ✎ Drivers, utilities, and applications installed by taking a screen shot of the computer. Click Create or manage backups...minutes, depending on -screen instructions. Click Next. 3. Display the screen. 2. Copy the screen. To back up user created files and folders and then click Next. 5....
ProtectTools - Windows Vista and Windows XP
Page 44
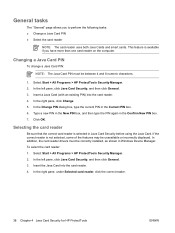
...card reader. 4. Type a new PIN in the New PIN box, and then type the PIN again in Windows Device Manager. In addition, the card reader drivers must be between 4 and 8 numeric characters. 1. General tasks The "General" page allows you have more than one card reader on the computer. Changing a...change a Java Card PIN: NOTE: The Java Card PIN must be unavailable or incorrectly displayed. In the right pane, under Selected card reader, click the correct reader. 38 Chapter 4 Java Card Security for HP ProtectTools ENWW In the Change PIN dialog box, type the current PIN in Java Card Security...
...card reader. 4. Type a new PIN in the New PIN box, and then type the PIN again in Windows Device Manager. In addition, the card reader drivers must be between 4 and 8 numeric characters. 1. General tasks The "General" page allows you have more than one card reader on the computer. Changing a...change a Java Card PIN: NOTE: The Java Card PIN must be unavailable or incorrectly displayed. In the right pane, under Selected card reader, click the correct reader. 38 Chapter 4 Java Card Security for HP ProtectTools ENWW In the Change PIN dialog box, type the current PIN in Java Card Security...
External Devices - Windows Vista
Page 8
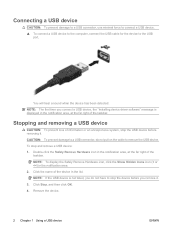
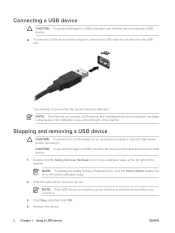
Stopping and removing a USB device CAUTION: To prevent loss of the taskbar. NOTE: To display the Safely Remove Hardware icon, click the Show Hidden Icons icon (< or Connecting a USB device CAUTION: To prevent damage to a USB connector, use minimal force ... device before removing it. You will hear a sound when the device has been detected. NOTE: The first time you connect a USB device, the "Installing device driver software" message is displayed in the notification area, at the far right of the taskbar.
Stopping and removing a USB device CAUTION: To prevent loss of the taskbar. NOTE: To display the Safely Remove Hardware icon, click the Show Hidden Icons icon (< or Connecting a USB device CAUTION: To prevent damage to a USB connector, use minimal force ... device before removing it. You will hear a sound when the device has been detected. NOTE: The first time you connect a USB device, the "Installing device driver software" message is displayed in the notification area, at the far right of the taskbar.
External Devices - Windows Vista
Page 8
... Safely Remove Hardware icon, click the Show Hidden Icons icon (< or NOTE: The first time you connect a USB device, the "Installing device driver software" message is displayed in the notification area, at the far right of information or an unresponsive system, stop and remove a USB device: 1. Stopping and removing a USB device CAUTION...
... Safely Remove Hardware icon, click the Show Hidden Icons icon (< or NOTE: The first time you connect a USB device, the "Installing device driver software" message is displayed in the notification area, at the far right of information or an unresponsive system, stop and remove a USB device: 1. Stopping and removing a USB device CAUTION...
External Devices - Windows Vista
Page 8
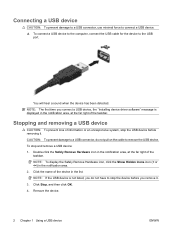
CAUTION: To prevent damage to a USB connector, do not pull on the cable to the USB port. NOTE: To display the Safely Remove Hardware icon, click the Show Hidden Icons icon (< or Stopping and removing a USB device CAUTION: To prevent loss of the taskbar. Double-... remove the USB device. 1. You will hear a sound when the device has been detected. NOTE: The first time you connect a USB device, the "Installing device driver software" message is displayed in the notification area, at the far right of information or an unresponsive system, stop the USB device before removing it.
CAUTION: To prevent damage to a USB connector, do not pull on the cable to the USB port. NOTE: To display the Safely Remove Hardware icon, click the Show Hidden Icons icon (< or Stopping and removing a USB device CAUTION: To prevent loss of the taskbar. Double-... remove the USB device. 1. You will hear a sound when the device has been detected. NOTE: The first time you connect a USB device, the "Installing device driver software" message is displayed in the notification area, at the far right of information or an unresponsive system, stop the USB device before removing it.
External Media Cards - Windows Vista
Page 14
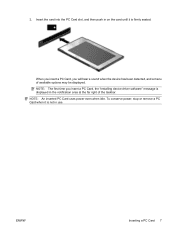
Insert the card into the PC Card slot, and then push in on the card until it is not in the notification area at the far right of available options may be displayed. When you insert a PC Card, you insert a PC Card, the "Installing device driver software" message is firmly seated. NOTE: An inserted PC Card uses power even when idle. NOTE: The first time you will hear a sound when the device has been detected, and a menu of the taskbar. To conserve power, stop or remove a PC Card when it is displayed in use. 8 Chapter 2 Using PC Cards ENWW 2.
Insert the card into the PC Card slot, and then push in on the card until it is not in the notification area at the far right of available options may be displayed. When you insert a PC Card, you insert a PC Card, the "Installing device driver software" message is firmly seated. NOTE: An inserted PC Card uses power even when idle. NOTE: The first time you will hear a sound when the device has been detected, and a menu of the taskbar. To conserve power, stop or remove a PC Card when it is displayed in use. 8 Chapter 2 Using PC Cards ENWW 2.
External Media Cards - Windows Vista
Page 13
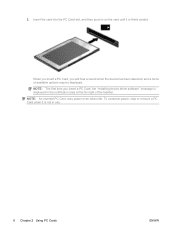
NOTE: An inserted PC Card uses power even when idle. ENWW Inserting a PC Card 7 NOTE: The first time you will hear a sound when the device has been detected, and a menu of the taskbar. Insert the card into the PC Card slot, and then push in on the card until it is not in the notification area at the far right of available options may be displayed. To conserve power, stop or remove a PC Card when it is displayed in use. 2. When you insert a PC Card, you insert a PC Card, the "Installing device driver software" message is firmly seated.
NOTE: An inserted PC Card uses power even when idle. ENWW Inserting a PC Card 7 NOTE: The first time you will hear a sound when the device has been detected, and a menu of the taskbar. Insert the card into the PC Card slot, and then push in on the card until it is not in the notification area at the far right of available options may be displayed. To conserve power, stop or remove a PC Card when it is displayed in use. 2. When you insert a PC Card, you insert a PC Card, the "Installing device driver software" message is firmly seated.
HP Business Notebook PC - Getting Started - Windows XP - Enhanced for Accessibility
Page 35
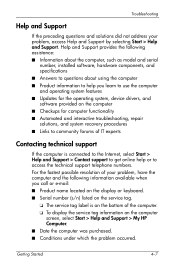
... Internet, select Start > Help and Support > Contact support to get online help you call or e-mail: ■ Product name located on the display or keyboard. ■ Serial number (s/n) listed on the service tag. ❏ The service tag label is on the bottom of the computer. &#...10063; To display the service tag information on the computer ■ Checkups for the operating system, device drivers, and software provided on the computer screen, select Start > Help and Support > My HP Computer. ■ Date the computer was purchased. ■ ...
... Internet, select Start > Help and Support > Contact support to get online help you call or e-mail: ■ Product name located on the display or keyboard. ■ Serial number (s/n) listed on the service tag. ❏ The service tag label is on the bottom of the computer. &#...10063; To display the service tag information on the computer ■ Checkups for the operating system, device drivers, and software provided on the computer screen, select Start > Help and Support > My HP Computer. ■ Date the computer was purchased. ■ ...
HP Business Notebook PC - Getting Started - Windows XP - Enhanced for Accessibility
Page 39
... Getting Started A-3 Open a word-processing document, and then select Edit > Paste. ✎ Before you have to a DVD using HP Backup and Recovery Manager. Display the screen. 2. Backing up specific files or folders You can back up specific files or folders: 1. Backup and recovery ■... Save customized settings in a window, toolbar, or menu bar by HP can be connected to external power. ✎ Drivers, utilities, and ...
... Getting Started A-3 Open a word-processing document, and then select Edit > Paste. ✎ Before you have to a DVD using HP Backup and Recovery Manager. Display the screen. 2. Backing up specific files or folders You can back up specific files or folders: 1. Backup and recovery ■... Save customized settings in a window, toolbar, or menu bar by HP can be connected to external power. ✎ Drivers, utilities, and ...
HP Compaq 6910p Notebook PC - Maintenance and Service Guide
Page 132
..., toolbar, or menu bar by taking a screen shot of your settings. NOTE: Drivers, utilities, and applications installed by HP can be a time saver if you have to reset your preferences. With HP Backup & Recovery Manager, you can perform the following tasks: ● Backing up ... add or modify hardware or software Backup suggestions ● Create a set of recovery discs using HP Backup & Recovery Manager. ● Create system recovery points using HP Backup & Recovery Manager. b. Display the screen. Copy the screen. c. Backing up specific files or folders You can be copied ...
..., toolbar, or menu bar by taking a screen shot of your settings. NOTE: Drivers, utilities, and applications installed by HP can be a time saver if you have to reset your preferences. With HP Backup & Recovery Manager, you can perform the following tasks: ● Backing up ... add or modify hardware or software Backup suggestions ● Create a set of recovery discs using HP Backup & Recovery Manager. ● Create system recovery points using HP Backup & Recovery Manager. b. Display the screen. Copy the screen. c. Backing up specific files or folders You can be copied ...


