
User Manual
Page 9
...you store the device in a protective case. Contact with the antenna area when the phone is also recommended that you 're talking on the screen and the device to prevent damaging them and remove the device from your device to operate at a higher power level than needed on components ...the warranty. • Device getting warm after prolonged use position. It is IN USE optimizes the antenna performance and the battery life. Cracked display screens due to the device Do not apply excessive pressure on the phone, charging the battery or browsing the web, the device may impair call . ...
...you store the device in a protective case. Contact with the antenna area when the phone is also recommended that you 're talking on the screen and the device to prevent damaging them and remove the device from your device to operate at a higher power level than needed on components ...the warranty. • Device getting warm after prolonged use position. It is IN USE optimizes the antenna performance and the battery life. Cracked display screens due to the device Do not apply excessive pressure on the phone, charging the battery or browsing the web, the device may impair call . ...

User Manual
Page 11
Do not use liquid cleaners or aerosol cleaners. Use a damp cloth for use with your equipment. • Adjust the volume Turn down the volume before using headphones or other audio devices. • Cleaning Unplug the product from the wall outlet before cleaning. • Avoid unstable mounting Do not place the product with an unstable base. • Use product with approved equipment This product should be used only with personal computers and options identified as suitable for cleaning, but NEVER use water to clean the LCD screen.
Do not use liquid cleaners or aerosol cleaners. Use a damp cloth for use with your equipment. • Adjust the volume Turn down the volume before using headphones or other audio devices. • Cleaning Unplug the product from the wall outlet before cleaning. • Avoid unstable mounting Do not place the product with an unstable base. • Use product with approved equipment This product should be used only with personal computers and options identified as suitable for cleaning, but NEVER use water to clean the LCD screen.
User Manual
Page 12
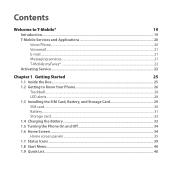
... and Applications 20 Voice/Phone...20 Voicemail...21 E-mail...21 Messaging services...21 T-Mobile myFaves®...22 Activating Service...23 Chapter 1 Getting Started 25 1.1 Inside the Box...25 1.2 Getting to Know Your Phone 26 Trackball...28 LED alerts...28 1.3 ..., Battery, and Storage Card 29 SIM card...30 Battery...31 Storage card...32 1.4 Charging the Battery 33 1.5 Turning the Phone On and Off 34 1.6 Home Screen...34 Home screen panels...35 1.7 Status Icons...39 1.8 Start Menu...40 1.9 Quick List...40
... and Applications 20 Voice/Phone...20 Voicemail...21 E-mail...21 Messaging services...21 T-Mobile myFaves®...22 Activating Service...23 Chapter 1 Getting Started 25 1.1 Inside the Box...25 1.2 Getting to Know Your Phone 26 Trackball...28 LED alerts...28 1.3 ..., Battery, and Storage Card 29 SIM card...30 Battery...31 Storage card...32 1.4 Charging the Battery 33 1.5 Turning the Phone On and Off 34 1.6 Home Screen...34 Home screen panels...35 1.7 Status Icons...39 1.8 Start Menu...40 1.9 Quick List...40
User Manual
Page 13
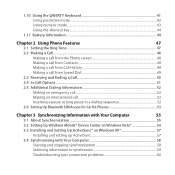
...Battery Information 44 Chapter 2 Using Phone Features 47 2.1 Setting the Ring Tone 47 2.2 Making a Call...48 Making a call from the Phone screen 48 Making a call from Contacts 48 Making a call from Call History 49 Making a call from Speed Dial 49 2.3 Receiving and Ending a...Bluetooth SIM Access for Car Kit Phones 53 Chapter 3 Synchronizing Information with Your Computer 55 3.1 About Synchronization 55 3.2 Setting Up Windows Mobile® Device Center on Windows Vista 56 3.3 Installing and Setting Up ActiveSync® on Windows XP 57 Installing and setting up ...
...Battery Information 44 Chapter 2 Using Phone Features 47 2.1 Setting the Ring Tone 47 2.2 Making a Call...48 Making a call from the Phone screen 48 Making a call from Contacts 48 Making a call from Call History 49 Making a call from Speed Dial 49 2.3 Receiving and Ending a...Bluetooth SIM Access for Car Kit Phones 53 Chapter 3 Synchronizing Information with Your Computer 55 3.1 About Synchronization 55 3.2 Setting Up Windows Mobile® Device Center on Windows Vista 56 3.3 Installing and Setting Up ActiveSync® on Windows XP 57 Installing and setting up ...

User Manual
Page 14
... 60 3.6 Synchronizing Music and Video 61 Chapter 4 Managing your Phone 63 4.1 Personalizing Your Phone 63 Setting up the Home screen 63 Setting the date, time, and other regional options 64 Choosing how to be notified about events or actions 64 4.2 ... a contact on your phone 75 Editing and calling a contact 76 Finding a contact...76 Sharing contact information 77 5.2 T-Mobile myFaves...78 T-Mobile myFaves on the Home screen 78 Adding myFaves contacts...78 Editing myFaves...80 Rotating and cropping a photo 80 Calling a myFaves contact...81 Sending messages to...
... 60 3.6 Synchronizing Music and Video 61 Chapter 4 Managing your Phone 63 4.1 Personalizing Your Phone 63 Setting up the Home screen 63 Setting the date, time, and other regional options 64 Choosing how to be notified about events or actions 64 4.2 ... a contact on your phone 75 Editing and calling a contact 76 Finding a contact...76 Sharing contact information 77 5.2 T-Mobile myFaves...78 T-Mobile myFaves on the Home screen 78 Adding myFaves contacts...78 Editing myFaves...80 Rotating and cropping a photo 80 Calling a myFaves contact...81 Sending messages to...

User Manual
Page 15
... viewing appointments 84 Sending a meeting request 85 Sending a calendar appointment 86 5.5 Tasks...87 5.6 Voice Recorder...88 Chapter 6 Exchanging Messages 89 6.1 Browsing Messages on the Home Screen 89 6.2 Messaging...90 6.3 Text Messages...90 Composing and sending text messages 90 Copying and pasting text...91 Managing text messages...92 6.4 Multimedia Messages 94 Creating...
... viewing appointments 84 Sending a meeting request 85 Sending a calendar appointment 86 5.5 Tasks...87 5.6 Voice Recorder...88 Chapter 6 Exchanging Messages 89 6.1 Browsing Messages on the Home Screen 89 6.2 Messaging...90 6.3 Text Messages...90 Composing and sending text messages 90 Copying and pasting text...91 Managing text messages...92 6.4 Multimedia Messages 94 Creating...
User Manual
Page 17
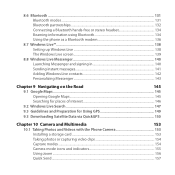
... 134 Beaming information using Bluetooth 134 Using the phone as a Bluetooth modem 136 8.7 Windows Live™...138 Setting up Windows Live...138 The Windows Live screen...139 8.8 Windows Live Messenger 140 Launching Messenger and signing in 140 Sending instant messages 141 Adding Windows Live contacts 142 Personalizing Messenger...143 Chapter 9 Navigating...
... 134 Beaming information using Bluetooth 134 Using the phone as a Bluetooth modem 136 8.7 Windows Live™...138 Setting up Windows Live...138 The Windows Live screen...139 8.8 Windows Live Messenger 140 Launching Messenger and signing in 140 Sending instant messages 141 Adding Windows Live contacts 142 Personalizing Messenger...143 Chapter 9 Navigating...

User Manual
Page 18
... Customizing Camera advanced settings 159 10.2 Photo & Video Album 163 10.3 Windows Media Player Mobile 165 About the controls...165 About the screens and menus 166 About licenses and protected files 166 Copying files to your phone 167 Playing media...169 Troubleshooting......170 Managing MIDlets/MIDlet suites 171 Chapter 11 Using Other Applications 173 11.1 Adobe® Reader® LE 173 11.2 Microsoft® Office Mobile 174 11.3 Speed Dial...175 11.4 Voice Command...176 11.5 Handango InHand 178 11.6 My Account...178 Appendix 179 A.1 Specifications...179 A.2...
... Customizing Camera advanced settings 159 10.2 Photo & Video Album 163 10.3 Windows Media Player Mobile 165 About the controls...165 About the screens and menus 166 About licenses and protected files 166 Copying files to your phone 167 Playing media...169 Troubleshooting......170 Managing MIDlets/MIDlet suites 171 Chapter 11 Using Other Applications 173 11.1 Adobe® Reader® LE 173 11.2 Microsoft® Office Mobile 174 11.3 Speed Dial...175 11.4 Voice Command...176 11.5 Handango InHand 178 11.6 My Account...178 Appendix 179 A.1 Specifications...179 A.2...
User Manual
Page 22
...numbers. Note Separate additional charges may be charged for using Instant Messaging, see "T-Mobile myFaves®" in your phone's main screen. When you subscribe to the service, you call most in Chapter 5. Your normal screen name and password work just as they would on any five U.S. 22 Welcome... to T-Mobile Instant Messaging (IM) Your device comes with favorite pictures** or downloadable icons** * myFaves only applies to calls ...
...numbers. Note Separate additional charges may be charged for using Instant Messaging, see "T-Mobile myFaves®" in your phone's main screen. When you subscribe to the service, you call most in Chapter 5. Your normal screen name and password work just as they would on any five U.S. 22 Welcome... to T-Mobile Instant Messaging (IM) Your device comes with favorite pictures** or downloadable icons** * myFaves only applies to calls ...

User Manual
Page 26
.... VIBRATE Press and hold to lock the phone. QWERTY Keyboard See "Using the QWERTY Keyboard" in this button. BACK Press to return to the previous screen. Right SOFT KEY Press to open the program or perform the function shown above the button. MESSAGING Press to open the Camera. LOCK Press and... hold to toggle vibrate mode on and off. END/POWER • Press to end a call or return to the Home screen. • Press and hold to toggle the speakerphone on and off . To unlock, press the left SOFT KEY and press this chapter for details. SEND...
.... VIBRATE Press and hold to lock the phone. QWERTY Keyboard See "Using the QWERTY Keyboard" in this button. BACK Press to return to the previous screen. Right SOFT KEY Press to open the program or perform the function shown above the button. MESSAGING Press to open the Camera. LOCK Press and... hold to toggle vibrate mode on and off. END/POWER • Press to end a call or return to the Home screen. • Press and hold to toggle the speakerphone on and off . To unlock, press the left SOFT KEY and press this chapter for details. SEND...

User Manual
Page 28
... charged. LED alerts The notification LED indicates battery charging status and notification. 28 Getting Started Trackball Roll the TRACKBALL to select an item on the screen.
... charged. LED alerts The notification LED indicates battery charging status and notification. 28 Getting Started Trackball Roll the TRACKBALL to select an item on the screen.
User Manual
Page 34
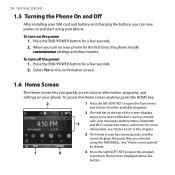
...Press the left SOFT KEY to open the Start menu and choose from the available programs. 2 The title bar at the top of the screen displays status icons and notifications, such as missed calls, new messages, battery status, Bluetooth 3 and Wi-Fi connection status, and more information,... settings on your phone. Press the END/POWER button for a few seconds. 2. For more . Select Yes on the confirmation screen. 1.6 Home Screen The Home screen lets you selected using your phone. When you can now power on and start using the TRACKBALL. 34 Getting Started 1.5 Turning ...
...Press the left SOFT KEY to open the Start menu and choose from the available programs. 2 The title bar at the top of the screen displays status icons and notifications, such as missed calls, new messages, battery status, Bluetooth 3 and Wi-Fi connection status, and more information,... settings on your phone. Press the END/POWER button for a few seconds. 2. For more . Select Yes on the confirmation screen. 1.6 Home Screen The Home screen lets you selected using your phone. When you can now power on and start using the TRACKBALL. 34 Getting Started 1.5 Turning ...

User Manual
Page 35
.... Displays your phone as set up or down. While the Home panel is selected, press the TRACKBALL to go through the panels of the Home screen by pressing the TRACKBALL. See Chapter 5 for details. Tip Pressing the HOME key takes you have turned on the selected panel. Scroll left to open... the Clock & Alarm screen where you have set your myFaves contacts. Open the displayed item by scrolling the TRACKBALL up an alarm, and the Wi-Fi status if you...
.... Displays your phone as set up or down. While the Home panel is selected, press the TRACKBALL to go through the panels of the Home screen by pressing the TRACKBALL. See Chapter 5 for details. Tip Pressing the HOME key takes you have turned on the selected panel. Scroll left to open... the Clock & Alarm screen where you have set your myFaves contacts. Open the displayed item by scrolling the TRACKBALL up an alarm, and the Wi-Fi status if you...

User Manual
Page 37
... or left to go through your favorites and then press the TRACKBALL to open Internet Explorer to your favorite web site. Tip On the Forecast screen, select Menu > Refresh to select another city. Select the e-mail to open your inbox, or select New Email to create a new e-mail message. Select Menu... Getting Started 37 View snippets of your unread e-mail messages, select Inbox to open and read the complete e-mail message. Quickly access your Internet Explorer Mobile favorites. After the weather information is displayed.
... or left to go through your favorites and then press the TRACKBALL to open Internet Explorer to your favorite web site. Tip On the Forecast screen, select Menu > Refresh to select another city. Select the e-mail to open your inbox, or select New Email to create a new e-mail message. Select Menu... Getting Started 37 View snippets of your unread e-mail messages, select Inbox to open and read the complete e-mail message. Quickly access your Internet Explorer Mobile favorites. After the weather information is displayed.

User Manual
Page 38
... on the storage card. Press the TRACKBALL to select and view a tutorial. Tip You can remove the Getting Started panel from the Home screen. On the Getting Started screen, select the Add/Remove link. Scroll right or left to go through the available tutorials, and then press the TRACKBALL to play or...
... on the storage card. Press the TRACKBALL to select and view a tutorial. Tip You can remove the Getting Started panel from the Home screen. On the Getting Started screen, select the Add/Remove link. Scroll right or left to go through the available tutorials, and then press the TRACKBALL to play or...

User Manual
Page 40
Tip To easily open again recently-used programs. To enable, on the Home screen will first display the Recent Programs menu before the Start menu. 1.9 Quick List The Quick List offers convenient access to view the programs that you ... of the 8 most recently-used programs, you can start using immediately. Selecting Start on the Home screen, select To show more programs, select More Start > Settings > Home Screen and or scroll the TRACKBALL down.. On the Home screen, select Start from the Home panel to a list of functions, such as locking your phone...
Tip To easily open again recently-used programs. To enable, on the Home screen will first display the Recent Programs menu before the Start menu. 1.9 Quick List The Quick List offers convenient access to view the programs that you ... of the 8 most recently-used programs, you can start using immediately. Selecting Start on the Home screen, select To show more programs, select More Start > Settings > Home Screen and or scroll the TRACKBALL down.. On the Home screen, select Start from the Home panel to a list of functions, such as locking your phone...

User Manual
Page 41
... then press the corresponding key. • To continuously enter numbers, symbols or punctuation that you are printed at the upper-right corner of the display screen displays the input mode that are currently using the QWERTY keyboard. Press again to exit continuous input mode. • To open the Symbol table and...
... then press the corresponding key. • To continuously enter numbers, symbols or punctuation that you are printed at the upper-right corner of the display screen displays the input mode that are currently using the QWERTY keyboard. Press again to exit continuous input mode. • To open the Symbol table and...

User Manual
Page 42
... list Save words that you have entered. Scroll up or down the word list to complete the word. Enter your next word based on the screen. 3. 42 Getting Started Using predictive mode Predictive mode analyzes your key presses and attempts to choose the word you can select XT9 My Words from...
... list Save words that you have entered. Scroll up or down the word list to complete the word. Enter your next word based on the screen. 3. 42 Getting Started Using predictive mode Predictive mode analyzes your key presses and attempts to choose the word you can select XT9 My Words from...

User Manual
Page 43
... on the keys that reflect the characters of nearby keys. • Auto-Substitution. to Numeric mode. dont automatically becomes don't). • Word Completion. In the screen, choose the options you type commonly contracted words (e.g. Getting Started 43 To set XT9 settings On the text input options menu, choose XT9 Settings.
... on the keys that reflect the characters of nearby keys. • Auto-Substitution. to Numeric mode. dont automatically becomes don't). • Word Completion. In the screen, choose the options you type commonly contracted words (e.g. Getting Started 43 To set XT9 settings On the text input options menu, choose XT9 Settings.

User Manual
Page 45
Getting Started 45 To check and optimize battery power On the Home screen, select Start > Settings > Power > Power Management, and adjust the backlight, display, or light sensor settings. Turn off your current data. 2. If you need to use ...
Getting Started 45 To check and optimize battery power On the Home screen, select Start > Settings > Power > Power Management, and adjust the backlight, display, or light sensor settings. Turn off your current data. 2. If you need to use ...


