Manual
Page 3
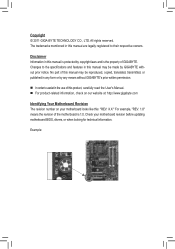
Changes to the specifications and features in this manual are legally registered to assist...carefully read the User's Manual. For product-related information, check on our website at: http://www.gigabyte.com Identifying Your Motherboard Revision The revision number on your motherboard revision before updating motherboard BIOS, drivers, or when ...mentioned in this : "REV: X.X." Disclaimer Information in this manual may be made by GIGABYTE without GIGABYTE's prior written permission. In order to their respective owners. Example: For example, "REV: 1.0" means the...
Changes to the specifications and features in this manual are legally registered to assist...carefully read the User's Manual. For product-related information, check on our website at: http://www.gigabyte.com Identifying Your Motherboard Revision The revision number on your motherboard revision before updating motherboard BIOS, drivers, or when ...mentioned in this : "REV: X.X." Disclaimer Information in this manual may be made by GIGABYTE without GIGABYTE's prior written permission. In order to their respective owners. Example: For example, "REV: 1.0" means the...
Manual
Page 4
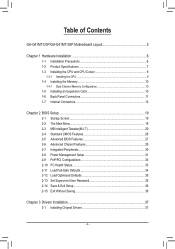
Table of Contents GA-G41MT-D3P/GA-G41MT-S2P Motherboard Layout 5 Chapter 1 Hardware Installation 6 1-1 Installation Precautions 6 1-2 Product Specifications 7 1-3 Installing the CPU and CPU Cooler 9 1-3-1 Installing the CPU...9 1-4 Installing the Memory 10 1-4-1 Dual Channel Memory Configuration 10 1-5 Installing an Expansion Card 10 1-6 Back Panel ...
Table of Contents GA-G41MT-D3P/GA-G41MT-S2P Motherboard Layout 5 Chapter 1 Hardware Installation 6 1-1 Installation Precautions 6 1-2 Product Specifications 7 1-3 Installing the CPU and CPU Cooler 9 1-3-1 Installing the CPU...9 1-4 Installing the Memory 10 1-4-1 Dual Channel Memory Configuration 10 1-5 Installing an Expansion Card 10 1-6 Back Panel ...
Manual
Page 7
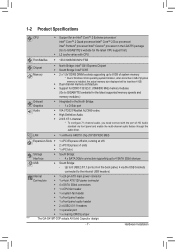
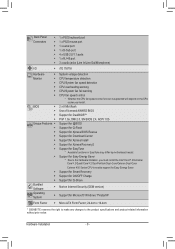
...Specifications CPU ŠŠ Support for an Intel® Core™ 2 Extreme processor/ Intel® Core™ 2 Quad processor/Intel® Core™ 2 Duo processor/ Intel® Pentium® processor/Intel® Celeron® processor in the LGA775 package (Go to GIGABYTE... front panel audio header ŠŠ 2 x USB 2.0/1.1 headers ŠŠ 1 x parallel port ŠŠ 1 x clearing CMOS jumper "*" The GA-G41MT-D3P adopts All-Solid Capacitor design. - 7 - Hardware Installation LAN ŠŠ 1 x Atheros AR8151 chip (10/100/1000 Mbit) Expansion Slots Š&#...
...Specifications CPU ŠŠ Support for an Intel® Core™ 2 Extreme processor/ Intel® Core™ 2 Quad processor/Intel® Core™ 2 Duo processor/ Intel® Pentium® processor/Intel® Celeron® processor in the LGA775 package (Go to GIGABYTE... front panel audio header ŠŠ 2 x USB 2.0/1.1 headers ŠŠ 1 x parallel port ŠŠ 1 x clearing CMOS jumper "*" The GA-G41MT-D3P adopts All-Solid Capacitor design. - 7 - Hardware Installation LAN ŠŠ 1 x Atheros AR8151 chip (10/100/1000 Mbit) Expansion Slots Š&#...
Manual
Page 8
... ŠŠ Support for EasyTune * Available functions in EasyTune may differ by motherboard model. ŠŠ Support for Easy Energy Saver * Due to the product specifications and product-related information without prior notice. Back Panel Connectors ŠŠ 1 x PS/2 keyboard port ŠŠ 1 x PS/2 mouse port ŠŠ 1 x serial ...) Operating System ŠŠ Support for Microsoft® Windows 7/Vista/XP Form Factor ŠŠ Micro ATX Form Factor; 24.4cm x 19.4cm * GIGABYTE reserves the right to make any changes to the hardware limitation, you install.
... ŠŠ Support for EasyTune * Available functions in EasyTune may differ by motherboard model. ŠŠ Support for Easy Energy Saver * Due to the product specifications and product-related information without prior notice. Back Panel Connectors ŠŠ 1 x PS/2 keyboard port ŠŠ 1 x PS/2 mouse port ŠŠ 1 x serial ...) Operating System ŠŠ Support for Microsoft® Windows 7/Vista/XP Form Factor ŠŠ Micro ATX Form Factor; 24.4cm x 19.4cm * GIGABYTE reserves the right to make any changes to the hardware limitation, you install.
Manual
Page 9
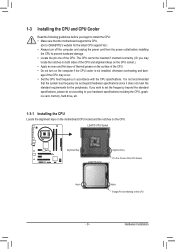
... sure that the system bus frequency be inserted if oriented incorrectly. (Or you wish to set beyond the standard specifications, please do so according to your hardware specifications including the CPU, graphics card, memory, hard drive, etc. 1-3-1 Installing the CPU Locate the alignment keys on...cooler is not recommended that the motherboard supports the CPU. (Go to GIGABYTE's website for the peripherals. If you may occur. • Set the CPU host frequency in accordance with the CPU specifications. 1-3 Installing the CPU and CPU Cooler Read the following guidelines before ...
... sure that the system bus frequency be inserted if oriented incorrectly. (Or you wish to set beyond the standard specifications, please do so according to your hardware specifications including the CPU, graphics card, memory, hard drive, etc. 1-3-1 Installing the CPU Locate the alignment keys on...cooler is not recommended that the motherboard supports the CPU. (Go to GIGABYTE's website for the peripherals. If you may occur. • Set the CPU host frequency in accordance with the CPU specifications. 1-3 Installing the CPU and CPU Cooler Read the following guidelines before ...
Manual
Page 10
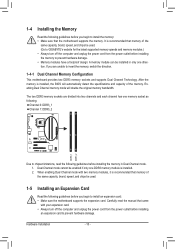
It is installed. 2. Enabling Dual Channel memory mode will automatically detect the specifications and capacity of the same capacity, brand, speed, and chips be installed in Dual Channel mode. 1. Dual Channel mode cannot be used . 1-5 Installing an ...0: DDR3_1 Channel 1: DDR3_2 DDR3_1 DDR3_2 Due to chipset limitations, read the manual that the motherboard supports the memory. A memory module can be used . (Go to GIGABYTE's website for the latest supported memory speeds and memory modules.) • Always turn off the computer and unplug the power cord from the power outlet...
It is installed. 2. Enabling Dual Channel memory mode will automatically detect the specifications and capacity of the same capacity, brand, speed, and chips be installed in Dual Channel mode. 1. Dual Channel mode cannot be used . 1-5 Installing an ...0: DDR3_1 Channel 1: DDR3_2 DDR3_1 DDR3_2 Due to chipset limitations, read the manual that the motherboard supports the memory. A memory module can be used . (Go to GIGABYTE's website for the latest supported memory speeds and memory modules.) • Always turn off the computer and unplug the power cord from the power outlet...
Manual
Page 11
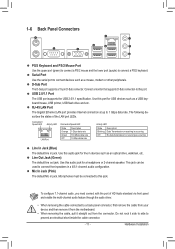
... Use the upper port (green) to connect a PS/2 mouse and the lower port (purple) to this port. USB 2.0/1.1 Port The USB port supports the USB 2.0/1.1 specification. Line Out Jack (Green) The default line out jack. To configure 7.1-channel audio, you need connect with the port of the LAN port LEDs. Mic...
... Use the upper port (green) to connect a PS/2 mouse and the lower port (purple) to this port. USB 2.0/1.1 Port The USB port supports the USB 2.0/1.1 specification. Line Out Jack (Green) The default line out jack. To configure 7.1-channel audio, you need connect with the port of the LAN port LEDs. Mic...

Manual
Page 16
... (L) 10 GND 10 NC • The front panel audio header supports HD audio by default. • Audio signals will make the device unable to USB 2.0/1.1 specification. For information about connecting the front panel audio module that has separated connectors on both of the front and back panel audio connections simultane- Make...
... (L) 10 GND 10 NC • The front panel audio header supports HD audio by default. • Audio signals will make the device unable to USB 2.0/1.1 specification. For information about connecting the front panel audio module that has separated connectors on both of the front and back panel audio connections simultane- Make...
Manual
Page 22
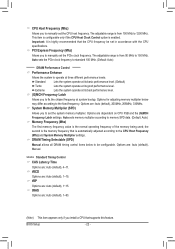
... clock frequency. This item is configurable only if the CPU Host Clock Control option is from 90 MHz to set in accordance with the CPU specifications. Options for adjusting memory multiplier below to fix the chipset frequency at its good performance level. Auto sets memory multiplier according to the fixed frequency...
... clock frequency. This item is configurable only if the CPU Host Clock Control option is from 90 MHz to set in accordance with the CPU specifications. Options for adjusting memory multiplier below to fix the chipset frequency at its good performance level. Auto sets memory multiplier according to the fixed frequency...
Manual
Page 26
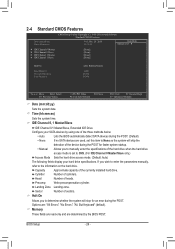
IDE Channel 0, 1 Master/Slave IDE Channel 0/1 Master/Slave, Extended IDE Drive Configure your hard drive specifications. Cylinder Number of sectors. Halt On Allows you to CHS. (For IDE Channel 0 Master/Slave only.) Sets the hard drive access ...determine whether the system will skip the detection of the device during the POST. Precomp Write precompensation cylinder. If you to manually enter the specifications of the three methods below: • Auto • None • Manual Access Mode Lets the BIOS automatically detect SATA devices during the...
IDE Channel 0, 1 Master/Slave IDE Channel 0/1 Master/Slave, Extended IDE Drive Configure your hard drive specifications. Cylinder Number of sectors. Halt On Allows you to CHS. (For IDE Channel 0 Master/Slave only.) Sets the hard drive access ...determine whether the system will skip the detection of the device during the POST. Precomp Write precompensation cylinder. If you to manually enter the specifications of the three methods below: • Auto • None • Manual Access Mode Lets the BIOS automatically detect SATA devices during the...
Manual
Page 32
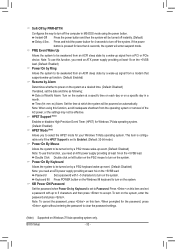
... PS/2 mouse to turn off instantly. (Default) Delay 4 Sec. HPET Support (Note) Enables or disables High Precision Event Timer (HPET) for 4 seconds to turn on a specific day in MS-DOS mode using this function, avoid inadequate shutdown from a PCI or PCIe device. PME Event Wake Up Allows the system to accept.... Press and hold the power button for Windows 7/Vista operating system. (Default: Enabled) HPET Mode (Note) Allows you need an ATX power supply providing at a specific time on each day or on the system. BIOS Setup - 32 -
... PS/2 mouse to turn off instantly. (Default) Delay 4 Sec. HPET Support (Note) Enables or disables High Precision Event Timer (HPET) for 4 seconds to turn on a specific day in MS-DOS mode using this function, avoid inadequate shutdown from a PCI or PCIe device. PME Event Wake Up Allows the system to accept.... Press and hold the power button for Windows 7/Vista operating system. (Default: Enabled) HPET Mode (Note) Allows you need an ATX power supply providing at a specific time on each day or on the system. BIOS Setup - 32 -