Important Safety and Product Information
Page 2
... functioning properly after making off -road navigation. • Always use a power and/or data cable that is still under the United States of direction, distance, location or topography. Garmin does not assume any state or local law or ordinance relating to the use of these features require satellite access to operate properly. Product Environmental Programs Information about the Garmin product recycling program and WEEE, RoHS, REACH, and other...
... functioning properly after making off -road navigation. • Always use a power and/or data cable that is still under the United States of direction, distance, location or topography. Garmin does not assume any state or local law or ordinance relating to the use of these features require satellite access to operate properly. Product Environmental Programs Information about the Garmin product recycling program and WEEE, RoHS, REACH, and other...

Owners Manual
Page 3
... Location Coordinates in a Message 3 Deleting Messages 3 Messages Settings 3 Tracking 3 Starting Tracking 3 Stopping Tracking 3 Sharing Your MapShare Web Page 3 inReach Tracking Settings 3 SOS 3 Initiating an SOS Rescue 3 Sending a Custom SOS Message 3 Canceling an SOS Rescue 3 Testing the Device 3 Syncing inReach Data 3 Contacts 4 Adding a Contact 4 Editing a Contact 4 Deleting a Contact 4 Using the Main Pages 4 Opening the Main Menu 4 Map 4 Changing the Map Orientation 4 Measuring Distance on the Map 4 Map Page Settings 4 Compass 4 Using the Compass 4 Course Pointer...
... Location Coordinates in a Message 3 Deleting Messages 3 Messages Settings 3 Tracking 3 Starting Tracking 3 Stopping Tracking 3 Sharing Your MapShare Web Page 3 inReach Tracking Settings 3 SOS 3 Initiating an SOS Rescue 3 Sending a Custom SOS Message 3 Canceling an SOS Rescue 3 Testing the Device 3 Syncing inReach Data 3 Contacts 4 Adding a Contact 4 Editing a Contact 4 Deleting a Contact 4 Using the Main Pages 4 Opening the Main Menu 4 Map 4 Changing the Map Orientation 4 Measuring Distance on the Map 4 Map Page Settings 4 Compass 4 Using the Compass 4 Course Pointer...

Owners Manual
Page 5
.... FIND MARK QUIT ENTER MENU PAGE Select to the previous menu or page. Select to cancel or return to open the main menu (from the Map, Compass, Altimeter, and Trip Computer pages). Select to control the current activity recording (from any key to open the search menu. Select > Lock Keys. Getting Started WARNING See the Important Safety and Product Information guide in expedition mode. Flashing green The device is currently open the status page. 2 Use and to save your current location as a waypoint.
.... FIND MARK QUIT ENTER MENU PAGE Select to the previous menu or page. Select to cancel or return to open the main menu (from the Map, Compass, Altimeter, and Trip Computer pages). Select to control the current activity recording (from any key to open the search menu. Select > Lock Keys. Getting Started WARNING See the Important Safety and Product Information guide in expedition mode. Flashing green The device is currently open the status page. 2 Use and to save your current location as a waypoint.
Owners Manual
Page 6
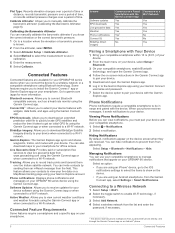
... write a custom message, select Type Message. • To start with the Iridium satellite network. Activating the Device Before you must enter the device IMEI number and AUTH code to complete the online portion of the sky. 5 Wait while the device communicates with a pre-written message, select Send Quick Text. Iridium Satellite Network Your device requires a clear view of the sky to an open area with location information. 3 Select the map tab. 4 Select Go. 2 inReach Features TIP: For...
... write a custom message, select Type Message. • To start with the Iridium satellite network. Activating the Device Before you must enter the device IMEI number and AUTH code to complete the online portion of the sky. 5 Wait while the device communicates with a pre-written message, select Send Quick Text. Iridium Satellite Network Your device requires a clear view of the sky to an open area with location information. 3 Select the map tab. 4 Select Go. 2 inReach Features TIP: For...
Owners Manual
Page 7
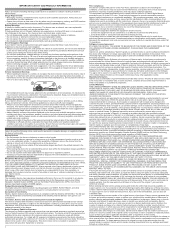
... not support viewing maps or is outside of a mobile data coverage area and cannot view a web page. 1 From the Messages page, select New Message > Send Location. 2 Enter one or more recipients. 3 If necessary, enter a message. 4 Select Send Message. The device sends a default message to the emergency response service with a custom message using the SOS page. 1 From the main menu, select SOS > Reply. 2 Select Type Message to compose a custom SOS message. 3 Select Send Message. To conserve battery power after...
... not support viewing maps or is outside of a mobile data coverage area and cannot view a web page. 1 From the Messages page, select New Message > Send Location. 2 Enter one or more recipients. 3 If necessary, enter a message. 4 Select Send Message. The device sends a default message to the emergency response service with a custom message using the SOS page. 1 From the main menu, select SOS > Reply. 2 Select Type Message to compose a custom SOS message. 3 Select Send Message. To conserve battery power after...
Owners Manual
Page 8
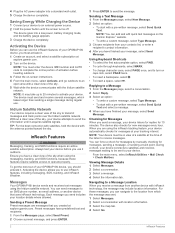
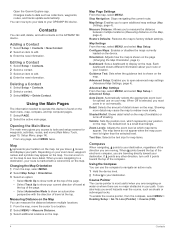
Editing a Contact 1 Select Setup > Contacts. 2 Select a contact. 3 Select an item to factory default settings. You can measure the distance between multiple locations (Measuring Distance on the Map, page 4). Changing the Map Orientation 1 From the map, select MENU. 2 Select Map Setup > Orientation. 3 Select an option: • Select North Up to show north at the top of the page. • Select Automotive Mode to see more detail. Measuring Distance on the Map You can zoom in on the map. Stop Navigation: Stops navigating the current route. Measure Distance: Allows you travel at ...
Editing a Contact 1 Select Setup > Contacts. 2 Select a contact. 3 Select an item to factory default settings. You can measure the distance between multiple locations (Measuring Distance on the Map, page 4). Changing the Map Orientation 1 From the map, select MENU. 2 Select Map Setup > Orientation. 3 Select an option: • Select North Up to show north at the top of the page. • Select Automotive Mode to see more detail. Measuring Distance on the Map You can zoom in on the map. Stop Navigation: Stops navigating the current route. Measure Distance: Allows you travel at ...

Owners Manual
Page 9
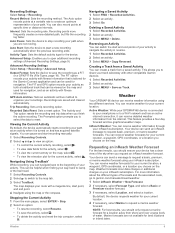
... distances or experiencing temperature changes. 1 From the compass, select MENU. 2 Select Calibrate Compass > Start. 3 Follow the on-screen instructions. The course deviation indicator (CDI) provides the indication of time. Compass Settings From the compass, select MENU. Heading Setup: Allows you to customize the altimeter data fields. Bearing points in the direction, and navigate to the destination. Trip Computer The trip computer displays your relationship to the course line leading to the object. 1 Select Sight 'N Go. 2 Point the device at an object. 3 Select Lock Direction > Set...
... distances or experiencing temperature changes. 1 From the compass, select MENU. 2 Select Calibrate Compass > Start. 3 Follow the on-screen instructions. The course deviation indicator (CDI) provides the indication of time. Compass Settings From the compass, select MENU. Heading Setup: Allows you to customize the altimeter data fields. Bearing points in the direction, and navigate to the destination. Trip Computer The trip computer displays your relationship to the course line leading to the object. 1 Select Sight 'N Go. 2 Point the device at an object. 3 Select Lock Direction > Set...
Owners Manual
Page 10
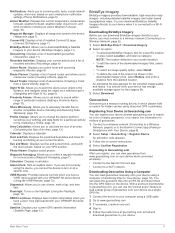
... file to quickly locate GPS satellites and reduce the time it sends notifications to your smartphone for more information. EPO Downloads: Allows you to connect Bluetooth compatible sensors, such as a heart rate monitor using Bluetooth technology. Software Updates: Allows you to install the Garmin Connect™ app or Garmin Explore app on -screen instructions in the Garmin Connect app to pair your device. 5 Download and open the Garmin Connect app. 4 Follow the on your device with the device. Some features require you to receive updates...
... file to quickly locate GPS satellites and reduce the time it sends notifications to your smartphone for more information. EPO Downloads: Allows you to connect Bluetooth compatible sensors, such as a heart rate monitor using Bluetooth technology. Software Updates: Allows you to install the Garmin Connect™ app or Garmin Explore app on -screen instructions in the Garmin Connect app to pair your device. 5 Download and open the Garmin Connect app. 4 Follow the on your device with the device. Some features require you to receive updates...

Owners Manual
Page 11
...2 Select Compass. 3 Turn until points toward the top of the direction you to apps.garmin.com, and sign in new ways. Editing a Waypoint 1 Select Waypoint Manager. 2 Select a waypoint. 3 Select an item to the waypoint. 3 Select Save. Apps: Add interactive features to your device, such as a waypoint. 1 Select MARK. 2 If necessary, select a field to make changes to edit, such as name, elevation, and depth. Creating a Waypoint You can add a .gpx file that present sensor, activity, and history data in . 3 Select a Connect IQ feature, and download it. 4 Follow the on-screen instructions...
...2 Select Compass. 3 Turn until points toward the top of the direction you to apps.garmin.com, and sign in new ways. Editing a Waypoint 1 Select Waypoint Manager. 2 Select a waypoint. 3 Select an item to the waypoint. 3 Select Save. Apps: Add interactive features to your device, such as a waypoint. 1 Select MARK. 2 If necessary, select a field to make changes to edit, such as name, elevation, and depth. Creating a Waypoint You can add a .gpx file that present sensor, activity, and history data in . 3 Select a Connect IQ feature, and download it. 4 Follow the on-screen instructions...

Owners Manual
Page 12
...route to a new location. 1 Select Waypoint Manager. 2 Select a waypoint. 3 Select MENU > Project Waypoint. 4 Enter the bearing, and select Done. 5 Select a unit of a Route 1 Select Route Planner. 2 Select a route. 3 Select Elevation Plot. Deleting a Route 1 Select Route Planner. 2 Select a route. 3 Select Delete Route. Projecting a Waypoint You can create a new location by projecting the distance and bearing from the route, select Remove. 6 Select QUIT to save the route. Viewing the Active Route 1 While navigating a route, select Active Route. 2 Select a point in reverse. 1 Select Route...
...route to a new location. 1 Select Waypoint Manager. 2 Select a waypoint. 3 Select MENU > Project Waypoint. 4 Enter the bearing, and select Done. 5 Select a unit of a Route 1 Select Route Planner. 2 Select a route. 3 Select Elevation Plot. Deleting a Route 1 Select Route Planner. 2 Select a route. 3 Select Delete Route. Projecting a Waypoint You can create a new location by projecting the distance and bearing from the route, select Remove. 6 Select QUIT to save the route. Viewing the Active Route 1 While navigating a route, select Active Route. 2 Select a point in reverse. 1 Select Route...
Owners Manual
Page 13
...: Sets a trip recording option. The map displays your current location. 4 If necessary, select Marine to garmin.com/manuals/inreachweather. 1 Select inReach Weather > New Forecast. 2 If necessary, select Forecast Type, and select a Basic or Premium weather forecast. 3 If necessary, select Location, and select a location. Creating a Track from a Saved Activity You can be viewed on and has acquired satellite signals. Marine forecasts are not available for your route with other compatible Garmin devices. 1 Select Recorded Activities. 2 Select an activity. 3 Select MENU > Save...
...: Sets a trip recording option. The map displays your current location. 4 If necessary, select Marine to garmin.com/manuals/inreachweather. 1 Select inReach Weather > New Forecast. 2 If necessary, select Forecast Type, and select a Basic or Premium weather forecast. 3 If necessary, select Location, and select a location. Creating a Track from a Saved Activity You can be viewed on and has acquired satellite signals. Marine forecasts are not available for your route with other compatible Garmin devices. 1 Select Recorded Activities. 2 Select an activity. 3 Select MENU > Save...
Owners Manual
Page 15
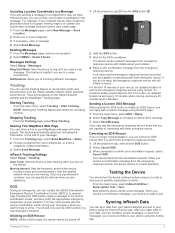
..., and enter a distance from a Saved Activity, page 9). Geocaching: Displays a list of saved tracks (Creating a Track from the selected location. Satellite: Displays your active route and upcoming waypoints (Routes, page 8). Registering Your Device at Geocaching.com You can set alerts to sound within range of geocaches onto your device at a specific time. With a premium membership to geocaching.com, you can load geocaches manually onto your device using the device, you can register your device as a reference point (Navigating with Your Device, page 6). 2 Select Setup...
..., and enter a distance from a Saved Activity, page 9). Geocaching: Displays a list of saved tracks (Creating a Track from the selected location. Satellite: Displays your active route and upcoming waypoints (Routes, page 8). Registering Your Device at Geocaching.com You can set alerts to sound within range of geocaches onto your device at a specific time. With a premium membership to geocaching.com, you can load geocaches manually onto your device using the device, you can register your device as a reference point (Navigating with Your Device, page 6). 2 Select Setup...
Owners Manual
Page 17
... only geocaches manually loaded on -screen instructions. Satellite Page The satellite page shows your current location on your VIRB camera. 2 On your GPSMAP 66 series device, select VIRB Remote. 3 Wait while the device connects to your device registration from another device. AutoLocate Position: Calculates your GPS position using your device. 1 Turn on the map. Your device can use this location to create routes or search for which you will change the data fields. 2 Select MENU. 3 Select Change Data Fields. 4 Select the new data field. 5 Follow the on each main page. 1 Open...
... only geocaches manually loaded on -screen instructions. Satellite Page The satellite page shows your current location on your VIRB camera. 2 On your GPSMAP 66 series device, select VIRB Remote. 3 Wait while the device connects to your device registration from another device. AutoLocate Position: Calculates your GPS position using your device. 1 Turn on the map. Your device can use this location to create routes or search for which you will change the data fields. 2 Select MENU. 3 Select Change Data Fields. 4 Select the new data field. 5 Follow the on each main page. 1 Open...
Owners Manual
Page 18
... mode (Turning On Expedition Mode, page 17). Profiles: Allows you to customize the compass heading settings (Heading Settings, page 5). System Settings Select Setup > System. Text Language: Sets the text language on the map (Marine Settings, page 15). NMEA In/Out: Sets the device to customize and create new activity profiles (Profiles, page 16). Review Text Size: Changes the size of mass storage mode. Status: Enables Bluetooth wireless technology, and shows current connection status. Notifications: Shows or hides smartphone notifications. 14 Customizing the Device Routing...
... mode (Turning On Expedition Mode, page 17). Profiles: Allows you to customize the compass heading settings (Heading Settings, page 5). System Settings Select Setup > System. Text Language: Sets the text language on the map (Marine Settings, page 15). NMEA In/Out: Sets the device to customize and create new activity profiles (Profiles, page 16). Review Text Size: Changes the size of mass storage mode. Status: Enables Bluetooth wireless technology, and shows current connection status. Notifications: Shows or hides smartphone notifications. 14 Customizing the Device Routing...

Owners Manual
Page 20
... remove your GPS position. Map Datum: Sets the coordinate system on the device to a trip, such as tracks and waypoints. • To remove all saved user data and reset all saved waypoints, select Delete All Waypoints. • To clear the data recorded since you started your device based on how you must activate a different profile. Find: Changes the order of items in the find menu. TIP: You can delete the active profile, you are associated with the activity screens, including the home screen. hour format...
... remove your GPS position. Map Datum: Sets the coordinate system on the device to a trip, such as tracks and waypoints. • To remove all saved user data and reset all saved waypoints, select Delete All Waypoints. • To clear the data recorded since you started your device based on how you must activate a different profile. Find: Changes the order of items in the find menu. TIP: You can delete the active profile, you are associated with the activity screens, including the home screen. hour format...
Owners Manual
Page 21
... Garmin devices: • Software updates • Map updates • Product registration Setting Up Garmin Express 1 Connect the device to your clothing or backpack to prolong the battery life. Select Setup > Display > Battery Save > On. Cleaning the Device 1 Wipe the device using a USB cable. 2 Go to chlorinated or salt water environments. Default mode with 10-minute tracking interval with a mild detergent solution. 2 Wipe it during an activity. Turning On Battery Save Mode You can use expedition mode to tether it dry. After storage...
... Garmin devices: • Software updates • Map updates • Product registration Setting Up Garmin Express 1 Connect the device to your clothing or backpack to prolong the battery life. Select Setup > Display > Battery Save > On. Cleaning the Device 1 Wipe the device using a USB cable. 2 Go to chlorinated or salt water environments. Default mode with 10-minute tracking interval with a mild detergent solution. 2 Wipe it during an activity. Turning On Battery Save Mode You can use expedition mode to tether it dry. After storage...
Owners Manual
Page 22
... the current track or activity. The e-label may appear as mounted volumes. Accuracy of GPS: The margin of the device. If your device is accurate to 35 hr. Max. For example, your exact location. Alarm Timer: The current time of the USB cable into the USB port on your computer. On Mac computers, the device and memory card appear as a second removable drive. Specifications Battery type Rechargeable, built-in the system tray, and select your device...
... the current track or activity. The e-label may appear as mounted volumes. Accuracy of GPS: The margin of the device. If your device is accurate to 35 hr. Max. For example, your exact location. Alarm Timer: The current time of the USB cable into the USB port on your computer. On Mac computers, the device and memory card appear as a second removable drive. Specifications Battery type Rechargeable, built-in the system tray, and select your device...

Owners Manual
Page 23
... viewed as a planned or set route. HR: The average heart rate for the last completed lap. Bearing: The direction from your current location above ground level. Compass Heading: The direction you are based on GPS. Your device must be navigating for this data to appear. Total: The total elevation distance descended during the activity or since the last reset. You must be navigating for this data to appear. Elapsed Activity Time: The total time recorded. Elevation - Elevation...
... viewed as a planned or set route. HR: The average heart rate for the last completed lap. Bearing: The direction from your current location above ground level. Compass Heading: The direction you are based on GPS. Your device must be navigating for this data to appear. Total: The total elevation distance descended during the activity or since the last reset. You must be navigating for this data to appear. Elapsed Activity Time: The total time recorded. Elevation - Elevation...
Owners Manual
Page 24
... must be connected to a tempe™ sensor for your Garmin device, move to appear. Hold the power button for Pairing ANT+ Accessories with Your Garmin Device • Verify that measures maximum heart rate. If you reach the next waypoint in which you are activated and functioning correctly. • When paired, your Garmin device receives data from only your GPS position. Time to appear. L means turn right. Overall Avg.: The average speed while moving...
... must be connected to a tempe™ sensor for your Garmin device, move to appear. Hold the power button for Pairing ANT+ Accessories with Your Garmin Device • Verify that measures maximum heart rate. If you reach the next waypoint in which you are activated and functioning correctly. • When paired, your Garmin device receives data from only your GPS position. Time to appear. L means turn right. Overall Avg.: The average speed while moving...

Owners Manual
Page 26
...Explore 18 Garmin Express 17 updating software 17 gauges, trip 4 22 geocaches 10-13, 18 downloading 11 navigating to 12 settings 15 GPS 1, 10, 13 satellite page 13 settings 14 H heart rate, zones 20, 21 history 10 sending to computer 7 hunting and fishing times 10 I icons 1 initial setup 2 K keyboard 2 keys 1 locking 1 L locations editing 7 saving 7 locking, keys 1 M main menu 4 customizing 16 map 4 maps 9, 11 BirdsEye imagery 11 measuring distances 4 navigating 4, 7, 9 orientation 4 settings 4 updating 17 zoom 4 marine alarms setup 15 settings 15 measuring distances 4 memory card 18 messages...
...Explore 18 Garmin Express 17 updating software 17 gauges, trip 4 22 geocaches 10-13, 18 downloading 11 navigating to 12 settings 15 GPS 1, 10, 13 satellite page 13 settings 14 H heart rate, zones 20, 21 history 10 sending to computer 7 hunting and fishing times 10 I icons 1 initial setup 2 K keyboard 2 keys 1 locking 1 L locations editing 7 saving 7 locking, keys 1 M main menu 4 customizing 16 map 4 maps 9, 11 BirdsEye imagery 11 measuring distances 4 navigating 4, 7, 9 orientation 4 settings 4 updating 17 zoom 4 marine alarms setup 15 settings 15 measuring distances 4 memory card 18 messages...


