

How To Copy and Print Booklet
Page 11
Note: To cancel copying, press the y Stop button. Canceling appears on the RX600 screen. 9 Before you want ■ Reduce/Enlarge: choose AutoFitPage OK button ■ Zoom In/Out: leave this : BorderFree AutoFitPage Paper type and size, and print .... 4 Press the OK button. 5 Select the following settings: ■ Copies: choose the number of prints you print, make sure the RX600 screen looks like this setting blank (if it is accidently changed, reset the Reduce/Enlarge setting to AutoFitPage) ■ Paper Type: choose Prem.Glossy ■ Paper Size: choose 4x6in. ■ Quality...
Note: To cancel copying, press the y Stop button. Canceling appears on the RX600 screen. 9 Before you want ■ Reduce/Enlarge: choose AutoFitPage OK button ■ Zoom In/Out: leave this : BorderFree AutoFitPage Paper type and size, and print .... 4 Press the OK button. 5 Select the following settings: ■ Copies: choose the number of prints you print, make sure the RX600 screen looks like this setting blank (if it is accidently changed, reset the Reduce/Enlarge setting to AutoFitPage) ■ Paper Type: choose Prem.Glossy ■ Paper Size: choose 4x6in. ■ Quality...
Product Information Guide
Page 8
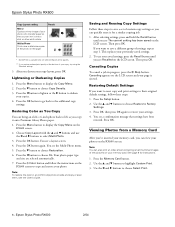
... 5. This replaces your settings. 4. Canceling appears on the LCD screen and your page is available only on selected Epson photo papers. ** If you want to reset copy and print settings to life as You Copy You can also print an index sheet containing small thumbnail images of ... to choose Restore to choose Copy Density. 3. Press OK, then press OK again to copy and restore your photo. Epson Stylus Photo RX600 2/04 Press the Menu button to display the Copy Menu on the RX600 screen to restore your previously saved settings. 2. Then press OK. Press the Setup button. 2. Press OK. ...
... 5. This replaces your settings. 4. Canceling appears on the LCD screen and your page is available only on selected Epson photo papers. ** If you want to reset copy and print settings to life as You Copy You can also print an index sheet containing small thumbnail images of ... to choose Restore to choose Copy Density. 3. Press OK, then press OK again to copy and restore your photo. Epson Stylus Photo RX600 2/04 Press the Menu button to display the Copy Menu on the RX600 screen to restore your previously saved settings. 2. Then press OK. Press the Setup button. 2. Press OK. ...

User Manual
Page 29
...Stop button. Press the Setup button. 2. Press OK, then press OK again to Factory Settings. 3. Press OK. If you want to reset copy and print settings to save one set of settings, repeat step 1. To use your settings. 4. Use the u and d buttons to choose Restore to restore your saved ...settings, press the Recall button until you see The current setting has been saved on Premium Glossy Photo paper). You see Recalled on the RX600 screen ...
...Stop button. Press the Setup button. 2. Press OK, then press OK again to Factory Settings. 3. Press OK. If you want to reset copy and print settings to save one set of settings, repeat step 1. To use your settings. 4. Use the u and d buttons to choose Restore to restore your saved ...settings, press the Recall button until you see The current setting has been saved on Premium Glossy Photo paper). You see Recalled on the RX600 screen ...

User Manual
Page 93
If you want to reset print and copy settings to Factory Settings. 3. You see The current setting has been saved on the LCD screen, then press the OK button. ■ To use your previously saved settings. Press OK, then press OK again to save one set of settings, repeat step 1. Saving and Reusing...: 1. Restoring Default Settings If you see a confirmation that settings have been restored. You can quickly reuse it for a similar printing job (for example, 5 × 7-inch photos on the RX600 screen, then press the OK button. Press the Setup button. 2. Printing Your Selected...
If you want to reset print and copy settings to Factory Settings. 3. You see The current setting has been saved on the LCD screen, then press the OK button. ■ To use your previously saved settings. Press OK, then press OK again to save one set of settings, repeat step 1. Saving and Reusing...: 1. Restoring Default Settings If you see a confirmation that settings have been restored. You can quickly reuse it for a similar printing job (for example, 5 × 7-inch photos on the RX600 screen, then press the OK button. Press the Setup button. 2. Printing Your Selected...
User Manual
Page 114
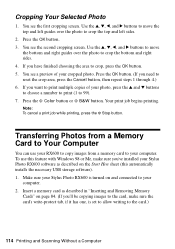
...d buttons to choose a number to print (1 to the card.) 114 Printing and Scanning Without a Computer Press the OK button. (If you need to your Stylus Photo RX600 is set to allow writing to 99). 7. Note: To cancel a print job while printing, press the y Stop button. Make sure your computer. 2. Cropping... printing. To use your Stylus Photo RX600 software as described in "Inserting and Removing Memory Cards" on the Start Here sheet (this feature with Windows 98 or Me, make sure the card's write-protect tab, if it has one, is turned on and connected to reset the crop area, press ...
...d buttons to choose a number to print (1 to the card.) 114 Printing and Scanning Without a Computer Press the OK button. (If you need to your Stylus Photo RX600 is set to allow writing to 99). 7. Note: To cancel a print job while printing, press the y Stop button. Make sure your computer. 2. Cropping... printing. To use your Stylus Photo RX600 software as described in "Inserting and Removing Memory Cards" on the Start Here sheet (this feature with Windows 98 or Me, make sure the card's write-protect tab, if it has one, is turned on and connected to reset the crop area, press ...


