
Basics Guide
Page 4
... Paper Position 54 Printing a CD/DVD Jewel Case Insert 55 Printing From Your Computer 56 Printing With Windows 56 Printing From a Macintosh 59 Selecting the Correct Paper Type 62 Scanning a Photo or Document 63 Scanning to Your Computer 63 Scanning to a Memory Card 66 Backing Up Your Photos 67 Maintaining Your RX580 69 Checking the Print Head Nozzles 69...
... Paper Position 54 Printing a CD/DVD Jewel Case Insert 55 Printing From Your Computer 56 Printing With Windows 56 Printing From a Macintosh 59 Selecting the Correct Paper Type 62 Scanning a Photo or Document 63 Scanning to Your Computer 63 Scanning to a Memory Card 66 Backing Up Your Photos 67 Maintaining Your RX580 69 Checking the Print Head Nozzles 69...
Basics Guide
Page 5
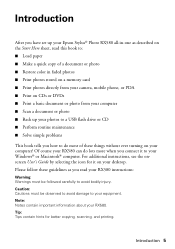
...your Epson Stylus® Photo RX580 all-in faded photos ■ Print photos stored on a memory card ■ Print photos directly from your camera, mobile phone, or PDA ■ Print on CDs or DVDs ■ Print a basic document or photo from your computer ■ Scan a document or photo ■ Back up your photos to a USB flash drive or CD ... to : ■ Load paper ■ Make a quick copy of a document or photo ■ Restore color in -one as you read this book to avoid bodily injury. Of course your RX580 can do lots more when you how to do most of these guidelines as described on...
...your Epson Stylus® Photo RX580 all-in faded photos ■ Print photos stored on a memory card ■ Print photos directly from your camera, mobile phone, or PDA ■ Print on CDs or DVDs ■ Print a basic document or photo from your computer ■ Scan a document or photo ■ Back up your photos to a USB flash drive or CD ... to : ■ Load paper ■ Make a quick copy of a document or photo ■ Restore color in -one as you read this book to avoid bodily injury. Of course your RX580 can do lots more when you how to do most of these guidelines as described on...

Basics Guide
Page 6
... RX580 Control Panel Copy a photo or document View and print photos on CD/DVDs; make PictBridge® or Bluetooth® settings Stop printing or copying; scan to use. 6 Introduction reprint or restore photos; You also see a green light rotate around the Mode buttons. backup photos; Press any button to reactivate the RX580. restore defaults; maintain the RX580; crop or zoom a photo Print...
... RX580 Control Panel Copy a photo or document View and print photos on CD/DVDs; make PictBridge® or Bluetooth® settings Stop printing or copying; scan to use. 6 Introduction reprint or restore photos; You also see a green light rotate around the Mode buttons. backup photos; Press any button to reactivate the RX580. restore defaults; maintain the RX580; crop or zoom a photo Print...

Basics Guide
Page 35
... Your Photos 35 Press OK again, then press the x Start button to the defaults, see page 40. Select from these options, then press r. ■ Color Effect: choose Off, Sepia (for an old-fashioned brown effect) or B&W (for black and white printing) &#...9632; Brightness: choose Standard, Brighter, Brightest, Darker, or Darkest ■ Contrast: choose Standard, Higher, or Highest ■ Sharpness: choose Standard, Sharper, Sharpest, Softer, or Softest ■ Saturation: choose Standard, Higher, Highest, Lower, or Lowest ■ Density: available only for CD/DVD printing...
... Your Photos 35 Press OK again, then press the x Start button to the defaults, see page 40. Select from these options, then press r. ■ Color Effect: choose Off, Sepia (for an old-fashioned brown effect) or B&W (for black and white printing) &#...9632; Brightness: choose Standard, Brighter, Brightest, Darker, or Darkest ■ Contrast: choose Standard, Higher, or Highest ■ Sharpness: choose Standard, Sharper, Sharpest, Softer, or Softest ■ Saturation: choose Standard, Higher, Highest, Lower, or Lowest ■ Density: available only for CD/DVD printing...
Basics Guide
Page 45
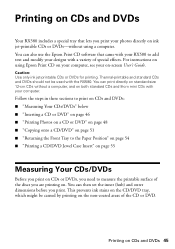
..., which might be used with the RX580. You can then set the inner (hub) and outer dimensions before you print. You can also use the Epson Print CD software that lets you print your photos directly on ink jet-printable CDs or DVDs-without a computer, and on both standard CDs and 8-cm mini CDs with a variety of special effects. Thermal...
..., which might be used with the RX580. You can then set the inner (hub) and outer dimensions before you print. You can also use the Epson Print CD software that lets you print your photos directly on ink jet-printable CDs or DVDs-without a computer, and on both standard CDs and 8-cm mini CDs with a variety of special effects. Thermal...

Basics Guide
Page 46
... any maintenance routines. 2. Otherwise, dirt or scratches on CDs and DVDs Only insert a CD or DVD when the RX580 is open and the front tray extensions are pushed in. 46 Printing on the surface may cause errors when you may damage the RX580 or tray. 1. Turn on adjusting the dimensions. Caution:... Make sure you insert the tray correctly, or you burn the data. Use a millimeter ruler to make sure it is satisfactory. Inserting a CD or DVD Make...
... any maintenance routines. 2. Otherwise, dirt or scratches on CDs and DVDs Only insert a CD or DVD when the RX580 is open and the front tray extensions are pushed in. 46 Printing on the surface may cause errors when you may damage the RX580 or tray. 1. Turn on adjusting the dimensions. Caution:... Make sure you insert the tray correctly, or you burn the data. Use a millimeter ruler to make sure it is satisfactory. Inserting a CD or DVD Make...

Basics Guide
Page 48
... in the next section to print photos on a CD or DVD 1. Printing Photos on your CD or DVD from your memory card or USB flash drive. line up the arrows exactly. 7. See your on your designs with a variety of special effects, you can use the Epson Print CD software on -screen User's Guide for printing, as described on page 46...
... in the next section to print photos on a CD or DVD 1. Printing Photos on your CD or DVD from your memory card or USB flash drive. line up the arrows exactly. 7. See your on your designs with a variety of special effects, you can use the Epson Print CD software on -screen User's Guide for printing, as described on page 46...

Basics Guide
Page 49
... you don't select enough photos for each quarter. 8 photos are printed on the CD/DVD, arranged in a circle. 12 photos are printed on the CD/DVD, arranged in the center). Printing Photos on the disc) before playing the disc or inserting it in a drive. For more information, see page 54. 4. Keep printed discs away from the RX580. Note: After you may...
... you don't select enough photos for each quarter. 8 photos are printed on the CD/DVD, arranged in a circle. 12 photos are printed on the CD/DVD, arranged in the center). Printing Photos on the disc) before playing the disc or inserting it in a drive. For more information, see page 54. 4. Keep printed discs away from the RX580. Note: After you may...

Basics Guide
Page 50
...different measurements, you only need to set them on the RX580. Make sure you have measured your discs, following the instructions on page 45. 2. Then press OK. 5. This prevents ink stains on the CD/DVD tray, which might be caused by printing on the noncoated areas of your changes and return to...46 mm for the inner hub, and 114 mm for a batch of CDs or DVDs. 50 Printing on CDs and DVDs Press d, u, l, or r to select CD Inner-Outer, then press r. 4. If the printable area of the CD or DVD. 1. Note: The RX580 remembers this setting even after it has been turned off, so you need...
...different measurements, you only need to set them on the RX580. Make sure you have measured your discs, following the instructions on page 45. 2. Then press OK. 5. This prevents ink stains on the CD/DVD tray, which might be caused by printing on the noncoated areas of your changes and return to...46 mm for the inner hub, and 114 mm for a batch of CDs or DVDs. 50 Printing on CDs and DVDs Press d, u, l, or r to select CD Inner-Outer, then press r. 4. If the printable area of the CD or DVD. 1. Note: The RX580 remembers this setting even after it has been turned off, so you need...

Basics Guide
Page 51
... RX580 remembers this setting even after it has been turned off, so you may need to the Setup menu. Press OK again to save your changes and return to adjust the dimensions once for a batch of CDs or DVDs. Copying onto a CD/DVD You can copy a printed photo, document, artwork, or CD ...label directly onto a CD or DVD. Adjusting the Print Position If your photo is not centered on page 46. Press l or r to adjust the...
... RX580 remembers this setting even after it has been turned off, so you may need to the Setup menu. Press OK again to save your changes and return to adjust the dimensions once for a batch of CDs or DVDs. Copying onto a CD/DVD You can copy a printed photo, document, artwork, or CD ...label directly onto a CD or DVD. Adjusting the Print Position If your photo is not centered on page 46. Press l or r to adjust the...

Basics Guide
Page 52
2. Close the document cover gently so that your original face-down on the glass, in the center of the glass as shown below: Your image will be automatically cropped and resized to fit on CDs and DVDs Open the document cover and place your original doesn't move. 52 Printing on a CD/DVD. 3. If you are copying a CD or DVD, place the original in the upper left corner.
2. Close the document cover gently so that your original face-down on the glass, in the center of the glass as shown below: Your image will be automatically cropped and resized to fit on CDs and DVDs Open the document cover and place your original doesn't move. 52 Printing on a CD/DVD. 3. If you are copying a CD or DVD, place the original in the upper left corner.

Basics Guide
Page 53
... y Stop/Clear Settings button. If ink smears on your printed CD/DVDs, you may need to adjust other settings, press the x Print Settings button. Press l or r to select Graphics, Photo, or Text. 7. Press d, then press l or r to choose Color or B&W. 6. Press the x Start button to select CD/DVD Copy for the Layout. 8. Press d, then press l or...
... y Stop/Clear Settings button. If ink smears on your printed CD/DVDs, you may need to adjust other settings, press the x Print Settings button. Press l or r to select Graphics, Photo, or Text. 7. Press d, then press l or r to choose Color or B&W. 6. Press the x Start button to select CD/DVD Copy for the Layout. 8. Press d, then press l or...

Basics Guide
Page 54
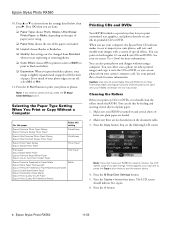
Pull out the front tray extensions. 54 Printing on CDs and DVDs Returning the Front Tray to the paper position. Caution: Do not move the tray lever when the RX580 is operating, and do not touch the tray when pushing down the lever. 2. Push up the lever to lower the front tray to the Paper Position 1.
Pull out the front tray extensions. 54 Printing on CDs and DVDs Returning the Front Tray to the paper position. Caution: Do not move the tray lever when the RX580 is operating, and do not touch the tray when pushing down the lever. 2. Push up the lever to lower the front tray to the Paper Position 1.

Basics Guide
Page 55
... button. Press l and r and the Copies + button to start printing. Printing a CD/DVD Jewel Case Insert 55 Press the x Start button to select your photo(s). If you select more than 24 photos, multiple inserts will be printed. Press the x Print Settings button. You can print a photo (or an index of photos) and have enough sheets of paper you have it...
... button. Press l and r and the Copies + button to start printing. Printing a CD/DVD Jewel Case Insert 55 Press the x Start button to select your photo(s). If you select more than 24 photos, multiple inserts will be printed. Press the x Print Settings button. You can print a photo (or an index of photos) and have enough sheets of paper you have it...

Basics Guide
Page 68
... are, this may take several minutes. However, the RX580 will be able to your connected storage device. Press OK again to display the message shown below on your files. All the photos on the right: 6. Each time you have backed up multiple times to print photos in a new folder. Press the Setup button. 5. .... 68 Backing Up Your Photos When the backup is full. Press OK to confirm, then press OK again to select Backup Memory Card, then press OK. Note: After you save files on a USB flash drive, the RX580 will not be able to the same drive, disk, or CD until it is complete, ...
... are, this may take several minutes. However, the RX580 will be able to your connected storage device. Press OK again to display the message shown below on your files. All the photos on the right: 6. Each time you have backed up multiple times to print photos in a new folder. Press the Setup button. 5. .... 68 Backing Up Your Photos When the backup is full. Press OK to confirm, then press OK again to select Backup Memory Card, then press OK. Note: After you save files on a USB flash drive, the RX580 will not be able to the same drive, disk, or CD until it is complete, ...

Basics Guide
Page 73
...the paper (lower) position. 2. Press u or d to select Maintenance, then press OK. sales) or www.epson.ca (Canadian sales). Other products may dry out. Cartridges are ready to be replaced. Make sure the RX580 is turned on, the CD/DVD tray is not inserted, and the front tray is expended, the...vacuum packed to your RX580 not covered by Epson's warranty. If an ink cartridge is closed, then lift up the scanner unit. Replacing Ink Cartridges 73 To find the nearest reseller, call 800-GO-EPSON (800-463-7766). Or you must complete all the steps in the print head nozzles may ...
...the paper (lower) position. 2. Press u or d to select Maintenance, then press OK. sales) or www.epson.ca (Canadian sales). Other products may dry out. Cartridges are ready to be replaced. Make sure the RX580 is turned on, the CD/DVD tray is not inserted, and the front tray is expended, the...vacuum packed to your RX580 not covered by Epson's warranty. If an ink cartridge is closed, then lift up the scanner unit. Replacing Ink Cartridges 73 To find the nearest reseller, call 800-GO-EPSON (800-463-7766). Or you must complete all the steps in the print head nozzles may ...

Basics Guide
Page 77
Make sure the RX580 is turned on the nozzle check pattern, you may have to select Head Alignment, then press ... the next pattern, then repeat steps 8 and 9. 11. Press OK. 10. Press r, then press u or d to align the print head. Aligning the Print Head 77 Press u or d to use a magnifying glass. 8. Press the x Start button. You may need to select the number for...lines are not aligned properly on and not printing. 2. Load several sheets of alignment patterns are done, press OK. Note: Make sure the front tray is in the paper (lower) position and the CD/DVD tray is most even, with no ...
Make sure the RX580 is turned on the nozzle check pattern, you may have to select Head Alignment, then press ... the next pattern, then repeat steps 8 and 9. 11. Press OK. 10. Press r, then press u or d to align the print head. Aligning the Print Head 77 Press u or d to use a magnifying glass. 8. Press the x Start button. You may need to select the number for...lines are not aligned properly on and not printing. 2. Load several sheets of alignment patterns are done, press OK. Note: Make sure the front tray is in the paper (lower) position and the CD/DVD tray is most even, with no ...
Basics Guide
Page 90
...to 48 jewel case insert, 55 measuring, 45 to 46 printing on, 45 to 51 E Enhancing photos, 35 Epson Help, 82 ink, 72, 82 paper, 10, 82 Epson Print CD, 45 Epson Scan, 63 to 65 Exif Print, 35 Expansion borderless copying, 17 borderless printing, 37 F Faded photos, restoring, 18 to 19 FCC statement, 85 File formats,... 21 to 23 IrDA printing, 43 to 44 J Jewel case insert, 55 L Layout CD/DVD, 49, 55 Fit Frame, 37 for copies, 16 selecting, 28 to 29 Loading paper, 7 to 9 M Macintosh color management settings, 60 page layout settings, 59, 60 printing from, 59 to 61 starting Epson Scan, 64 Maintenance, 69...
...to 48 jewel case insert, 55 measuring, 45 to 46 printing on, 45 to 51 E Enhancing photos, 35 Epson Help, 82 ink, 72, 82 paper, 10, 82 Epson Print CD, 45 Epson Scan, 63 to 65 Exif Print, 35 Expansion borderless copying, 17 borderless printing, 37 F Faded photos, restoring, 18 to 19 FCC statement, 85 File formats,... 21 to 23 IrDA printing, 43 to 44 J Jewel case insert, 55 L Layout CD/DVD, 49, 55 Fit Frame, 37 for copies, 16 selecting, 28 to 29 Loading paper, 7 to 9 M Macintosh color management settings, 60 page layout settings, 59, 60 printing from, 59 to 61 starting Epson Scan, 64 Maintenance, 69...

Basics Guide
Page 92
...color, 18 to 19, 63 S Safety instructions, 83 to 84 Saturation, 35 Scanning, 63 to 66 Screen error messages, 78 to 79 problems, 80 safety instructions, 84 using, 6 Sepia, 35 Setup button, 6 Sharpness, 35 Sizing photos, 17, 36 to 37 Software ArcSoft PhotoImpression, 64, 82 Epson Print CD, 45 Epson... Scan, 63 to 65 Specialty Print button, 6 Stop/Clear Settings button, 6 Stopping printing, 26, 58, 61 Storing prints, 11 T Technical support, 82 Touching up photos, 34 to 35 Troubleshooting, ...
...color, 18 to 19, 63 S Safety instructions, 83 to 84 Saturation, 35 Scanning, 63 to 66 Screen error messages, 78 to 79 problems, 80 safety instructions, 84 using, 6 Sepia, 35 Setup button, 6 Sharpness, 35 Sizing photos, 17, 36 to 37 Software ArcSoft PhotoImpression, 64, 82 Epson Print CD, 45 Epson... Scan, 63 to 65 Specialty Print button, 6 Stop/Clear Settings button, 6 Stopping printing, 26, 58, 61 Storing prints, 11 T Technical support, 82 Touching up photos, 34 to 35 Troubleshooting, ...
Product Information Guide
Page 8
... photos. ❏ Color Effect: choose Off (to print in color) or B&W (to fill the sheet of letter-size plain paper are done. ❏ Paper Type: choose Prem. Press the x Start button to print your RX580 is slightly expanded and cropped to print ...Epson Stylus Photo RX580 11/06 Glossy, Ultra Glossy, Photo Paper, or Matte, depending on CDs or DVDs, you 're using a computer. Caution: Use only ink jet-printable CDs and DVDs for several sheets of special effects. Make sure your photo or photos. Epson Stylus Photo RX580 10. Cleaning the Rollers Before you print...
... photos. ❏ Color Effect: choose Off (to print in color) or B&W (to fill the sheet of letter-size plain paper are done. ❏ Paper Type: choose Prem. Press the x Start button to print your RX580 is slightly expanded and cropped to print ...Epson Stylus Photo RX580 11/06 Glossy, Ultra Glossy, Photo Paper, or Matte, depending on CDs or DVDs, you 're using a computer. Caution: Use only ink jet-printable CDs and DVDs for several sheets of special effects. Make sure your photo or photos. Epson Stylus Photo RX580 10. Cleaning the Rollers Before you print...


