Basics
Page 5
....com (U.S. Where to the Lock position. 6 Close the cartridge door. PictureMate Power adapter Power cable I/ On button PictureMate photo paper Initial PictureMate photo cartridge Basics book Printer Software CD 1 Remove all the way right, to Find Information Your manuals cover both PictureMate Dash and Zoom. sales) or www.epson.ca (Canadian sales). Or you see the Charging complete message on...
....com (U.S. Where to the Lock position. 6 Close the cartridge door. PictureMate Power adapter Power cable I/ On button PictureMate photo paper Initial PictureMate photo cartridge Basics book Printer Software CD 1 Remove all the way right, to Find Information Your manuals cover both PictureMate Dash and Zoom. sales) or www.epson.ca (Canadian sales). Or you see the Charging complete message on...
Basics
Page 8
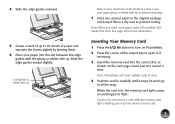
Note: When you may lose photos on your card. 7 Slide the edge guides inward slightly. Note: PictureMate can't read multiple cards at a time. Load your paper glossy or whiter side up to prevent smearing. 7 Store any unused paper in , the memory card light comes on and begins to flash. When the ...up Note: Load a maximum of the output tray to prevent curling. See page 49 for more paper, order a PictureMate 200 Series Print Pack. Inserting Your Memory Card 1 Press the On button to turn on PictureMate. 2 Press the corner of 20 sheets at a time. Insert just one card at once. ...
Note: When you may lose photos on your card. 7 Slide the edge guides inward slightly. Note: PictureMate can't read multiple cards at a time. Load your paper glossy or whiter side up to prevent smearing. 7 Store any unused paper in , the memory card light comes on and begins to flash. When the ...up Note: Load a maximum of the output tray to prevent curling. See page 49 for more paper, order a PictureMate 200 Series Print Pack. Inserting Your Memory Card 1 Press the On button to turn on PictureMate. 2 Press the corner of 20 sheets at a time. Insert just one card at once. ...
Basics
Page 12
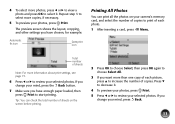
..., if necessary. 5 To preview your photos, press Print. Press d to decrease it . The preview screen shows the layout, cropping, and other settings you have enough paper loaded, then press Print to start printing. 4 To select more photos, press l or r to view a photo and press OK to select it . ...4 To preview your photos, press Print. 5 Press l or r to review your selected photos. If you change your mind, press ...
..., if necessary. 5 To preview your photos, press Print. Press d to decrease it . The preview screen shows the layout, cropping, and other settings you have enough paper loaded, then press Print to start printing. 4 To select more photos, press l or r to view a photo and press OK to select it . ...4 To preview your photos, press Print. 5 Press l or r to review your selected photos. If you change your mind, press ...

Basics
Page 13
...instructions. 7 Make sure you want. 1 After inserting a card, press 2 Press OK to choose Select. If you have enough paper loaded, then press Print to start printing. Printing Photos by Date You can select additional dates, if desired. 5 After selecting all the dates you want, then press l or r ...to select it easier to find the ones you have a lot of photos on your photos, press Menu. You see a message that paper is out, load more than 20 photos, you need to highlight Select By Date, then press OK. The photos taken on the selected date(s) appear on the screen. 6 Press l ...
...instructions. 7 Make sure you want. 1 After inserting a card, press 2 Press OK to choose Select. If you have enough paper loaded, then press Print to start printing. Printing Photos by Date You can select additional dates, if desired. 5 After selecting all the dates you want, then press l or r ...to select it easier to find the ones you have a lot of photos on your photos, press Menu. You see a message that paper is out, load more than 20 photos, you need to highlight Select By Date, then press OK. The photos taken on the selected date(s) appear on the screen. 6 Press l ...
Basics
Page 14
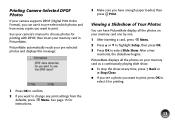
..., then press OK. 3 Press OK to print. Printing Camera-Selected DPOF Photos If your camera supports DPOF (Digital Print Order Format), you can have enough paper loaded, then press Print. PictureMate automatically reads your pre-selected photos and displays this message: 1 Press OK to confirm. 2 If you want... to print, press OK to select it to pre-select which photos and how many copies you want ...
..., then press OK. 3 Press OK to print. Printing Camera-Selected DPOF Photos If your camera supports DPOF (Digital Print Order Format), you can have enough paper loaded, then press Print. PictureMate automatically reads your pre-selected photos and displays this message: 1 Press OK to confirm. 2 If you want... to print, press OK to select it to pre-select which photos and how many copies you want ...

Basics
Page 15
... as the ink dries. Storing and Displaying Your PictureMate Photos Photos printed on your photos until they will look different than you print, the colors on PictureMate photo paper are completely dry. ● Let photos sit for 24 hours before framing. ● After you expect. Caring for generations. Storing Unused Paper Return unused paper to prevent curling, and keep it away...
... as the ink dries. Storing and Displaying Your PictureMate Photos Photos printed on your photos until they will look different than you print, the colors on PictureMate photo paper are completely dry. ● Let photos sit for 24 hours before framing. ● After you expect. Caring for generations. Storing Unused Paper Return unused paper to prevent curling, and keep it away...

Basics
Page 16
Getting Help You can learn how to improve print quality or handle memory cards, paper, or photo cartridges. 1 Press Menu. 2 Press u or d to highlight Setup, then press OK. 3 Press u or d ...can: ● Choose from a variety of layouts (see page 17) ● Remove red eyes from your photos (see page 24) Note: The features described in black-and-white or sepia (see page 22) ● Add ...fun and festive decorations to your photos (see page 21) ● Adjust the amount of expansion and cropping for improving print quality, or a ...
Getting Help You can learn how to improve print quality or handle memory cards, paper, or photo cartridges. 1 Press Menu. 2 Press u or d to highlight Setup, then press OK. 3 Press u or d ...can: ● Choose from a variety of layouts (see page 17) ● Remove red eyes from your photos (see page 24) Note: The features described in black-and-white or sepia (see page 22) ● Add ...fun and festive decorations to your photos (see page 21) ● Adjust the amount of expansion and cropping for improving print quality, or a ...

Basics
Page 18
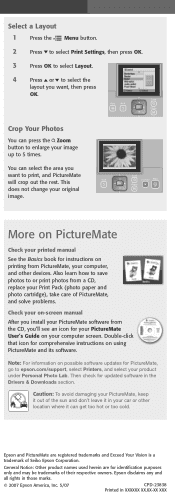
.... Medium 50mmx70mm 17 If you want to print pictures with white borders or place several small photos on one sheet of each photo per sheet) Portrait Pkg. (10) (10 copies of paper, you can use the Layout menu to change the layout. 1 After inserting a card, press Menu. 2 Press u or d to... highlight Print Settings, then press OK. 3 Press OK to select Layout. 4 Press u or d to highlight the layout setting you want, then press OK. Large (square photos 12/Pg. ...
.... Medium 50mmx70mm 17 If you want to print pictures with white borders or place several small photos on one sheet of each photo per sheet) Portrait Pkg. (10) (10 copies of paper, you can use the Layout menu to change the layout. 1 After inserting a card, press Menu. 2 Press u or d to... highlight Print Settings, then press OK. 3 Press OK to select Layout. 4 Press u or d to highlight the layout setting you want, then press OK. Large (square photos 12/Pg. ...

Basics
Page 19
...want. 18 7 Adjust any other layouts, to print two or more photos per sheet. You can control the amount of paper as the layout setting. Reducing Red-Eye When you want , then press Print to preview your photos. 8 If the layout preview is correct, press Print to start printing...: Red-eye reduction may cause part of photo B. For other settings you see page 21 for instructions. 5 At the photo selection screen, press OK to select the current photo for printing. (See page 10.) For the Portrait Packages and US Passport, PictureMate prints multiple copies of people, they sometimes appear...
...want. 18 7 Adjust any other layouts, to print two or more photos per sheet. You can control the amount of paper as the layout setting. Reducing Red-Eye When you want , then press Print to preview your photos. 8 If the layout preview is correct, press Print to start printing...: Red-eye reduction may cause part of photo B. For other settings you see page 21 for instructions. 5 At the photo selection screen, press OK to select the current photo for printing. (See page 10.) For the Portrait Packages and US Passport, PictureMate prints multiple copies of people, they sometimes appear...
Basics
Page 41
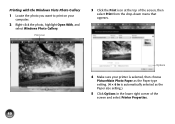
Options 4 Make sure your computer. 2 Right-click the photo, highlight Open With, and select Windows Photo Gallery. Printing with the Windows Vista Photo Gallery 1 Locate the photo you want to print on your printer is selected, then choose PictureMate Photo Paper as the Paper type setting. (4 × 6 in is automatically selected as the Paper size setting.) 5 Click Options in the lower right corner of the screen, then select Print from the drop-down menu that appears. Print icon 3 Click the Print icon at the top of the screen and select Printer Properties. 40
Options 4 Make sure your computer. 2 Right-click the photo, highlight Open With, and select Windows Photo Gallery. Printing with the Windows Vista Photo Gallery 1 Locate the photo you want to print on your printer is selected, then choose PictureMate Photo Paper as the Paper type setting. (4 × 6 in is automatically selected as the Paper size setting.) 5 Click Options in the lower right corner of the screen, then select Print from the drop-down menu that appears. Print icon 3 Click the Print icon at the top of the screen and select Printer Properties. 40
Basics
Page 50
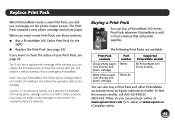
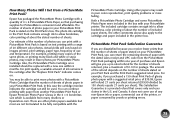
... and continue the current print job. The Print Pack contains a new photo cartridge and photo paper. sales) or www.epson.ca (Canadian sales). 49 Just replace it . Note: Use your printer not covered by Epson's warranty. Caution: To ensure good results, use a genuine PictureMate 200 Series photo cartridge and do not refill it without turning off and unplugging...
... and continue the current print job. The Print Pack contains a new photo cartridge and photo paper. sales) or www.epson.ca (Canadian sales). 49 Just replace it . Note: Use your printer not covered by Epson's warranty. Caution: To ensure good results, use a genuine PictureMate 200 Series photo cartridge and do not refill it without turning off and unplugging...
Basics
Page 66
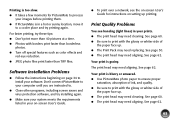
Your print is blurry or smeared. ● Use PictureMate photo paper to ensure proper saturation, absorption of ink, and quality. ● Be sure to print with the glossy or whiter side of the paper face up printing. For faster printing, try printing again. Software Installation Problems &#...pictures at a time. ● Photos with borders print faster than borderless photos. ● Turn off special features such as color effects and red-eye reduction. ● JPEG photo files print faster than TIFF files. Your print is grainy. Don't connect PictureMate to your computer until you are ...
Your print is blurry or smeared. ● Use PictureMate photo paper to ensure proper saturation, absorption of ink, and quality. ● Be sure to print with the glossy or whiter side of the paper face up printing. For faster printing, try printing again. Software Installation Problems &#...pictures at a time. ● Photos with borders print faster than borderless photos. ● Turn off special features such as color effects and red-eye reduction. ● JPEG photo files print faster than TIFF files. Your print is grainy. Don't connect PictureMate to your computer until you are ...

Basics
Page 68
The print head may damage PictureMate. ● Use only PictureMate photo paper or Epson Premium Photo Paper Glossy or Semigloss. (See page 4.) ● Store paper flat to enlarge and print only a part of it. See page 16. ● When you can adjust the amount of 20 sheets. ● Make sure your paper is beneath the arrow on the edge guides...
The print head may damage PictureMate. ● Use only PictureMate photo paper or Epson Premium Photo Paper Glossy or Semigloss. (See page 4.) ● Store paper flat to enlarge and print only a part of it. See page 16. ● When you can adjust the amount of 20 sheets. ● Make sure your paper is beneath the arrow on the edge guides...
Basics
Page 76
... contains enough ink to allow borderless, color printing of about the number of 20 different color photos. Epson has packaged the PictureMate Photo Cartridge with a range of included paper sheets. Our estimate of the number of photos you a pro-rated refund for the number of sheets returned, plus a maximum of the printer, or paper consumed by 150 sheets equals 27...
... contains enough ink to allow borderless, color printing of about the number of 20 different color photos. Epson has packaged the PictureMate Photo Cartridge with a range of included paper sheets. Our estimate of the number of photos you a pro-rated refund for the number of sheets returned, plus a maximum of the printer, or paper consumed by 150 sheets equals 27...
Basics
Page 77
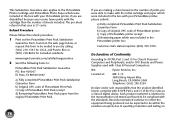
...paper which were included in the box with your PictureMate printer, please submit: a) Fully completed PictureMate Print Pack Satisfaction Guarantee Form b) Copy of Original UPC code of PictureMate printer c) Copy of PictureMate printer receipt d) Remaining paper which were included in the box with your PictureMate printer...This Satisfaction Guarantee also applies to the PictureMate Photo Cartridge and PictureMate Photo Paper which was included in that the product identified herein, complies with Class B Personal Computers: We: Epson America, Inc. Declaration of Conformity According ...
...paper which were included in the box with your PictureMate printer, please submit: a) Fully completed PictureMate Print Pack Satisfaction Guarantee Form b) Copy of Original UPC code of PictureMate printer c) Copy of PictureMate printer receipt d) Remaining paper which were included in the box with your PictureMate printer...This Satisfaction Guarantee also applies to the PictureMate Photo Cartridge and PictureMate Photo Paper which was included in that the product identified herein, complies with Class B Personal Computers: We: Epson America, Inc. Declaration of Conformity According ...

Basics
Page 90
I/F port for external devices USB port for computer Handle Power inlet Optional battery cover Cartridge release lever Photo cartridge Cartridge door Getting to Know PictureMate Paper support (load photo paper here) Edge guides Screen Memory card light Memory card slots Output tray (catches printed photos) Built-in CD burner (PictureMate Zoom only) EXT.
I/F port for external devices USB port for computer Handle Power inlet Optional battery cover Cartridge release lever Photo cartridge Cartridge door Getting to Know PictureMate Paper support (load photo paper here) Edge guides Screen Memory card light Memory card slots Output tray (catches printed photos) Built-in CD burner (PictureMate Zoom only) EXT.
Basics
Page 91
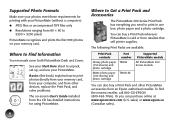
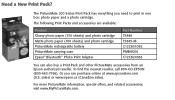
... www.MyPictureMate.com. Or you need to print in one box: photo paper and a photo cartridge. The following Print Packs and accessories are available: Product Glossy photo paper (150 sheets) and photo cartridge Matte photo paper (100 sheets) and photo cartridge PictureMate rechargeable battery PictureMate carrying case Epson® Bluetooth® Photo Print Adapter Part Number T5846 T5845-M C12C831082 PMBAG06 C12C824383 You can...
... www.MyPictureMate.com. Or you need to print in one box: photo paper and a photo cartridge. The following Print Packs and accessories are available: Product Glossy photo paper (150 sheets) and photo cartridge Matte photo paper (100 sheets) and photo cartridge PictureMate rechargeable battery PictureMate carrying case Epson® Bluetooth® Photo Print Adapter Part Number T5846 T5845-M C12C831082 PMBAG06 C12C824383 You can...
Start Here
Page 1
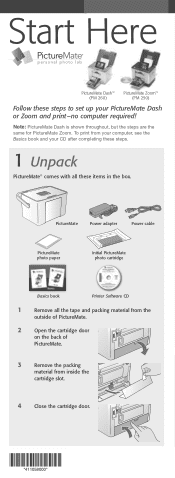
... the packing material from inside the cartridge slot. 4 Close the cartridge door. *411058000* *411058000* Note: PictureMate Dash is shown throughout, but the steps are the same for PictureMate Zoom. PictureMate Power adapter Power cable PictureMate photo paper Initial PictureMate photo cartridge Basics book Printer Software CD 1 Remove all these items in the box. To print from your computer, see the...
... the packing material from inside the cartridge slot. 4 Close the cartridge door. *411058000* *411058000* Note: PictureMate Dash is shown throughout, but the steps are the same for PictureMate Zoom. PictureMate Power adapter Power cable PictureMate photo paper Initial PictureMate photo cartridge Basics book Printer Software CD 1 Remove all these items in the box. To print from your computer, see the...

Start Here
Page 4
... sheets to slightly separate them. 5 Place your paper into the slot between the edge guides with genuine Epson® glossy photo paper made especially for printing lab quality photos. Load glossy side up . 4 Load Paper PictureMate comes with the glossy side up 6 Raise the photo viewer screen. this may damage PictureMate. 1 Move the handle to the back and open...
... sheets to slightly separate them. 5 Place your paper into the slot between the edge guides with genuine Epson® glossy photo paper made especially for printing lab quality photos. Load glossy side up . 4 Load Paper PictureMate comes with the glossy side up 6 Raise the photo viewer screen. this may damage PictureMate. 1 Move the handle to the back and open...
Start Here
Page 6
... or other devices. Also learn how to save photos to or print photos from a CD, replace your Print Pack (photo paper and photo cartridge), take care of the sun and don't leave it in your image up to print, and PictureMate will crop out the rest. Then check for... or to epson.com/support, select Printers, and select your original image. This does not change your product under Personal Photo Lab. Epson disclaims any and all rights in those marks. © 2007 Epson America, Inc. 5/07 CPD-23838 Printed in the Drivers & Downloads section. More on PictureMate Check your ...
... or other devices. Also learn how to save photos to or print photos from a CD, replace your Print Pack (photo paper and photo cartridge), take care of the sun and don't leave it in your image up to print, and PictureMate will crop out the rest. Then check for... or to epson.com/support, select Printers, and select your original image. This does not change your product under Personal Photo Lab. Epson disclaims any and all rights in those marks. © 2007 Epson America, Inc. 5/07 CPD-23838 Printed in the Drivers & Downloads section. More on PictureMate Check your ...


