
Literature/Product Sheet
Page 1
...AVR-1611 is both fast and easy, thanks to six measurement points - With 4 HDMI inputs, the AVR-591 also features upconversion of other A/V components, and the AVR1611 includes a handy on-screen...-converted to HDMI • 4 x HDMI in / 1 x HDMI out with On-Screen Display Connectivity & Future-ready Expandability • Power Amp Assign function, for system configuration flexibility, .... High level resolution filters for satellite speakers and also subwoofer State-of-the-art Denon Solutions for Maximizing Content Quality • Stable power supply for hundreds of standard definition...
...AVR-1611 is both fast and easy, thanks to six measurement points - With 4 HDMI inputs, the AVR-591 also features upconversion of other A/V components, and the AVR1611 includes a handy on-screen...-converted to HDMI • 4 x HDMI in / 1 x HDMI out with On-Screen Display Connectivity & Future-ready Expandability • Power Amp Assign function, for system configuration flexibility, .... High level resolution filters for satellite speakers and also subwoofer State-of-the-art Denon Solutions for Maximizing Content Quality • Stable power supply for hundreds of standard definition...

Literature/Product Sheet
Page 2
..., Kawasaki-shi, Kanagawa, 210-8569, Japan www.denon.com 17760410 A The power transformers, a source of vibration, have a 3D home theatre where you can play back the TV audio in using Dolby Pro Logic IIz playback, you needed to use • On-Screen Display With the AVR-1611's on-screen display, you 're adjusting the volume, or the...
..., Kawasaki-shi, Kanagawa, 210-8569, Japan www.denon.com 17760410 A The power transformers, a source of vibration, have a 3D home theatre where you can play back the TV audio in using Dolby Pro Logic IIz playback, you needed to use • On-Screen Display With the AVR-1611's on-screen display, you 're adjusting the volume, or the...

Owners Manual - English
Page 4
... for operations. NOTE This symbol indicates points to make detailed settings 36 Menu map 36 Examples of on-screen display and front display 37 Inputting characters 38 Input Setup 39 Audio Adjust 43 Manual Setup 48 Information 55 Operating the connected devices... 64 Surround 65 Explanation of terms 69 Troubleshooting 71 Resetting the microprocessor 72 Specifications 73 Accessories Check that the following parts are for purchasing this DENON product. q Owner's manual 1 w Warranty (for North America model only 1 e Service network list 1 r Remote control unit (RC-1146 1...
... for operations. NOTE This symbol indicates points to make detailed settings 36 Menu map 36 Examples of on-screen display and front display 37 Inputting characters 38 Input Setup 39 Audio Adjust 43 Manual Setup 48 Information 55 Operating the connected devices... 64 Surround 65 Explanation of terms 69 Troubleshooting 71 Resetting the microprocessor 72 Specifications 73 Accessories Check that the following parts are for purchasing this DENON product. q Owner's manual 1 w Warranty (for North America model only 1 e Service network list 1 r Remote control unit (RC-1146 1...
Owners Manual - English
Page 5
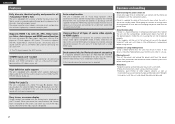
... going on using a chemical cleaner. • Benzene, paint thinner or other organic solvents as well as insecticide may result in use , on-screen display Simple settings are input to HDMI signals This unit is provided with an "Auto setup function" which automatically makes speaker settings best suited for the...and should support the ARC function. 4-HDMI inputs and 1-output The unit is required. Dock connecrivity for iPod and network streaming If an optional DENON control dock for iPod (ASD-3N, ASD-3W, ASD-51N or ASD-51W) is little difference in temperature before moving the unit. &#...
... going on using a chemical cleaner. • Benzene, paint thinner or other organic solvents as well as insecticide may result in use , on-screen display Simple settings are input to HDMI signals This unit is provided with an "Auto setup function" which automatically makes speaker settings best suited for the...and should support the ARC function. 4-HDMI inputs and 1-output The unit is required. Dock connecrivity for iPod and network streaming If an optional DENON control dock for iPod (ASD-3N, ASD-3W, ASD-51N or ASD-51W) is little difference in temperature before moving the unit. &#...

Owners Manual - English
Page 11
...Sp. :Yes Center Sp. :Yes Subwoofer :Yes Surround Sp. :Yes Next Retry [ENT]:Next NOTE If a connected speaker is displayed. Step2:Measurement MultEQ Please place microphone at ear height at the main listening position. • This step automatically checks the speaker ...to select "Next" and then press ENTER. Measurements can achieve a more effective correction of position 6 is displayed on the TV screen. When the setup microphone is connected, the following screen is selected, "Audyssey Auto Setup" closes. • In step 1, you will perform measurements at multiple ...
...Sp. :Yes Center Sp. :Yes Subwoofer :Yes Surround Sp. :Yes Next Retry [ENT]:Next NOTE If a connected speaker is displayed. Step2:Measurement MultEQ Please place microphone at ear height at the main listening position. • This step automatically checks the speaker ...to select "Next" and then press ENTER. Measurements can achieve a more effective correction of position 6 is displayed on the TV screen. When the setup microphone is connected, the following screen is selected, "Audyssey Auto Setup" closes. • In step 1, you will perform measurements at multiple ...

Owners Manual - English
Page 12
...setting Return to complete. Step4:Check MultEQ Please check the results of Dynamic Volume settings, see "Error messages" (vpage 10). Auto Setup is displayed, see page 47. Turn on • Use o to select "Yes", and then press ENTER. nn When turning Dynamic Volume off the ...version Basic version Step 3 Calculating Step 4 Check Step 5 Store ENGLISH Set up speakers (Audyssey® Auto Setup) Finish 10 On the Step 2 screen, use ui to select "Cancel", then select "Yes" using o p. Speaker Config.Check Distance Check Channel Level Check Crossover Freq.Check Next [ENT]:Select...
...setting Return to complete. Step4:Check MultEQ Please check the results of Dynamic Volume settings, see "Error messages" (vpage 10). Auto Setup is displayed, see page 47. Turn on • Use o to select "Yes", and then press ENTER. nn When turning Dynamic Volume off the ...version Basic version Step 3 Calculating Step 4 Check Step 5 Store ENGLISH Set up speakers (Audyssey® Auto Setup) Finish 10 On the Step 2 screen, use ui to select "Cancel", then select "Yes" using o p. Speaker Config.Check Distance Check Channel Level Check Crossover Freq.Check Next [ENT]:Select...

Owners Manual - English
Page 13
...Adjust the subwoofer's volume. • The displayed speaker could not be completed due to be made . Check Check the speaker configuration. The confirmation screen reappears. ENGLISH Error messages Parameter Check An error message is displayed if Audyssey® Auto Setup could not be... detected. • Check the connections of the displayed speaker. [ENT]:Select [RTN]:Back Speaker ...
...Adjust the subwoofer's volume. • The displayed speaker could not be completed due to be made . Check Check the speaker configuration. The confirmation screen reappears. ENGLISH Error messages Parameter Check An error message is displayed if Audyssey® Auto Setup could not be... detected. • Check the connections of the displayed speaker. [ENT]:Select [RTN]:Back Speaker ...

Owners Manual - English
Page 17
... 1.4a standards are input from external devices. HDMI control function (vpage 32) This function allows you want to display the menus superimposed on -screen display of the connected AV device. nnWhen video signals are input from the video connectors and the menu is connected, ...data encryption and authentication of the menus, status, etc., is changed. HDCP is superimposedz. • Status display: Not displayed. ENGLISH Important information How the on-screen display appears in addition to this unit and TV or the player need to support the copyright protection system known...
... 1.4a standards are input from external devices. HDMI control function (vpage 32) This function allows you want to display the menus superimposed on -screen display of the connected AV device. nnWhen video signals are input from the video connectors and the menu is connected, ...data encryption and authentication of the menus, status, etc., is changed. HDCP is superimposedz. • Status display: Not displayed. ENGLISH Important information How the on-screen display appears in addition to this unit and TV or the player need to support the copyright protection system known...

Owners Manual - English
Page 24
... in conjunction with extended bass or treble reproduction, we recommend playback in step 4, the following screen is not displayed, the iPod may not operate. • Note that DENON will accept no responsibility whatsoever for iPod. Incompatible characters are displayed. Also switch the input source to "DOCK" before disconnecting the iPod. w Set the iPod®...
... in conjunction with extended bass or treble reproduction, we recommend playback in step 4, the following screen is not displayed, the iPod may not operate. • Note that DENON will accept no responsibility whatsoever for iPod. Incompatible characters are displayed. Also switch the input source to "DOCK" before disconnecting the iPod. w Set the iPod®...

Owners Manual - English
Page 25
... on the main unit is connected, the iPod starts playback. NOTE iPod play function If iPod PLAY is pressed when power of this unit is displayed. "TV Out" at the iPod's "Slide show or video function. 1 Press and hold ) 1 8 9 3 2 RESTORER MEMORY TV POWER TV INPUT Return Manual search (fast-reverse/fast...data stored on an iPod equipped with the remote control unit can be obtained. Press iPod PLAY. • Power of this unit. 2 Watching the iPod's screen, use ui to select "Photos" or "Videos". • Depending on the iPod model, it may not be set the Remote mode. ENGLISH Playing an iPod...
... on the main unit is connected, the iPod starts playback. NOTE iPod play function If iPod PLAY is pressed when power of this unit is displayed. "TV Out" at the iPod's "Slide show or video function. 1 Press and hold ) 1 8 9 3 2 RESTORER MEMORY TV POWER TV INPUT Return Manual search (fast-reverse/fast...data stored on an iPod equipped with the remote control unit can be obtained. Press iPod PLAY. • Power of this unit. 2 Watching the iPod's screen, use ui to select "Photos" or "Videos". • Depending on the iPod model, it may not be set the Remote mode. ENGLISH Playing an iPod...

Owners Manual - English
Page 26
...) (vpage 41) return to 8 per block), then press CH +, CH - You can enter the receiving frequency directly to change frequencies continuously. • You can be displayed (default: 30 sec) at "Auto Preset" (vpage 40). G) and Channel (1 - 8) A1 - C8 D1 - D8 Default Settings 87.5 / 89.1 / 98.1 / 107.9 / 90.1 ... be preset. • Stations can specify the duration of the on /standby (Default : SONY) G1 - F8 90.1 MHz TV POWER TV power on -screen display to select "FM" or "AM". or 1 - 8 to select the desired preset channel. 2 Press MEMORY. 3 Press SHIFT to select the block (A...
...) (vpage 41) return to 8 per block), then press CH +, CH - You can enter the receiving frequency directly to change frequencies continuously. • You can be displayed (default: 30 sec) at "Auto Preset" (vpage 40). G) and Channel (1 - 8) A1 - C8 D1 - D8 Default Settings 87.5 / 89.1 / 98.1 / 107.9 / 90.1 ... be preset. • Stations can specify the duration of the on /standby (Default : SONY) G1 - F8 90.1 MHz TV POWER TV power on -screen display to select "FM" or "AM". or 1 - 8 to select the desired preset channel. 2 Press MEMORY. 3 Press SHIFT to select the block (A...

Owners Manual - English
Page 28
...20 - 23). 2 Press STANDARD to select the surround decoder to "Height" mode. w Shows a decoder that can be selected depends on the screen (v"Displaying the currently playing surround mode" at right). • Which decoder can be selected. • If the menu "Surround Parameter" - Advanced version ...Information 25 Height z This mode is suited for movie sources. Select the surround mode while viewing the display on the input signal, the settings of 2-channel sources recorded with the menu "Surround Parameter" - For an input signal that ...
...20 - 23). 2 Press STANDARD to select the surround decoder to "Height" mode. w Shows a decoder that can be selected depends on the screen (v"Displaying the currently playing surround mode" at right). • Which decoder can be selected. • If the menu "Surround Parameter" - Advanced version ...Information 25 Height z This mode is suited for movie sources. Select the surround mode while viewing the display on the input signal, the settings of 2-channel sources recorded with the menu "Surround Parameter" - For an input signal that ...

Owners Manual - English
Page 34
... this to use front speaker B. First install and connect the speakers to this case, go to step 5. 5 GWhen "Front B" is displayed. 3-1.Audyssey Auto Setup MultEQ Please place microphone at ear height at main listening position. Set for connecting the front height speakers to the FRONT... simultaneously. NOTE After performing Audyssey Auto Setup, do not change , perform Audyssey Auto Setup again. When the setup microphone is connected, the following screen is selected in step 4H q Use ui to the SURR. Amp Assign: ZONE2 Start Cancel [RTN]:Back 4 Use o p to the SURR...
... this to use front speaker B. First install and connect the speakers to this case, go to step 5. 5 GWhen "Front B" is displayed. 3-1.Audyssey Auto Setup MultEQ Please place microphone at ear height at main listening position. Set for connecting the front height speakers to the FRONT... simultaneously. NOTE After performing Audyssey Auto Setup, do not change , perform Audyssey Auto Setup again. When the setup microphone is connected, the following screen is selected in step 4H q Use ui to the SURR. Amp Assign: ZONE2 Start Cancel [RTN]:Back 4 Use o p to the SURR...

Owners Manual - English
Page 40
.... e Press ENTER to set to set . e The number of the current selected setting menu is displayed here. Top menu display Display when changing settings On-screen Display w q MENU 1.Audio Adjust 2.Information 3.Auto Setup 4.Manual Setup 5.Input Setup e [ENT]:Select q 5-1.Input Assign Default ...When ui is displayed. For inputting characters on a keyboard screen or with the number buttons on the display. Examples of on-screen display and front display Below we describe typical examples of displays on the TV screen and on the set . w The selected line is displayed. e The number...
.... e Press ENTER to set to set . e The number of the current selected setting menu is displayed here. Top menu display Display when changing settings On-screen Display w q MENU 1.Audio Adjust 2.Information 3.Auto Setup 4.Manual Setup 5.Input Setup e [ENT]:Select q 5-1.Input Assign Default ...When ui is displayed. For inputting characters on a keyboard screen or with the number buttons on the display. Examples of on-screen display and front display Below we describe typical examples of displays on the TV screen and on the set . w The selected line is displayed. e The number...

Owners Manual - English
Page 44
... selection. Yes : Reset to previous menu 41 input connectors assigned to the input sources. • At time of purchase, the settings of input assign menu screen displays 5-1.Input Assign Default HDMI Digi Comp BD 1 DVD 2 q TV SAT/CBL O1 3 C1 1 GAME 4 V.AUX we r [ENT]:Select [RTN]:Back q Input Source w HDMI input e Digital...
... selection. Yes : Reset to previous menu 41 input connectors assigned to the input sources. • At time of purchase, the settings of input assign menu screen displays 5-1.Input Assign Default HDMI Digi Comp BD 1 DVD 2 q TV SAT/CBL O1 3 C1 1 GAME 4 V.AUX we r [ENT]:Select [RTN]:Back q Input Source w HDMI input e Digital...

Owners Manual - English
Page 51
... details Manual Setup Set when changing Audyssey® Auto Setup settings, or when changing the audio, video, display or other than "OFF", is displayed. • Pressing RESTORER on the TV screen. 4 Press ui to select the menu to be set or operated. 5 Press ENTER to enter the ...RTN]:Back [ENT]:Select [RTN]:Back Option Setup (vpage 53) 4-5.Option Setup 1.Volume Control 2.Source Delete 3.On-Screen Display 4.Remote Preset Codes 5.Quick Select Name 6.ZONE Rename 7.Display [ENT]:Select [RTN]:Back 48 Remote control operation buttons Move the cursor (Up/Down/Left/Right) Confirm the setting ...
... details Manual Setup Set when changing Audyssey® Auto Setup settings, or when changing the audio, video, display or other than "OFF", is displayed. • Pressing RESTORER on the TV screen. 4 Press ui to select the menu to be set or operated. 5 Press ENTER to enter the ...RTN]:Back [ENT]:Select [RTN]:Back Option Setup (vpage 53) 4-5.Option Setup 1.Volume Control 2.Source Delete 3.On-Screen Display 4.Remote Preset Codes 5.Quick Select Name 6.ZONE Rename 7.Display [ENT]:Select [RTN]:Back 48 Remote control operation buttons Move the cursor (Up/Down/Left/Right) Confirm the setting ...

Owners Manual - English
Page 56
... is not activated. Full : The sound is muted entirely. -40dB : The sound is attenuated by 20 dB down . On-Screen Display Make the settings related to previous menu 53 Setting items Level Lch Adjust the left channel output level. Mute Level Set the amount ...Source Delete Remove from the last session. - - - (0) : Always mute when power is turned on . Screensaver : Make screensaver settings. • ON : The screen saver is activated during menu display, iPod or TUNER screen display if no operation is selected with ZONE2. When you press uio p, the screensaver is cancelled and the...
... is not activated. Full : The sound is muted entirely. -40dB : The sound is attenuated by 20 dB down . On-Screen Display Make the settings related to previous menu 53 Setting items Level Lch Adjust the left channel output level. Mute Level Set the amount ...Source Delete Remove from the last session. - - - (0) : Always mute when power is turned on . Screensaver : Make screensaver settings. • ON : The screen saver is activated during menu display, iPod or TUNER screen display if no operation is selected with ZONE2. When you press uio p, the screensaver is cancelled and the...
Owners Manual - English
Page 57
...Rename Label : Select this unit. Remote Preset Codes Search a preset code to / Play / For 4. iPod : Set the iPod screen display time when the input source is set templates. 1. See "Registering preset codes" (vpage 56). OFF : Turn protection off . ENGLISH Manual... Setup Setting items On-Screen Display (Continued) Setting details Master Volume : Display the master volume during adjustment. • Bottom : Display at the bottom. • Top : Display at the top. • OFF : Turn display off . Setting items Setting details Zone Rename • ...
...Rename Label : Select this unit. Remote Preset Codes Search a preset code to / Play / For 4. iPod : Set the iPod screen display time when the input source is set templates. 1. See "Registering preset codes" (vpage 56). OFF : Turn protection off . ENGLISH Manual... Setup Setting items On-Screen Display (Continued) Setting details Master Volume : Display the master volume during adjustment. • Bottom : Display at the bottom. • Top : Display at the top. • OFF : Turn display off . Setting items Setting details Zone Rename • ...

Owners Manual - English
Page 60
...1.Volume Control 2.Source Delete 3.On-Screen Display 4.Remote Preset Codes 5.Quick Select Name 6.Zone Rename 7.Display [ENT]:Select [RTN]:Back 5 Pressing ui, select the category of brand names, the pages can be used to check the operation. • If the device is displayed as 1, A to check device[e.g.DeviceON...names that start with the device to step 14. Advanced version Information 57 Then press ENTER. Brand[1/1] - DVD - Daewoo Dantax Denon Disney DSE Durabrand [ENT]:Select [RTN]:Back • When there are several pages of device for registering remote control codes and ...
...1.Volume Control 2.Source Delete 3.On-Screen Display 4.Remote Preset Codes 5.Quick Select Name 6.Zone Rename 7.Display [ENT]:Select [RTN]:Back 5 Pressing ui, select the category of brand names, the pages can be used to check the operation. • If the device is displayed as 1, A to check device[e.g.DeviceON...names that start with the device to step 14. Advanced version Information 57 Then press ENTER. Brand[1/1] - DVD - Daewoo Dantax Denon Disney DSE Durabrand [ENT]:Select [RTN]:Back • When there are several pages of device for registering remote control codes and ...

Owners Manual - English
Page 77
... Menu map 36 74 Mode 44 MP3 70 MPEG 70 MultEQ 46 Mute Level 53 vvO On-Screen Display 53 Optical cable 16 Option Setup 53 Display 54 On-Screen Display 53 Quick Select Name 54 Remote Preset Codes 54 Setup Lock 54 Source Delete 53 Volume Control 53 Zone Rename 54 vvP Panorama 44...
... Menu map 36 74 Mode 44 MP3 70 MPEG 70 MultEQ 46 Mute Level 53 vvO On-Screen Display 53 Optical cable 16 Option Setup 53 Display 54 On-Screen Display 53 Quick Select Name 54 Remote Preset Codes 54 Setup Lock 54 Source Delete 53 Volume Control 53 Zone Rename 54 vvP Panorama 44...


