Owner's Manual
Page 6
7 Using the Camera 69 Accessing the Camera's Help File 69 Manually Adjusting the Camera Settings 70 Creating a Picture or a Video 70 8 Using ExpressCards 71 ExpressCard Blanks 71 Installing an ExpressCard 72 Removing an ExpressCard or Blank 72 9 Using the Memory Card Reader 73 Memory Card Blanks 73 Installing a Memory Card 73 Removing a Memory Card or Blank 74 10 Setting Up and Using Networks 75 Connecting a Network or Broadband Modem Cable 75 Setting Up a Network in the Microsoft Windows Vista® Operating System 76 Wireless Local Area Network (WLAN 76...
7 Using the Camera 69 Accessing the Camera's Help File 69 Manually Adjusting the Camera Settings 70 Creating a Picture or a Video 70 8 Using ExpressCards 71 ExpressCard Blanks 71 Installing an ExpressCard 72 Removing an ExpressCard or Blank 72 9 Using the Memory Card Reader 73 Memory Card Blanks 73 Installing a Memory Card 73 Removing a Memory Card or Blank 74 10 Setting Up and Using Networks 75 Connecting a Network or Broadband Modem Cable 75 Setting Up a Network in the Microsoft Windows Vista® Operating System 76 Wireless Local Area Network (WLAN 76...
Owner's Manual
Page 10
... 129 Turning Off Your Computer 129 Before Working Inside Your Computer 130 Hard Drive 131 Removing the Hard Drive 132 Replacing the Hard Drive 133 Returning a Hard Drive to Dell 133 Center Control Cover and Hinge Covers 134 Removing the Center Control Cover and Hinge Covers 134 Replacing the Center Control Cover and Hinge Covers 136 Keyboard 136 Removing the Keyboard 137 Replacing the Keyboard 138 Memory 138 Removing the Memory Module 138 Replacing the Memory Module 140 Subscriber Identity Module 142 Wireless Mini-Cards 142 Removing a WLAN Card 143 Replacing a WLAN Card...
... 129 Turning Off Your Computer 129 Before Working Inside Your Computer 130 Hard Drive 131 Removing the Hard Drive 132 Replacing the Hard Drive 133 Returning a Hard Drive to Dell 133 Center Control Cover and Hinge Covers 134 Removing the Center Control Cover and Hinge Covers 134 Replacing the Center Control Cover and Hinge Covers 136 Keyboard 136 Removing the Keyboard 137 Replacing the Keyboard 138 Memory 138 Removing the Memory Module 138 Replacing the Memory Module 140 Subscriber Identity Module 142 Wireless Mini-Cards 142 Removing a WLAN Card 143 Replacing a WLAN Card...
Owner's Manual
Page 11
... 148 Internal Card With Bluetooth® Wireless Technology 149 Removing the Card 149 Replacing the Card 150 14 Traveling With Your Computer 151 Identifying Your Computer 151 Packing the Computer 151 Travel Tips 152 Traveling by Air 152 15 Getting Help 153 Obtaining Assistance 153 Technical Support and Customer Service . . . . . 154 DellConnect 154 Online Services 154 AutoTech Service 155 Automated Order-Status Service 155 Problems...
... 148 Internal Card With Bluetooth® Wireless Technology 149 Removing the Card 149 Replacing the Card 150 14 Traveling With Your Computer 151 Identifying Your Computer 151 Packing the Computer 151 Travel Tips 152 Traveling by Air 152 15 Getting Help 153 Obtaining Assistance 153 Technical Support and Customer Service . . . . . 154 DellConnect 154 Online Services 154 AutoTech Service 155 Automated Order-Status Service 155 Problems...

Owner's Manual
Page 33
... Connects USB devices, such as WLAN cards and internal cards with a plastic blank installed in your computer to rapidly turn off or on any wireless devices such as a mouse, keyboard, or printer. Lets you attach a commercially available antitheft device to an audio device. For more information see "Dell Wi-Fi Catcher™ Network Locator" on page 83). 1 23 1 off : Disables wireless devices. 2 on page 71. When enabled through Dell QuickSet, this switch can also use...
... Connects USB devices, such as WLAN cards and internal cards with a plastic blank installed in your computer to rapidly turn off or on any wireless devices such as a mouse, keyboard, or printer. Lets you attach a commercially available antitheft device to an audio device. For more information see "Dell Wi-Fi Catcher™ Network Locator" on page 83). 1 23 1 off : Disables wireless devices. 2 on page 71. When enabled through Dell QuickSet, this switch can also use...
Owner's Manual
Page 70
... and click Launch Webcam Console. 2 In the Webcam Console window: • Click the Camera tab to adjust video settings, such as contrast and brightness. • Click the Effects tab to adjust audio settings, such as the volume level. The blue camera light turns on your hard drive. To record a video, click Record. Manually Adjusting the Camera Settings If you do not want to record. The screen shows you can manually adjust the camera settings. 1 Right-click the...
... and click Launch Webcam Console. 2 In the Webcam Console window: • Click the Camera tab to adjust video settings, such as contrast and brightness. • Click the Effects tab to adjust audio settings, such as the volume level. The blue camera light turns on your hard drive. To record a video, click Record. Manually Adjusting the Camera Settings If you do not want to record. The screen shows you can manually adjust the camera settings. 1 Right-click the...
Owner's Manual
Page 82
... the Dell Support website at support.dell.com and on the screen. 82 Setting Up and Using Networks OR 1 Click Start → All Programs→ Dell Wireless. 2 Click Dell Wireless Broadband and follow the instructions on the media included with your Mobile Broadband card if you purchased the card separately from your cellular service provider. Hardware screen, you can view the type of Mobile Broadband card installed in the Windows Help and Support Center: 1 Click Start...
... the Dell Support website at support.dell.com and on the screen. 82 Setting Up and Using Networks OR 1 Click Start → All Programs→ Dell Wireless. 2 Click Dell Wireless Broadband and follow the instructions on the media included with your Mobile Broadband card if you purchased the card separately from your cellular service provider. Hardware screen, you can view the type of Mobile Broadband card installed in the Windows Help and Support Center: 1 Click Start...
Owner's Manual
Page 93
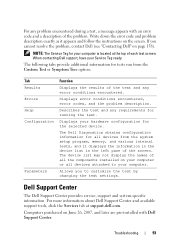
... about Dell Support Center and available support tools, click the Services tab at the top of all the components installed on the screen. Displays error conditions encountered, error codes, and the problem description. Describes the test and any requirements for tests run from the system setup program, memory, and various internal tests, and it appears and follow the instructions on your computer or all devices from...
... about Dell Support Center and available support tools, click the Services tab at the top of all the components installed on the screen. Displays error conditions encountered, error codes, and the problem description. Describes the test and any requirements for tests run from the system setup program, memory, and various internal tests, and it appears and follow the instructions on your computer or all devices from...
Owner's Manual
Page 94
Dell Support 3 The Dell Support 3 is customized for information about your warranty, ordering accessories and details about installing recommended drivers and downloads. In addition, using your Service Tag, Dell can link you can download Dell Support Center from the Services page at the top of the Dell Support Center home page displays your computer's model number along with its Service Tag, Express Service code, and warranty expiration details. This utility provides self-support information, software updates, and health...
Dell Support 3 The Dell Support 3 is customized for information about your warranty, ordering accessories and details about installing recommended drivers and downloads. In addition, using your Service Tag, Dell can link you can download Dell Support Center from the Services page at the top of the Dell Support Center home page displays your computer's model number along with its Service Tag, Express Service code, and warranty expiration details. This utility provides self-support information, software updates, and health...
Owner's Manual
Page 96
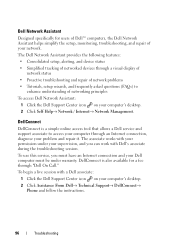
...; Network / Internet→ Network Management. Dell Network Assistant Designed specifically for a fee through an Internet connection, diagnose your problem and repair it. The associate works with your permission under your supervision, and you must have an Internet connection and your network. The Dell Network Assistant provides the following features: • Consolidated setup, alerting, and device status • Simplified tracking of networked devices through a visual display of network status • Proactive troubleshooting and repair of your Dell...
...; Network / Internet→ Network Management. Dell Network Assistant Designed specifically for a fee through an Internet connection, diagnose your problem and repair it. The associate works with your permission under your supervision, and you must have an Internet connection and your network. The Dell Network Assistant provides the following features: • Consolidated setup, alerting, and device status • Simplified tracking of networked devices through a visual display of network status • Proactive troubleshooting and repair of your Dell...

Owner's Manual
Page 111
... the card activation instructions located within the Dell Mobile Broadband Card Utility. When the power light is not a Dellbranded card, see "Using the Sleep Power State" on the computer. NOTE: The icon appears in the main window: • No card detected - A C T I V A T E T H E M O B I L E B R O A D B A N D E X P R E S S C A R D - If your plan coverage and supported services. CAUTION: Before you complete these checks. Troubleshooting 111 You can connect to verify the status of your WWAN service - CHECK THE POWER LIGHT - Double...
... the card activation instructions located within the Dell Mobile Broadband Card Utility. When the power light is not a Dellbranded card, see "Using the Sleep Power State" on the computer. NOTE: The icon appears in the main window: • No card detected - A C T I V A T E T H E M O B I L E B R O A D B A N D E X P R E S S C A R D - If your plan coverage and supported services. CAUTION: Before you complete these checks. Troubleshooting 111 You can connect to verify the status of your WWAN service - CHECK THE POWER LIGHT - Double...
Owner's Manual
Page 117
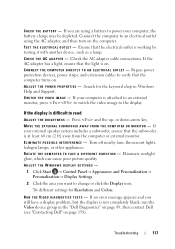
... using a battery to change or click the Display icon. Connect the computer to read AD J U S T T H E BRIGHTNESS - TEST THE ELECTRICAL OUTLET - Bypass power protection devices, power strips, and extension cables to the display. If your computer is attached to an external monitor, press to switch the video image to verify that the light is working by testing it with another device, such as a lamp. or down-arrow key. S WITCH T H E VIDEO IMAGE - Troubleshooting...
... using a battery to change or click the Display icon. Connect the computer to read AD J U S T T H E BRIGHTNESS - TEST THE ELECTRICAL OUTLET - Bypass power protection devices, power strips, and extension cables to the display. If your computer is attached to an external monitor, press to switch the video image to verify that the light is working by testing it with another device, such as a lamp. or down-arrow key. S WITCH T H E VIDEO IMAGE - Troubleshooting...
Owner's Manual
Page 119
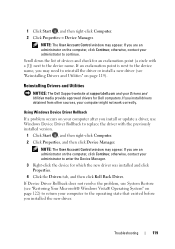
... to enter the Device Manager. 3 Right-click the device for Dell computers. If Device Driver Rollback does not resolve the problem, use Windows Device Driver Rollback to replace the driver with a [!]) next to the operating state that existed before you are an administrator on page 119). NOTE: The User Account Control window may appear. NOTE: The User Account Control window may appear. Troubleshooting 119 otherwise, contact your computer after you install or update a driver, use System Restore...
... to enter the Device Manager. 3 Right-click the device for Dell computers. If Device Driver Rollback does not resolve the problem, use Windows Device Driver Rollback to replace the driver with a [!]) next to the operating state that existed before you are an administrator on page 119). NOTE: The User Account Control window may appear. NOTE: The User Account Control window may appear. Troubleshooting 119 otherwise, contact your computer after you install or update a driver, use System Restore...
Owner's Manual
Page 121
... of the device for your device. NOTE: The User Account Control window may not yet be available. otherwise, contact your administrator to your computer. Troubleshooting Software and Hardware Problems in the previous section, click Start , and then right-click Computer. 2 Click Properties→ Device Manager. NOTE: Windows Vista® is detected but incorrectly configured, use Windows Vista Help and Support to resolve the incompatibility. Troubleshooting 121 Check with the driver installation (see...
... of the device for your device. NOTE: The User Account Control window may not yet be available. otherwise, contact your administrator to your computer. Troubleshooting Software and Hardware Problems in the previous section, click Start , and then right-click Computer. 2 Click Properties→ Device Manager. NOTE: Windows Vista® is detected but incorrectly configured, use Windows Vista Help and Support to resolve the incompatibility. Troubleshooting 121 Check with the driver installation (see...
Owner's Manual
Page 123
... Support. 2 Type System Restore in an undesirable operating state. Restoring the Computer to an Earlier Operating State If problems occur after you install a device driver, use System Restore. See the Windows Help and Support Center for the Windows default view, so they may not apply if you set your Dell computer to resolve the problem. Under Tasks, click Create a restore point or change settings. To access the Windows Help and Support Center, click Start → Help and Support...
... Support. 2 Type System Restore in an undesirable operating state. Restoring the Computer to an Earlier Operating State If problems occur after you install a device driver, use System Restore. See the Windows Help and Support Center for the Windows default view, so they may not apply if you set your Dell computer to resolve the problem. Under Tasks, click Create a restore point or change settings. To access the Windows Help and Support Center, click Start → Help and Support...
Owner's Manual
Page 138
... 2, remove it clicks and pull down on the system board. Your computer has two user-accessible SODIMM sockets that can increase your computer memory by your computer. Failure to do so could result in the connector labeled "DIMM2." NOTE: Memory modules purchased from Dell are intended for information on the back of the keyboard. 4 Replace the hinge covers and the center control cover...
... 2, remove it clicks and pull down on the system board. Your computer has two user-accessible SODIMM sockets that can increase your computer memory by your computer. Failure to do so could result in the connector labeled "DIMM2." NOTE: Memory modules purchased from Dell are intended for information on the back of the keyboard. 4 Replace the hinge covers and the center control cover...
Owner's Manual
Page 169
An exception is the External Hot Key option, which you can use system setup as follows: • To set through system setup. The system setup screens display the current setup information and settings for your computer work incorrectly. Certain changes might make your computer, such as the amount of the options available in system setup, thus overriding options that you set or change user-selectable features such as your computer password • To verify...
An exception is the External Hot Key option, which you can use system setup as follows: • To set through system setup. The system setup screens display the current setup information and settings for your computer work incorrectly. Certain changes might make your computer, such as the amount of the options available in system setup, thus overriding options that you set or change user-selectable features such as your computer password • To verify...
Owner's Manual
Page 170
... appears, press immediately. To the right of each screen, the system setup options are listed across the bottom of the screen. You can control the boot sequence and enable/disable devices using the Boot Order page of the screen displays help information for new settings to start the operating system. Options or values that you reboot the computer for the currently highlighted option; Commonly Used Options Certain options require that you see "Performing a One-Time...
... appears, press immediately. To the right of each screen, the system setup options are listed across the bottom of the screen. You can control the boot sequence and enable/disable devices using the Boot Order page of the screen displays help information for new settings to start the operating system. Options or values that you reboot the computer for the currently highlighted option; Commonly Used Options Certain options require that you see "Performing a One-Time...
Owner's Manual
Page 191
... networks. Microsoft Windows® Vista™ security feature that plugs in computers with security software enhances network and computer security by enabling features such as a USB-compatible keyboard, mouse, joystick, scanner, set of time when there is usually faster than relying on your computer. USB devices can be connected and disconnected while the computer is turned on the system board (in to video functions. user account control- uninterruptible power supply - USB...
... networks. Microsoft Windows® Vista™ security feature that plugs in computers with security software enhances network and computer security by enabling features such as a USB-compatible keyboard, mouse, joystick, scanner, set of time when there is usually faster than relying on your computer. USB devices can be connected and disconnected while the computer is turned on the system board (in to video functions. user account control- uninterruptible power supply - USB...
Owner's Manual
Page 195
See sound B battery charge gauge, 45 charging, 47 checking the charge, 44 performance, 43 power meter, 45 removing, 48 storing, 49 blanks ExpressCards, 71, 73 removing, 72, 74 Bluetooth wireless technology card device status light, 29 installing, 149 Blu-ray Disc, 56, 97 boot sequence, 170 brightness adjusting, 41 C carnet, 152 CD blank, 55 CD-RW drive problems, 97 drive problems, 97 Check Disk, 98 cleaning display, 172 keyboard, 172 media, 173 mouse, 173 touch pad, 173 computer crashes, 107...
See sound B battery charge gauge, 45 charging, 47 checking the charge, 44 performance, 43 power meter, 45 removing, 48 storing, 49 blanks ExpressCards, 71, 73 removing, 72, 74 Bluetooth wireless technology card device status light, 29 installing, 149 Blu-ray Disc, 56, 97 boot sequence, 170 brightness adjusting, 41 C carnet, 152 CD blank, 55 CD-RW drive problems, 97 drive problems, 97 Check Disk, 98 cleaning display, 172 keyboard, 172 media, 173 mouse, 173 touch pad, 173 computer crashes, 107...
Owner's Manual
Page 200
... V video problems, 116 video controller determining configuration, 25 volume adjusting, 114 W warranty information, 14 Windows Device Driver Rollback, 119 Windows Easy Transfer wizard, 21 Windows Vista Program Compatibility wizard, 108 reinstalling, 123, 125 System Restore, 122-123 Windows Easy Transfer wizard, 21 wizards Program Compatibility wizard, 108 Windows Easy Transfer, 21 WLAN, 143 installing Mini-Card, 142 WWAN installing, 145 See Mobile Broadband 200 Index system setup program commonly used options, 170 screens...
... V video problems, 116 video controller determining configuration, 25 volume adjusting, 114 W warranty information, 14 Windows Device Driver Rollback, 119 Windows Easy Transfer wizard, 21 Windows Vista Program Compatibility wizard, 108 reinstalling, 123, 125 System Restore, 122-123 Windows Easy Transfer wizard, 21 wizards Program Compatibility wizard, 108 Windows Easy Transfer, 21 WLAN, 143 installing Mini-Card, 142 WWAN installing, 145 See Mobile Broadband 200 Index system setup program commonly used options, 170 screens...


