Owner's Manual
Page 4
... Removing the Input/Output (I/O) board...34 Installing the I/O Board...35 3 System Setup...37 Boot Sequence...37 Navigation Keys...37 System Setup Options...38 Updating the BIOS ...42 System and Setup Password...42 Assigning a System Password and Setup Password 42 Deleting or Changing an Existing System and/or Setup Password 43 4 Diagnostics...
... Removing the Input/Output (I/O) board...34 Installing the I/O Board...35 3 System Setup...37 Boot Sequence...37 Navigation Keys...37 System Setup Options...38 Updating the BIOS ...42 System and Setup Password...42 Assigning a System Password and Setup Password 42 Deleting or Changing an Existing System and/or Setup Password 43 4 Diagnostics...
Owner's Manual
Page 37
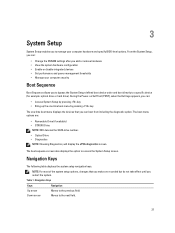
...). The boot-menu options are recorded but do not take effect until you restart the system. During the Power-on Self Test (POST), when the Dell logo appears, you can: • Access System Setup by pressing key • Bring up the one-time boot menu by pressing key The one-time...; View the system hardware configuration • Enable or disable integrated devices • Set performance and power management thresholds • Manage your computer hardware and specify BIOS‐level options.
...). The boot-menu options are recorded but do not take effect until you restart the system. During the Power-on Self Test (POST), when the Dell logo appears, you can: • Access System Setup by pressing key • Bring up the one-time boot menu by pressing key The one-time...; View the system hardware configuration • Enable or disable integrated devices • Set performance and power management thresholds • Manage your computer hardware and specify BIOS‐level options.

Owner's Manual
Page 38
.... Pressing in the field. The table below defines the function of the processor. CPU Cache L1 Cache Displays the processor L1 cache size. 38 BIOS Version Displays the BIOS revision. Keys Spacebar Navigation Allows you to the next focus area. Displays the System Setup help file. Expands or collapses a drop‐down...
.... Pressing in the field. The table below defines the function of the processor. CPU Cache L1 Cache Displays the processor L1 cache size. 38 BIOS Version Displays the BIOS revision. Keys Spacebar Navigation Allows you to the next focus area. Displays the System Setup help file. Expands or collapses a drop‐down...
Owner's Manual
Page 42
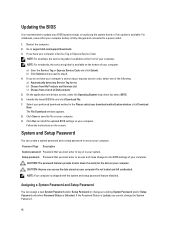
...and/or Setup Password or change the System Password. 42 b) Click Submit and proceed to support.dell.com/support/downloads. 3. CAUTION: The password features provide a basic level of all Dell products 5. NOTE: Your computer is shipped with the system and setup password feature disabled. Go...unattended. click Download Now. Restart the computer. 2. On the application and drivers screen, under the Operating System drop-down list, select BIOS. 6. If you have your computer. The File Download window appears. 8. CAUTION: Anyone can create a system password and a setup password...
...and/or Setup Password or change the System Password. 42 b) Click Submit and proceed to support.dell.com/support/downloads. 3. CAUTION: The password features provide a basic level of all Dell products 5. NOTE: Your computer is shipped with the system and setup password feature disabled. Go...unattended. click Download Now. Restart the computer. 2. On the application and drivers screen, under the Operating System drop-down list, select BIOS. 6. If you have your computer. The File Download window appears. 8. CAUTION: Anyone can create a system password and a setup password...

Owner's Manual
Page 43
...following special characters are not allowed. - Type the setup password that you entered earlier and click OK. 5. The computer reboots. In the System BIOS or System Setup screen, select System Security and press . In the System Security screen, verify that Password Status is Unlocked. 3. If you ...entered earlier and click OK. 7. In the System BIOS or System Setup screen, select System Security and press . A message prompts you to save the changes. 6. To enter the System Setup, press ...
...following special characters are not allowed. - Type the setup password that you entered earlier and click OK. 5. The computer reboots. In the System BIOS or System Setup screen, select System Security and press . In the System Security screen, verify that Password Status is Unlocked. 3. If you ...entered earlier and click OK. 7. In the System BIOS or System Setup screen, select System Security and press . A message prompts you to save the changes. 6. To enter the System Setup, press ...
Owner's Manual
Page 45
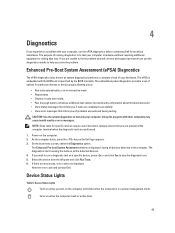
...without requiring additional equipment or risking data loss. Enhanced Pre-Boot System Assessment (ePSA) Diagnostics The ePSA diagnostics (also known as the Dell logo appears. 3. Power-on when the computer reads or writes data. 45 The Enhanced Pre-boot System Assessment window is displayed, listing... or save test results • Run thorough tests to introduce additional test options to test your hardware. Using this program with the BIOS and is embedded with other computers may cause invalid results or error messages. As the computer boots, press the key as system diagnostics...
...without requiring additional equipment or risking data loss. Enhanced Pre-Boot System Assessment (ePSA) Diagnostics The ePSA diagnostics (also known as the Dell logo appears. 3. Power-on when the computer reads or writes data. 45 The Enhanced Pre-boot System Assessment window is displayed, listing... or save test results • Run thorough tests to introduce additional test options to test your hardware. Using this program with the BIOS and is embedded with other computers may cause invalid results or error messages. As the computer boots, press the key as system diagnostics...
Owner's Manual
Page 46
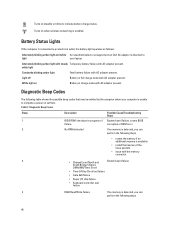
... charge status. white light Constantly blinking amber light Fatal battery failure with AC adapter present. Diagnostic Beep Codes Beep 1 Description BIOS ROM checksum in progress of failure. Battery Status Lights If the computer is connected to an electrical outlet, the battery light ...operates as follows: Alternately blinking amber light and white An unauthenticated or unsupported non-Dell AC adapter is enabled. Possible Cause/Troubleshooting Steps System board failure, covers BIOS corruption or ROM error 2 No RAM detected If no memory is detected, you can ...
... charge status. white light Constantly blinking amber light Fatal battery failure with AC adapter present. Diagnostic Beep Codes Beep 1 Description BIOS ROM checksum in progress of failure. Battery Status Lights If the computer is connected to an electrical outlet, the battery light ...operates as follows: Alternately blinking amber light and white An unauthenticated or unsupported non-Dell AC adapter is enabled. Possible Cause/Troubleshooting Steps System board failure, covers BIOS corruption or ROM error 2 No RAM detected If no memory is detected, you can ...

Owner's Manual
Page 47
Reseat the battery. If issue persists, there can be an issue with the coin-cell battery or the connector (that memory if the issue persists • issue with the memory connector CMOS battery failure. Beep 5 6 7 8 Description Real-time clock power fail Video BIOS Test Failure Processor Failure Display Possible Cause/Troubleshooting Steps • reseat the memory if an additional memory is available • install that will involve replacing the system board) Video card failure Processor failure Display failure 47
Reseat the battery. If issue persists, there can be an issue with the coin-cell battery or the connector (that memory if the issue persists • issue with the memory connector CMOS battery failure. Beep 5 6 7 8 Description Real-time clock power fail Video BIOS Test Failure Processor Failure Display Possible Cause/Troubleshooting Steps • reseat the memory if an additional memory is available • install that will involve replacing the system board) Video card failure Processor failure Display failure 47


