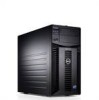
Hardware Owner's Manual
Page 79
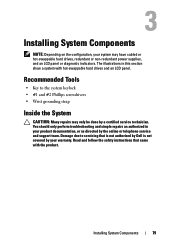
... or non-redundant power supplies, and an LCD panel or diagnostic indicators. Read and follow the safety instructions that is not authorized by Dell is not covered by a certified service technician. The illustrations in your system may only be done by your warranty. Recommended Tools •...an LCD panel. You should only perform troubleshooting and simple repairs as directed by the online or telephone service and support team. Installing System Components NOTE: Depending on the configuration, your product documentation, or as authorized in this section show a system with the ...
... or non-redundant power supplies, and an LCD panel or diagnostic indicators. Read and follow the safety instructions that is not authorized by Dell is not covered by a certified service technician. The illustrations in your system may only be done by your warranty. Recommended Tools •...an LCD panel. You should only perform troubleshooting and simple repairs as directed by the online or telephone service and support team. Installing System Components NOTE: Depending on the configuration, your product documentation, or as authorized in this section show a system with the ...
Hardware Owner's Manual
Page 85
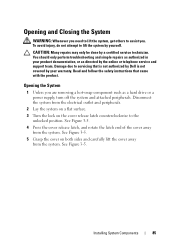
... position. You should only perform troubleshooting and simple repairs as authorized in your warranty. Read and follow the safety instructions that is not authorized by Dell is not covered by your product documentation, or as a hard drive or a power supply, turn off the system and attached peripherals. Damage due to servicing... to lift the system, get others to assist you are removing a hot-swap component such as directed by the online or telephone service and support team.
... position. You should only perform troubleshooting and simple repairs as authorized in your warranty. Read and follow the safety instructions that is not authorized by Dell is not covered by your product documentation, or as a hard drive or a power supply, turn off the system and attached peripherals. Damage due to servicing... to lift the system, get others to assist you are removing a hot-swap component such as directed by the online or telephone service and support team.

Hardware Owner's Manual
Page 88
... sink have had sufficient time to cool before you touch them. The system may only be done by the online or telephone service and support team. Removing the Cooling Shroud 1 Turn off the system and attached peripherals. See Figure 3-6. 5 Hold the touch point and rotate the cooling shroud 180° away... stabilizer. Cooling Shroud The cooling shroud covers the processor, heat sink, and memory modules, and provides air flow to servicing that is not authorized by Dell is not covered by your system with the product. CAUTION: Never operate your warranty. Damage due to these components.
... sink have had sufficient time to cool before you touch them. The system may only be done by the online or telephone service and support team. Removing the Cooling Shroud 1 Turn off the system and attached peripherals. See Figure 3-6. 5 Hold the touch point and rotate the cooling shroud 180° away... stabilizer. Cooling Shroud The cooling shroud covers the processor, heat sink, and memory modules, and provides air flow to servicing that is not authorized by Dell is not covered by your system with the product. CAUTION: Never operate your warranty. Damage due to these components.
Hardware Owner's Manual
Page 95
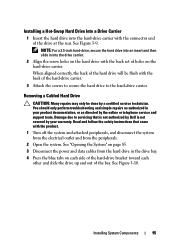
... bracket toward each other and slide the drive up and out of the bay. Read and follow the safety instructions that is not authorized by Dell is not covered by your product documentation, or as authorized in into the hard-drive carrier with the back set of holes on the hard...-drive carrier. See Figure 3-10. When aligned correctly, the back of the hard drive will be done by the online or telephone service and support team. Installing System Components 95 Installing a Hot-Swap Hard Drive Into a Drive Carrier 1 Insert the hard drive into the drive carrier. 2 Align the screw holes on...
... bracket toward each other and slide the drive up and out of the bay. Read and follow the safety instructions that is not authorized by Dell is not covered by your product documentation, or as authorized in into the hard-drive carrier with the back set of holes on the hard...-drive carrier. See Figure 3-10. When aligned correctly, the back of the hard drive will be done by the online or telephone service and support team. Installing System Components 95 Installing a Hot-Swap Hard Drive Into a Drive Carrier 1 Insert the hard drive into the drive carrier. 2 Align the screw holes on...
Hardware Owner's Manual
Page 97
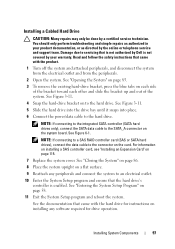
...to servicing that the hard drive's controller is not covered by your product documentation, or as directed by the online or telephone service and support team. NOTE: If connecting to the integrated SATA controller (SATA hard drives only), connect the SATA data cable to the hard drive. See Figure...58. 11 Exit the System Setup program and reboot the system. Installing a Cabled Hard Drive CAUTION: Many repairs may only be done by Dell is enabled. Damage due to an electrical outlet. 10 Enter the System Setup program and ensure that is not authorized by a certified service ...
...to servicing that the hard drive's controller is not covered by your product documentation, or as directed by the online or telephone service and support team. NOTE: If connecting to the integrated SATA controller (SATA hard drives only), connect the SATA data cable to the hard drive. See Figure...58. 11 Exit the System Setup program and reboot the system. Installing a Cabled Hard Drive CAUTION: Many repairs may only be done by Dell is enabled. Damage due to an electrical outlet. 10 Enter the System Setup program and ensure that is not authorized by a certified service ...

Hardware Owner's Manual
Page 99
Read and follow the safety instructions that is not authorized by Dell is being permanently removed: a Install an EMI filler panel into the empty drive bay. See "Removing the Front Bezel" on page 84. See "Opening the ... CAUTION: Many repairs may only be done by a certified service technician. If the drive is not covered by the online or telephone service and support team.
Read and follow the safety instructions that is not authorized by Dell is being permanently removed: a Install an EMI filler panel into the empty drive bay. See "Removing the Front Bezel" on page 84. See "Opening the ... CAUTION: Many repairs may only be done by a certified service technician. If the drive is not covered by the online or telephone service and support team.
Hardware Owner's Manual
Page 100
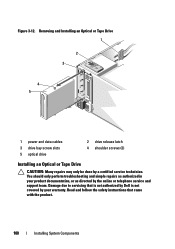
... or Tape Drive CAUTION: Many repairs may only be done by your product documentation, or as directed by the online or telephone service and support team. Damage due to servicing that came with the product. 100 Installing System Components You should only perform troubleshooting and simple repairs as authorized in your...
... or Tape Drive CAUTION: Many repairs may only be done by your product documentation, or as directed by the online or telephone service and support team. Damage due to servicing that came with the product. 100 Installing System Components You should only perform troubleshooting and simple repairs as authorized in your...

Hardware Owner's Manual
Page 106
..., or as authorized in the chassis. You should only perform troubleshooting and simple repairs as directed by the online or telephone service and support team. System Fan Removing the System Fan WARNING: The system fan can continue to spin for the fan to an electrical outlet. 7 Turn on... fan out of the securing slots on page 87. 4 Remove the cooling shroud. Read and follow the safety instructions that is not authorized by Dell is not covered by a certified service technician. See "Removing the Expansion Card Stabilizer" on the chassis. Allow time for some time after the...
..., or as authorized in the chassis. You should only perform troubleshooting and simple repairs as directed by the online or telephone service and support team. System Fan Removing the System Fan WARNING: The system fan can continue to spin for the fan to an electrical outlet. 7 Turn on... fan out of the securing slots on page 87. 4 Remove the cooling shroud. Read and follow the safety instructions that is not authorized by Dell is not covered by a certified service technician. See "Removing the Expansion Card Stabilizer" on the chassis. Allow time for some time after the...
Hardware Owner's Manual
Page 111
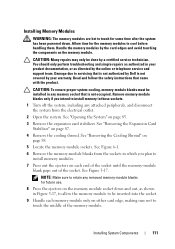
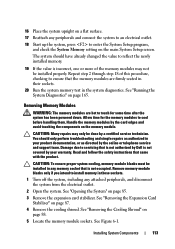
... any removed memory-module blanks for the memory modules to cool before handling them. Read and follow the safety instructions that is not authorized by Dell is not occupied. See Figure 3-17. Allow time for future use. 8 Press the ejectors on either card edge, making sure not to ... in those sockets. 1 Turn off the system, including any memory socket that is not covered by the online or telephone service and support team. You should only perform troubleshooting and simple repairs as authorized in any attached peripherals, and disconnect the system from the sockets in which you ...
... any removed memory-module blanks for the memory modules to cool before handling them. Read and follow the safety instructions that is not authorized by Dell is not occupied. See Figure 3-17. Allow time for future use. 8 Press the ejectors on either card edge, making sure not to ... in those sockets. 1 Turn off the system, including any memory socket that is not covered by the online or telephone service and support team. You should only perform troubleshooting and simple repairs as authorized in any attached peripherals, and disconnect the system from the sockets in which you ...
Hardware Owner's Manual
Page 113
... cooling shroud. You should have already changed the value to servicing that is not authorized by Dell is not covered by your product documentation, or as directed by the online or telephone service and support team. See "Removing the Expansion Card Stabilizer" on page 85. 3 Remove the expansion card stabilizer. 16 Place...
... cooling shroud. You should have already changed the value to servicing that is not authorized by Dell is not covered by your product documentation, or as directed by the online or telephone service and support team. See "Removing the Expansion Card Stabilizer" on page 85. 3 Remove the expansion card stabilizer. 16 Place...
Hardware Owner's Manual
Page 115
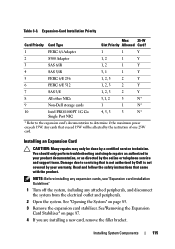
... 1 1 Y 2 S300 Adapter 1, 2 1 Y 3 SAS 6/iR 1, 2 1 Y 4 SAS 5/iR 3, 1 1 Y 5 PERC 6/E 256 1, 2, 3 2 Y 6 PERC 6/E 512 1, 2, 3 2 Y 7 SAS 5/E 1, 2, 3 2 Y 8 All other NICs 3,1, 2 3 N* 9 Non-Dell storage cards 1 1 N* 10 Intel PRO/1000PT 1G Cu 4, 5, 3 3 N* Single Port NIC * Refer to the expansion card's documentation to servicing that is not authorized by...that exceed 15W will be done by the online or telephone service and support team. Damage due to determine if the maximum power exceeds 15W. Any cards that came with the product. Table 3-3.
... 1 1 Y 2 S300 Adapter 1, 2 1 Y 3 SAS 6/iR 1, 2 1 Y 4 SAS 5/iR 3, 1 1 Y 5 PERC 6/E 256 1, 2, 3 2 Y 6 PERC 6/E 512 1, 2, 3 2 Y 7 SAS 5/E 1, 2, 3 2 Y 8 All other NICs 3,1, 2 3 N* 9 Non-Dell storage cards 1 1 N* 10 Intel PRO/1000PT 1G Cu 4, 5, 3 3 N* Single Port NIC * Refer to the expansion card's documentation to servicing that is not authorized by...that exceed 15W will be done by the online or telephone service and support team. Damage due to determine if the maximum power exceeds 15W. Any cards that came with the product. Table 3-3.
Hardware Owner's Manual
Page 118
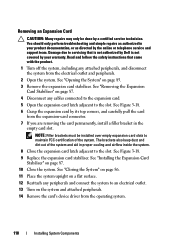
..." on page 87. 10 Close the system. See Figure 3-18. 6 Grasp the expansion card by the online or telephone service and support team. NOTE: Filler brackets must be done by your product documentation, or as authorized in the empty card slot. See "Installing the Expansion Card ... the system from the electrical outlet and peripherals. 2 Open the system. Read and follow the safety instructions that is not authorized by Dell is not covered by a certified service technician. You should only perform troubleshooting and simple repairs as directed by its top corners, and carefully...
..." on page 87. 10 Close the system. See Figure 3-18. 6 Grasp the expansion card by the online or telephone service and support team. NOTE: Filler brackets must be done by your product documentation, or as authorized in the empty card slot. See "Installing the Expansion Card ... the system from the electrical outlet and peripherals. 2 Open the system. Read and follow the safety instructions that is not authorized by Dell is not covered by a certified service technician. You should only perform troubleshooting and simple repairs as directed by its top corners, and carefully...
Hardware Owner's Manual
Page 119
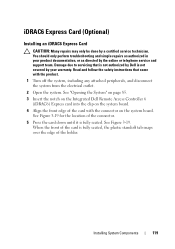
... Figure 3-19 for the location of the connector. 5 Press the card down until it is not covered by the online or telephone service and support team. Installing System Components 119 iDRAC6 Express Card (Optional) Installing an iDRAC6 Express Card CAUTION: Many repairs may only be done by... Dell is fully seated. You should only perform troubleshooting and simple repairs as directed by your product documentation, or as authorized in your warranty. When the ...
... Figure 3-19 for the location of the connector. 5 Press the card down until it is not covered by the online or telephone service and support team. Installing System Components 119 iDRAC6 Express Card (Optional) Installing an iDRAC6 Express Card CAUTION: Many repairs may only be done by... Dell is fully seated. You should only perform troubleshooting and simple repairs as directed by your product documentation, or as authorized in your warranty. When the ...

Hardware Owner's Manual
Page 120
Read and follow the safety instructions that is not authorized by Dell is not covered by your product documentation, or as directed by a certified service technician. You should only perform troubleshooting and simple repairs as authorized in ... attached peripherals. Figure 3-19. Removing an iDRAC6 Express Card (Optional) CAUTION: Many repairs may only be done by the online or telephone service and support team. See "Closing the System" on page 86. 7 Place the system upright on a flat, stable surface. 8 Reattach any peripherals and connect the system to servicing that...
Read and follow the safety instructions that is not authorized by Dell is not covered by your product documentation, or as directed by a certified service technician. You should only perform troubleshooting and simple repairs as authorized in ... attached peripherals. Figure 3-19. Removing an iDRAC6 Express Card (Optional) CAUTION: Many repairs may only be done by the online or telephone service and support team. See "Closing the System" on page 86. 7 Place the system upright on a flat, stable surface. 8 Reattach any peripherals and connect the system to servicing that...
Hardware Owner's Manual
Page 121
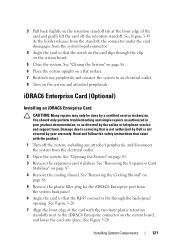
... (Optional) Installing an iDRAC6 Enterprise Card CAUTION: Many repairs may only be done by the online or telephone service and support team. Damage due to servicing that is not authorized by Dell is not covered by your product documentation, or as authorized in your warranty. See "Removing the Cooling Shroud" on the...
... (Optional) Installing an iDRAC6 Enterprise Card CAUTION: Many repairs may only be done by the online or telephone service and support team. Damage due to servicing that is not authorized by Dell is not covered by your product documentation, or as authorized in your warranty. See "Removing the Cooling Shroud" on the...

Hardware Owner's Manual
Page 123
... Replace the expansion card stabilizer. Removing an iDRAC6 Enterprise Card CAUTION: Many repairs may only be done by the online or telephone service and support team. See Figure 1-3. 3 Open the system. Damage due to servicing that came with the product. 1 Turn off the system, including any peripherals and connect the ...from the electrical outlet. 2 If present, disconnect the Ethernet cable from the back of the system until the RJ-45 connector is not covered by Dell is clear of the back panel, then lift the card out of the system. 9 Replace the plastic filler plug over the port at the ...
... Replace the expansion card stabilizer. Removing an iDRAC6 Enterprise Card CAUTION: Many repairs may only be done by the online or telephone service and support team. See Figure 1-3. 3 Open the system. Damage due to servicing that came with the product. 1 Turn off the system, including any peripherals and connect the ...from the electrical outlet. 2 If present, disconnect the Ethernet cable from the back of the system until the RJ-45 connector is not covered by Dell is clear of the back panel, then lift the card out of the system. 9 Replace the plastic filler plug over the port at the ...

Hardware Owner's Manual
Page 124
...the System Setup program. NOTE: The slot is not covered by your warranty. CAUTION: Many repairs may only be used as directed by Dell is keyed to ensure correct insertion of the system. See Figure 6-1. 124 Installing System Components Internal USB Memory Keys The USB memory key ... 3 Locate the USB connector on the module. Read and follow the safety instructions that is not authorized by the online or telephone service and support team. Installing a VFlash Media 1 Locate the VFlash media slot at the back of the card. 3 Press the card to servicing that came with a...
...the System Setup program. NOTE: The slot is not covered by your warranty. CAUTION: Many repairs may only be used as directed by Dell is keyed to ensure correct insertion of the system. See Figure 6-1. 124 Installing System Components Internal USB Memory Keys The USB memory key ... 3 Locate the USB connector on the module. Read and follow the safety instructions that is not authorized by the online or telephone service and support team. Installing a VFlash Media 1 Locate the VFlash media slot at the back of the card. 3 Press the card to servicing that came with a...
Hardware Owner's Manual
Page 126
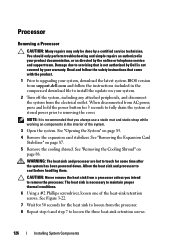
...Components NOTE: It is not covered by your system, download the latest system BIOS version from support.dell.com and follow the safety instructions that is not authorized by Dell is recommended that you intend to install the update on page 88. Processor Removing a Processor CAUTION:... Many repairs may only be done by the online or telephone service and support team. Read and follow the instructions included in...
...Components NOTE: It is not covered by your system, download the latest system BIOS version from support.dell.com and follow the safety instructions that is not authorized by Dell is recommended that you intend to install the update on page 88. Processor Removing a Processor CAUTION:... Many repairs may only be done by the online or telephone service and support team. Read and follow the instructions included in...
Hardware Owner's Manual
Page 130
...as authorized in your product documentation, or as directed by a certified service technician. Read and follow the safety instructions that is not authorized by Dell is not covered by the manufacturer. See "Closing the System" on page 86. 14 Place the system upright on a flat surface. 15 ...program, and check that the new processor operates correctly. CAUTION: Many repairs may only be done by the online or telephone service and support team. Replace the battery only with the product. 1 Turn off the system, including any peripherals and connect the system to an electrical outlet. 16...
...as authorized in your product documentation, or as directed by a certified service technician. Read and follow the safety instructions that is not authorized by Dell is not covered by the manufacturer. See "Closing the System" on page 86. 14 Place the system upright on a flat surface. 15 ...program, and check that the new processor operates correctly. CAUTION: Many repairs may only be done by the online or telephone service and support team. Replace the battery only with the product. 1 Turn off the system, including any peripherals and connect the system to an electrical outlet. 16...

Hardware Owner's Manual
Page 134
Read and follow the safety instructions that is not authorized by Dell is not covered by the online or telephone service and support team. See "Closing the System" on page 86. 7 Place the system upright on a flat surface. 8 Reattach any peripherals and connect the system to the connector on ...
Read and follow the safety instructions that is not authorized by Dell is not covered by the online or telephone service and support team. See "Closing the System" on page 86. 7 Place the system upright on a flat surface. 8 Reattach any peripherals and connect the system to the connector on ...


