Rack Installation Guide
Page 123
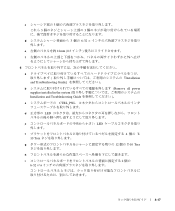
c 3 3 3 d 3 6-32 × e 12mm (0.5 ) f 6 a ( and Troubleshooting Guide ) b supplies installed in the system ( Installation and Troubleshooting Guide c CTRL_PNL d LED e LED f 10 Torx g h i 6-32 × ¼ Installation (Remove all power ) 4 T- 12 T-10 Torx 2 4-17
c 3 3 3 d 3 6-32 × e 12mm (0.5 ) f 6 a ( and Troubleshooting Guide ) b supplies installed in the system ( Installation and Troubleshooting Guide c CTRL_PNL d LED e LED f 10 Torx g h i 6-32 × ¼ Installation (Remove all power ) 4 T- 12 T-10 Torx 2 4-17
Rack-to-Tower Conversion Guide
Page 9
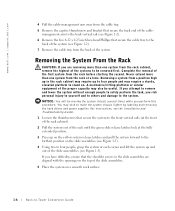
...grasp the system at a time. You may wish to make the system chassis lighter by labeling and removing the hard drives and power supplies (for instructions, see the Installation and Troubleshooting Guide). 1 Loosen the thumbscrews that secure the system to the front vertical rails (at the front of the rack cabinet). ... the second. NOTICE: You will be removed first. If you are aligned with the openings on the top of the system. www.dell.com | support.dell.com 4 Pull the cable-management arm away from the cable tray. 5 Remove the captive thumbscrew and bracket that secure the back end...
...grasp the system at a time. You may wish to make the system chassis lighter by labeling and removing the hard drives and power supplies (for instructions, see the Installation and Troubleshooting Guide). 1 Loosen the thumbscrews that secure the system to the front vertical rails (at the front of the rack cabinet). ... the second. NOTICE: You will be removed first. If you are aligned with the openings on the top of the system. www.dell.com | support.dell.com 4 Pull the cable-management arm away from the cable tray. 5 Remove the captive thumbscrew and bracket that secure the back end...
Rack-to-Tower Conversion Guide
Page 12
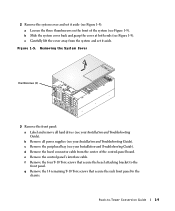
... set it aside. b Remove all hard drives (see your Installation and Troubleshooting Guide). Removing the System Cover thumbscrews (3) 3 Remove the front panel: a Label and remove all power supplies (see your Installation and Troubleshooting Guide). c Remove the peripheral bay (see your Installation and Troubleshooting Guide). c Carefully lift the cover away from the center of the system...
... set it aside. b Remove all hard drives (see your Installation and Troubleshooting Guide). Removing the System Cover thumbscrews (3) 3 Remove the front panel: a Label and remove all power supplies (see your Installation and Troubleshooting Guide). c Remove the peripheral bay (see your Installation and Troubleshooting Guide). c Carefully lift the cover away from the center of the system...
Rack-to-Tower Conversion Guide
Page 16
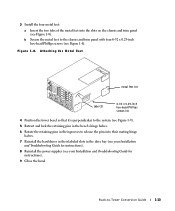
... of the metal feet into their mating hinge halves. 7 Reinstall the hard drives in the drive bay (see your Installation and Troubleshooting Guide for instructions). 8 Reinstall the power supplies (see your Installation and Troubleshooting Guide for instructions). 9 Close the bezel. Attaching the Metal Feet metal feet (4) tabs (2) 6-32 x 0.25-inch hex-head Phillips screws...
... of the metal feet into their mating hinge halves. 7 Reinstall the hard drives in the drive bay (see your Installation and Troubleshooting Guide for instructions). 8 Reinstall the power supplies (see your Installation and Troubleshooting Guide for instructions). 9 Close the bezel. Attaching the Metal Feet metal feet (4) tabs (2) 6-32 x 0.25-inch hex-head Phillips screws...


