
Quick Reference Guide
Page 10
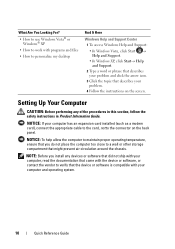
...help allow the computer to maintain proper operating temperature, ensure that the device or software is compatible with your computer and operating system. 10 Quick Reference Guide Setting Up Your Computer CAUTION: Before performing any devices or software that did not ship with your computer, read ... with programs and files • How to personalize my desktop Find It Here Windows Help and Support Center 1 To access Windows Help and Support: • In Windows Vista, click Start → Help and Support. • In Windows XP, click Start→ Help and Support. 2 Type a word or phrase...
...help allow the computer to maintain proper operating temperature, ensure that the device or software is compatible with your computer and operating system. 10 Quick Reference Guide Setting Up Your Computer CAUTION: Before performing any devices or software that did not ship with your computer, read ... with programs and files • How to personalize my desktop Find It Here Windows Help and Support Center 1 To access Windows Help and Support: • In Windows Vista, click Start → Help and Support. • In Windows XP, click Start→ Help and Support. 2 Type a word or phrase...
Quick Reference Guide
Page 16
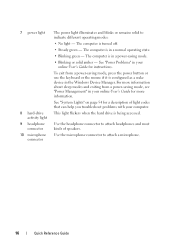
... - See "Power Problems" in your online User's Guide for a description of speakers. For more information. The computer is in the Windows Device Manager. 7 power light 8 hard-drive activity light 9 headphone connector 10 microphone connector The power light illuminates and blinks or remains solid to attach a microphone. 16 Quick Reference Guide See "System...
... - See "Power Problems" in your online User's Guide for a description of speakers. For more information. The computer is in the Windows Device Manager. 7 power light 8 hard-drive activity light 9 headphone connector 10 microphone connector The power light illuminates and blinks or remains solid to attach a microphone. 16 Quick Reference Guide See "System...
Quick Reference Guide
Page 28
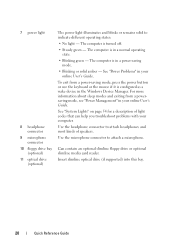
... to indicate different operating states: • No light - To exit from a powersaving mode, see "Power Management" in the Windows Device Manager. For more information about sleep modes and exiting from a power-saving mode, press the power button or use the keyboard...8226; Blinking or solid amber - See "System Lights" on page 54 for a description of speakers. 7 power light 8 headphone connector 9 microphone connector 10 floppy drive bay (optional) 11 optical drive (optional) The power light illuminates and blinks or remains solid to attach a microphone. The computer is configured...
... to indicate different operating states: • No light - To exit from a powersaving mode, see "Power Management" in the Windows Device Manager. For more information about sleep modes and exiting from a power-saving mode, press the power button or use the keyboard...8226; Blinking or solid amber - See "System Lights" on page 54 for a description of speakers. 7 power light 8 headphone connector 9 microphone connector 10 floppy drive bay (optional) 11 optical drive (optional) The power light illuminates and blinks or remains solid to attach a microphone. The computer is configured...
Quick Reference Guide
Page 66
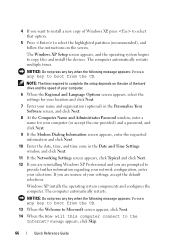
... Next. 7 Enter your name and organization (optional) in the Personalize Your Software screen, and click Next. 8 At the Computer Name and Administrator Password window, enter a name for your computer (or accept the one provided) and a password, and click Next. 9 If the Modem Dialing Information screen appears,... enter the requested information and click Next. 10 Enter the date, time, and time zone in the Date and Time Settings window, and click Next. 11 If the Networking Settings screen appears, click Typical and click Next. 12 If ...
... Next. 7 Enter your name and organization (optional) in the Personalize Your Software screen, and click Next. 8 At the Computer Name and Administrator Password window, enter a name for your computer (or accept the one provided) and a password, and click Next. 9 If the Modem Dialing Information screen appears,... enter the requested information and click Next. 10 Enter the date, time, and time zone in the Date and Time Settings window, and click Next. 11 If the Networking Settings screen appears, click Typical and click Next. 12 If ...

Quick Reference Guide
Page 71
...CDs operating system, 8 computer restore to previous state, 61 conflicts software and hardware incompatibilities, 60 cover opening, 38 removing, 32 D Dell Diagnostics, 51 Dell support site, 9 diagnostics beep codes, 59 Dell Diagnostics, 51 documentation End User License Agreement, 6 ergonomics, 6 online, 9 Product Information Guide, 6 regulatory, 6 safety, 6 User...6 ergonomics information, 6 error messages beep codes, 59 system lights, 54 H hardware beep codes, 59 conflicts, 60 Dell Diagnostics, 51 Hardware Troubleshooter, 60 Help and Support Center, 10 help file Windows Help and Support Center...
...CDs operating system, 8 computer restore to previous state, 61 conflicts software and hardware incompatibilities, 60 cover opening, 38 removing, 32 D Dell Diagnostics, 51 Dell support site, 9 diagnostics beep codes, 59 Dell Diagnostics, 51 documentation End User License Agreement, 6 ergonomics, 6 online, 9 Product Information Guide, 6 regulatory, 6 safety, 6 User...6 ergonomics information, 6 error messages beep codes, 59 system lights, 54 H hardware beep codes, 59 conflicts, 60 Dell Diagnostics, 51 Hardware Troubleshooter, 60 Help and Support Center, 10 help file Windows Help and Support Center...
Quick Reference Guide
Page 72
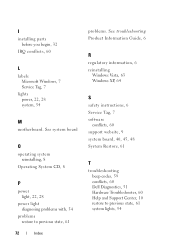
I installing parts before you begin, 32 IRQ conflicts, 60 L labels Microsoft Windows, 7 Service Tag, 7 lights power, 22, 28 system, 54 M motherboard. See system board O operating system reinstalling, 8 Operating System CD, 8 P power light...28 power light diagnosing problems with, 54 problems restore to previous state, 61 72 Index problems. See troubleshooting Product Information Guide, 6 R regulatory information, 6 reinstalling Windows Vista, 63 Windows XP, 64 S safety instructions, 6 Service Tag, 7 software conflicts, 60 support website, 9 system board, 40, 45, 48 System Restore, 61 T ...
I installing parts before you begin, 32 IRQ conflicts, 60 L labels Microsoft Windows, 7 Service Tag, 7 lights power, 22, 28 system, 54 M motherboard. See system board O operating system reinstalling, 8 Operating System CD, 8 P power light...28 power light diagnosing problems with, 54 problems restore to previous state, 61 72 Index problems. See troubleshooting Product Information Guide, 6 R regulatory information, 6 reinstalling Windows Vista, 63 Windows XP, 64 S safety instructions, 6 Service Tag, 7 software conflicts, 60 support website, 9 system board, 40, 45, 48 System Restore, 61 T ...

Quick Reference Guide
Page 73
U User's Guide, 6 W warranty information, 6 Windows Vista Hardware Troubleshooter, 60 Help and Support Center, 10 reinstalling, 63 System Restore, 61 Windows XP Device Driver Rollback, 68 Hardware Troubleshooter, 60 Help and Support Center, 10 reinstalling, 8, 64 System Restore, 61 Index 73
U User's Guide, 6 W warranty information, 6 Windows Vista Hardware Troubleshooter, 60 Help and Support Center, 10 reinstalling, 63 System Restore, 61 Windows XP Device Driver Rollback, 68 Hardware Troubleshooter, 60 Help and Support Center, 10 reinstalling, 8, 64 System Restore, 61 Index 73

User's Guide
Page 10
Error Messages 333 Resolving Software and Hardware Incompatibilities 337 Microsoft® Windows® XP 337 16 Microsoft® Windows® XP and Windows Vista® Features 339 Transferring Information to a New Computer 339 Microsoft Windows Vista 339 Microsoft® Windows® XP 339 User Accounts and Fast User Switching 342 Adding User Accounts 342 Fast User... 348 Support Service 348 Problems With Your Order 349 Product Information 349 Returning Items for Warranty Repair or Credit 349 Before You Call 349 Contacting Dell 351 10 Contents
Error Messages 333 Resolving Software and Hardware Incompatibilities 337 Microsoft® Windows® XP 337 16 Microsoft® Windows® XP and Windows Vista® Features 339 Transferring Information to a New Computer 339 Microsoft Windows Vista 339 Microsoft® Windows® XP 339 User Accounts and Fast User Switching 342 Adding User Accounts 342 Fast User... 348 Support Service 348 Problems With Your Order 349 Product Information 349 Returning Items for Warranty Repair or Credit 349 Before You Call 349 Contacting Dell 351 10 Contents

User's Guide
Page 22
...Flexbay drive 3 USB 2.0 connectors (2) 4 LAN indicator light 5 diagnostic lights 6 power button 7 power light 8 hard-drive activity light 9 headphone connector 10 microphone connector Insert media (if supported) into this button to indicate different operating modes: • No light - Use the front USB connectors for more information... on page 19 for devices that can help you connect occasionally, such as a wake device in the Windows Device Manager. See "Turning Off Your Computer" on booting to help you press the power button the computer will perform an...
...Flexbay drive 3 USB 2.0 connectors (2) 4 LAN indicator light 5 diagnostic lights 6 power button 7 power light 8 hard-drive activity light 9 headphone connector 10 microphone connector Insert media (if supported) into this button to indicate different operating modes: • No light - Use the front USB connectors for more information... on page 19 for devices that can help you connect occasionally, such as a wake device in the Windows Device Manager. See "Turning Off Your Computer" on booting to help you press the power button the computer will perform an...
User's Guide
Page 34
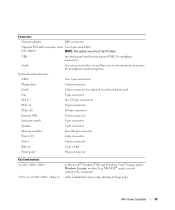
... second serial port card Fan 5-pin connector PCI 2.3 two 124-pin connectors PCIe-x1 36-pin connector PCIe-x16 164-pin connector Internal USB 10-pin connector Intrusion switch 3-pin connector Speaker 5-pin connector Memory modules four 240-pin connector Power 12V 4-pin connector Power 24-pin connector Battery ... PS/2 with secondary serial two 6-pin mini-DINs port adapter NOTE: This option uses one of the PCI slots. If in Microsoft® Windows® XP and Windows Vista®, brings up only) Mini Tower Computer 34 starts embedded system setup (during start-up the...
... second serial port card Fan 5-pin connector PCI 2.3 two 124-pin connectors PCIe-x1 36-pin connector PCIe-x16 164-pin connector Internal USB 10-pin connector Intrusion switch 3-pin connector Speaker 5-pin connector Memory modules four 240-pin connector Power 12V 4-pin connector Power 24-pin connector Battery ... PS/2 with secondary serial two 6-pin mini-DINs port adapter NOTE: This option uses one of the PCI slots. If in Microsoft® Windows® XP and Windows Vista®, brings up only) Mini Tower Computer 34 starts embedded system setup (during start-up the...
User's Guide
Page 98
...when the hard drive is turned off. • Steady green - Insert a floppy disk into this drive. The computer is in the Windows Device Manager. To exit from a power-saving mode, see "Diagnostic Lights" on page 267. For more information about sleep modes and ... Insert media (if supported) into this drive. 5 power light 6 diagnostic lights 7 hard-drive activity light 8 headphone connector 9 microphone connector 10 floppy drive 11 optical drive The power light illuminates and blinks or remains solid to attach a microphone. The computer is being accessed. The computer...
...when the hard drive is turned off. • Steady green - Insert a floppy disk into this drive. The computer is in the Windows Device Manager. To exit from a power-saving mode, see "Diagnostic Lights" on page 267. For more information about sleep modes and ... Insert media (if supported) into this drive. 5 power light 6 diagnostic lights 7 hard-drive activity light 8 headphone connector 9 microphone connector 10 floppy drive 11 optical drive The power light illuminates and blinks or remains solid to attach a microphone. The computer is being accessed. The computer...

User's Guide
Page 108
... card 5-pin connector two 124-pin connectors 164-pin connector 10-pin connector 3-pin connector 5-pin connector four 240-pin connector 4-pin connector 24-pin connector 2-pin socket 40-pin connector Key Combinations or or in Microsoft® Windows® XP and Windows Vista®, brings up only) starts the RAID setup menu...
... card 5-pin connector two 124-pin connectors 164-pin connector 10-pin connector 3-pin connector 5-pin connector four 240-pin connector 4-pin connector 24-pin connector 2-pin socket 40-pin connector Key Combinations or or in Microsoft® Windows® XP and Windows Vista®, brings up only) starts the RAID setup menu...

User's Guide
Page 186
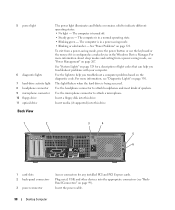
...modes and exiting from a power-saving mode, press the power button or use the keyboard or the mouse if it is in the Windows Device Manager. This light indicates that can help you troubleshoot problems with your computer. The computer is established. See "System Lights" on ...or optional slimline media card reader. 4 hard drive activity light 5 diagnostic lights 6 LAN indicator light 7 power light 8 headphone connector 9 microphone connector 10 3.5-inch drive bay 11 optical drive This light flickers when the hard drive is turned off. • Steady green - See "Power Problems" on ...
...modes and exiting from a power-saving mode, press the power button or use the keyboard or the mouse if it is in the Windows Device Manager. This light indicates that can help you troubleshoot problems with your computer. The computer is established. See "System Lights" on ...or optional slimline media card reader. 4 hard drive activity light 5 diagnostic lights 6 LAN indicator light 7 power light 8 headphone connector 9 microphone connector 10 3.5-inch drive bay 11 optical drive This light flickers when the hard drive is turned off. • Steady green - See "Power Problems" on ...
User's Guide
Page 196
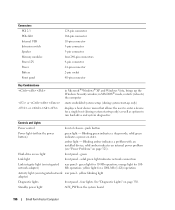
...page 321). green light for 100Mb operation; Standby power light AUX_PWR on integrated network adapter) rear panel - in Microsoft® Windows® XP and Windows Vista, brings up only) as well as options to enter a device for a single boot (during system start-up the... Windows Security window; amber light - Connectors PCI 2.3 PCIe-X16 Internal USB Intrusion switch Speaker Memory modules Power 12V Power Battery Front panel 124-pin connector 164-pin connector 10-pin connector 3-pin connector 5-pin connector four 240-pin ...
...page 321). green light for 100Mb operation; Standby power light AUX_PWR on integrated network adapter) rear panel - in Microsoft® Windows® XP and Windows Vista, brings up only) as well as options to enter a device for a single boot (during system start-up the... Windows Security window; amber light - Connectors PCI 2.3 PCIe-X16 Internal USB Intrusion switch Speaker Memory modules Power 12V Power Battery Front panel 124-pin connector 164-pin connector 10-pin connector 3-pin connector 5-pin connector four 240-pin ...
User's Guide
Page 266
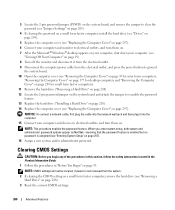
...Replacing the Computer Cover" on page 297). 6 Connect your computer and monitor to electrical outlets, and turn them on. 7 After the Microsoft® Windows® desktop appears on your computer, shut down your computer and devices to reenable the password feature. 13 Replace the hard drive ("Installing a Hard ... password feature is enabled but no password is not removed from the electrical outlet, and press the power button to ground the system board. 10 Open the computer cover (see "Removing the Computer Cover" on page 39 for mini tower computers, "Removing the Computer Cover" on page...
...Replacing the Computer Cover" on page 297). 6 Connect your computer and monitor to electrical outlets, and turn them on. 7 After the Microsoft® Windows® desktop appears on your computer, shut down your computer and devices to reenable the password feature. 13 Replace the hard drive ("Installing a Hard ... password feature is enabled but no password is not removed from the electrical outlet, and press the power button to ground the system board. 10 Open the computer cover (see "Removing the Computer Cover" on page 39 for mini tower computers, "Removing the Computer Cover" on page...
User's Guide
Page 272
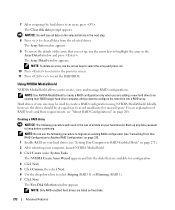
...computer, and you to avoid unallocated or unused space. NOTE: To delete an array, use the arrow keys to select the array and press . 10 Press to return to the previous screen. 11 Press to create a RAID configuration using NVIDIA MediaShield. Creating a RAID Array NOTICE: The following procedure... Your Computer to highlight the array in the loss of any data you are listed as free disks. 272 Advanced Features The Free Disk Selection window appears. 7 After assigning the hard drives to configure the new drive into a RAID array. NOTE: Use NVIDIA MediaShield to create a RAID ...
...computer, and you to avoid unallocated or unused space. NOTE: To delete an array, use the arrow keys to select the array and press . 10 Press to return to the previous screen. 11 Press to create a RAID configuration using NVIDIA MediaShield. Creating a RAID Array NOTICE: The following procedure... Your Computer to highlight the array in the loss of any data you are listed as free disks. 272 Advanced Features The Free Disk Selection window appears. 7 After assigning the hard drives to configure the new drive into a RAID array. NOTE: Use NVIDIA MediaShield to create a RAID ...
User's Guide
Page 273
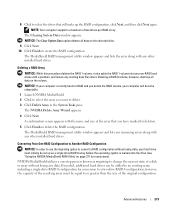
...the resulting array must initially be equal to delete. 3 Click Delete Array in the System Tasks pane. The MediaShield RAID management utility window appears and lists any remaining arrays along with any existing data files intact. The NVIDIA Delete Array Wizard appears. 4 Click Next. ...Deleting a RAID 0 volume, however, destroys all data on the selected drive. 9 Click Next. 10 Click Finish to convert a RAID configuration without losing any other installed hard drives. NVIDIA MediaShield utilizes a one-step process known as a single ...
...the resulting array must initially be equal to delete. 3 Click Delete Array in the System Tasks pane. The MediaShield RAID management utility window appears and lists any remaining arrays along with any existing data files intact. The NVIDIA Delete Array Wizard appears. 4 Click Next. ...Deleting a RAID 0 volume, however, destroys all data on the selected drive. 9 Click Next. 10 Click Finish to convert a RAID configuration without losing any other installed hard drives. NVIDIA MediaShield utilizes a one-step process known as a single ...
User's Guide
Page 309
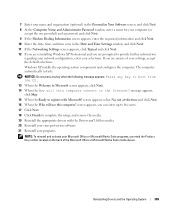
.... 7 Enter your name and organization (optional) in the Personalize Your Software screen, and click Next. 8 At the Computer Name and Administrator Password window, enter a name for your computer (or accept the one provided) and a password, and click Next. 9 If the Modem Dialing Information screen appears..., enter the requested information and click Next. 10 Enter the date, time, and time zone in the Date and Time Settings window, and click Next. 11 If the Networking Settings screen appears, click Typical and click Next. 12 If...
.... 7 Enter your name and organization (optional) in the Personalize Your Software screen, and click Next. 8 At the Computer Name and Administrator Password window, enter a name for your computer (or accept the one provided) and a password, and click Next. 9 If the Modem Dialing Information screen appears..., enter the requested information and click Next. 10 Enter the date, time, and time zone in the Date and Time Settings window, and click Next. 11 If the Networking Settings screen appears, click Typical and click Next. 12 If...

User's Guide
Page 328
... Performs a quick test of devices. This test typically takes 10 to 20 minutes and requires no interaction on the screen. If you cannot resolve the error condition, contact Dell (see the Windows desktop. If you wait too long and the Windows logo appears, continue to wait until you see "Contacting... Dell" on the symptom of the problem you are listed, select the version appropriate ...
... Performs a quick test of devices. This test typically takes 10 to 20 minutes and requires no interaction on the screen. If you cannot resolve the error condition, contact Dell (see the Windows desktop. If you wait too long and the Windows logo appears, continue to wait until you see "Contacting... Dell" on the symptom of the problem you are listed, select the version appropriate ...

User's Guide
Page 365
... responding. The higher the refresh rate, the less video flicker can be seen by a printer or displayed on your Windows desktop and double-click the icon, you call Dell for troubleshooting problems. S SAS - ROM - Some programs essential to the operation of the SCSI interface (as opposed ... the original SCSI parallel architecture). Interference that occur per minute - The number of rotations that is generated at the lower end of 10 kHz to install and configure hardware and software. A jumper on the system board that can open its corresponding folder or file without ...
... responding. The higher the refresh rate, the less video flicker can be seen by a printer or displayed on your Windows desktop and double-click the icon, you call Dell for troubleshooting problems. S SAS - ROM - Some programs essential to the operation of the SCSI interface (as opposed ... the original SCSI parallel architecture). Interference that occur per minute - The number of rotations that is generated at the lower end of 10 kHz to install and configure hardware and software. A jumper on the system board that can open its corresponding folder or file without ...


