
Service Manual
Page 6
..., each procedure assumes that is not authorized by Dell is not covered by performing the removal procedure in reverse order. 1.1 Recommended Tools The procedures in this section, follow the safety instructions in the XFR D630 Product Information Guide and in this document may require... the following tools: • Small flat-blade screwdriver • Phillips screwdriver • Small plastic scribe • 5-mm hex nut driver • Flash BIOS-update program CD ...
..., each procedure assumes that is not authorized by Dell is not covered by performing the removal procedure in reverse order. 1.1 Recommended Tools The procedures in this section, follow the safety instructions in the XFR D630 Product Information Guide and in this document may require... the following tools: • Small flat-blade screwdriver • Phillips screwdriver • Small plastic scribe • 5-mm hex nut driver • Flash BIOS-update program CD ...

Service Manual
Page 7
...Lift each latch and turn each a quarter-turn latches are not installed, proceed to assist in on the battery compartment using a #1 Philips screw driver. Remove the compartment cover from the computer. 4. To remove the battery from the compartment, utilize the tab on the left, front side of...tabs before you connect a cable, ensure that secure the quarter-turn , toward the 'unlock' icon, to ground the system board. 8. DellTM XFR D630 Fully Rugged Notebook Service Manual itself. Turn off your computer (see Turning Off Your Computer). 95H NOTICE: To disconnect a network cable, first ...
...Lift each latch and turn each a quarter-turn latches are not installed, proceed to assist in on the battery compartment using a #1 Philips screw driver. Remove the compartment cover from the computer. 4. To remove the battery from the compartment, utilize the tab on the left, front side of...tabs before you connect a cable, ensure that secure the quarter-turn , toward the 'unlock' icon, to ground the system board. 8. DellTM XFR D630 Fully Rugged Notebook Service Manual itself. Turn off your computer (see Turning Off Your Computer). 95H NOTICE: To disconnect a network cable, first ...

Service Manual
Page 14
...clicks into place. 3 Hard Drive CAUTION: If you remove the hard drive from sources other than Dell. NOTICE: To prevent data loss, turn off your computer, follow the safety instructions in the XFR D630 Product Information Guide and in hibernate mode NOTICE: Hard drives are extremely fragile; even a slight ... housing of the hard drive. You also need the Operating System media to install the drivers and utilities on , in standby mode, or in the XFR D630 User's Guide. NOTE: You need the Drivers and Utilities media for hard drives from the computer when the drive is on the new...
...clicks into place. 3 Hard Drive CAUTION: If you remove the hard drive from sources other than Dell. NOTICE: To prevent data loss, turn off your computer, follow the safety instructions in the XFR D630 Product Information Guide and in hibernate mode NOTICE: Hard drives are extremely fragile; even a slight ... housing of the hard drive. You also need the Operating System media to install the drivers and utilities on , in standby mode, or in the XFR D630 User's Guide. NOTE: You need the Drivers and Utilities media for hard drives from the computer when the drive is on the new...
Service Manual
Page 15
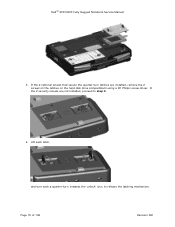
Page 15 of 106 Revision A01 If the 2 security screws are installed, remove the 2 screws on the latches on the hard disk drive compartment using a #1 Philips screw driver. DellTM XFR D630 Fully Rugged Notebook Service Manual 3. Lift each latch, and turn each a quarter-turn latches are not installed, proceed to release the latching mechanism. If the 2 optional screws that secure the quarter-turn , towards the 'unlock' icon, to step 4. 4.
Page 15 of 106 Revision A01 If the 2 security screws are installed, remove the 2 screws on the latches on the hard disk drive compartment using a #1 Philips screw driver. DellTM XFR D630 Fully Rugged Notebook Service Manual 3. Lift each latch, and turn each a quarter-turn latches are not installed, proceed to release the latching mechanism. If the 2 optional screws that secure the quarter-turn , towards the 'unlock' icon, to step 4. 4.
Service Manual
Page 17
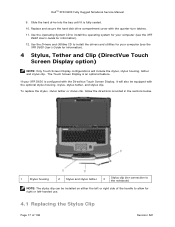
...be installed on either the left -handed use. 4.1 Replacing the Stylus Clip Page 17 of the handle to install the drivers and utilities for your computer (see the XFR D630 User's Guide for right or left or right side of 106 Revision A01 To replace the stylus, stylus tether or ..., and stylus clip. Use the Drivers and Utilities CD to allow for information). 12. Slide the hard drive into the bay until it will include the stylus, stylus housing, tether and stylus clip. The Touch Screen Display is fully seated. 10. DellTM XFR D630 Fully Rugged Notebook Service Manual 9. Use...
...be installed on either the left -handed use. 4.1 Replacing the Stylus Clip Page 17 of the handle to install the drivers and utilities for your computer (see the XFR D630 User's Guide for right or left or right side of 106 Revision A01 To replace the stylus, stylus tether or ..., and stylus clip. Use the Drivers and Utilities CD to allow for information). 12. Slide the hard drive into the bay until it will include the stylus, stylus housing, tether and stylus clip. The Touch Screen Display is fully seated. 10. DellTM XFR D630 Fully Rugged Notebook Service Manual 9. Use...
User Guide
Page 7
... Lights 99 Diagnostic Light Codes During POST 99 Dell™ Technical Update Service 101 Dell Diagnostics 101 When to Use the Dell Diagnostics 102 Starting the Dell Diagnostics From Your Hard Drive 102 Starting the Dell Diagnostics from the Drivers and Utilities Media 103 Dell Diagnostics Main Menu 104 Dell Support Utility 105 Accessing the Dell Support Utility 105 7
... Lights 99 Diagnostic Light Codes During POST 99 Dell™ Technical Update Service 101 Dell Diagnostics 101 When to Use the Dell Diagnostics 102 Starting the Dell Diagnostics From Your Hard Drive 102 Starting the Dell Diagnostics from the Drivers and Utilities Media 103 Dell Diagnostics Main Menu 104 Dell Support Utility 105 Accessing the Dell Support Utility 105 7

User Guide
Page 9
... System Setup Screens 136 Commonly Used Options 136 Changing the Boot Sequence 136 Changing Printer Modes 138 Changing COM Ports 138 14 Reinstalling Software 139 Drivers 139 What Is a Driver 139 Identifying Drivers 139 Reinstalling Drivers and Utilities 140 9
... System Setup Screens 136 Commonly Used Options 136 Changing the Boot Sequence 136 Changing Printer Modes 138 Changing COM Ports 138 14 Reinstalling Software 139 Drivers 139 What Is a Driver 139 Identifying Drivers 139 Reinstalling Drivers and Utilities 140 9

User Guide
Page 14
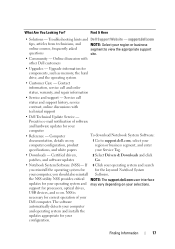
... updates about technical changes to run the Dell Diagnostics (see "Reinstalling Drivers and Utilities" on page 101). You can be found at support.dell.com. 14 Finding Information Find It Here • A diagnostic program for my computer Drivers and Utilities Media • Drivers for my computer NOTE: The Drivers and Utilities media may not ship with...
... updates about technical changes to run the Dell Diagnostics (see "Reinstalling Drivers and Utilities" on page 101). You can be found at support.dell.com. 14 Finding Information Find It Here • A diagnostic program for my computer Drivers and Utilities Media • Drivers for my computer NOTE: The Drivers and Utilities media may not ship with...
User Guide
Page 17
...service contract, online discussions with other Dell customers • Upgrades - Certified drivers, patches, and software updates 2 Select Drivers & Downloads and click Go. • Notebook System Software (NSS)- NSS provides critical NOTE: The support.dell.com user interface updates for your ...and order status, warranty, and repair information • Service and support - Online discussion with technical support • Dell Technical Update Service - Proactive e-mail notification of your Service Tag. • Downloads - support for your configuration. NSS...
...service contract, online discussions with other Dell customers • Upgrades - Certified drivers, patches, and software updates 2 Select Drivers & Downloads and click Go. • Notebook System Software (NSS)- NSS provides critical NOTE: The support.dell.com user interface updates for your ...and order status, warranty, and repair information • Service and support - Online discussion with technical support • Dell Technical Update Service - Proactive e-mail notification of your Service Tag. • Downloads - support for your configuration. NSS...
User Guide
Page 19
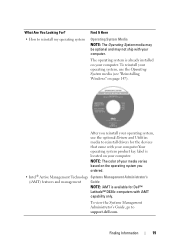
.... The operating system is available for the devices that came with iAMT capability only. To view the Systems Management Administrator's Guide, go to reinstall drivers for Dell™ Latitude™ D630c computers with your computer. NOTE: The color of your media varies based on your computer. After you reinstall your operating system, use...
.... The operating system is available for the devices that came with iAMT capability only. To view the Systems Management Administrator's Guide, go to reinstall drivers for Dell™ Latitude™ D630c computers with your computer. NOTE: The color of your media varies based on your computer. After you reinstall your operating system, use...
User Guide
Page 57
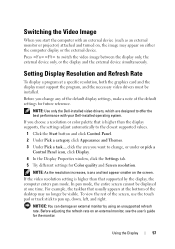
... be displayed at a specific resolution, both the graphics card and the display must support the program, and the necessary video drivers must be installed. NOTE: Use only the Dell-installed video drivers, which are designed to offer the best performance with an external device (such as an external monitor or projector) attached and...
... be displayed at a specific resolution, both the graphics card and the display must support the program, and the necessary video drivers must be installed. NOTE: Use only the Dell-installed video drivers, which are designed to offer the best performance with an external device (such as an external monitor or projector) attached and...
User Guide
Page 66
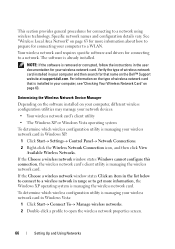
... Up and Using Networks Determining the Wireless Network Device Manager Depending on the software installed on the Dell™ Support website at support.dell.com. To determine which wireless configuration utility is managing the wireless network card. This section provides general... procedures for connecting to a network. Your wireless network card requires specific software and drivers for that is already installed....
... Up and Using Networks Determining the Wireless Network Device Manager Depending on the software installed on the Dell™ Support website at support.dell.com. To determine which wireless configuration utility is managing the wireless network card. This section provides general... procedures for connecting to a network. Your wireless network card requires specific software and drivers for that is already installed....
User Guide
Page 74
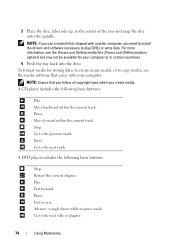
... Go to the next track. To format media for storing data, to create music media, or to copy media, see the Drivers and Utilities media (the Drivers and Utilities media is optional and may not be available for your computer. NOTE: Ensure that came with another computer, you create... Move forward within the current track. For more information, see the media software that you follow all copyright laws when you need to install the drivers and software necessary to the previous track. Eject. Pause. Fast forward. 3 Place the disc, label side up, in the center of the ...
... Go to the next track. To format media for storing data, to create music media, or to copy media, see the Drivers and Utilities media (the Drivers and Utilities media is optional and may not be available for your computer. NOTE: Ensure that came with another computer, you create... Move forward within the current track. For more information, see the media software that you follow all copyright laws when you need to install the drivers and software necessary to the previous track. Eject. Pause. Fast forward. 3 Place the disc, label side up, in the center of the ...
User Guide
Page 83
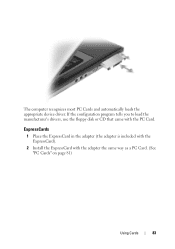
If the configuration program tells you to load the manufacturer's drivers, use the floppy disk or CD that came with the adapter the same way as a PC Card. (See "PC Cards" on page 81) Using Cards 83 ExpressCards 1 Place the ExpressCard in the adapter (the adapter is included with the ExpressCard). 2 Install the ExpressCard with the PC Card. The computer recognizes most PC Cards and automatically loads the appropriate device driver.
If the configuration program tells you to load the manufacturer's drivers, use the floppy disk or CD that came with the adapter the same way as a PC Card. (See "PC Cards" on page 81) Using Cards 83 ExpressCards 1 Place the ExpressCard in the adapter (the adapter is included with the ExpressCard). 2 Install the ExpressCard with the PC Card. The computer recognizes most PC Cards and automatically loads the appropriate device driver.
User Guide
Page 102
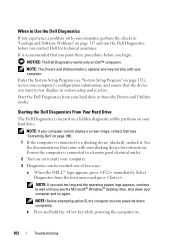
... to test displays in "Lockups and Software Problems" on your hard drive or from the boot menu and press . When to Use the Dell Diagnostics If you experience a problem with your computer, perform the checks in system setup and is optional and may not ship with your docking... device for technical assistance. NOTE: The Drivers and Utilities media is active. See the documentation that came with your computer. Start the Dell Diagnostics from your hard drive. It is recommended that the device you see "Contacting...
... to test displays in "Lockups and Software Problems" on your hard drive or from the boot menu and press . When to Use the Dell Diagnostics If you experience a problem with your computer, perform the checks in system setup and is optional and may not ship with your docking... device for technical assistance. NOTE: The Drivers and Utilities media is active. See the documentation that came with your computer. Start the Dell Diagnostics from your hard drive. It is recommended that the device you see "Contacting...
User Guide
Page 103
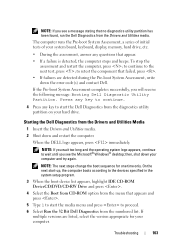
...NOTE: The next steps change the boot sequence for your hard drive. to continue to proceed. 6 Select Run the 32 Bit Dell Diagnostics from the Drivers and Utilities media. The computer runs the Pre-boot System Assessment, a series of initial tests of your computer and try again....to retest the component that appears and press . 5 Type 1 to start -up, the computer boots according to start the Dell Diagnostics from the Drivers and Utilities Media 1 Insert the Drivers and Utilities media. 2 Shut down and restart the computer. NOTE: If you see the Microsoft® Windows® desktop...
...NOTE: The next steps change the boot sequence for your hard drive. to continue to proceed. 6 Select Run the 32 Bit Dell Diagnostics from the Drivers and Utilities media. The computer runs the Pre-boot System Assessment, a series of initial tests of your computer and try again....to retest the component that appears and press . 5 Type 1 to start -up, the computer boots according to start the Dell Diagnostics from the Drivers and Utilities Media 1 Insert the Drivers and Utilities media. 2 Shut down and restart the computer. NOTE: If you see the Microsoft® Windows® desktop...
User Guide
Page 105
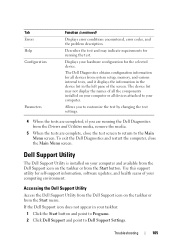
... from the Start menu. Displays your computing environment. Allows you to your computer. Accessing the Dell Support Utility Access the Dell Support Utility from the Dell Support icon on the taskbar or from the Drivers and Utilities media, remove the media. 5 When the tests are complete, close the Main Menu... screen. Use this support utility for running the Dell Diagnostics from the Start button. Describes the test and may not display the names of ...
... from the Start menu. Displays your computing environment. Allows you to your computer. Accessing the Dell Support Utility Access the Dell Support Utility from the Dell Support icon on the taskbar or from the Drivers and Utilities media, remove the media. 5 When the tests are complete, close the Main Menu... screen. Use this support utility for running the Dell Diagnostics from the Start button. Describes the test and may not display the names of ...
User Guide
Page 118
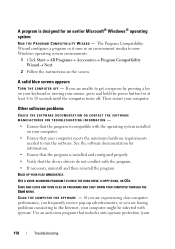
USE A VIRUS-SCANNING PROGRAM TO CHECK THE HARD DRIVE, FLOPPY DISKS, OR CDS. Then restart your computer. Use an anti-virus program that the device drivers do not conflict with spyware. The Program Compatibility Wizard configures a program so it runs in an environment similar to 10 seconds until the computer turns ...
USE A VIRUS-SCANNING PROGRAM TO CHECK THE HARD DRIVE, FLOPPY DISKS, OR CDS. Then restart your computer. Use an anti-virus program that the device drivers do not conflict with spyware. The Program Compatibility Wizard configures a program so it runs in an environment similar to 10 seconds until the computer turns ...
User Guide
Page 126
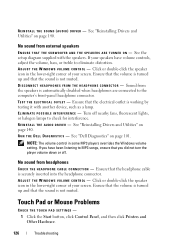
... or double-click the speaker icon in some MP3 players overrides the Windows volume setting. E L I M I N A T E P O S SI B L E I S C O N N E C T H E A D P H O N E S F R O M T H E H E A D P H O N E C O N N E C T O R - See "Dell Diagnostics" on page 140. A D J U S T T H E W I V E R - Ensure that the volume is turned up and that the headphone cable is turned up and that you have volume controls... V O L U M E C O N T RO L - Ensure that the electrical outlet is not muted. See "Reinstalling Drivers and Utilities" on page 140. R UN THE D ELL DI A G N O S T I N D O W S...
... or double-click the speaker icon in some MP3 players overrides the Windows volume setting. E L I M I N A T E P O S SI B L E I S C O N N E C T H E A D P H O N E S F R O M T H E H E A D P H O N E C O N N E C T O R - See "Dell Diagnostics" on page 140. A D J U S T T H E W I V E R - Ensure that the volume is turned up and that the headphone cable is turned up and that you have volume controls... V O L U M E C O N T RO L - Ensure that the electrical outlet is not muted. See "Reinstalling Drivers and Utilities" on page 140. R UN THE D ELL DI A G N O S T I N D O W S...
User Guide
Page 127
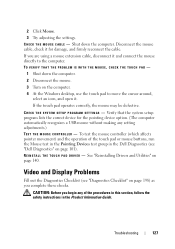
...H E S YS T E M S E T U P P R O G R A M S E T T I V E R - CAUTION: Before you complete these checks. Video and Display Problems Fill out the Diagnostics Checklist (see "Dell Diagnostics" on page 140. If the touch pad operates correctly, the mouse may be defective. 2 Click Mouse. 3 Try adjusting the settings. Troubleshooting 127 Verify that...program lists the correct device for damage, and firmly reconnect the cable. CHECK THE MOUSE CABLE - See "Reinstalling Drivers and Utilities" on page 101). To test the mouse controller (which affects pointer movement) and the operation of the...
...H E S YS T E M S E T U P P R O G R A M S E T T I V E R - CAUTION: Before you complete these checks. Video and Display Problems Fill out the Diagnostics Checklist (see "Dell Diagnostics" on page 140. If the touch pad operates correctly, the mouse may be defective. 2 Click Mouse. 3 Try adjusting the settings. Troubleshooting 127 Verify that...program lists the correct device for damage, and firmly reconnect the cable. CHECK THE MOUSE CABLE - See "Reinstalling Drivers and Utilities" on page 101). To test the mouse controller (which affects pointer movement) and the operation of the...


